Loading ...
Loading ...
Loading ...
1. Make sure that the lifted section on the drive disc/
support flange engages correctly in the center hole
of the blades.
2. Install the blades.
To attach and remove the guard extension
The guard extension is used on the cutting attachment
guard. Attach the guard extension when you use a
trimmer head or plastic blades. Remove the extension
guard when you use a grass blade.
• Put the guide on the guard extension into the slot
on the cutting attachment guard. Lock the 4 locking
hooks into position.
• Release the locking hooks with a screwdriver to
remove the guard extension.
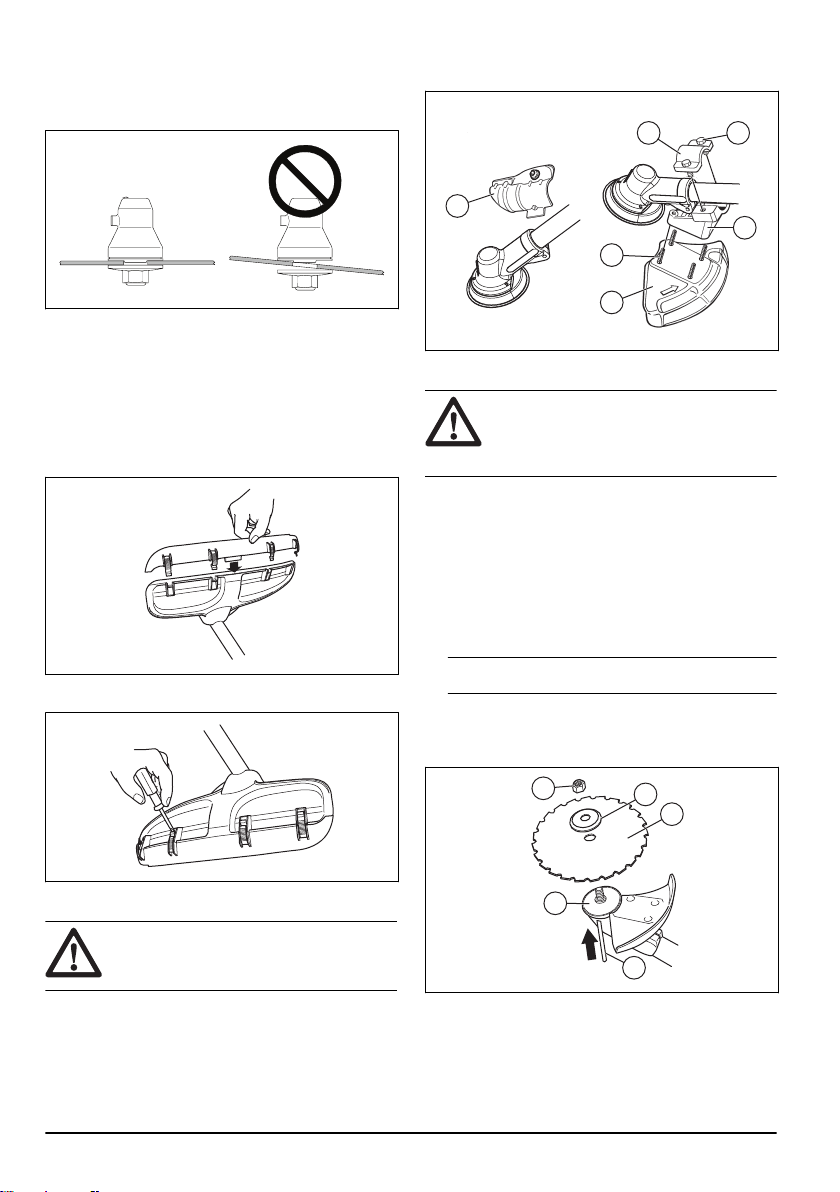
To install the blade guard
CAUTION:
Only use the approved
guard for the blades. Refer to
Technical data
on page 28
.
1. Remove the bracket (H).
2. Attach the adapter (I) and bracket (J) with the 2
screws (K).
3. Attach the blade guard (A) to the adapter with the 4
screws (L).
J K
I
L
A
H
To install the saw blade
WARNING: There is a risk of injury
around the saw blade nut. Make sure that
the blade guard is correctly installed. Always
use protective gloves.
1. Attach the drive disc (B) to the output shaft.
2. Turn the blade shaft until one of the holes in the
drive disc aligns with the hole in the gear housing.
3. Put the locking pin or hex key (C) in the hole to lock
the shaft.
4. Install the saw blade (D) and the support flange (F)
to the output shaft.
5. Install the saw blade nut (G).
Note:
The saw blade nut has a left hand thread.
6. Turn the socket wrench counterclockwise to tighten
the locknut. Make sure that the torque of the locknut
is 35-50 Nm (3.5-5 kpm). Hold the shaft of the socket
wrench as near the blade guard as possible.
G
F
D
B
C
12
1756 - 001 - 08.06.2022
Loading ...
Loading ...
Loading ...