Loading ...
Loading ...
Loading ...
English
CCD-0005773 Rev: 04-25-22
- 3 -
Handling Electrical Cables
WARNING
The electrical power supply must only be connected by a
qualified electrician.
CAUTION
● Refer to NEC (National Electric Code) for proper sizing of
wire gauge (awg) based on cable length and overcurrent
protection rating that is suppling power to the air
conditioner.
● See rooftop unit nameplate for proper overcurrent
protection sizing.
● Attach and lay the cables so that they cannot be tripped
over or damaged.
● Only a qualified electrician should connect the rooftop air
conditioner to electrical power.
● Do not lay loose or bent cables next to electrically
conductive materials.
● Do not pull on the cables.
● Use cable ducts to lay cables through walls with sharp
edges.
● Refer to rooftop unit nameplate and NEC for proper power
supply rating.
BEFORE INSTALLING
Read this installation manual completely before installing the
rooftop air conditioner.
The following tips and instructions must be observed while
installing the rooftop air conditioner.
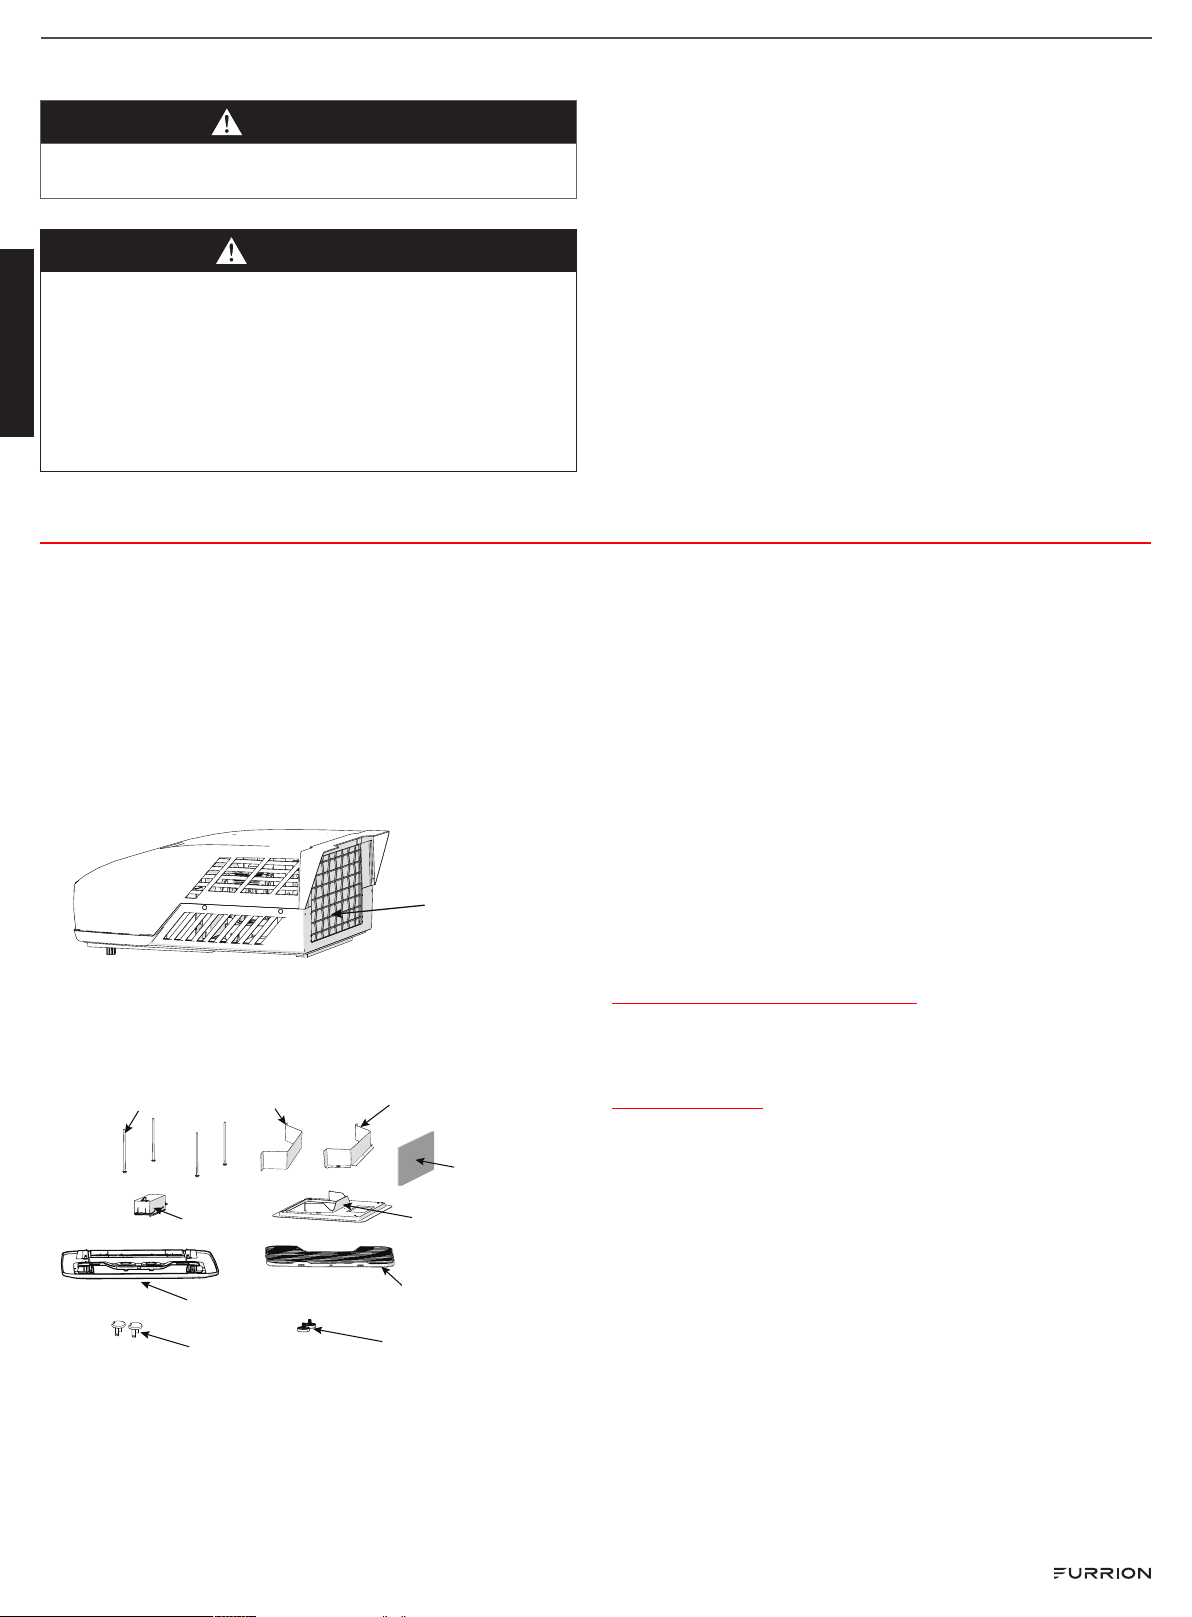
What’s in the Box
Open and remove the components from carton. Make sure you
have all the following items included in the packaging, if any
item is missing, contact your dealer.
Rooftop Unit (sold separately):
Rooftop Unit
● Rooftop Unit x 1
● Warranty Manual x 1
Air Distributor Box:
Mounting
Frame
Filter
ADB Shroud
Control Box
Bolt
Control Knob
Lower Duct Divider
with Plastic Screws
Upper Duct Divider
PE Foam
Screw Cap
● Upper Duct Divider x 1
● Lower Duct Divider x 1
● Bolt x 4
● Mounting Frame x 1
● Control Box x 1
● Air Distribution Box (ADB) Shroud x 1
● Filter x 1
● PE Foam x 1
● Control Knob x 2
● Self-tapping Screws x 4
● Screw Cap x 2
● Instruction Manual x 1
● Warranty Manual x 1
Choosing Proper Location for the Air
Conditioner
IMPORTANT: The roof must be designed to support the
weight of the rooftop unit and the weight of 2 installers
standing on the roof.
There are two ways of installing the rooftop air conditioner:
1. Using the existing roof vent opening in the vehicle roof.
2. Making a new opening. In this case the opening should be
reinforced by an appropriate frame as required.
Existing Roof Vent Opening
The air conditioner is designed to fit over an existing 14” roof
vent opening.
New Opening
When no roof vent is available or another location is desired,
the following is recommended:
– For one unit installation - the air conditioner should be
mounted slightly forward of center (front to back) and
centered from side to side.
– For two unit installations, install one air conditioner one
third from the front of the RV and the other air conditioner
two thirds from the front of the RV, aligned in the center.
It is preferred that the air conditioner be installed on a relatively
flat and horizontal roof section measured when the RV is
parked on a level surface.
NOTE: A 15° slant to either side or front to back is acceptable
for all units. If the roof exceeds 15° please use an exterior
leveling shim to make air conditioner level.
Loading ...
Loading ...
Loading ...