Loading ...
Loading ...
Loading ...
Product Operation
Battery Charging
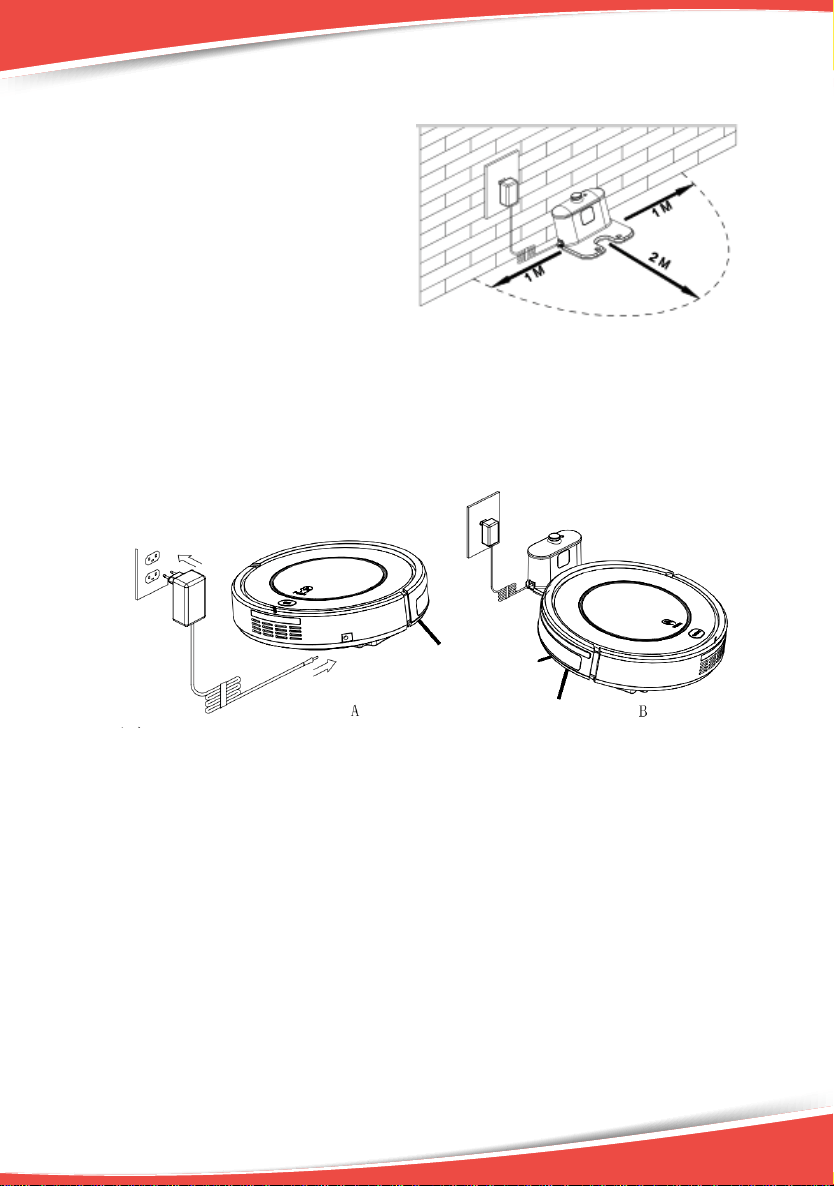
1. Charging station placement
Place charging station against the wall
and remove obstacles within 1 meter
at two sides and 2 meters ahead.
As shown in the right figure.
2. If the robot has been shut down, power on it by turning on the power switch at
the right side of the robot before charging.
3. Charge the robot in either of following way as shown:
a. Plug the adapter into the robot and plug the other end into the power socket,
as shown in Fig A.
b. Press “HOME” button on remote controller to direct the robot to charging
station for recharging, as shown in Fig B.
Note:
a. Make sure the power switch of robot is turned on while charging. Otherwise,
CLEAN indicator will flash red quickly and beep a long time. (If power switch is
turned off, the schedule setting will be lost.)
b. When robot is being charged, CLEAN indicator will flash red gradually.
c. After fully charged, the robot will beep five times. (Every charge should take no
more than 5 hours).
d. In the working status, the robot will return to charging station automatically
when battery power is low.
Tips to extend battery life:
a. Before first use, charge the robot for 12 hours.
b. Charge the robot as soon as battery power is low.
c. The robot will return to charging station automatically when it finishes cleaning
or battery power is low.
d. If the robot is not to be used for a long time, fully charge the battery, turn the
power off, remove it from robot and store it in a cool, dry place.
e. If the robot is not to be used for more than 3 months, charge the robot for 12
hours, turn the power off, and store it in a cool, dry place.
8
Loading ...
Loading ...
Loading ...