Loading ...
Loading ...
Loading ...
STARTINGA FLOODED ENGINE
Flooded engines can be started by placing the
choke Iever in the RUN posff]on; then, puff the
rope to clear the engine of excess f_el. This
could require puI]ing the starter handle many
times depending on how badly the unit is
flooded. If the unit stii] doesnt start, refer to
TROUBLESHOOTING TABLE or calI
1-800-554-6723
OPERATING INSTRUCTIONS
It is recommended that the engine not be
operated for longer than 1 minute at full
throttle.
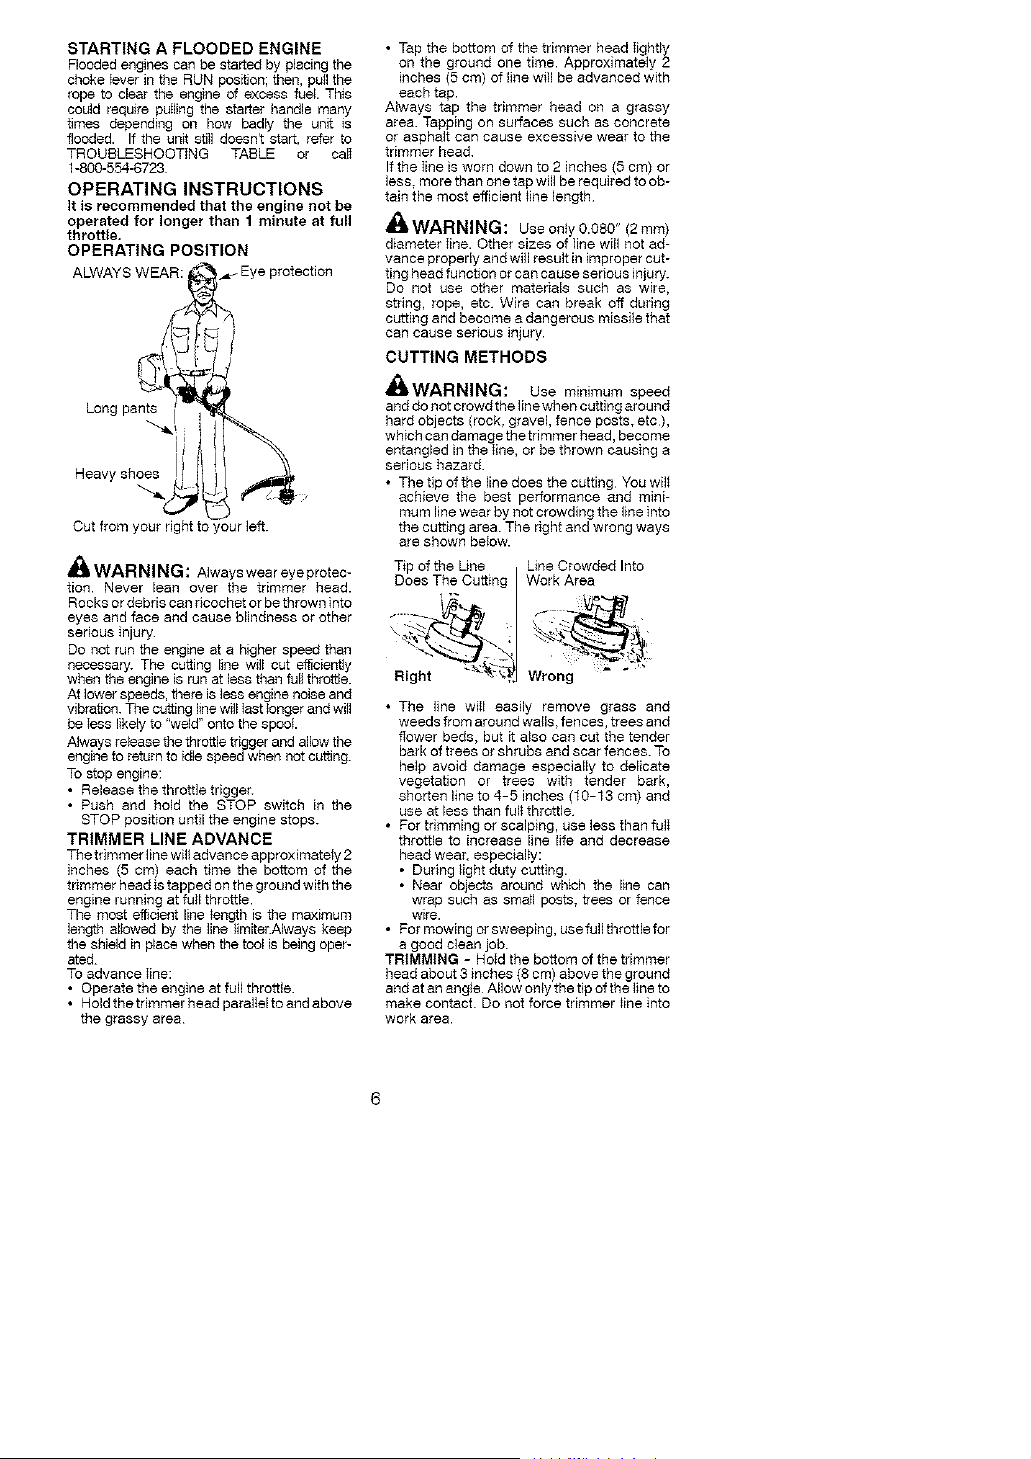
OPERATING POSITION
ALWAYS WEAR:
J
Long pan_
Heavy shoes
Cut from your right to your left.
_k WARNING: Always wear eye protec-
tion. Never lean over the trimmer head.
Rocks or debris can ricochet or be thrown into
eyes and face and cause blindness or other
serious injury
Do not run the engine at a Ngber speed than
necessary. The cutting line w{ll cut efficiently
when the engine is run at less then full throttle.
At lower speeds, there is less engine noise and
vibration. The cutting line will Iast longer and will
be Iess likely to "weld" onto the spool
Always release the throttle trigger and allow the
engine to return to idle speed when not cutting.
To stop engine:
• Release the throttle trigger.
• Push and hold the STOP switch in the
STOP position until the engine stops.
TRIMMER LINE ADVANCE
The trimmer line wil_advance approximately 2
inches (5 cm) each time the bottom of the
trimmer head is tapped on the ground with the
engine running at full throttle.
The most efficient line _ength is tile maximum
length albwed by the line limiter.A]ways keep
the shield in place when the tool is being oper-
ated.
To advance Iine:
• Operate the engine at full throttle.
• Hold the trimmer head paraltelto and above
the grassy area
• Tap the bottom of the trimmer head Iightly
on the ground one time. Approximately 2
inches (5 cm) of lille will be advanced with
each tap.
Always tap the trimmer head on a grassy
area. Tapping on surfaces such as concrete
or asphalt can cause excessive wear to the
trimmer head
If the Iine is worn down to 2 inches (5 cm) or
less. more than one tap will be required to ob-
tain the most efficient _ine length
Ai_WARNING: Use oniy O.O8O" (2ram)
diameter Iine. Other sizes of line will not ad-
vance properly and will result in improper cut-
ting head function or can cause serious injury.
Do not use other materials such as wire,
string, rope, etc. Wire can break off during
cutting and become a dangerous missi_e that
can cause serious injury.
CUTTING METHODS
nWARNING: Use minimum speed
and donot crowd the linewhen cuttingaround
hard objects (rock, grave], fence posts, etc),
which can damage thetrimmer heed, become
entangled in the Iine, or bethrown causing a
serious hazard.
• The tip ofthe linedoes the cutting You wilt
achieve the best performance and mini-
mum linewear by not crowding the lineinto
the cutting area. The right and wrong ways
are shown beIow.
Tip of the Une Line Crowded Into
Does The Cutting Work Area
........
• The line wiII easily remove grass and
weeds from around walls, fences, trees and
flower beds, but it also can cut the tender
bark of trees or shrubs and scar fences. To
help avoid damage especially to delicate
vegetation or trees with tender bark,
shorten line to 4-5 inches (t0-13 cm) and
use at less than fuli throttle
• For thmming or scalping, use less than fulI
throttle to increase line life and decrease
head wear, especially:
• During light duty cutting.
• Near objects around which the line can
wrap such as small posts, trees or fence
wire.
• For mowing or sweeping, use full throttle for
a good clean job.
TRIMMING -HoId the bottom of the trimmer
head about 3 inches (8 cm) above the ground
and at an angle Allow only the tip of the line to
make contact. Do not force trimmer _ine into
work area.
Loading ...
Loading ...
Loading ...