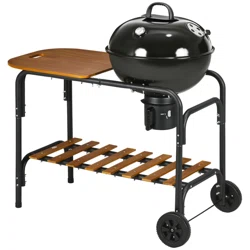
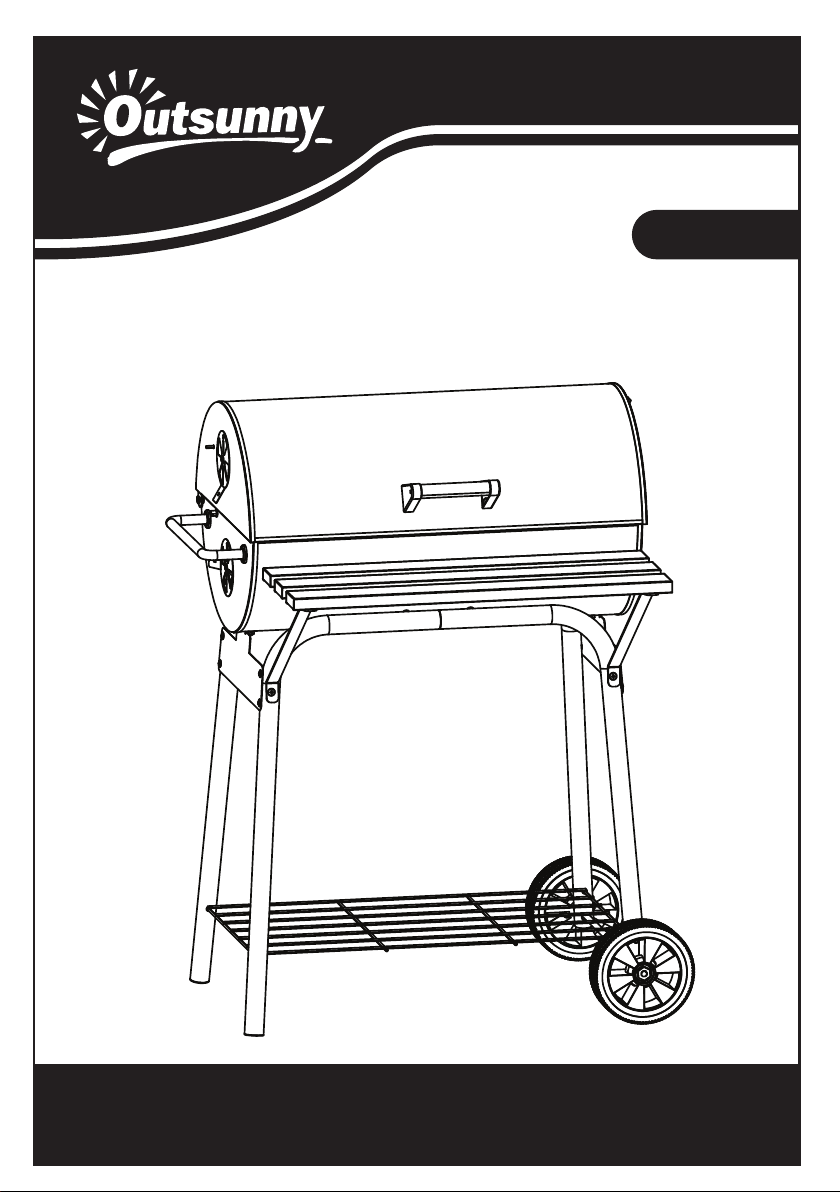
CHARCOAL GRILL
846-081
ASSEMBLY & INSTRUCTION MANUAL
INb1a008_US
IMPORTANT, RETAIN FOR FUTURE REFERENCE: READ CAREFULLY
3
3
1
4
4
5
6
7
10
10
8
8
9
13
3
3
12
11
16
14
15
14
20
19
18
17
20
21
22
2

WARNINGS
1
• Out door use only. DO NOT use t he grill indoors or in an enclosed or non-ventilated
area.
• Keep a fire ext inguisher near t his product at all t imes.
• For household use only. DO NOT operate t his grill f or other t han it s int ended use.
• Some part s of t his grill have been re-oiled at the factory. Please burn off the oils
before cooking.
• Do not wear loose clot hing when using t he grill or allow hair t o come in contact wit h
t he grill.
• Never use t he grill on a wooden surface or ot her flammable surfaces. Use t he grill only
on a hard, st able surface t hat can support t he grill weight.
• Keep10 feet of clearance bet ween grill and any combust ible mat erials when grill is in
use (including, but not limit ed t o bushes, shrubs, trees, leaves, grass, wooden decks
or fences, buildings, et c. ).
• Keep t he grill away from gasoline and/ or ot her flammable liquids, gases, vapors, or
areas where these may be present . Do not st ore or use t he grill in t hese areas.
• In windy condit ions, place it an outdoor area t hat is shelt ered from t he wind.
• Keep out of t he reach of children and pet s, st ore out of t he reach of children when not
in use.
• When moving or lif t ing the grill, use it caut iously t o avoid back st rains or inj uries.
• Do not t ry t o move t he grill while it is in use.
• Don't place goods over 10kgs/ 22lbs on each side shelf. Do not use gasoline, kerosene,
or alcohol t o light charcoal. Using any of t hese products or similar products could cause
a flare up, a flas
h fire or an explosion. Severe bodily inj uries can be a potent ial result .
• If using a light er fluid to st art a fire, leave t he roll t op hood open until briquet t es area
has shed over and light er fluid has burned off. Closing t he hood t oo soon could cause
fumes from t he lighter fluid t o accumulat e inside t he grill.This could cause a flare up
or an explosion when the hood is opened.
• Do not add a light er fluid t o warm or hot coals. A flash fire may result t hat could cause
bodily inj uries.
• Do not add inst ant light charcoal briquett es t o t he exist ing fire. Aflash fire may result
t hat could cause bodily inj uries.
• Do not light and operate t he grill wit hout t he slide out ash pan in place.
• Do not leave grill or coals hot and ashes unat t ended.
• Do not remove or empty slide out ash pan until coals and asheshave complet ely cooled.
• Allow t he unit t o cool complet ely before conducting any rout ine cleaning or
maint aining.
• “ WARNING! This barbecue will become very hot, do not move it during operation"."Do
not use indoors!”
•
“WARNING! Do not use spirit or petrol for lighting or re-lighting! Use only firelighters complying
to EN1880-3!”
2
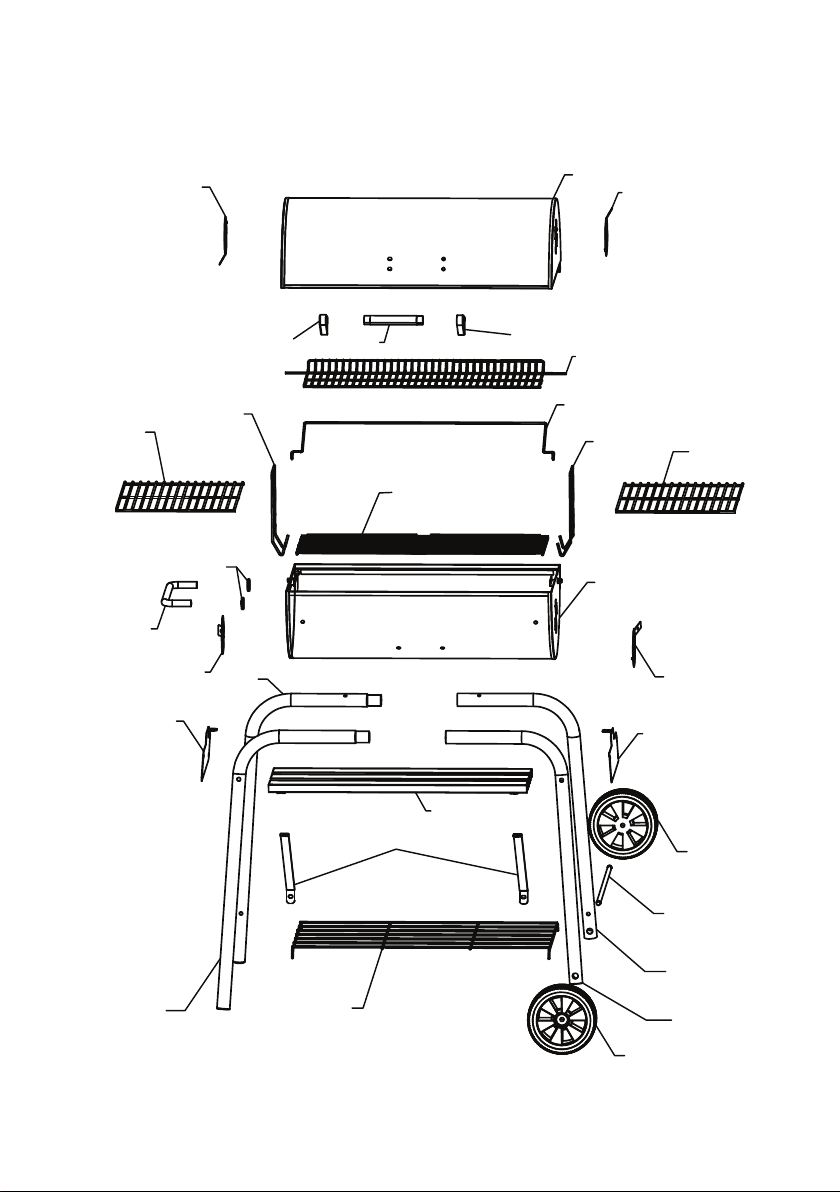
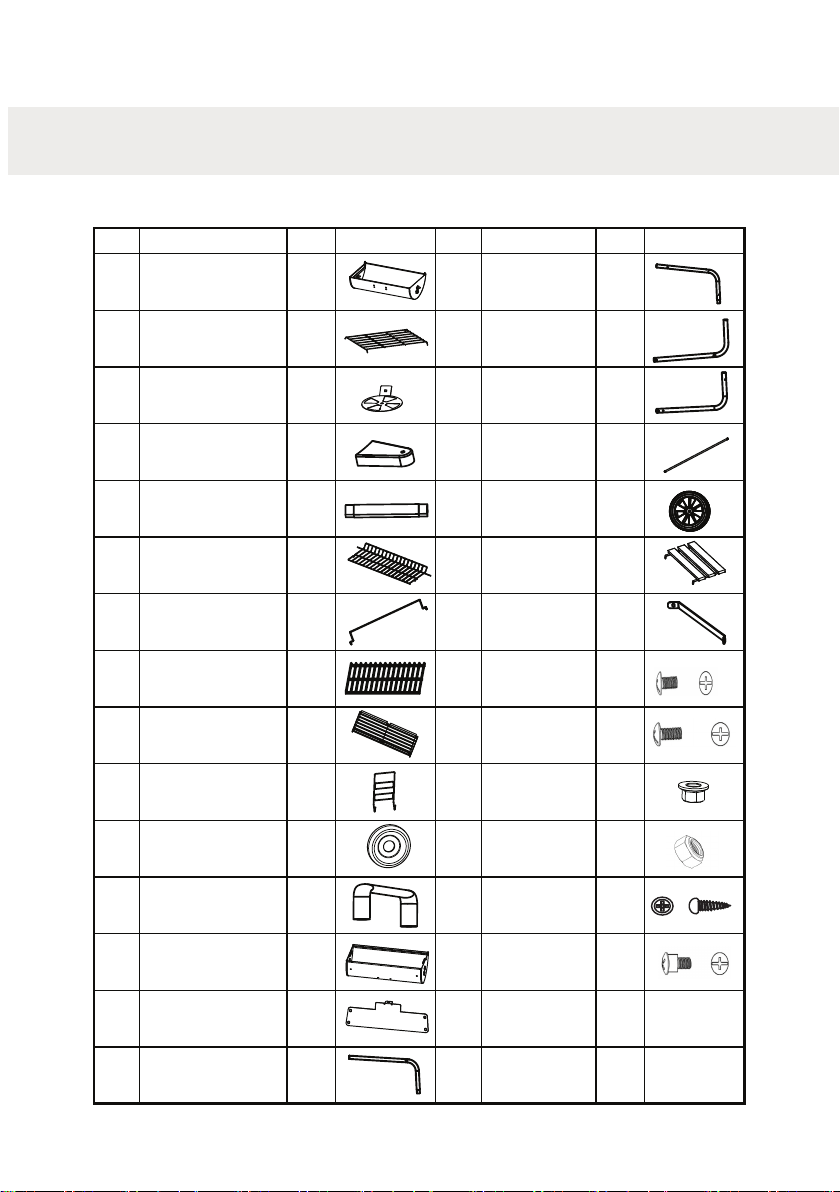
Parts List
No. Desc. Qty Pic. No. Desc. Qty Pic.
1 Lid 1 16 Back leg LH 1
2 1 17 Front leg RH 1
3 Air rent 4 18 Back leg RH 1
4 Handle bracket 2 19 Wheel shaft 1
5 Wood handle 1 20 Wheel 2
6 Warming grate 1 21 Front tabel 1
7 Warming grate hook 1 22 Tabel support 2
8 Cooking grate 2
Bottom grate
9 Ash pan 1
A
10 Ash pan hook 2
B
11 Handle washer 2
C
12 Handle 1
D
13 Firebox 1
14 Side plate 2
15 Front leg LH 1
M6*12 screw
M6*16 screw
M6 nut
M10 nut
E
M6*20 step
screw
F
M5*12 self-tap
screw
28+2
2
12+2
2
4
2
(spare)
(spare)
3
Assembly
Note: Please do not tight the screws and nuts till all assembly steps completed.
A
14
16
15
18
17
2
14
A
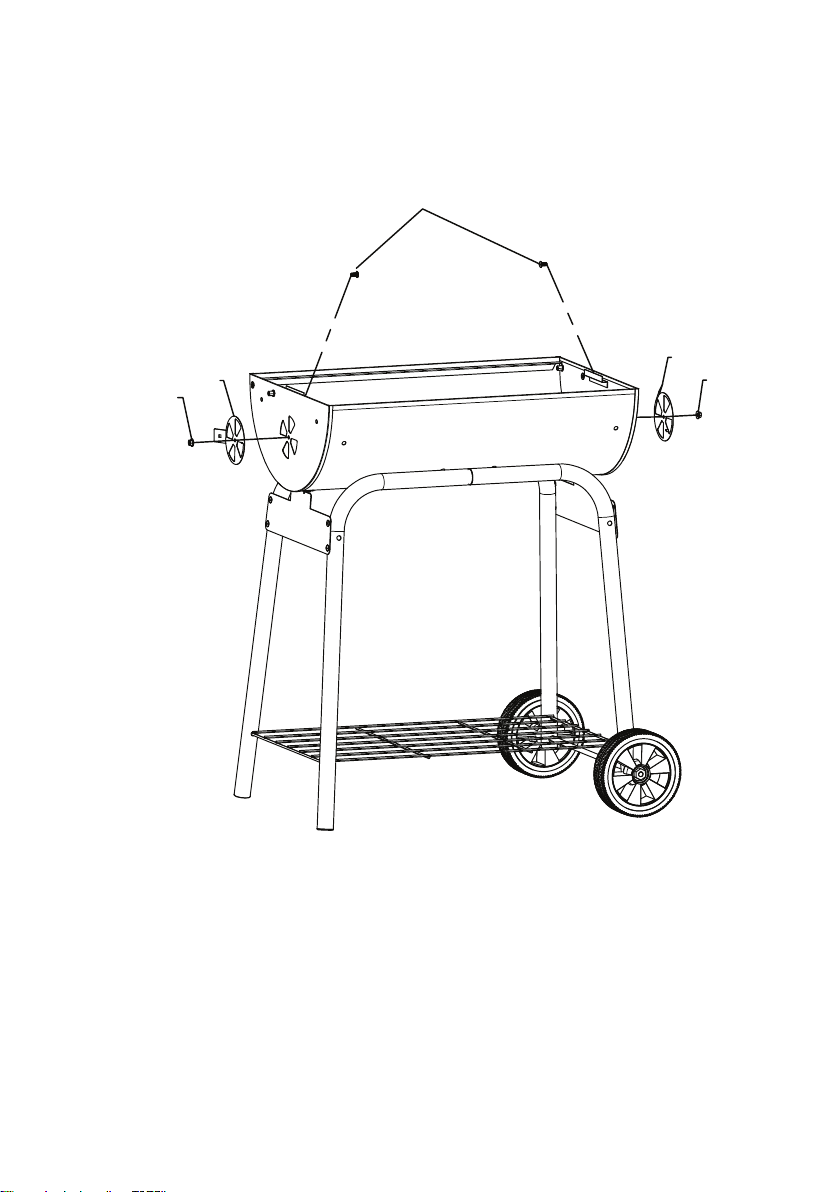
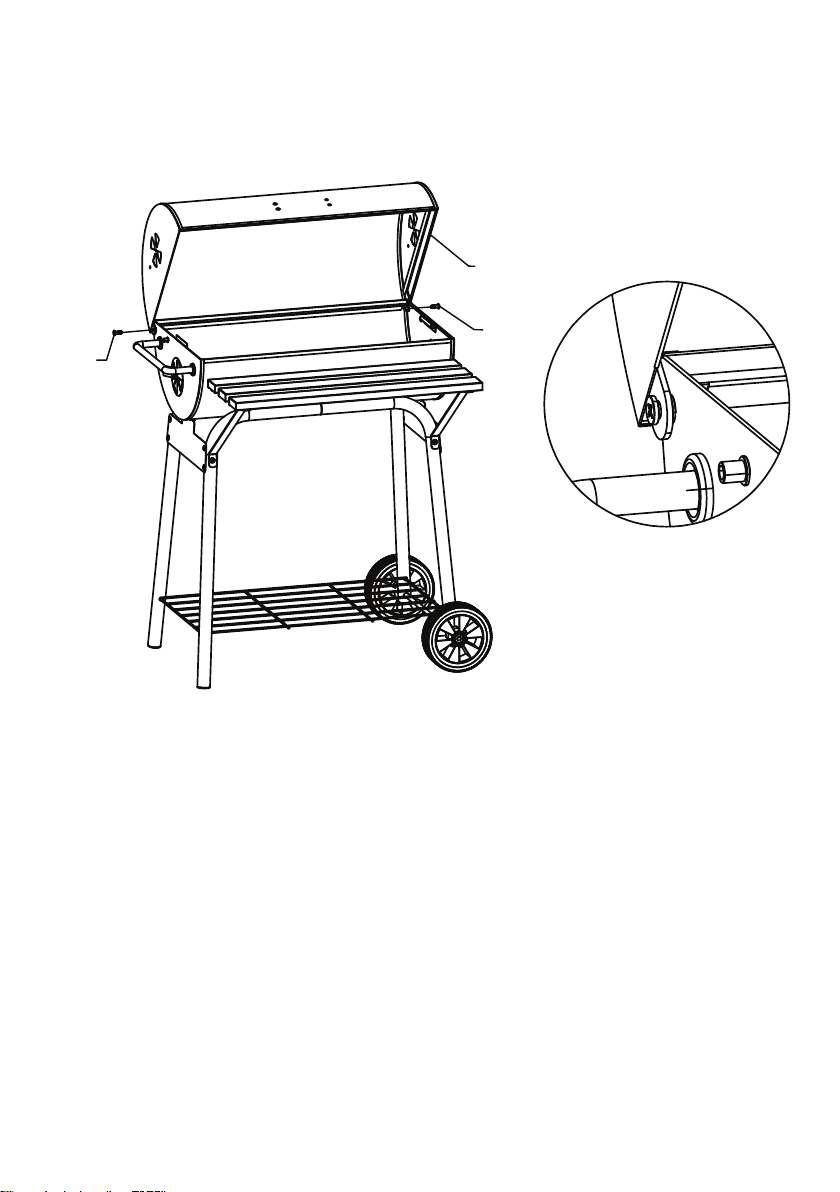
1. Legs (15, 16, 17&18) are fixed together.
Bottom grate (2) are fixed to the leg holes.
Side plates (14) are fixed to the legs by 8pcs M6*12 screws (A).
4
Assembly
D
20
19
20
D
2. Wheel shaft (19) and wheels (20) are fixed on the RH legs
by 2pcs M10 nuts (D).
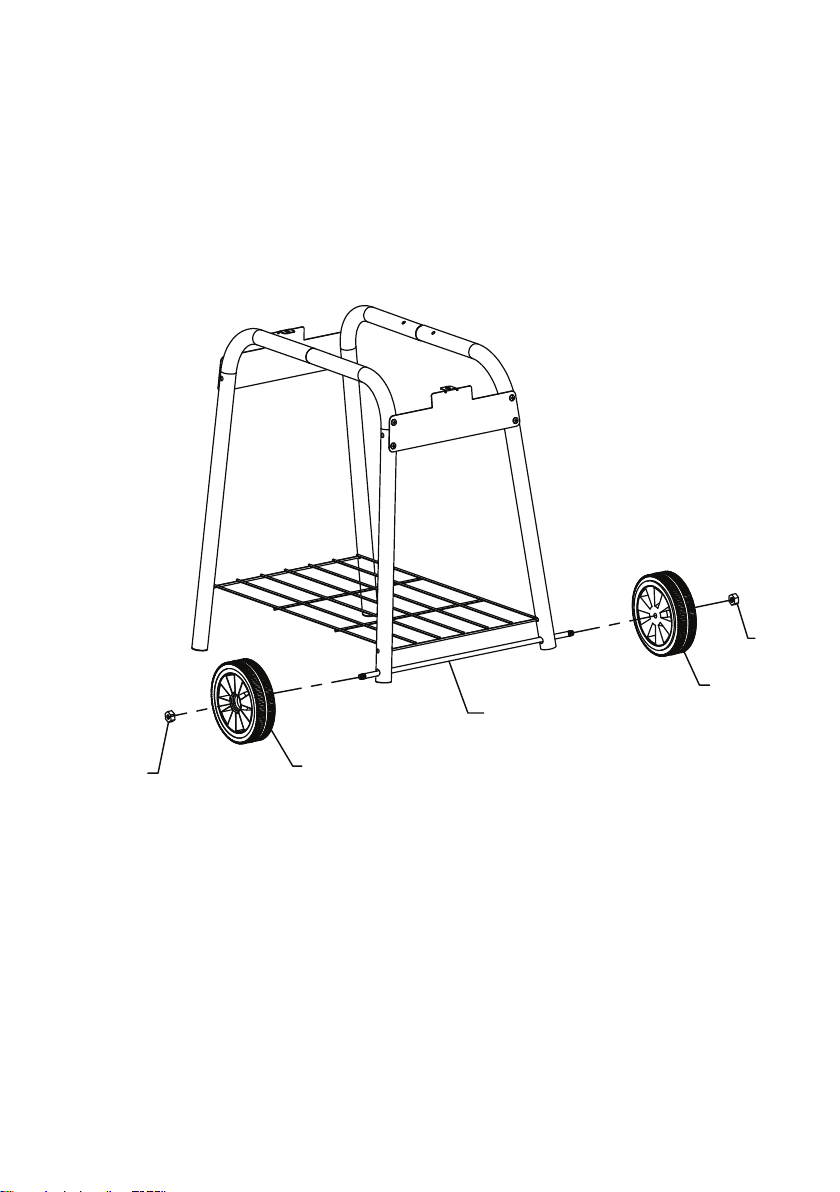
5
Assembly
A
c
c
A
A
3. Firebox is fixed to legs by 6pcs M6*12 screws (A) and
2pcs M6 nuts(C).
6
Assembly
3
C
A
C
3
4. Air vents (3) are fixed to firebox by 2pcs M6*12 screws (A)
and M6 nuts (C).
7
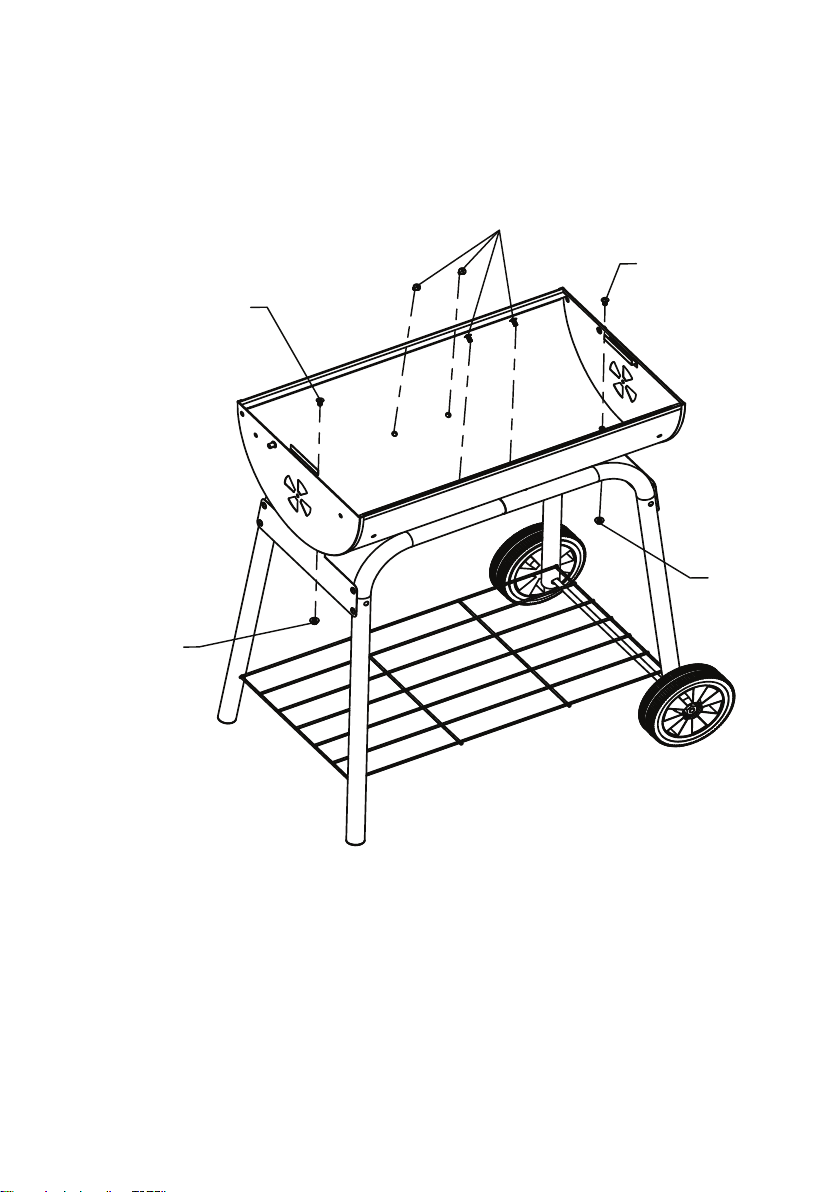
Assembly
12
11
B
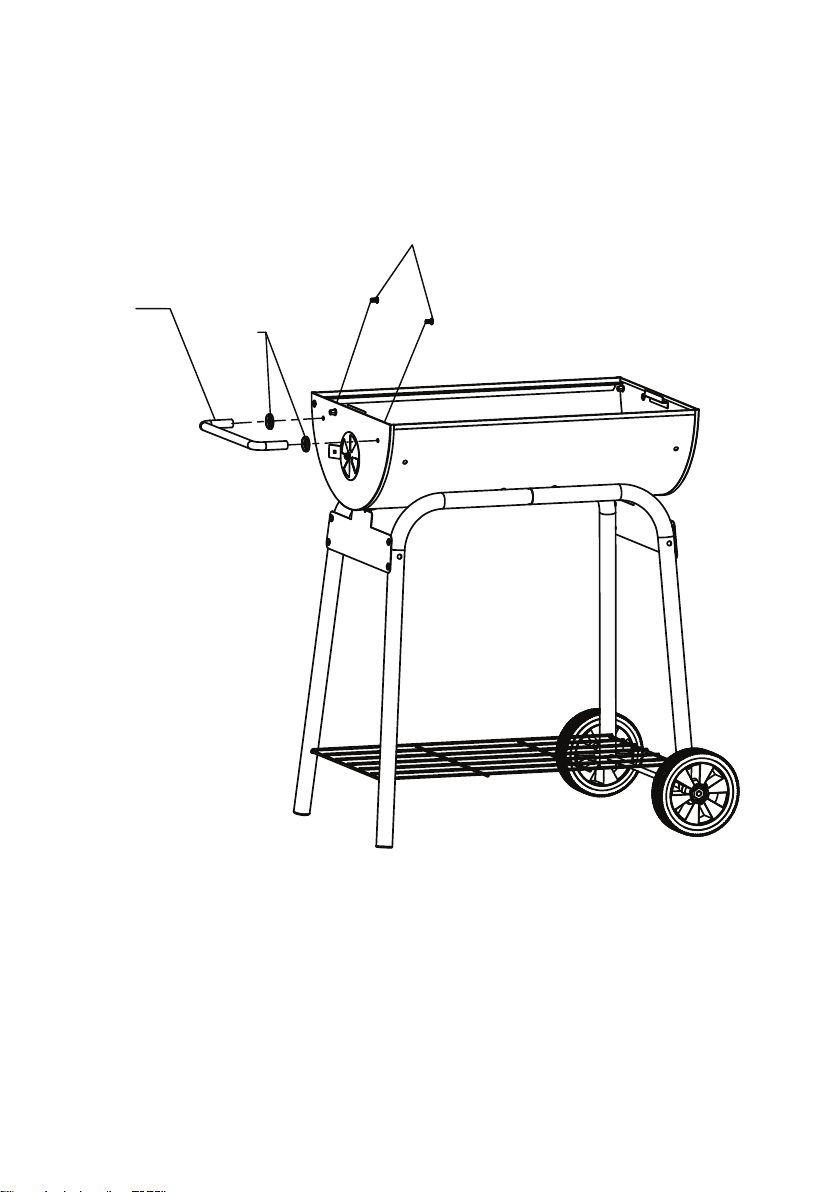
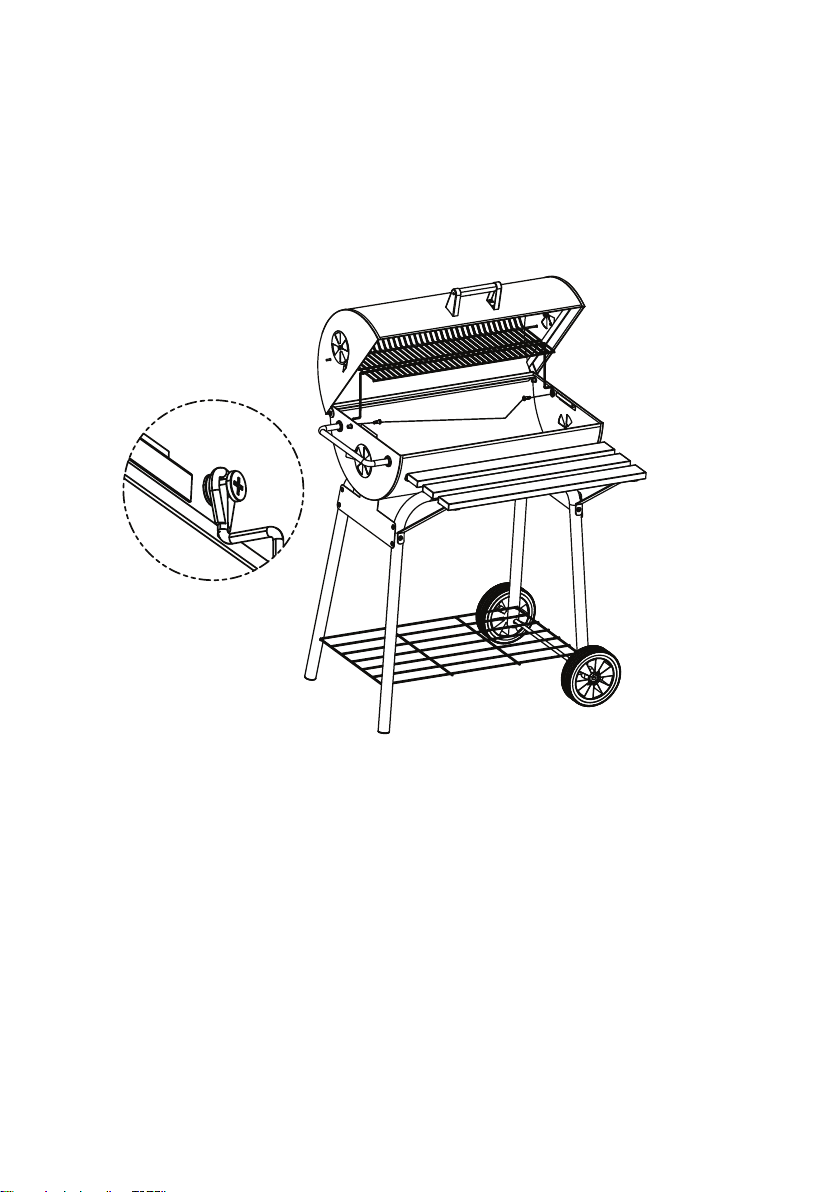
5. Handle (12) and handle washers (11) are fixed to firebox
by 2pcs M6*16 screws (B).
8
Assembly
22
22
A
A
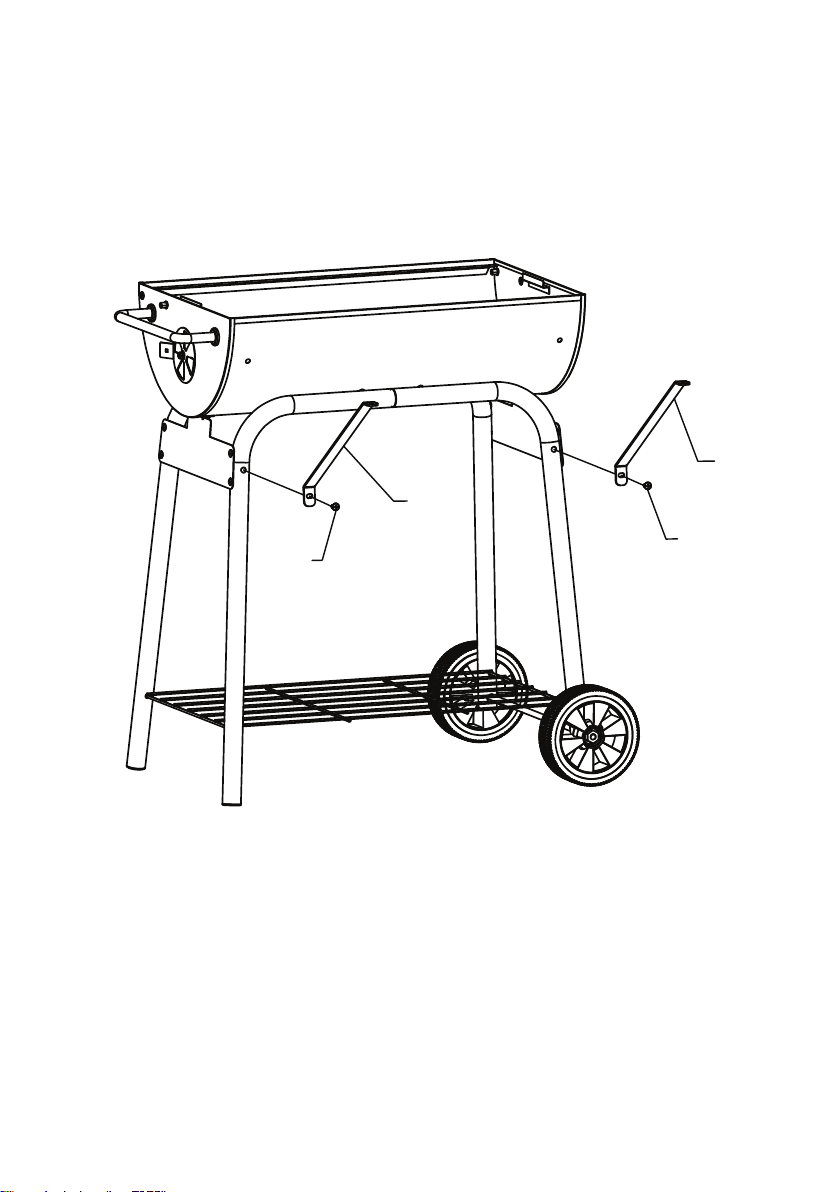
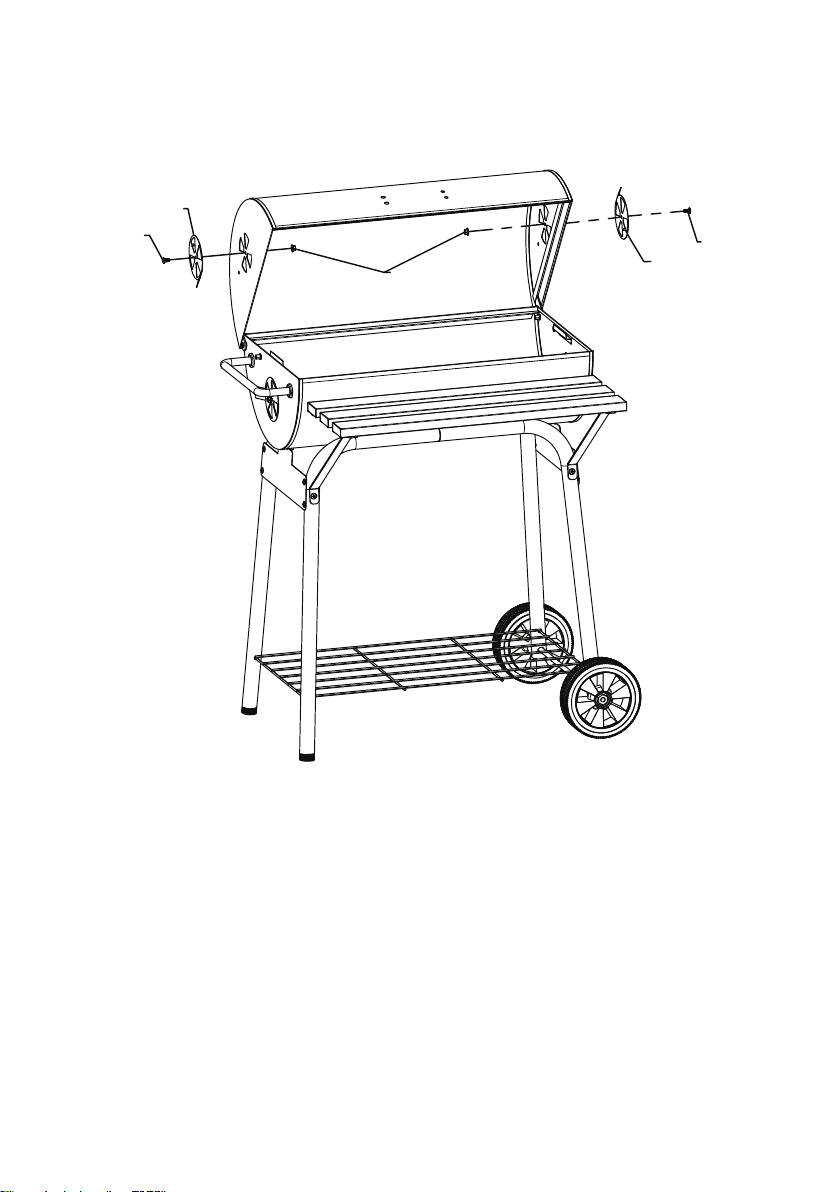
6. Front tabel supports (22) are fixed to the front legs by 2pcs
M6*12 screws (A).
9
Assembly
21
C
A
A
A
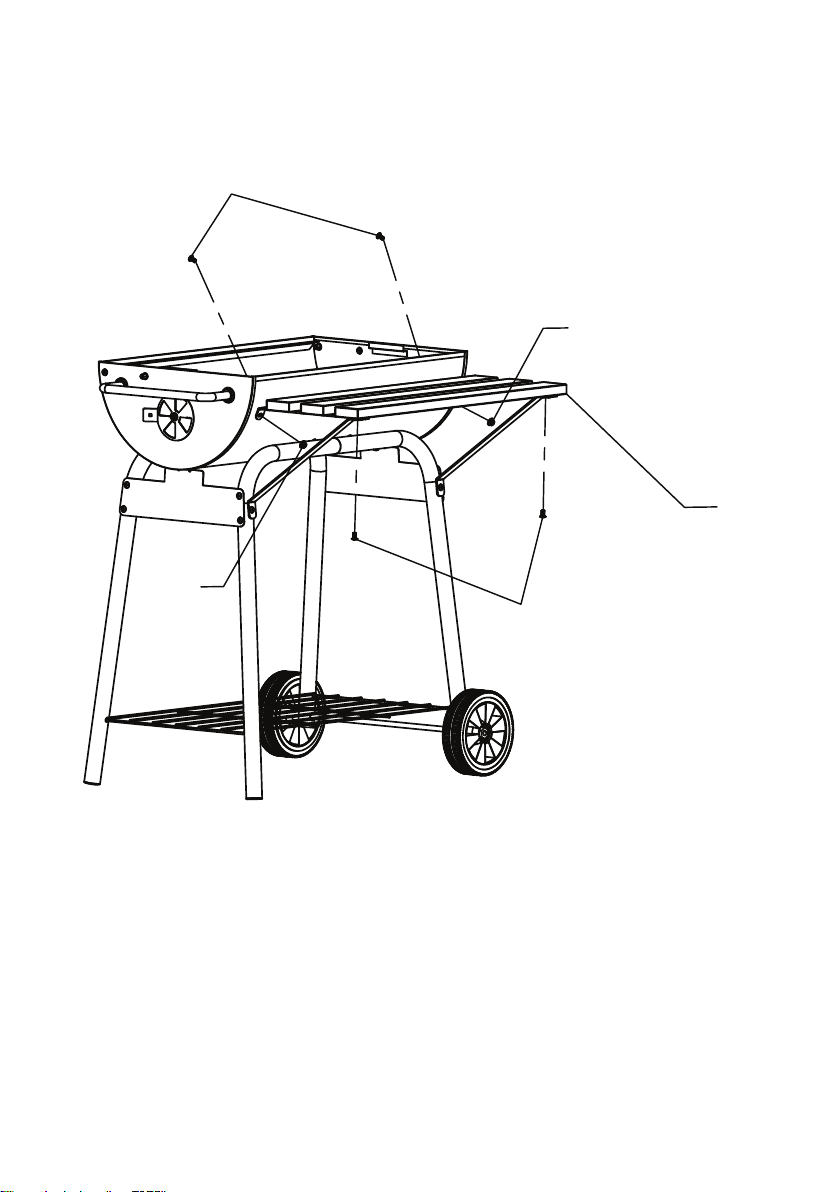
7. Front tabel (21) is fixed to the firebox and supports by 4pcs
M6*12 screws (A) and 2pcs M6 nuts (C).
10
Assembly
1
F
F
8. Lid (1) is fixed to the firebox by 2pcs M6*20 step screws (E).
11
Assembly
A
3
A
3
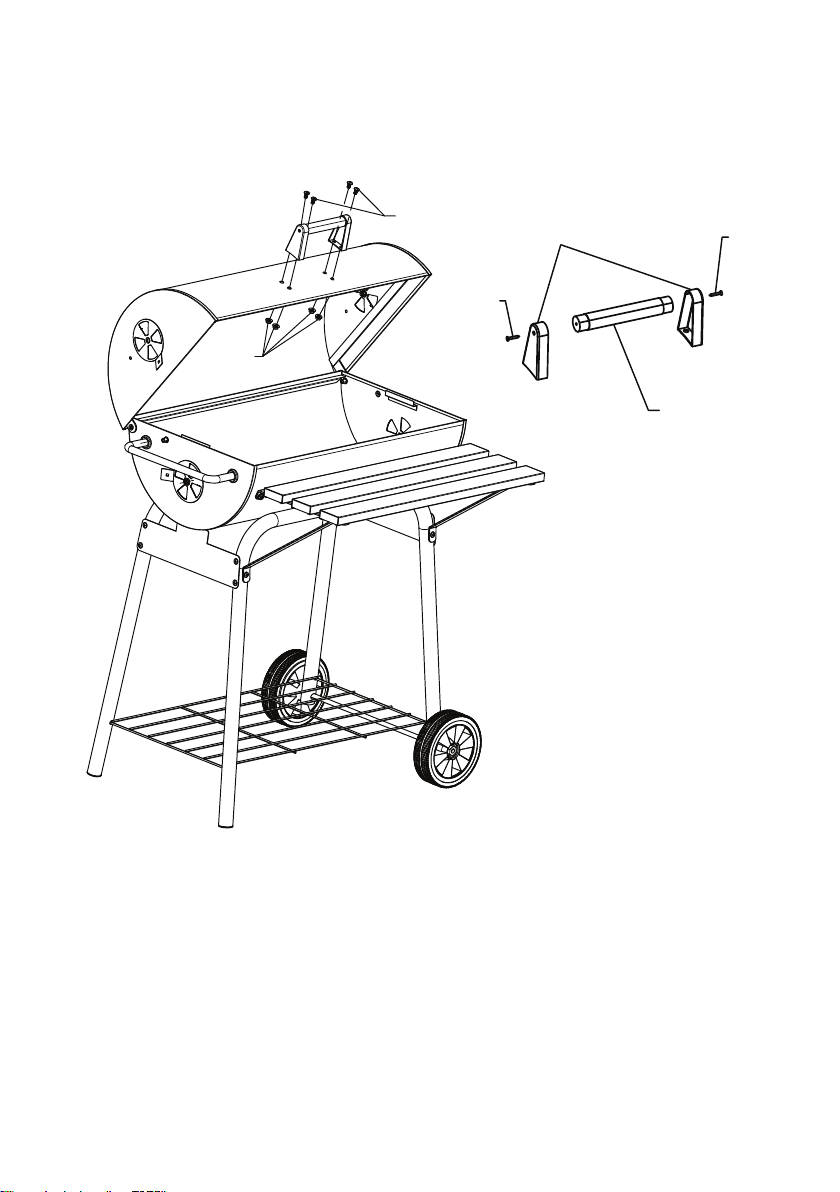
9. Air vents (3) are fixed to the lid by 2pcs M6*12 screws (A).
C
12
Assembly
E
E
4
5
C
A
10. Wood handle (5) is fixed to the handle brackets (4) by 2pcs
M5*12 self-tap screws (E).
Then wood handle is fixed to the lid by 4pcs M6*12 screws (A)
and M6 nuts (C).
13
Assembly
6
7
11. Warming grate (6) and warming grate hook (7) are fixed
togegther.
F
12. Warming grate is fixed to the lid, then to the firebox by
2pcs M6*20 step screws (F).
Assembly
14
Assembly
9
10
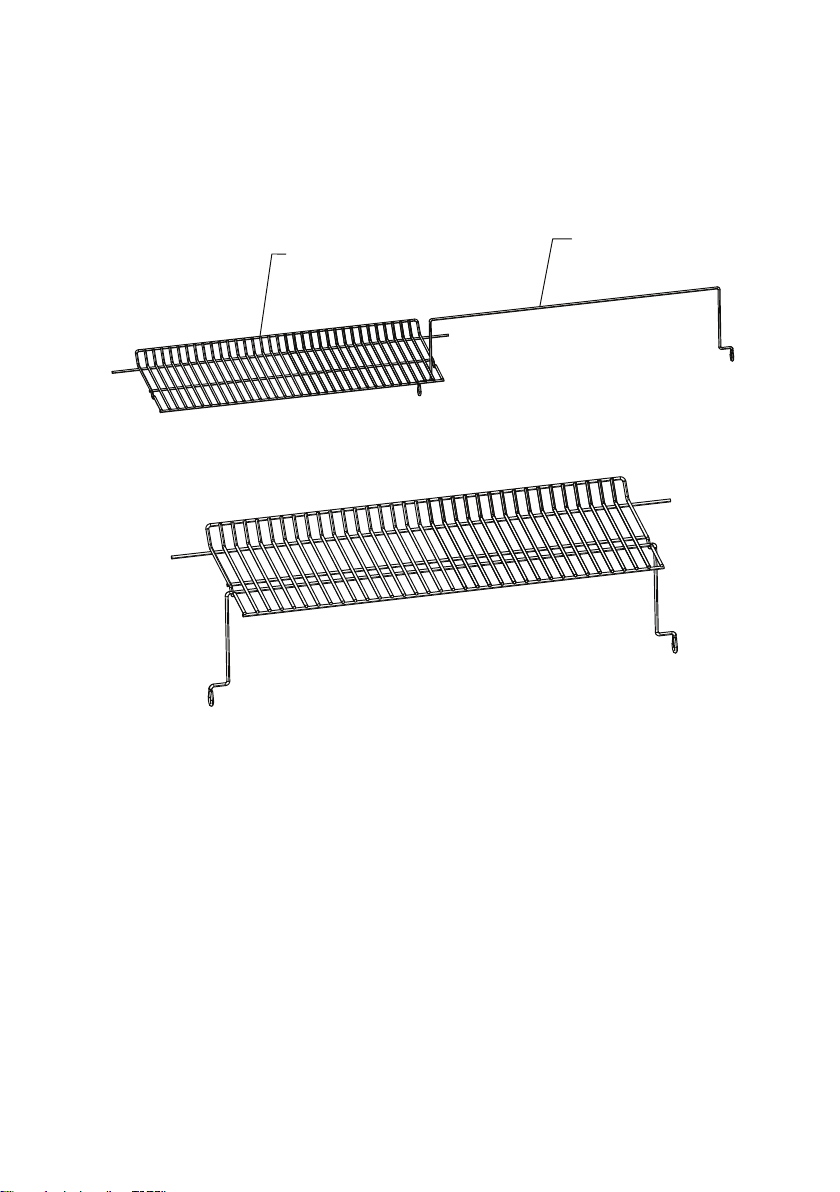
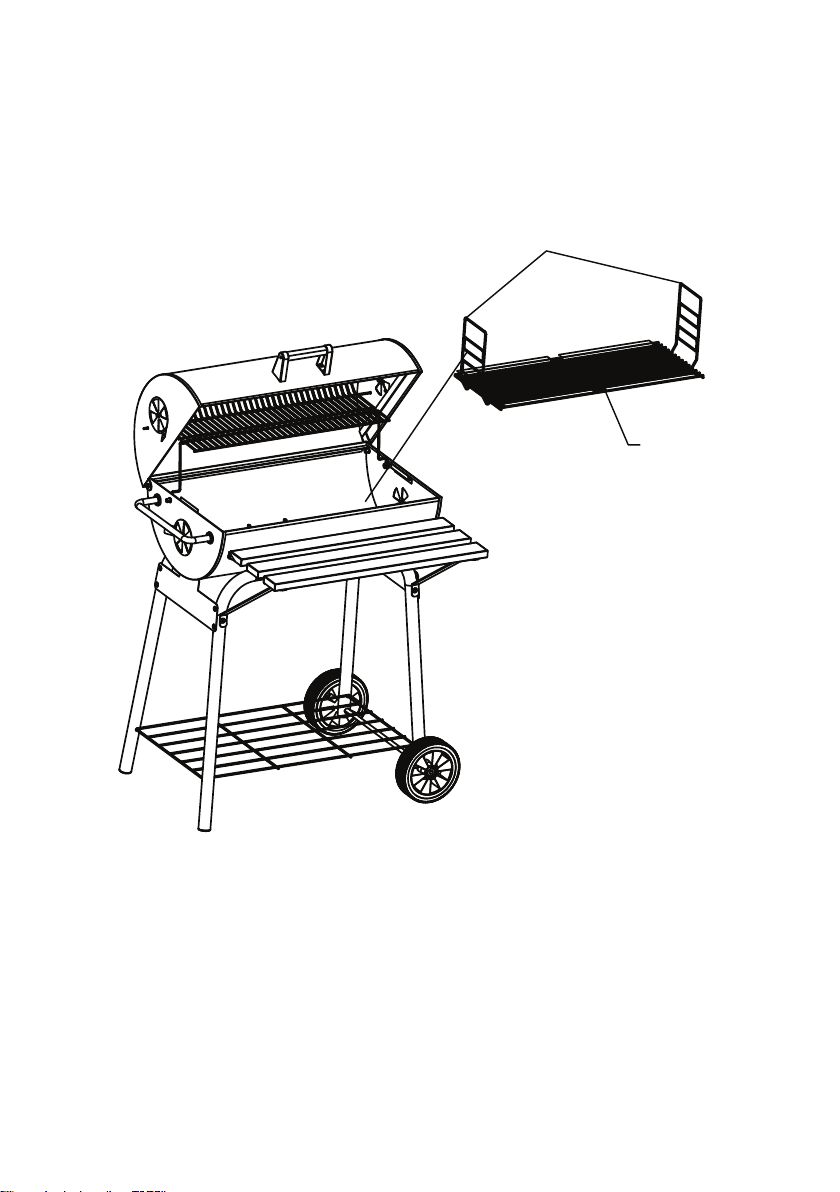
13. Ash pan (9) and ash pan hooks (10) are fixed to the firebox.
15
Assembly
8
8
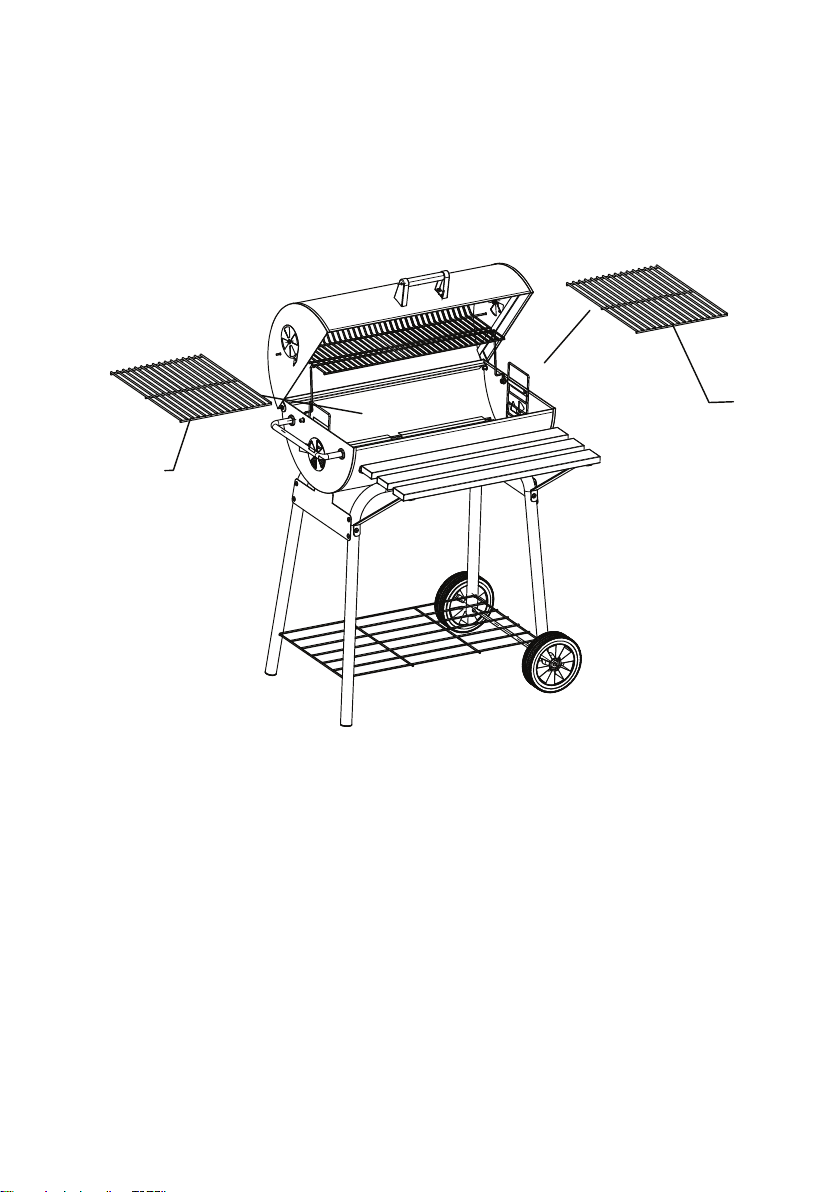
14. Cooking grates (8) are fixed on the firebox.
TIGHT ALL SCREWS
ASSEMBLY FINISHED
16