Loading ...
Loading ...
Loading ...
en Installation instructions
14
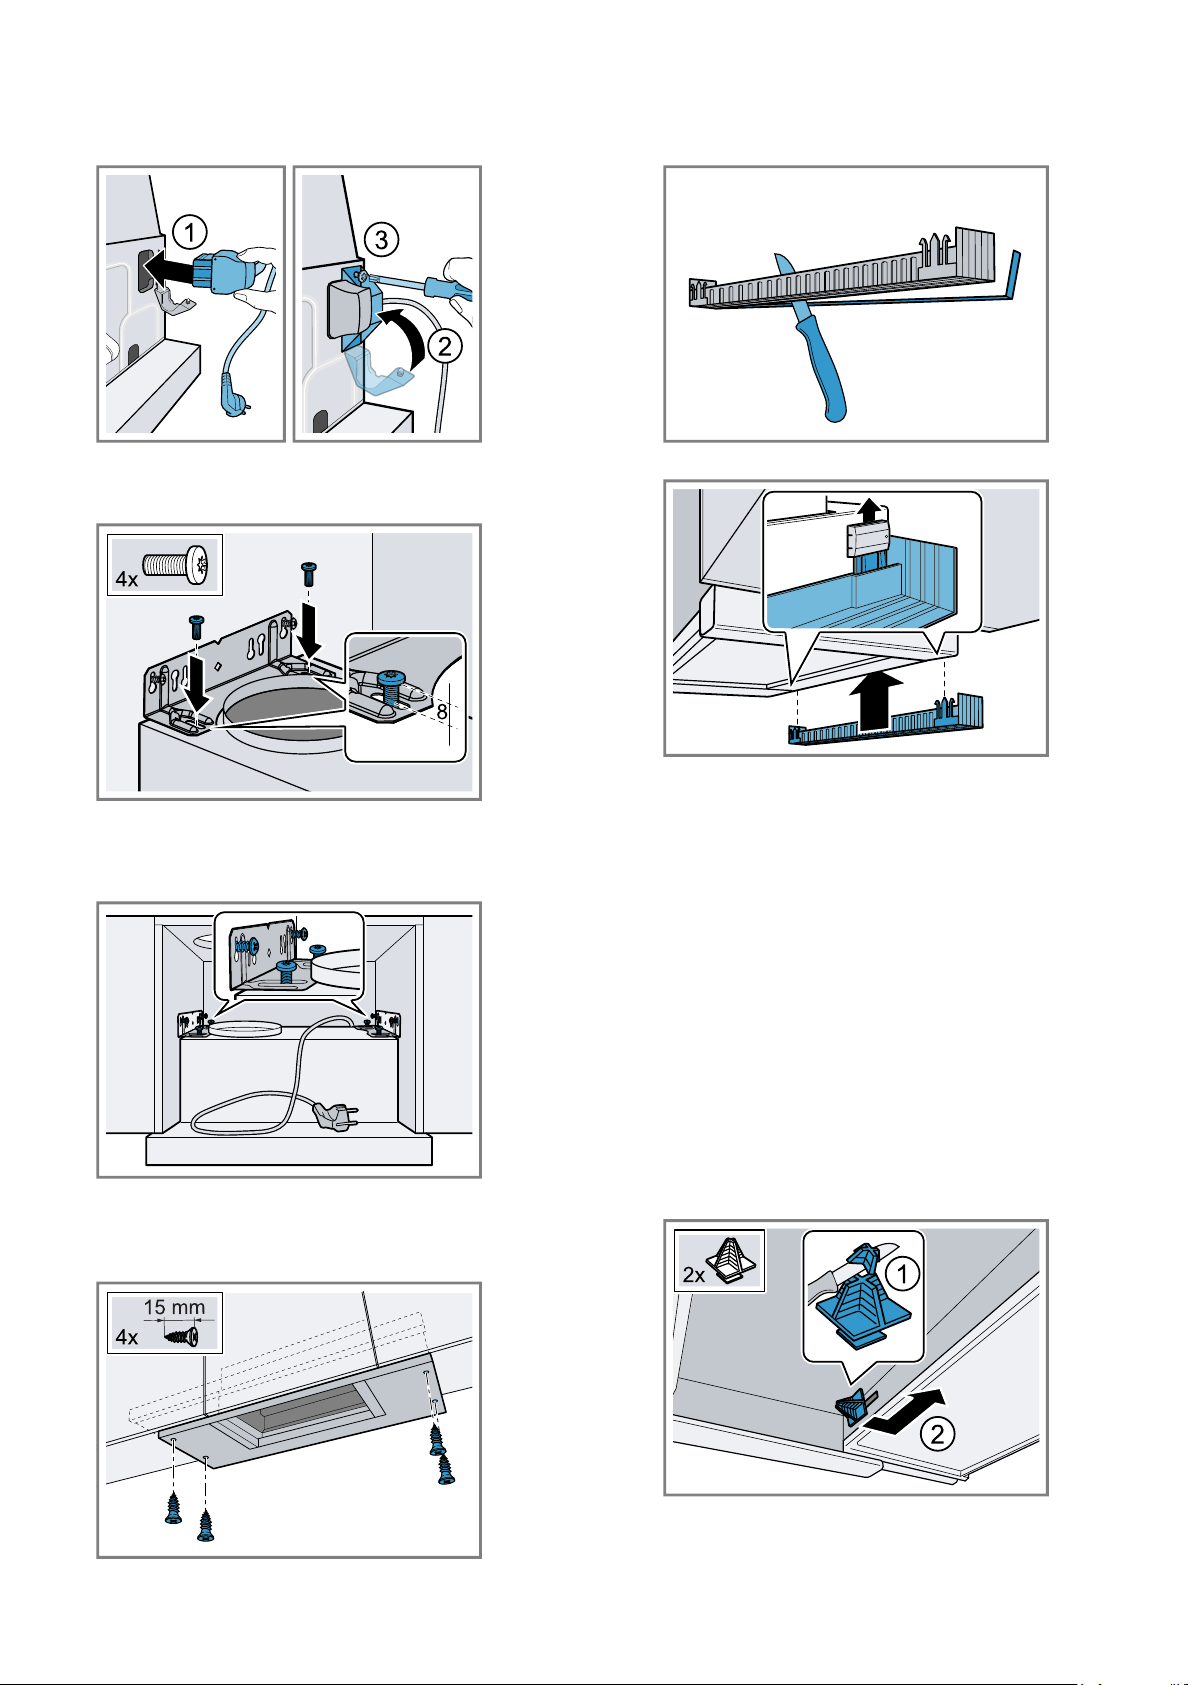
3.
Connect the enclosed power cord to the appliance
and secure the stain relief.
4.
Screw the two angle brackets to the appliance. Note
the position of the screws. Screw in the screws until
8mm of the threaded section is still protruding.
Installing the appliance
1.
Use the angle brackets to hang the appliance on
the screws, align it and tighten it.
2.
Appliance width 90cm: Pull the filter pull-out out
completely towards the front. Also use two screws
each on the left and right to screw the appliance to
the side upper cabinets from below.
3.
Adjust the wall closing strip to the clearance
between the appliance and the wall.
4.
Snap the wall closing strip into the holders.
5.
Fit the grease filters.
6.
Establish the pipe connection.
7.
Establish the electrical connection.
Note:
You can conceal the housing of the extractor hood
within the upper cabinet. In doing so, observe the
following:
¡ The intermediate floor must not rest on the housing.
¡ The front panel must not be secured to the housing.
¡ Access to the housing must remain possible in or-
der to change the filter and for after-sales service.
Changing the filter pull-out's limit stop
On some versions of the appliance, the limit stop for
the filter pull-out can be changed. Spacers are included
with these appliances in order to set the appliance's
handle strip so that it is flush with the fitted unit.
1.
Pull the filter pull-out towards the front.
2.
Shorten the spacers to the required dimension and
insert them into the slot specified.
Loading ...
Loading ...