Loading ...
Loading ...
Loading ...
4
ON
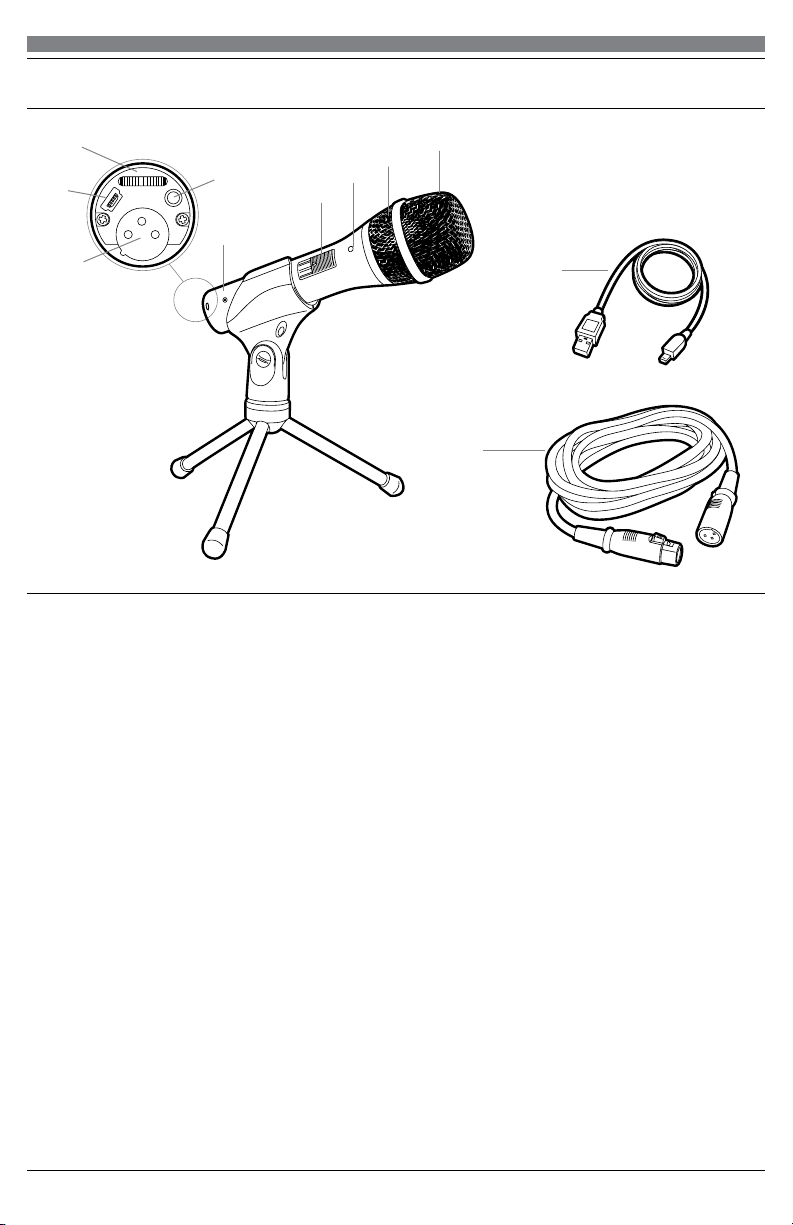
1. Windscreen–Multi-stage grille design offers excellent protection against plosives and sibilance
without compromising high-frequency clarity
2. Capsule–Dynamic microphone element with cardioid polar pattern
3. Blue LED–Blue light shows mic is receiving USB power (Note: The blue LED is not affected
by the on/off switch position)
4. ON/OFF switch–Functions for both USB and analog operation
5. Metal construction–Tough, durable, resilient design
6. Headphone level control–Up/Down dial controls headphone volume
7. XLR connector–XLR connector with analog output for connection to PA system’s conventional
microphone input
8. USB–USB connector for connection to your Mac or PC
9. Headphone Jack–
1
/
8
-inch (3.5 mm) stereo jack for connecting your headphones
10. USB cable
11. XLRM to XLRF cable
Setting up your microphone with included stand clamp and tripod desk stand
A. Screw the stand clamp onto the threaded portion of the desk stand.
B. Extend the tripod legs to provide a wide, secure base, and place the tripod desk stand on
a flat surface.
B. Install the AT2005USB microphone into the microphone mount, with ON/OFF switch up
C. The top of the microphone should be facing the sound source.
D. Use a screwdriver or coin to loosen and tighten the pivot screw for angle adjustment.
E. Plug the provided USB cable into the USB output at the base of the microphone, or plug the
provided XLR cable into the microphone input of your sound system.
Note: Many recording software programs are available online. Audacity is widely used free software
for recording and editing sounds. It is available online at http://audacity.sourceforge.net/
AT2005USB
1
2
3
4
5
6
7
8
9
10
11
Loading ...
Loading ...
Loading ...