Loading ...
Loading ...
Loading ...
10 — English
OPERATION
In some areas, products are required to be registered
with local utility companies.
If the product is used at a construction site, there may
be additional regulations which must be observed.
INSTALLING/REMOVING BATTERY PACKS
See Figure 2.
The power station has a total of four battery ports, but will
function even if only one battery pack is installed. The more
batteries installed, however, the greater the amount of power
available and/or length of run or charge time provided, up to
the full capacity noted in the Product Specifications section
of this manual. For best performance, use at least two 5Ah
or greater batteries.
Battery packs are shipped in a low charge condition and
should be charged before first use.
To install:
Attach the battery pack to the power source by aligning
the raised ribs on the battery pack with the grooves on
the power source. Press down on the battery pack until
the latch snaps into place and the battery is fully seated.
Repeat to install additional battery packs as desired.
To remove:
Locate the latch on the bottom of the battery pack and
depress to release, then pull up on the battery pack to
remove.
CHARGING THE POWER STATION
See Figures 2 - 4.
Install the desired number of battery packs.
NOTE: If not using all of the available battery slots, the
location of the batteries installed does not matter and will
not affect power station charging performance.
Connect the charger cord to the power station, then plug
the charger into a standard electrical outlet that is nominal
120/60 Hz AC (typical U.S. household type circuit).
Once the charging cable is connected and plugged in,
sequential charging of the batteries will begin.
NOTE: If connecting the charger immediately after
using the power station at a high AC load, the battery
temperature may be outside the acceptable charging range
and cause the LCD display to show an error condition.
If this occurs, charging will begin automatically once the
battery temperature reaches an acceptable level.
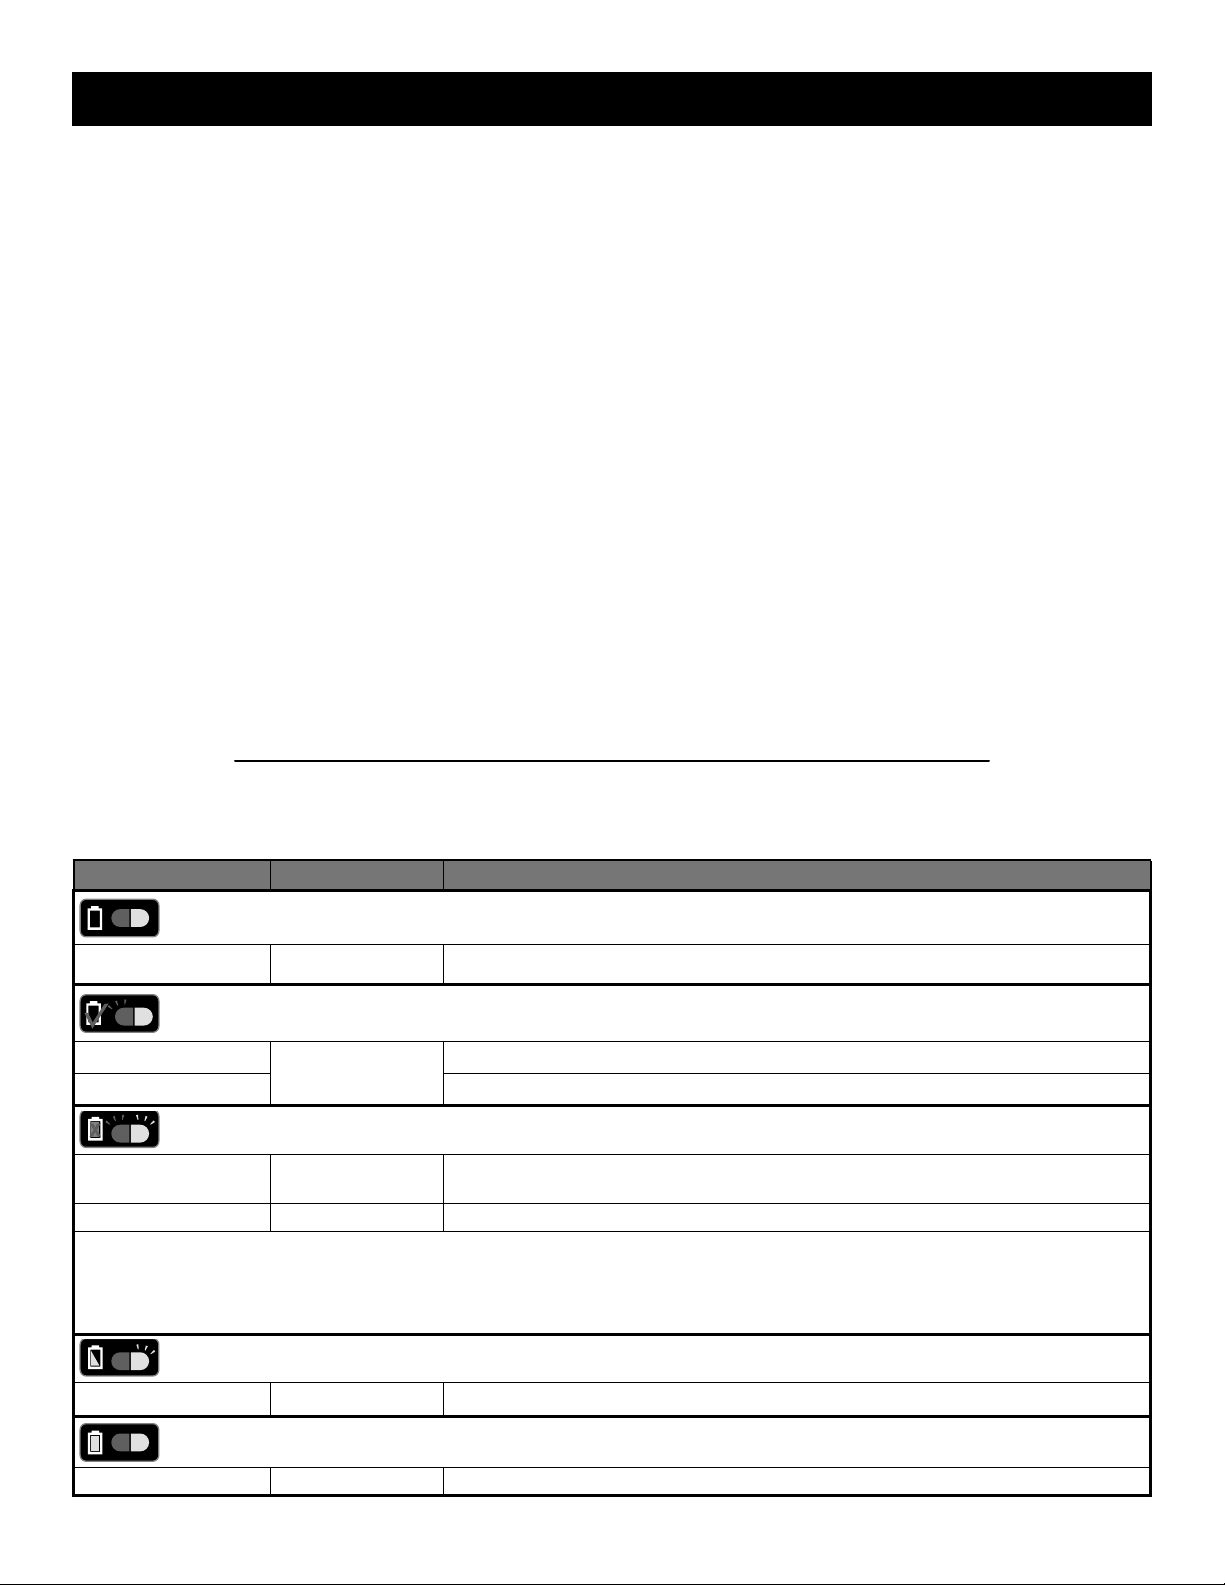
BATTERY PORT LED FUNCTIONS
See Figure 2.
BATTERY PACK LED ACTION
Power On
Without battery pack Solid Red Ready to charge battery pack.
Testing
Hot battery pack
Flashing Red
When battery pack reaches cooled temperature, charger begins charge mode.
Cold battery pack When battery pack reaches warmed temperature, charger begins charge mode.
Error
Error
Flashing Red
and Green
Battery pack or charger error.
Deeply discharged Flashing Red Charger conditions battery until normal voltage is reached, then begins charge mode.
• Try to repeat the conditions a second time by removing and reinstalling the battery pack. If the LED error status repeats a second time,
try charging a different battery.
• If a different battery charges normally, dispose of the pack that received the error (see your battery pack manual for instructions).
• If a different battery also indicates error, the charger should be replaced.
Charging
Fast charging Flashing Green Battery is being charged.
Ready
Battery full Solid Green Charging is complete.
Loading ...
Loading ...
Loading ...