5
• Useofthisproductbypeopleotherthanthosetrainedonthisproductmayresultinexposuretohazardous
laserlight.
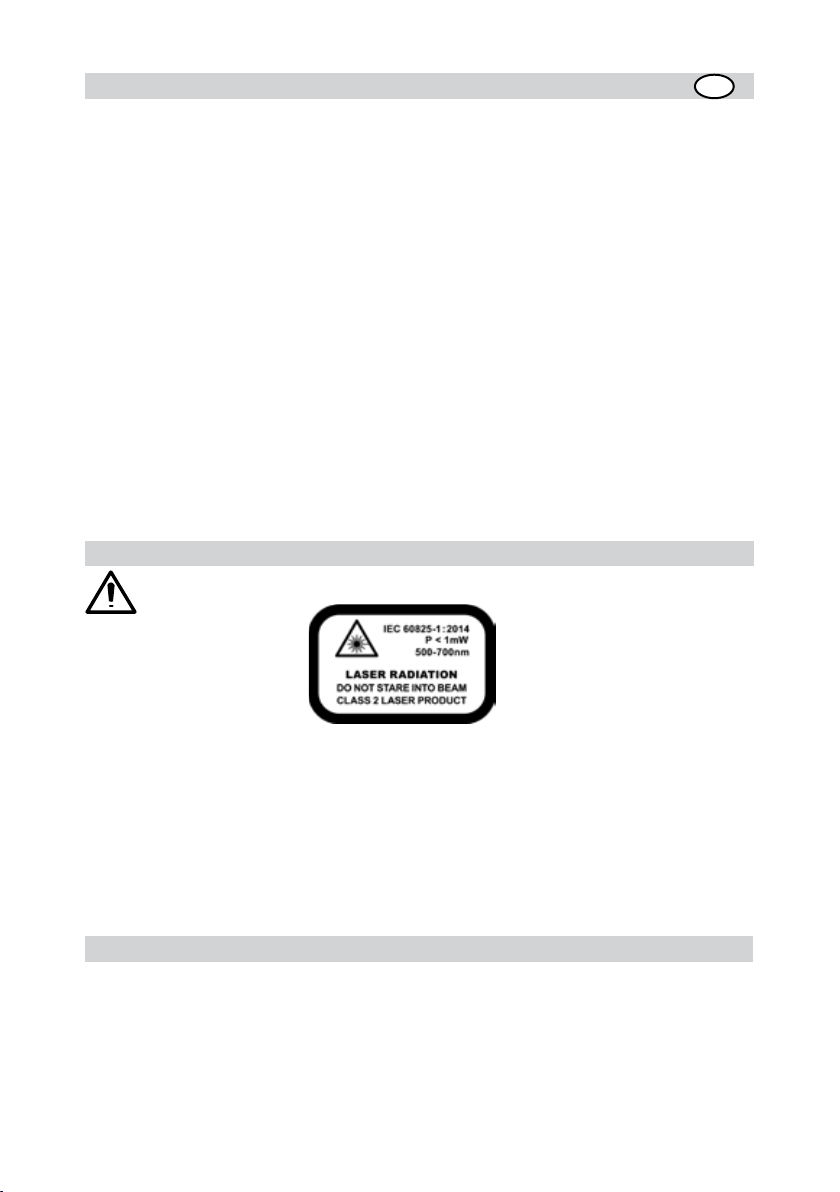
• Donotremovewarninglabelsfromtheunit.
• Thelaserissubjecttoclass2.
• Duetothesmalldiameterbeam,watchandsecurethecourseofthebeaminremoteareas.
• Neverlookintothelaserbeamordirectittotheeyesofotherpeople.
• Alwaysoperatetheunitinawaythatpreventsthebeamfromgettingintopeople’seyes.
• Ifinitialserviceisrequired,whichresultsintheremovaloftheouterprotectivecover,removalmustonlybe
performedbyfactory-trainedpersonnel.
Caution:Useofotherthanthedescribeduserandcalibrationtoolsorotherproceduresmayresult
inexposuretohazardouslaserlight.
Caution:UsingdifferentthandescribedattheLL300Nuserguide,mayresultinunsafeoperation.
Important Information
The Model LL300N is a simple-to-use tool that allows one or more workers to take accurate horizontal
measurementsatdistancesbetween3ft(1m)and820ft(250m)usingahand-heldorrod-mountedreceiver.
• Alwaysplacethelaserinthemiddleoftheworkingarea.
• Tripod/wallmountoperationisrecommendedfordistancesover20m(65ft).
• Checktheaccuracyregularly.
• Stablemountingisnecessaryforsecureoperations.
• Keeptheglassoftheinstrumentclean.
TABLE OF CONTENTS
FOR YOUR SAFETY 5
Important Information 5
COMPONENTS 6
POWER SUPPLY 6
Installing the Batteries 6
Operating Time 6
Charging the Batteries 7
HOW TO USE THE LASER 7
Laser Setup 7
Self-leveling and Height (HI) Change Alert 7
Manual-/Single Slope Mode 7
OPERATING EXAMPLES 8
Determining the Height of Instrument (HI) 8
Marking Heights 8
Vertical Application 8
LEVELING ACCURACY 9
Inuences on Leveling Accuracy 9
Checking Calibration 9
MAINTENANCE AND CARE 10
SYSTEM CLEANING 10
PROTECTING THE ENVIRONMENT 10
WARRANTY 11
SPECIFICATIONS 11
FOR YOUR SAFETY
Forhazardlessandsafeoperation,readalltheuserguideinstructions.
GB

6
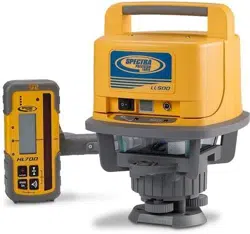
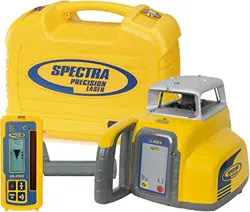
COMPONENTS
Buttons
1 Power Button
2 Manual Button
Control indicators
3 Leveling Indicator
4 Manual/HI-Warning Indicator
5 Battery Indicator
Elements of the unit
6 Infrared Receiver (for remote control)
7 Rotor Cage
8 Sighting Guides
9 Beam Aperture/Prism Cap
10 Handle
11 Battery Door
12 5/8x 11 Tripod Mounts
13 Rubber Feet
POWER SUPPLY
Beforeusingtheunitforthersttime,installalkalineorrechargeablebatteries.Ifrechargeableareused,rst
rechargethebatteries.Seebatterysection.
TheNi-CadandNi-MHbatteriesmaycontainsmallamountsofharmfulsubstances.
Be sure to charge the battery before using it for the rst time, and after not using it for an
extendedlengthoftime.Chargeonlywithspeciedchargersaccordingtodevicemanufacturer’s
instructions.
Donotopenbattery,disposeofinreorshortcircuit;itmayignite,explode,leakorgethotcausing
personalinjury.
Disposeinaccordancewithallapplicablefederal,state,andlocalregulations.
Keepthebatteryawayfromchildren.Ifswallowed,donotinducevomiting.Seekmedicalattention
immediately.
Installing Batteries
Removethebatterydoorbyturningthecenterscrew90°counterclockwise.Insertbatteries(orarechargeable
batterypack)intothehousingsothatthenegative poles are on the bigger battery spiral springs.
DO NOT REMOVE RECHARGEABLE BATTERIES FROM THEIR HOLDER AND INSTALL ALKALINE
BATTERIES, SEVERE DAMAGE TO UNIT WILL RESULT IF CHARGING IS ATTEMPTED.
Installthebatterydoorandtightenitbyturningthecenterscrew90°clockwise.
Amechanicalswitchpreventsalkalinebatteriesfrombeingcharged.Onlytheoriginalrechargeable
batterypackallowschargingwithintheunit.Anyotherrechargeablebatterieshavetobecharged
externally.
Operating Time
Rechargeablebatteriespermitanoperatingtimeofapprox.45hoursinrotation.
Alkalinebatteries(AIMn)permitanoperatingtimeofapprox.90hoursinrotation.
The following factors reduce the operating time:
• frequentself-levelingduetowindorvibration;
• extremetemperatures;
• oldrechargeablebatteriesorrechargeablebatterieswithmemory-effect;
• usingbatteriesofdifferentcapacities.
Removeallbatteriesatthesametime.Neverusebatterieswithdifferentcapacities.Onlyusenew
(charged)batteries(rechargeable).
Lowvoltageisindicatedbytheslowashingbatteryindicator(5).

7
Charging the batteries
Thechargerrequiresapprox.10hourstochargeemptyrechargeablebatteries.Forthischarging,connectthe
plugofthechargertotherechargejackoftheunit.Neworlong-timeout-of-userechargeablebatteriesreach
theirbestperformanceafterbeingchargedandrechargedvetimes.
Thebatteriesshouldonlybechargedwhenthelaserisbetween50°Fand104°F(10°Cto40°
C)Chargingatahighertemperaturemaydamagethebatteries.Chargingatalowertemperature
mayincreasethechargetimeanddecreasethechargecapacity,resultinginlossofperformance
andshortenedlifeexpectancy.
HOW TO USE THE LASER
Laser Setup
Positiontheunithorizontally(tripodmountandrubberfeetdownward!)onastableplatform,wallmount,or
tripodatthedesiredelevation.
Pressthepowerbutton(1)toturnontheunit.TheLEDs(3,4and5)areturnedonfor3seconds.Self-leveling
willstartatonce.Theunitisleveledwhenthelevelingindicator(3)isnolongerashing(onceeverysecond).
Therotorwillnotspinuntiltheunitisleveled.Fortherstveminutesafterthelaserselflevels,theLEDlights
solidthenasheseveryfoursecondstoletyouknowthelaserisstilllevel.
Inordertoswitchtheunitoff,pressthepowerbutton(1)again.
If the laser is positioned beyond its self-levelingrangeof ±8%, the manual and leveling indicators ash
simultaneouslyandawarningsoundisemitted.Repositionthelaserwithinitsself-levelingrange.
Self-leveling, Height Change (HI) Alert
Onceturnedon,theunitautomaticallylevelsitselfinrangesof8%(±0.8m/10m).Inordertorecognize
thelevelingprocessatthemeasuringareaandinordernottomarkfaultyheightsduringthisoperation,the
rotationstops.
Onceleveled,theunitconstantlymonitorsitslevelcondition.Theheightchange(HI)alertisactivated5minutes
afterself-levelingwasperformedandthelaserisrotatingat600min
-1
.
Levelerrors>30mm/10mputtheunitintoalertmodebecausetheyaregenerallycausedbyadisturbance
thatcouldleadtoinaccuratemeasurements.Whenenteringintoalertmode,theprismstops,thelaserbeam
turnsoff,awarningsoundisheardandtheHIWarningLED(4)ashes2xpersecond.Turntheunitoffand
thenonagain.Toensureyourformerelevation,nowyouhavetocheckorarrangetheexactheight.
Manual Mode/Single Slope Mode
Whenyoupressthemanualbutton(2)onthelaser,theremotecontrol,orthereceiver-remotecontrol,thelaser
issetfromautomaticself-levelingmodetoManualmode.Manualmodeisindicatedbytheashing(onceevery
second)redLED(4).InManualmode,theY-axiscanbeslopedbypressingtheUp-andDown-Arrow-buttons
ontheremotecontrol.Additionally,theX-axiscanbeslopedbypressingtheLeft-andRight-Arrow-buttons
ontheremotecontrol.
Whenyoupressthemanualbuttonagainontheremotecontrol,thelaserissetintoSingleSlopemode.This
isindicatedbytheashingred(4)andgreen(3)LEDs(onceeverysecond).InSingleSlopemode,theY-axis
canbeslopedbypressingtheUp-andDown-Arrow-buttonsontheremotecontrol,whiletheX-axisremains
inautomaticselflevelingmode(e.g.whensettinguprampsordriveways).TheHeightchange(HI)alertis
stillactive.
Pressingthemanualbuttonatthelaserorremotecontrolagain,changesthelaserbacktoautomaticself-
levelingmodeasindicatedbytheashinggreenLED(3).

8
LL300
OPERATING EXAMPLES
Determining the Height of Instrument (HI)
Theheightofinstrument(HI)istheelevationofthelaser’sbeam.
TheHIisdeterminedbyaddingthegrade-rodreadingtoabenchmarkorknownelevation.
Setupthelaserandplacethegraderodonajob-sitebenchmark(BM)orknownelevation.
Slidethereceiverup/downthegraderoduntilitshowsanon-gradereading.
Addthegrade-rodreadingtothebenchmarktodeterminetheheightofinstrument.
Example:
Benchmark = 30.55m(100.23ft)
Rodreading = +1.32m(+4.34ft)
Heightofinstrument = 31.87m(104.57ft)
UsethisHIasareferenceforallotherelevations.
Marking Heights
Setupthe laserin horizontal mode(e.g., using atripod orwall mount)sothat thelaser beamis atthe
desiredheight.
Whenworkingwithoutatripodorwallmount,setupthelaseronastablesurfaceandmeasuretheheight
differencebetweenlaserbeamanddesiredheightbyusingarulerandmarkthemeasuredheightagain.
Vertical Application
Levelthetripodandallowthelasertolevelinautomaticself-levelingmode.
Pushthemanualmodebuttonandchangethelaser’spositiononthetripodforverticalalignmentbyusing
theverticalmountingthread.
Rotatethelaseruntiltheverticallaserplanealignswiththereceiver’son-gradeposition.
HeightofInstrument(HI)
RodReading
1.32m(4.34ft)
Benchmark
30.55m(100.23ft)
HI=RodReading+Benchmark
HI=1,32m+30,55m=31,87m(4.34ft+100.23ft=104.57ft)
HI

9
Inordertoavoidoffseterrors,thereceivershouldbeusedclosetotheelevationwherethelaserhasbeensetup.
Ifaremotecontrolisavailable,theupanddownarrowbuttonscanbeusedforneadjustments.
LEVELING ACCURACY
Inuences on the leveling accuracy
Theoverallaccuracyoftheunitcanbeinuencedbymanyfactors:
• factoryaccuracy;
• temperatureoftheunit;
• ambientinuenceslikerain,windandtemperature.
The factor thatinuenceson the unit’s accuracymostis the ambient temperature. Vertical differences in
temperature near the ground can divert the laser beam, similar to the heat waves seen on hot asphalt
streets.
This factor also applies to all optical measuring devices such as automatic levels and
theodolites.
Accuracy Check
Toensurejob-siteaccuracy,youneedadistanceof20m(65feet)betweentwowallsAandB,whereyouwill
execute4measuringoperationsonatripodasfollows(transitmeasurement).
SettheunithorizontallyonatripodnearwallAandswitchitonwiththeplusX-axispointingtowardswallA.
Aftertheunitislevel,marktheheightofthelaserbeamusingareceiveratwallA.Turntheentireunit180°,
letitself-levelandmarkthecenterofthelaserbeamatwallB.
Now,placetheunitnearwallBwiththeplusX-axispointingtowardswallB.Aftertheunitislevel,markthe
heightofthelaserbeamatwallB.Turntheentireunit180°,letitself-levelandmarkthecenterofthelaser
beamatwallA.Thedifference(h)ofthemarkedpointsatwallAshowsthedeviation.

10
Iftheunitiswithinitsworkingaccuracylimits(±20”)themaximumdifferencefromtruelevelat20m(65ft.)+
20m(65ft.)=40m(130ft.)is4mm(3/16inch).
Repeattheabovestepsfor“minusX”andfor“plus-”and“minusY”,sothatameasurementforallfouraxes
oftheunithavebeenperformed.
Theaccuracyofthedetectorhastoberegarded.
PROTECTING THE UNIT
Donotexposetheunittoextremetemperaturesortemperaturechanges(donotleaveinsidethecar).
Theunitisveryrobustandcanresistdamageifdroppedevenfromtripodheight.Beforecontinuingyourwork,
alwayscheckthelevelingaccuracy.SeeAccuracyChecksection.
Thelaseriswaterproofandcanbeusedindoorsandoutdoors.
CLEANING AND MAINTENANCE
Dirtandwaterontheglasspartsoflaserorprismwillinuencebeamqualityandoperatingrangeconsiderably.
Cleanwithcottonswabs.
Removedirtonthehousingwithalint-free,warm,wetandsmoothcloth.Donotuseharshcleansersorsolvents.
Allowtheunittoairdryaftercleaningit.
PROTECTING THE ENVIRONMENT
Theunit,accessoriesandpackagingshouldberecycled.
Thismanualismadeofnon-chlorinerecyclingpaper.
Allplasticpartsaremarkedforrecyclingaccordingtomaterialtype.
Do not throw used batteries into the garbage, water or re. Remove them in compliance with
environmentalrequirements.

11
WARRANTY
TrimblewarrantstheLL300Ntobefreeofdefectsinmaterialandworkmanshipforaperiodof5years.Trimble
oritsauthorizedservicecenterwillrepairorreplace,atitsoption,anydefectivepart,ortheentireproduct,
forwhichnoticehasbeengivenduringthewarrantyperiod.Ifrequired,travelandperdiemexpensestoand
fromtheplacewhererepairsaremadewillbechargedtothecustomerattheprevailingrates.Customers
should send the product toTrimble Navigation Ltd. orthenearest authorized service center for warranty
repairsorexchange,freightprepaid.Anyevidenceofnegligent,abnormaluse,accident,oranyattemptto
repairtheproductbyotherthanfactory-authorizedpersonnelusingTrimblecertiedorrecommendedparts,
automaticallyvoidsthewarranty.
TheforegoingstatestheentireliabilityofTrimbleregardingthepurchaseanduseofitsequipment.Trimble
willnotbeheldresponsibleforanyconsequentiallossordamageofanykind.Thiswarrantyisinlieuofall
otherwarranties,except assetforthabove, includinganyimpliedwarranty merchantabilityoftnessfor a
particularpurpose,areherebydisclaimed.Thiswarrantyisinlieuofallotherwarranties,expressedorimplied.
SPECIFICATIONS
LevelingAccuracy
1,3
: <±15arcseconds,<±2.2mm/30m
(<±3/32in./100ft)
RotationSpeed: 600rpm
OperatingRange(Diameter)
1,2
: 500m(1640feet)
LaserType: 635nm
LaserClass: Class2
Self-LevelingRange: approx.±8%(approx.±4,8°)
LevelingTime: approx.30sec
LevelingIndicators: LEDashes
LaserBeamDiameter
1
: approx.8mmatthelaser
PowerSource: 4xD-cellNiMHoralkalinebatteries(LR20)
OperatingTemp.: -20°C...50°C(-4°F...122°F)
StorageTemp.: -20°C...70°C (-4°F...158°F)
TripodMounts: 5/8x11horizontallyandvertically
Weight: 2,7kg
Lowvoltageindication: ashing/shiningofthebatteryindicator
Lowvoltagedisconnection: unitshutsoff
1) at 21° Celsius
2) under optimal atmospheric circumstances
3) along the axis
DECLARATION OF CONFORMITY
We
Trimble Kaiserslautern GmbH
declareunderoursoleresponsibilitythattheproduct
LL300N
towhichthisdeclarationrelatesisinconformitywiththefollowingstandards
EN 61000-6-3:2007 + A1:2010, EN 61000-6-2:2005 and EN 60825-1:2014
followingtheprovisionsofdirective
Electromagnetic compatibility 2004/108/EC.
Themanagingdirector