Loading ...
Loading ...
Loading ...
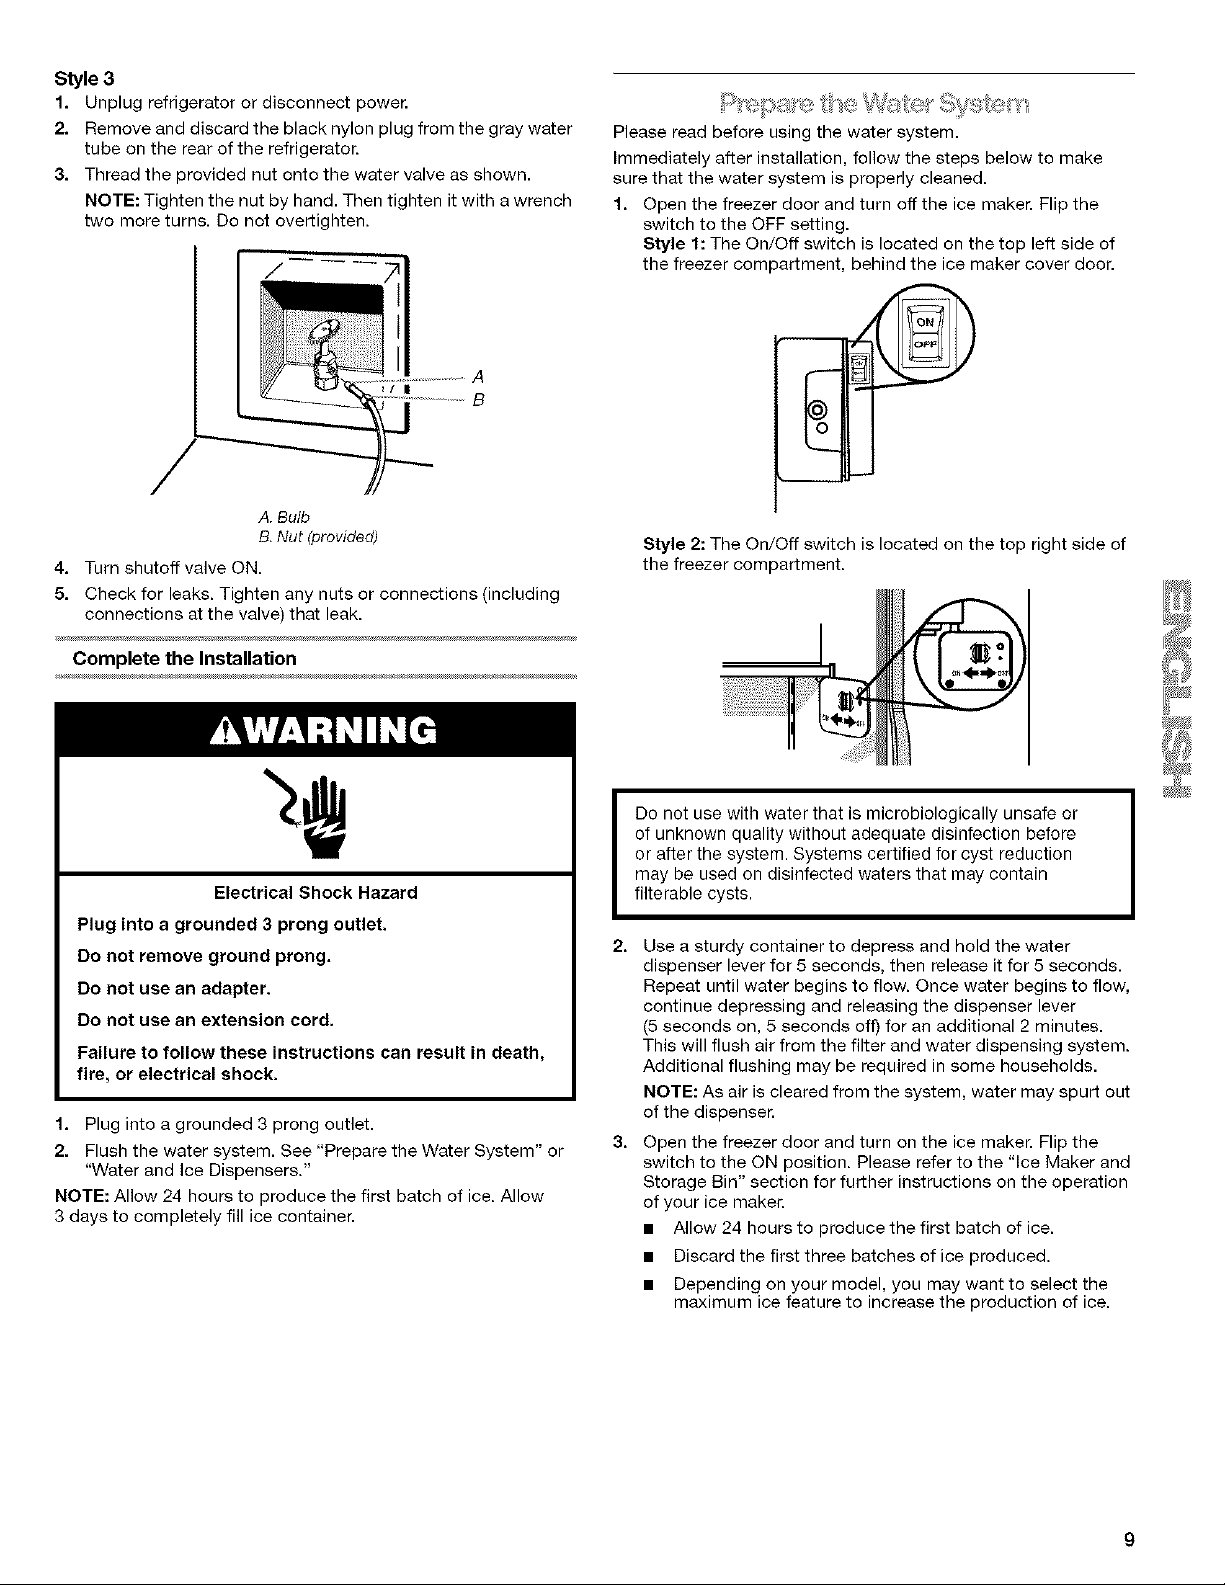
Style 3
1. Unplug refdgerator or disconnect power.
2. Remove and discard the black nylon plug from the gray water
tube on the rear of the refrigerator.
3. Thread the provided nut onto the water valve as shown.
NOTE: Tighten the nut by hand. Then tighten it with a wrench
two more turns. Do not overtighten.
A
B
A. Bulb
B. Nut (provided)
4. Turn shutoff valve ON.
5. Check for leaks. Tighten any nuts or connections (including
connections at the valve) that leak.
Complete the Installation
Please read before using the water system.
Immediately after installation, follow the steps below to make
sure that the water system is properly cleaned.
1. Open the freezer door and turn off the ice maker. Flip the
switch to the OFF setting.
Style 1: The On/Off switch is located on the top left side of
the freezer compartment, behind the ice maker cover door.
Pc
Style 2: The On/Off switch is located on the top right side of
the freezer compartment.
Electrical Shock Hazard
Plug into a grounded 3 prong outlet.
Do not remove ground prong.
Do not use an adapter.
Do not use an extension cord.
Failure to follow these instructions can result in death,
fire, or electrical shock.
1. Plug into a grounded 3 prong outlet.
2. Flush the water system. See "Prepare the Water System" or
"Water and Ice Dispensers."
NOTE: Allow 24 hours to produce the first batch of ice. Allow
3 days to completely fill ice container.
Do not use with water that is microbiologically unsafe or
of unknown quality without adequate disinfection before
or after the system. Systems certified for cyst reduction
may be used on disinfected waters that may contain
filterable cysts.
2.
3.
Use a sturdy container to depress and hold the water
dispenser lever for 5 seconds, then release it for 5 seconds.
Repeat until water begins to flow. Once water begins to flow,
continue depressing and releasing the dispenser lever
(5 seconds on, 5 seconds off) for an additional 2 minutes.
This will flush air from the filter and water dispensing system.
Additional flushing may be required in some households.
NOTE: As air is cleared from the system, water may spurt out
of the dispenser.
Open the freezer door and turn on the ice maker. Flip the
switch to the ON position. Please refer to the "Ice Maker and
Storage Bin" section for further instructions on the operation
of your ice maker.
• Allow 24 hours to produce the first batch of ice.
• Discard the first three batches of ice produced.
• Depending on your model, you may want to select the
maximum ice feature to increase the production of ice.
Loading ...
Loading ...
Loading ...