Loading ...
Loading ...
Loading ...

Page 11
OPERATION
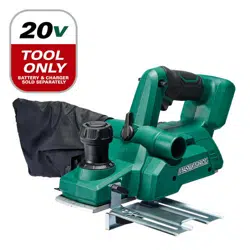
For more efficient operation, empty the
extraction port and shavings bag frequently
while planing. Clear the shavings from
the extraction port and clean it with a soft
brush.
NOTE: Empty the shavings bag by
unzipping the bag and then gently tapping
the bag to remove the shavings and dust.
For a more thorough cleaning of the
shavings bag, turn the bag inside out. Use
a soft brush to brush the dust off.
WARNING:
Wear a suitable dust
mask, as there may be some residual
airborne dust particles in the area.
PARK REST (FIG. 6)
The park rest swings down to help keep
the blade from coming into contact with
the work surface when the planer is not
in use. The park rest was designed to
automatically swing up and out of the way
when the rear base plate of the planer
crosses the leading edge of the workpiece.
FIG. 6
Park Rest
PLANING (FIG. 7)
FIG. 7
WARNING:
• Make sure that the trigger switch is
released and the battery pack is removed
before making any adjustments to planer
or planer attachments.
• Hold the tool with both hands while
starting the tool, since torque from the
motor can cause the tool to twist.
1. Support the workpiece using bench-
mounted clamps, a vise, or another
safe, practical support.
2. Adjust the edge guide (if required) and
the cutting depth as appropriate.
3. While standing comfortably, hold the
planer firmly with both hands.
4. Turn the planer on and wait until it runs
at full speed before allowing the blade
to contact the workpiece.
5. Place the front plate flat on the
workpiece and push the planer forward
at an even speed.
6. Move the planer gently forward,
applying pressure on the front of the
planer at the beginning of the planing
pass, then applying pressure at the rear
of the planer at the end of the planing
pass.
7. When finished planing, carefully lift the
planer from the workpiece and release
the trigger switch. Wait until the planer
blade comes to a complete stop.
8. Remove the battery and turn the depth-
adjustment knob to the P (park) setting.
Store in a safe, clean, dry location.
Loading ...
Loading ...
Loading ...
