
Loading ...
Loading ...
Loading ...
36
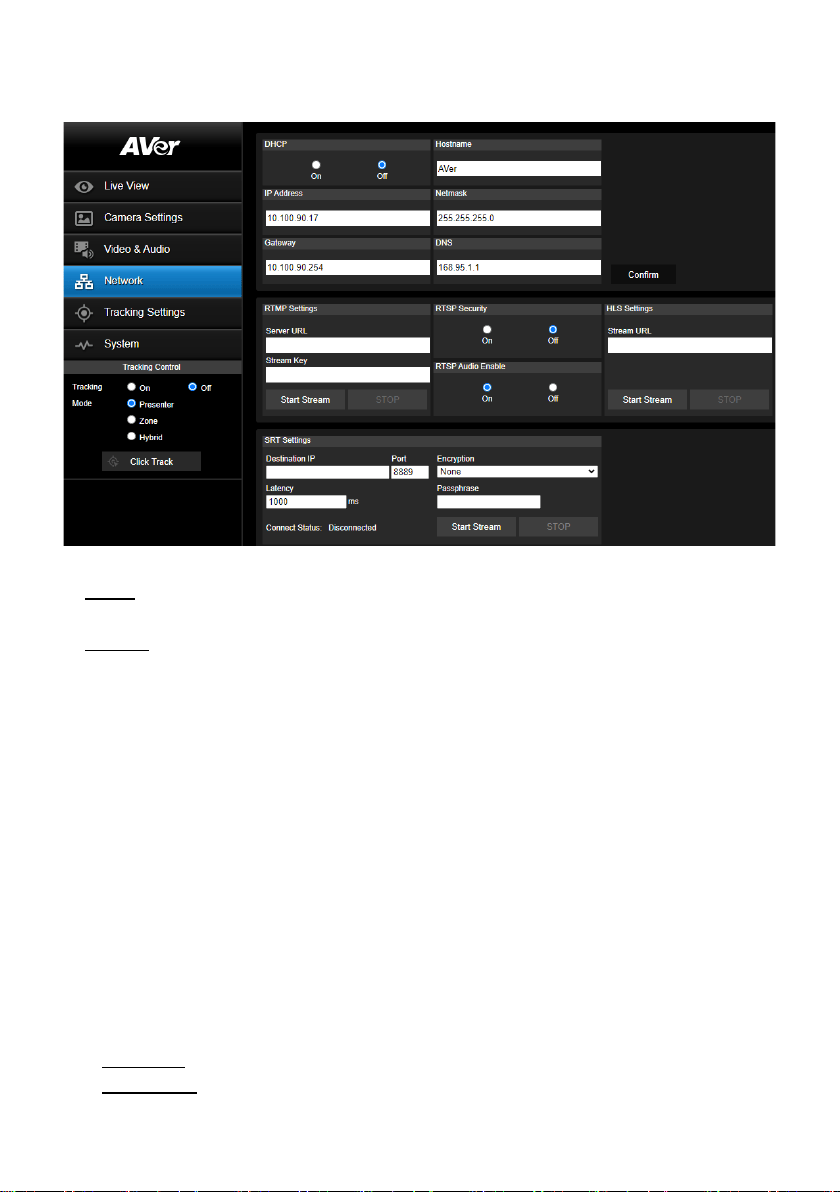
Network
You can configure network settings on this page.
◼ DHCP: You can set up the network to DHCP or Static IP.
DHCP: Select On to enable the DHCP button. The camera will be automatically assigned with the
related IP settings. Click Confirm to save the settings.
Static IP: Select Off to disable the DHCP button and manually input the IP Address, Netmask,
Gateway and DNS. Click Confirm to save the settings.
◼ Hostname: The default Hostname is AVer. You can change the hostname to be displayed on other
devices, e.g. IP router.
◼ RTMP Settings: Configure the RTMP settings to transfer camera stream to the broadcasting
platform, e.g. YouTube. To set up the RTMP settings:
1. Input the Server URL and Stream Key of the broadcasting platform you use. Please refer to the
instruction of the broadcasting platform you use to get the RTMP server URL and stream key.
2. Click Start Stream, the camera stream should be transferred to your broadcasting platform.
3. To stop broadcasting, click STOP.
◼ RTSP Security: Configure the RTSP settings to display camera streams on applications such as
VLC, PotPlayer or Quick Time using the RTSP stream. To enable RTSP:
1. Select On in the RTSP Security field.
2. Select On in the RTSP Audio Enable field if you want to transfer audio.
3. On your application, input the RTSP (ex: rtsp://192.168.1.100/live_st1) and ID/Password of the
camera.
RTSP URL: rtsp://[IP address of the camera]/live_st1
ID/Password: Same with the Web login ID/Password.
Loading ...
Loading ...
Loading ...