Loading ...
Loading ...
Loading ...
8
Twist Lock Compact Cover
Removal
Note: The twist lock cover is designed
to be removed without the use of tools.
DO NOT force the cover to rotate with
tools or other objects. To avoid damaging
the cover, apply pressure to the cover
frame, not the clear plastic material.
To remove the cover, pressure will be applied
at two points to disengage the cover from
locking tabs on the motor plate.
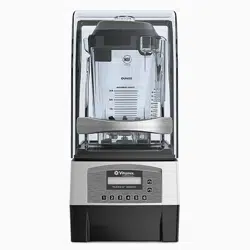
To remove the twist lock sound enclosure:
1. Remove the compact cover door to
prevent it from closing unexpectedly.
Lift the handle to open the cover. Gently
spread the sides of the door over the round
hinges and remove.
2. Lift up on the front of the centering pad
and peel away from the motor base. Lift
it up and over the drive socket to remove.
(See Figure A).
3. Grasp the bottom frame of the
cover with two hands as shown in
(See Figure B).
FIGURE A
FIGURE C
FIGURE D
FIGURE E
4. With equal pressure and in one motion, use
the index finger of your left hand to apply
pressure at the back of the cover frame
while at the same time apply pressure
with your right thumb to unlock and twist
the cover away from center in a counter-
clockwise direction (See Figure C).
5. If necessary, continue applying pressure at
these two points until the cover is free and
can be separated from the motor base
(See Figure D).
6. Once disengaged, lift the cover up and
away from the blender base (See Figure
D).
Note: See Figure E for an example of the
motor base with the twist lock compact cover
removed.
FIGURE B
Twist Lock Compact Cover
Installation
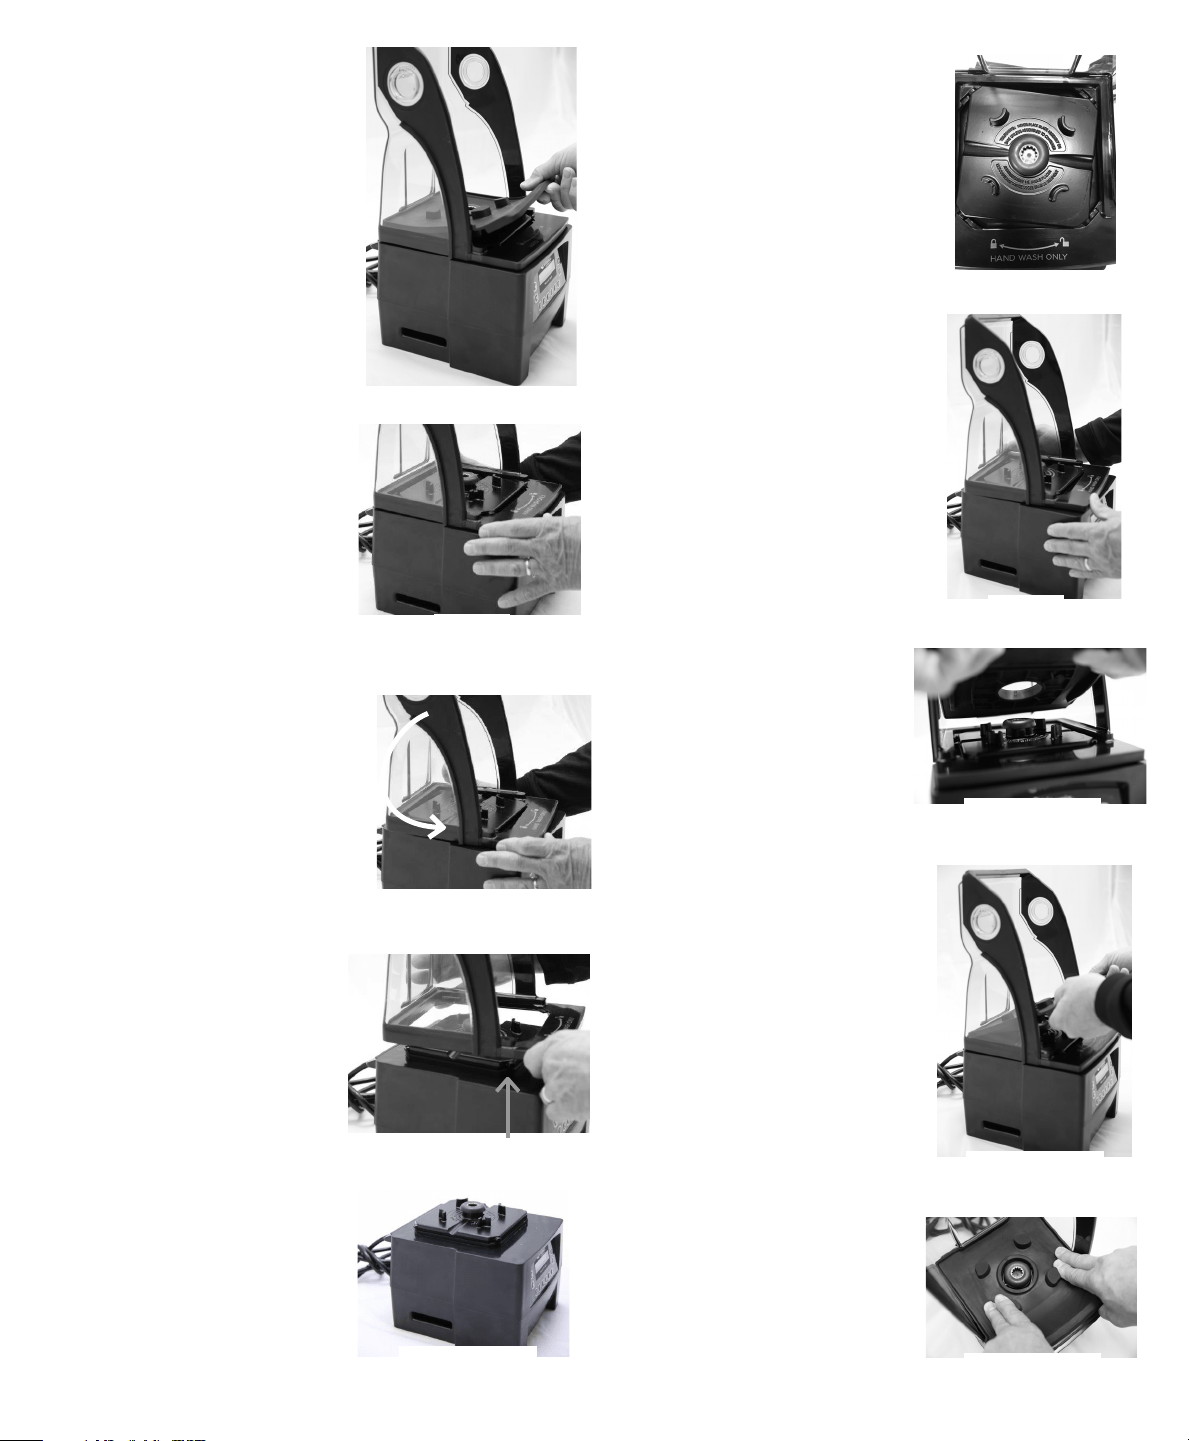
1. Put the twist lock compact cover on
top of the blender base. Align the four
locking tabs on the motor adapter plate
with the openings on the compact cover.
(See Figure A).
2. Twist the compact cover clockwise
on the motor base to lock it in place.
(See Figure B).
FIGURE E
FIGURE A
FIGURE B
3. Align the rail guides on the centering
pad with the slots between the
compact cover and the motor adapter
on the motor base (See Figure C).
4. Put the centering pad in place on the
motor base in the proper alignment.
(See Figure D).
Note: The centering pad MUST be used
on the motor base during use to keep
the twist lock compact cover in place.
DO NOT use the machine without the
centering pad.
5. From the back of the motor base
working towards the front, apply
pressure on the centering pad to push
it into position on the motor base,
making sure that the centering pad
is completely seated under the drive
socket. (See Figure E).
FIGURE D
FIGURE C
Loading ...
Loading ...
Loading ...