Loading ...
Loading ...
Loading ...
engaging the lock button located near the rear of the tool, while
holding the paddle depressed. Always be sure that the tool is not
locked on before plugging in. To turn the tool off when it is locked on,
squeeze and release the paddle once.
Setting the Blades
TURN OFF TOOL AND DISCONNECT FROM POWER SUPPLY
BEFORE ADJUSTING BLADES.
VERTICAL CLEARANCE: Position the moving blade at the top of its
stroke. Adjust the vertical clearance so that the “V” shaped opening
appears as in Figure 2.
HORIZONTAL CLEARANCE: The upper movable blade must be
centered to correspond with the position of the lower fixed blade as
shown in Figure 2 by releasing the clamp screw with the key
provided.
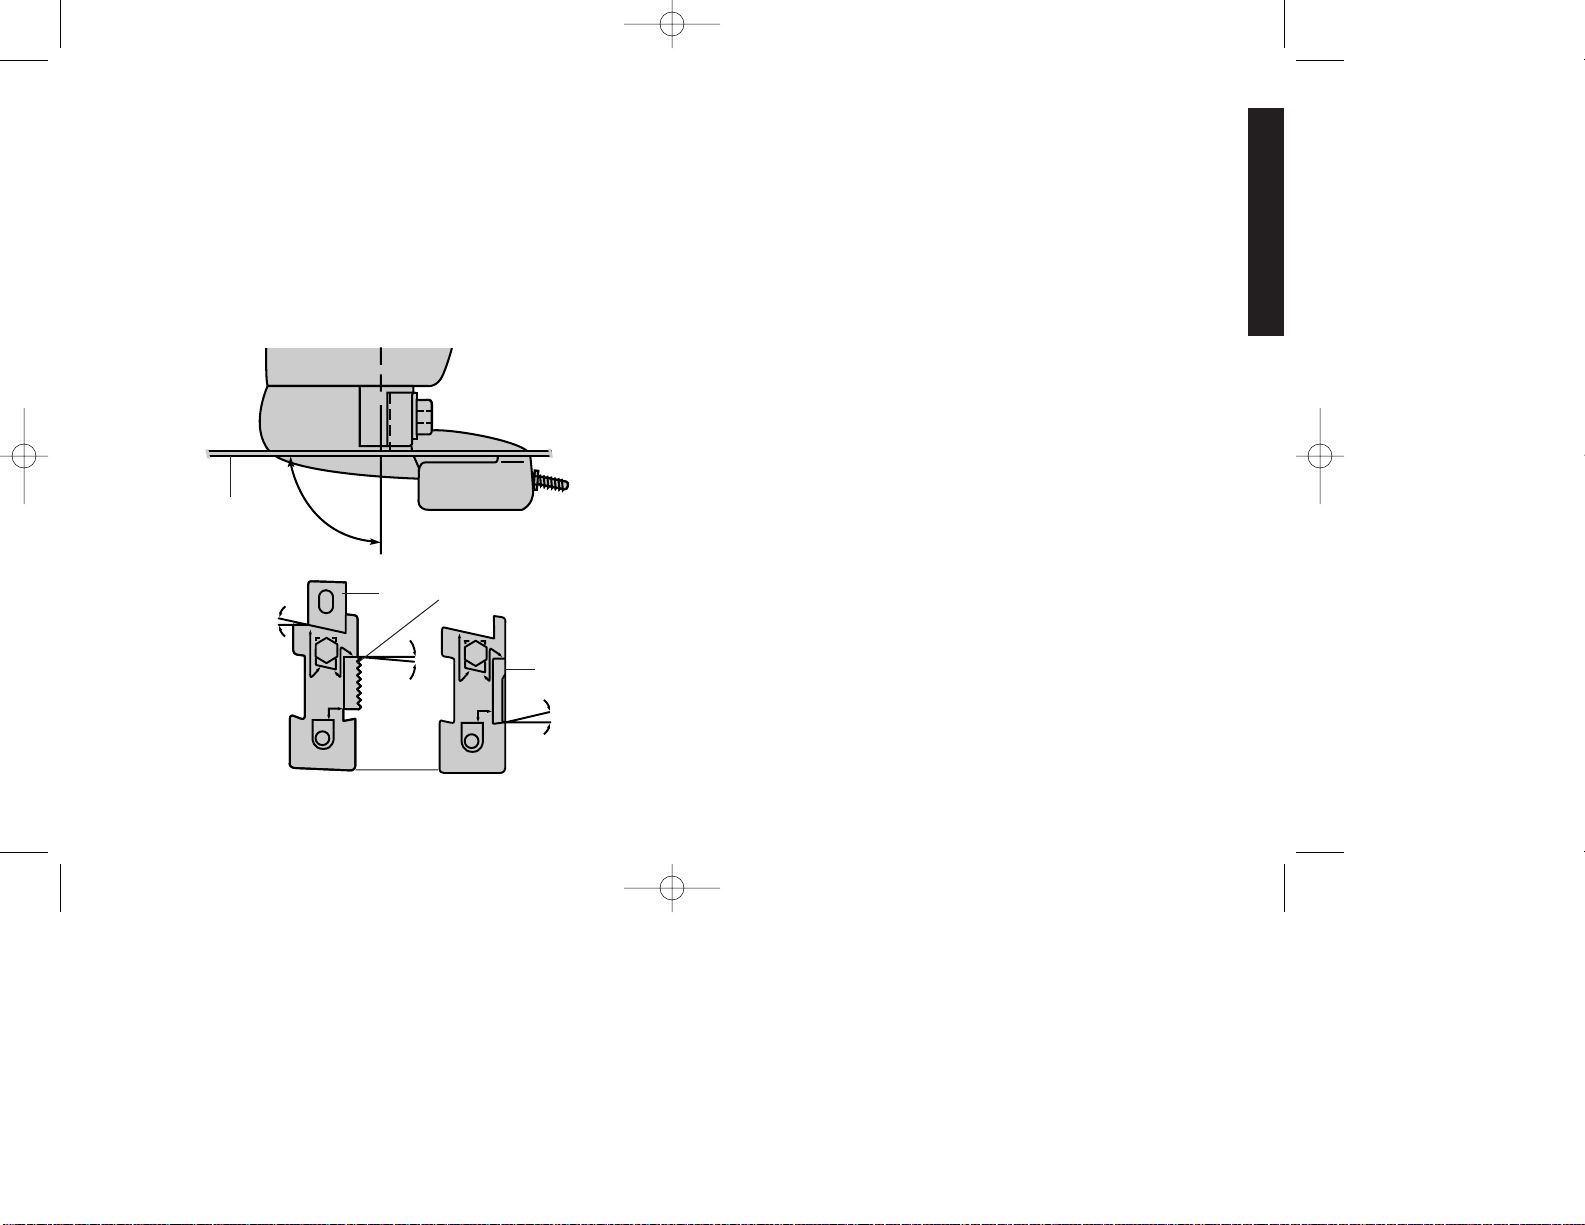
The lower blade must be positioned relative to the upper blade ac-
cording to the thickness of the material to be cut. The shear is sup-
plied with a gauge to facilitate this adjustment. As shown in Figure 3,
loosen the clamp screw “A” and withdraw the lower blade away from
the upper loosening set screw “B”. Insert the appropriate size feeler
gauge between the 2 blades and slowly tighten screw “B” until both
blades are in contact with the gauge. Lock the lower blade by tight-
ening screw “A” and tighten the hex nut “C” to lock set screw “B”.
Operation
Start the shear by depressing the paddle switch. Hold the shear
positioned so the main body is parallel to the work and the cutters are
at right angle to the work (Figure 4). Engage the cutters with the edge
of the material to be cut, and apply only sufficient forward pressure to
start cutting. The relative position of the cutters to the work is critical,
and it may be necessary to tilt the tool forward or backward until the
best cutting rate is achieved. Too much tilt will stop the cut. Blades
must be sharpened in accordance with the angles in Figure 5, using
the template provided.
3
English
STEEL
SHEET
90˚
FIG. 5
FIG. 4
RUNNING BLADE
12˚
13˚
5˚
FIXED
BLADE
BLADE TEMPLATE
Motor
Your DEWALT tool is powered by a DEWALT built motor. Be sure your
power supply agrees with the nameplate marking. Voltage decrease
of more than 10% will cause loss of power and overheating. All
D
EWALT tools are factory tested; if this tool does not operate, check
the power supply.
Switch
To start shear, depress the paddle switch (Figure 1). To turn the tool
off, release the paddle. The paddle switch can be locked on by
384417/DW892 .1 7/15/02 11:46 AM Page 3
Loading ...
Loading ...
Loading ...