
INSTANT
®
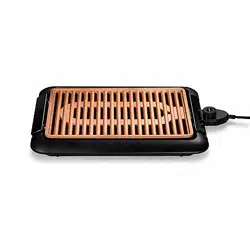
INDOOR GRILL
USER MANUAL

to your new Instant Grill!
This Instant
®
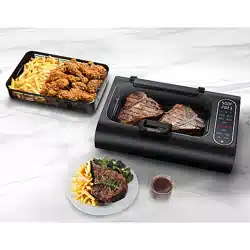
Indoor Grill combines the best features of a countertop
grill with an air fryer, so you can cook with less oil and less hassle. We
hope you fall in love with Instant grilling and enjoy delicious meals for
years to come!
Get started with your new Indoor Grill!
Welcome

CONTENTS
Important Safeguards 2
What’s in the box 6
Initial set up 7
Using your Grill 8
Grill 11
Air Fry 14
Roast 17
Bake 19
Dehydrate 22
Cleaning 24
Error Codes 24
Learn more 25
Warranty 26

2
User Manual
Read all instructions before using and only use this indoor grill as
described in this manual.
When using electrical appliances, basic safety precautions should
always be followed to reduce the risk of fire, electric shock, and injury
to persons.
Placement
• DO place the appliance on a countertop only. Always operate the
appliance on a stable, non-combustible, level surface.
• DO NOT place the appliance on or close to a hot gas or electric
burner, or a heated oven.
• DO NOT use the appliance near water or flame.
• DO NOT use outdoors. Keep out of direct sunlight.
• DO NOT place on anything that may block the vents on the
appliance.
• DO make sure all parts are dry and free of food debris before use.
• DO make sure basket is always in place prior to cooking regardless
of the cooking function.
• DO make sure oil collector is properly installed prior to cooking.
General use
• DO NOT touch the appliance’s hot surfaces, or any accessories
during or immediately after cooking because they will be hot.
• DO use the appliance’s handles and knobs.
• DO use oven mitts when removing accessories.
• DO place hot accessories on a heat-resistant surface or cooking plate.
• DO NOT cover the appliance tray or any part of the oven with foil.
This will cause overheating of the grill.
• DO NOT move the appliance while it is in use.
• DO NOT allow children or persons with reduced physical, sensory
or mental capabilities to operate this appliance. Close supervision
is necessary when any appliance is used near children and
individuals with reduced capabilities. Children should not play
with this appliance.
IMPORTANT SAFEGUARDS

3
User Manual
• DO NOT use the appliance for anything other than household use.
It is not intended for commercial use.
• DO NOT leave the appliance unattended while in use.
• DO NOT use the appliance for more than 60 minutes in a
2-hour period.
Air frying cautions
When the appliance is in operation, hot air is released through the
air vents. Keep your hands and face at a safe distance from the air
vents and take extreme caution when removing hot accessories
from the appliance. Failure to do so may result in personal injury
or property damage.
While cooking, the internal temperature of the appliance reaches
several hundred degrees. To avoid personal injury, never place
unprotected hands inside the appliance until it has cooled to
room temperature.
• DO NOT use a ceramic-coated or stoneware pot (such as
CorningWare stoneware) for air frying.
• DO NOT block the vents on the appliance. Leave at least 5 in / 13 cm
of space around the appliance when in use.
• DO NOT place the appliance on a hot stove.
• DO NOT operate the appliance on or near combustible materials
such as tablecloths and curtains.
• DO NOT cover the air vents while the appliance is in operation.
Doing so will prevent even cooking and may cause damage to
the appliance.
• DO NOT overfill the appliance. Overfilling may cause food to contact
the heating element, which may result in fire, property damage,
and/or personal injury.
• DO NOT pour oil into the cooking container. If needed, spray food
lightly with non-stick cooking spray. Using cooking oil could result
in personal injury and/or property damage.
• DO use caution with cooking containers made of materials other
than glass. Failure to do so may result in fire, personal injury, and/or
property damage.

4
User Manual
Should the unit emit black smoke during use, press Cancel and unplug
the appliance immediately. Wait for smoking to stop before opening
the door/basket, then clean thoroughly. For further information refer
to ‘Troubleshooting’ in the User Manual.
• DO use extreme caution when moving the appliance containing oils
or other hot liquids.
• DO use extreme caution when removing the basket and oil collector
or disposing of hot grease.
• DO NOT use this appliance for deep frying foods.
Care and Storage
• DO let the appliance cool to room temperature before cleaning
or storage.
• DO NOT store any materials in the appliance when not in use.
• DO NOT place any combustible materials in the appliance, such as
paper, cardboard, plastic, Styrofoam or wood.
• DO NOT clean the appliance with metal scouring pads or steel wool.
Pieces can break off and touch the electrical parts, causing a risk of
shock, burns or personal injury.
Power Cord
• A short power-supply cord is provided to reduce the hazards
resulting from grabbing, entanglement and tripping. This appliance
has a 3-prong grounding plug. To reduce the risk of electric shock:
• ONLY plug the power cord into a grounded electrical outlet.
• DO NOT remove ground.
• DO NOT let the power cord hang over edges of tables or counters,
or touch hot surfaces or open flame, including the stovetop.
• DO NOT use below-counter power outlets.
• DO NOT use with extension cords, power converters or adapters,
timer switches or separate remote-control systems.

5
User Manual
Electrical Cautions
The appliance contains electrical components that are an electrical
shock hazard. Failure to follow these instructions may result in electric
shock and/or death.
To avoid electrical shock:
To disconnect, select Cancel, then remove plug from power source.
Always unplug when not in use, as well as before adding or removing
parts or accessories, and before cleaning. To unplug, grasp the plug
and pull from the outlet. Never pull from the power cord.
• DO allow unit to cool before adding or removing parts
or accessories.
• DO regularly inspect the appliance and power cord.
• DO NOT operate the appliance if the power cord or plug is damaged,
or after the appliance malfunctions or is dropped or damaged in
any manner. For assistance, contact Customer Care by email at
support@instanthome.com.
• DO NOT attempt to dislodge food while the appliance is plugged
into an electrical outlet, as this may cause electric shock, burns
or personal injury.
• DO NOT attempt to repair, replace or modify components of the
appliance, as this may cause electric shock, fire or personal injury,
and will void the warranty.
• DO NOT tamper with any of the safety mechanisms, as this may
result in personal injury or property damage.
• DO NOT immerse power cord, plug or the appliance in water or
other liquid.
• DO NOT rinse the appliance under tap.
• DO NOT use the appliance in electrical systems other than
120 V ~ 60 Hz for North America.
SAVE THESE INSTRUCTIONS
6
User Manual
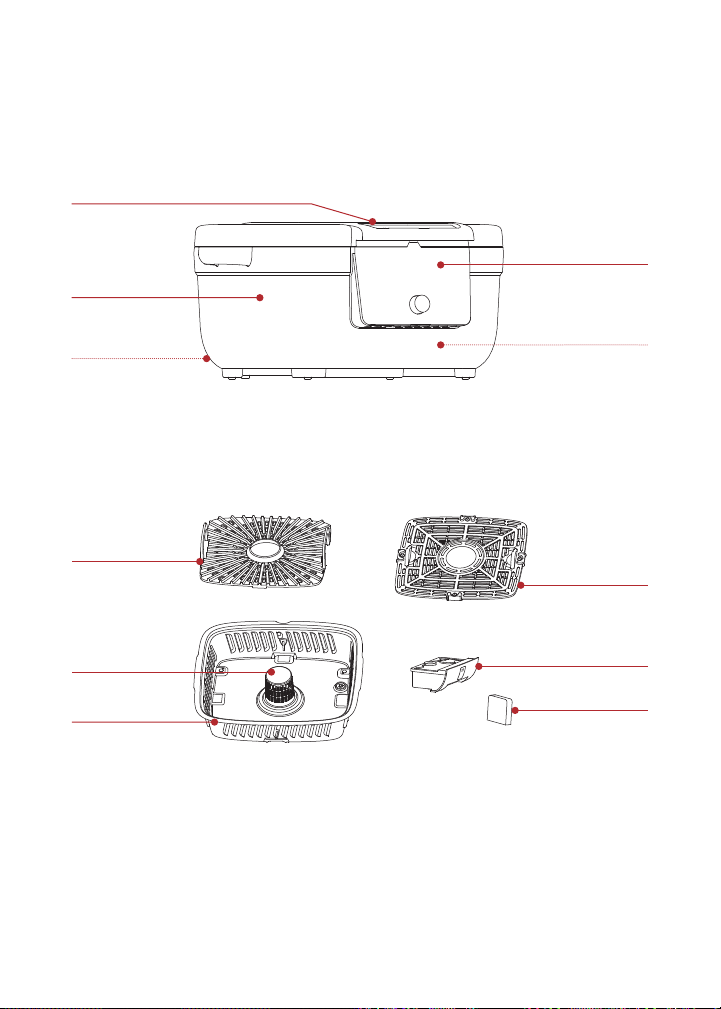
WHAT’S IN THE BOX
Indoor Grill
Parts and accessories
Illustrations are for reference only and may differ from the actual product.
Remember to recycle! We designed this packaging with sustainability in mind.
Please recycle everything that can be recycled where you live.
Air vents (rear)
Cooking chamber
(inside)
Power cord (rear)
Control panel
Air frying tray
Removable
oil collector
OdorErase Filter
Cooking basket
EvenHeat Core
Grill plate
Removable glass lid

7
User Manual
INITIAL SET UP
Unpack
1. Remove your new Grill from the box.
2. Remove all the packaging material from in and around the grill.
3. Make sure to remove all the accessories from inside the grill chamber.
4. Don’t remove the safety warning stickers or the rating label from
the grill.
Clean before use
1. Wipe the interior with a damp cloth. Use a clean, soft cloth to dry.
2. Wash the accessories with hot water and dish soap. Rinse with
warm, clear water and use a soft cloth to dry.
Placement
1. Place your Grill on a stable, level surface, away from combustible
material and external heat sources. Do not place your Grill on top
of another appliance.
2. Make sure to leave at least 5” / 13 cm of space above and around
all sides of the appliance to allow for sufficient air flow.
Turn on the Grill
1. Plug the Grill into an electric outlet. The Control Panel will light up.
2. When the display shows Off, the unit is ready for cooking.
If your Instant Grill is left inactive for over 2 minutes, the display will dim.
Press any button or the Control Dial to return to ready mode.
8
User Manual
USING YOUR GRILL
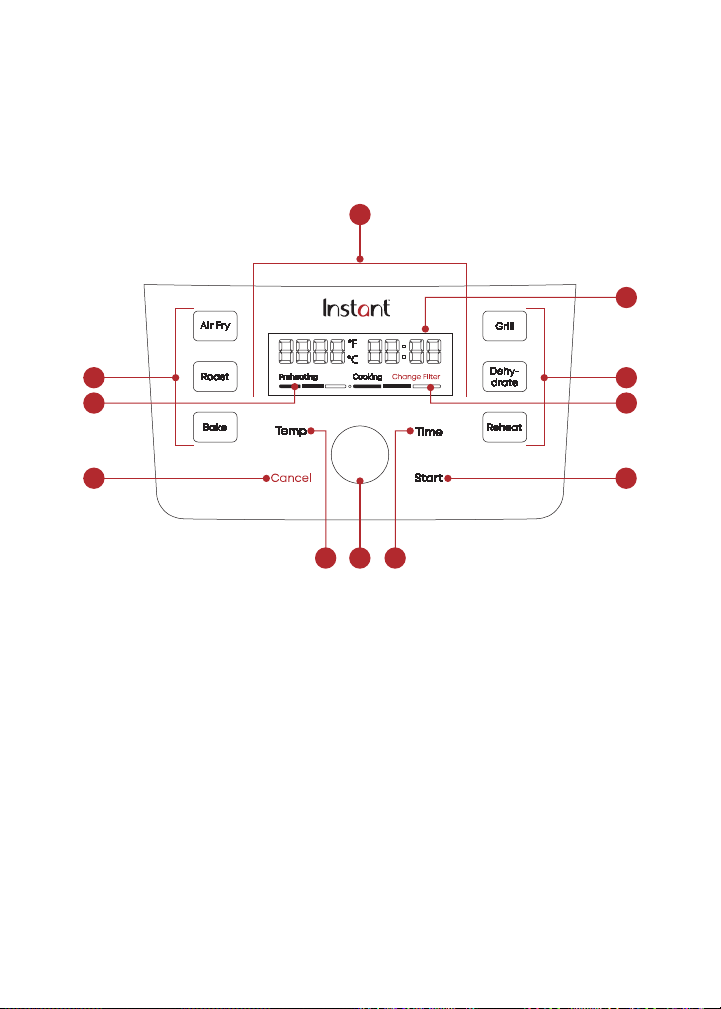
Control panel
We’ve designed the control panel to be simple to use and easy to read.
1. Smart Program buttons
• Air Fry
• Roast
• Bake
• Grill
• Dehydrate
• Reheat
2. Time/Temperature
• Cooking time
• Cooking temperature
• Fahrenheit/Celcius indicator
3. Status Bar
4. Cooking status
5. Change filter alert
6. Temp button
7. Time button
8. Control Dial
• Used to select time
and temperature
9. Cancel button
10. Start button
1
5
3
10
1
4
9
86 7
2

9
User Manual
Turning sound On/Off
• While the display shows OFF, press and hold Time and Temp for
5 seconds.
Audible safety alerts (beeps) cannot be turned off.
Choosing temperature unit
Choose which cooking temperature unit you would like to use,
Fahrenheit or Celsius.
• While the display shows OFF, press and hold Temp for 5 seconds,
until display shows either °F or °C.
Reset Smart Programs to original settings
Reset individual Smart Programs
• While the display shows OFF or is in cooking mode, press and
hold one of the Smart Program buttons for 3+ seconds.
The Smart Program’s cooking time and temperature are restored
to the factory default setting.
Reset all Smart Programs
• While the display shows OFF, press and hold the Control Dial
for 3+ seconds.
All Smart Program cooking times and temperatures are restored to the
factory default setting.
Cancel active cooking program
You can cancel any cooking program at any time.
• While in Standby, Preheating or active cooking program, press
Cancel. Depending on the temperature of the unit, the internal
fan may keep running to cool the unit.

10
User Manual
Change the OdorErase
™
filter
When the display shows Change Filter, it’s time to replace the filter.
Visit instanthome.com to purchase compatible filters, designed to work
with your unit
1. Make sure the unit is not in use and turned off.
2. Open the filter panel door and carefully remove the old filter.
3. Remove a new filter from its packaging.
4. Insert the new filter into the filter housing and close the panel door.
5. Press Bake and Reheat together for 3 seconds to reset the filter
sensor. The display should no longer show Change Filter.
6. The OdorErase filter will automatically begin removing odors while
you cook.
Empty the oil collector
Each time you cook with the Indoor Grill, you’ll need to check the
oil collector and empty it.
1. Make sure the unit is not in use and turned off.
2. Carefully remove the oil collector.
3. Empty any oil out of the collector and properly dispose of the oil.
4. Clean the oil collector in the dishwasher or by hand with mild
dish soap. Dry thoroughly.
5. Carefully replace the oil collector into the grill base.

11
User Manual
GRILL
You can grill meats and veggies for delicious results with less smoke
and mess.
The Grill Smart Program is set to the following default cooking settings.
You can change the cooking time and temperature according to your
recipe if you want.
Setting Default Minimum Maximum
Temperature
Level 5 Level 1 Level 5
Cooking Time
15 minutes
(00:15)
1 minute
(00:01)
1 hour
(01:00)
Cooking Timetable
Frozen/
Fresh
Food Item Amount Temperature Time Internal
Temp
Canned Fruit Pineapple 1 can or
8–10 slices
L 5 (500° F) 8–10 min n/a
Fresh Fruit Pineapple 1-1/2 lb or
4–5 slices
L 5 (500° F) 10–12 min n/a
Fresh Fruit Melon 1/2 lb or
4–6 slices
L 5 (500° F) 3–5 min n/a
Fresh Vegetable Cauliflower 1 lb (florets) L 5 (500° F) 12–15 min n/a
Fresh Vegetable Broccoli 1 lb (florets) L 5 (500° F) 5–8 min n/a
Fresh Vegetable Asparagus 1 lb L 5 (500° F) 2–4 min n/a
Fresh Vegetable Portobello
mushroom
4 L 5 (500° F) 8–10 min n/a
Fresh Vegetable Corn on
the cob
4 L 5 (500° F) 13–15 min n/a
Fresh Vegetable Zucchini 1 lb or
6–8 slices
L 5 (500° F) 8–10 min n/a
Fresh Cheese Cheese
halloumi
1/2 lb or
6–8 slices
L 5 (500° F) 2–3 min n/a
Fresh Pork Baby back
ribs
1-1/2 lb L 4 (475° F) 30–45
min
190° F
Fresh Pork Pork chops 1 lb L 4 (475° F) 5–8 min 145° F
Fresh Pork Pork
skewers
320 g or
4 skewers
L 4 (475° F) 10–12 min 145° F

12
User Manual
Frozen/
Fresh
Food Item Amount Temperature Time Internal
Temp
Fresh Pork Sausage 500 g or
5 pcs
L 2 (425° F) 10–12 min 160° F
Fresh Pork Chorizo 500 g or
5 pcs
L 4 (475° F) 12–15 min 160° F
Fresh Poultry 1/4 chicken 2 pcs L 4 (475° F) 30–35 min 165° F
Fresh Poultry Chicken
breast
1 lb or
3–4 pcs
L 4 (475° F) 12–15 min 165° F
Frozen Poultry Chicken
breast
1-1/2 lb or
5 pcs
L 3 (450° F) 20–25 min 165° F
Frozen Poultry Chicken
kebab
320 g or
4 skewers
L 3 (450° F) 10–12 min 165° F
Fresh Poultry Chicken
kebab
320 g or
4 skewers
L 5 (500° F) 8–10 min 165° F
Fresh Beef Hot dogs 1 lb or
6 hot dogs
L 5 (500° F) 5 min 160° F
Fresh Beef Tenderloin 1 lb or
2 steaks
(1.25-in
thick)
L 5 (500° F) 7–8 min Medium-
rare
Fresh Beef Sirloin 580–600 g
or 2 steaks
(1-in thick)
L 5 (500° F) 11–12 min
14–15 min
Medium-
rare
Well
done
Fresh Beef Rib-eye
steak
2 lb or
2 steaks
(1-in thick)
L 5 (500° F) 7–8 min Medium-
rare
Fresh Beef Burger
patties
4 pcs L 5 (500° F) 5–6 min 160° F
Frozen Beef Burger
patties
4 pcs L 5 (500° F) 12–13 min 160° F
Fresh Beef Beef
medallions
4 pcs (1.5–
in thick)
L 5 (500° F) 8–9 min Medium-
rare
Fresh Seafood Salmon 1 lb or
4–6 pcs
L 5 (500° F) 10–12 min 145° F
Frozen Seafood Salmon 1 lb or
4–5 pcs
L 4 (475° F) 12–15 min 145° F
Fresh Seafood Shrimp 1 lb L 5 (500° F) 2–3 min n/a
Frozen Seafood Shrimp 1 lb L 5 (500° F) 3–5 min n/a

13
User Manual
To grill
Prep
• Cut, chop, season or marinate the ingredients according to your recipe.
Cook
1. Insert the cooking basket and grill plate into the cooking chamber
and close the lid.
2. Select Grill by pressing its button. The Grill button flashes and the
display shows the default time and temperature settings.
3. If you want to change the cooking settings, press Temp or Time and
use the Control Dial to adjust the temperature and cooking time.
4. Press Start to begin. The cooking program starts and the Status
Bar shows Preheating.
5. When the cooker reaches the target temperature, the display shows
Add Food.
6. Open the lid, place the food onto the grill plate, and close the lid.
Turn
1. Part way through the cooking cycle the display shows Turn Food.
2. Open the lid and carefully turn, flip, or rotate your food.
If you do not remove the lid after Turn Food displays, cooking will proceed
after 10 seconds.
3. Close the lid. Cooking continues.
Finish
• When the Smart Program completes, the lid beeps, and the display
shows End.
The grill beeps every minute for 10 minutes to remind you that cooking
has completed You will still hear the fan running for up to 5 minutes after
grilling in order to cool the surface..

14
User Manual
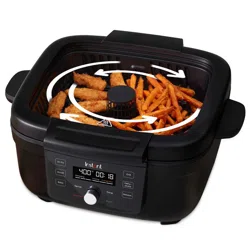
AIR FRY
You can air fry foods like fries, cauliflower bites, wings, nuggets and more.
The Air Fry Smart Program is set to the following default cooking
settings. You can change the cooking time and temperature according
to your recipe if you want.
Setting Default Minimum Maximum
Temperature
400°F / 205°C 180°F / 82°C 400°F / 205°C
Cooking Time
18 minutes
(00:18)
1 minute
(00:01)
1 hour
(01:00)
Cooking Timetable
Frozen/
Fresh
Food Item Amount Temperature Time Internal
Temp
Frozen Vegetable Falafel 1 lb 400° F 8–10 min n /a
Frozen Vegetable French
fries
1 lb 400° F 14–16 min n/a
Frozen Vegetable French
fries
1.5 lb 400° F 18–20 min n/a
Frozen Cheese Mozzarella
sticks
1 lb 400° F 8–10 min n/a
Fresh Cheese Nachos 400° F 3–5 min n/a
Fresh Poultry Chicken
wings
1 lb 400° F 23–25 min 165° F
Fresh Poultry Chicken
wings
2 lb 400° F 28–30 min 165° F
Frozen Poultry Chicken
nuggets
1 lb 400° F 10–12 min 165° F
Frozen Poultry Chicken
strips
1 lb 400° F 12–15 min 165° F
Frozen Poultry Chicken
wings
(breaded)
1 lb 400° F 15–17 min 165° F
Frozen Poultry Chicken
wings
1 lb 400° F 25 min 165° F
Frozen Poultry Chicken
wings
2 lb 400° F 30 min 165° F
Fresh Pork Bacon 4–6 strips 380° F 12–15 min 145° F

15
User Manual
Frozen/
Fresh
Food Item Amount Temperature Time Internal
Temp
Frozen Seafood Fish sticks 1 lb 400° F 10–12 min 165° F
Frozen Snack Pizza
pockets
4 pcs 400° F 23–25 min n/a
Frozen Snack Mini pizza 4 pcs 400° F 12 min n/a
To air fry
Prep
• Cut, chop, season, marinate or batter the ingredients according
to your recipe.
Cook
1. Place the food into the cooking basket with the air frying tray and
set aside.
2. Select Air Fry by pressing its button. The Air Fry button flashes and
the display shows the default time and temperature settings.
3. If you want to change the cooking settings, press Temp or Time and
use the Control Dial to adjust the temperature and cooking time.
4. Press Start to begin. The cooking program starts and the Status
Bar shows Preheating.
5. When the cooker reaches the target temperature, the display shows
Add Food.
6. Open the lid, insert the air fry basket, and close the lid.

16
User Manual
Turn
1. Part way through the cooking cycle the display shows Turn Food.
2. Open the lid and carefully turn, flip, or rotate your food.
If you do not remove the lid after Turn Food displays, cooking will proceed
after 10 seconds.
3. Close the lid. Cooking continues.
Finish
• When the Smart Program completes, the lid beeps, and the display
shows End.
The grill beeps every minute for 10 minutes to remind you that cooking
has completed.

17
User Manual
ROAST
You can roast foods like beef, lamb, pork, poultry, vegetables and
scalloped potatoes, for a deliciously tender inside and browned outside.
The Roast Smart Program is set to the following default cooking
settings. You can change the cooking time and temperature according
to your recipe if you want.
Setting Default Minimum Maximum
Temperature
380°F / 193°C 180°F / 82°C 400°F / 205°C
Cooking Time
40 minutes
(00:40)
1 minute
(00:01)
1 hour
(01:00)
Cooking Timetable
Frozen/
Fresh
Food Item Amount Temperature Time Internal
Temp
Fresh Vegetable Cauliflower
(florets)
1 lb 380° F 15 min n/a
Fresh Vegetable Mini
potatoes
1 lb 385° F 20–22 min n/a
Fresh Vegetable Broccoli
(florets)
1 lb 400° F 5–7 min n/a
Fresh Poultry Drumsticks 1 lb or
4–5 pcs
380° F 37 min 165° F
Fresh Poultry Drumsticks 2 lb or
8–10 pcs
380° F 42 min 165° F
Fresh Poultry Chicken whole
(divided
in 2)
370° F 45–60
min
165° F
Fresh Seafood Salmon 1 lb or
4–5 pcs
400° F 15–18 min 145° F

18
User Manual
To roast
Prep
• Cut, chop, season or marinate the ingredients according to your recipe.
Cook
1. Insert the cooking basket with the air frying tray into the cooking
chamber and close the lid.
2. Select Roast by pressing its button. The Roast button flashes and
the display shows the default time and temperature settings.
3. If you want to change the cooking settings, press Temp or Time and
use the Control Dial to adjust the temperature and cooking time.
4. Press Start to begin. The cooking program starts and the Status
Bar shows Preheating.
5. When the cooker reaches the target temperature, the display shows
Add Food.
6. Open the lid, place the food onto the grill plate, and close the lid.
Finish
• When the Smart Program completes, the lid beeps, and the display
shows End.
The grill beeps every minute for 10 minutes to remind you that cooking has completed.

19
User Manual
BAKE
You can bake foods like breads, cakes, pastries and buns, with the Grill
as your own “mini oven”.
The Bake Smart Program is set to the following default cooking
settings. You can change the cooking time and temperature according
to your recipe if you want.
Setting Default Minimum Maximum
Temperature
350°F / 176°C 180°F / 82°C 400°F / 205°C
Cooking Time
30 minutes
(00:30)
1 minute
(00:01)
1 hour
(01:00)
Cooking Timetable
Frozen/
Fresh
Food Item Amount Temperature Time Internal
Temp
Fresh Bread Brioche,
sandwich
loaf
2 (8 in x 4 in x
2.5 in) loaf pans,
300–320 g dough
per each pan
350° F 30 min 190° F–
200° F
Fresh Bread Banana
bread
2 (7.3 in x 5.4 in x
2 in) loaf pans,
330–340 g batter
per each pan
350° F 40 min n/a
Fresh Cake Carrot cake
loaf
2 (8 in x 4 in x
2.5 in) loaf pans,
400 g batter
per each pan
350° F 40 min n/a
Fresh Cake Box cake 2 (8 in x 4 in x
2.5 in) loaf pans,
400 g batter
per each pan
350° F 30 min n/a
Fresh Muffin Banana
blueberry
muffins
6 (ramequins) 350° F 15 min n/a
Fresh Cookie Chocolate
cookies
6 to 8 (15–20 g
each)
(directly on
the bottom of
the basket)
350° F 12–14 min n/a
Frozen Pastry Spanakopita 6 pcs 380° F 10–12 min n /a

20
User Manual
What to bake in
You can bake many foods right in the cooking basket. For foods that
require a pan, you can use an aluminum foil pan that fits inside the
cooking chamber.
To bake
Prep
1. Prepare the ingredients according to your recipe.
2. Place your food into the cooking basket or an aluminum foil pan.
If you’re using a pan, make sure there is approximately 1”/ 2.5 cm of space
between the pan and the sides of the cooking chamber to allow heat to
circulate evenly.
Cook
1. Select Bake by pressing its button. The Bake button flashes and the
display shows the default time and temperature settings.
2. If you want to change the cooking settings, press Temp or Time and
use the Control Dial to adjust the temperature and cooking time.
3. Press Start to begin. The cooking program starts and the Status
Bar shows Preheating.
4. When the cooker reaches the target temperature, the display shows
Add Food.
5. Open the lid, insert the cooking basket or aluminum cooking pan
into the cooking chamber and close the lid.
Finish
• When the Smart Program completes, the lid beeps, and the display
shows End.
The grill beeps every minute for 10 minutes to remind you that cooking
has completed.

21
User Manual
REHEAT
Bring the crisp and crunch back to leftover fries and pizza in just a
few minutes.
The Reheat Smart Program is set to the following default cooking
settings. You can change the cooking time and temperature according
to your recipe if you want.
Setting Default Minimum Maximum
Temperature
300°F / 148°C 300°F / 148°C 400°F / 205°C
Cooking Time
5 minutes
(00:05)
1 minute
(00:01)
30 minutes
(00:30)
Cooking Timetable
Frozen/
Fresh
Food Item Amount Temperature Time Internal
Temp
Fresh Poultry Drumsticks 2 lb or
8–10 pcs
300° F 20 min n/a
Fresh Poultry Chicken half 300° F 15 min 165° F
Fresh Seafood Shrimp 1 lb 300° F 8 min 165° F
Fresh Snack Pizza 2–4 slices 300° F 10 min n/a
To reheat
Cook
1. Place the food in the cooking basket with air frying tray, insert it
into the cooking chamber, and close the lid.
2. Select Reheat by pressing its button. The display shows the default
time and temperature settings.
3. If you want to change the cooking settings, press Temp or Time and
use the Control Dial to adjust the temperature and cooking time.
Then press Start to accept the new settings.
Finish
• When the Smart Program completes, the lid beeps, and the display
shows End.
The grill beeps every minute for 10 minutes to remind you that cooking
has completed.

22
User Manual
DEHYDRATE
Prepare jerky, dried fuit and fruit chips or even veggie sticks.
The Dehydrate Smart Program is set to the following default cooking
settings. You can change the cooking time and temperature according
to your recipe if you want.
Setting Default Minimum Maximum
Temperature
125°F / 52°C 105°F / 41°C 165°F / 74°C
Cooking Time
7 hous
(07:00)
1 hour
(01:00)
72 hours
(72:00)
Cooking Timetable
Frozen/
Fresh
Food Item Amount Temperature Time
Fresh Fruit Apple chips 1/2 apple
(2 mm thick)
125° F 7–8 hours
Fresh
Fruit Mango chips 1/2 mango
(2 mm thick)
150° F 6–7 hours
Fresh
Fruit Banana 2 bananas
(0.8 in thick)
150° F 6 hours
Fresh
Vegetable Kale 2 bundles
(max)
125° F 2 hours
Fresh
Meat Beef jerky 300 g (1/8 in
thick)
165° F 5–6 hours

23
User Manual
To dehydrate
Cook
1. Place the food in the cooking basket with air frying tray, insert it
into the cooking chamber, and close the lid.
2. Select Dehydrate by pressing its button. The display shows the
default time and temperature settings.
3. If you want to change the cooking settings, press Temp or Time and
use the Control Dial to adjust the temperature and cooking time.
Then press Start to accept the new settings.
Finish
• When the Smart Program completes, the lid beeps, and the display
shows End.
The grill beeps every minute for 10 minutes to remind you that cooking
has completed.

24
User Manual
CLEANING
Clean your Instant Grill after each use. Always unplug the unit and let
all parts cool to room temperature before cleaning. Before using or
storing, make sure all surfaces are dry.
DO NOT immerse power cord, plug or the appliance in water or
other liquid, which may result in electric shock.
Part Cleaning instructions
Cooking basket
Air frying tray
Air vent cover
Oil collector
• Dishwasher safe.
• The cooking basket and air frying tray have a non-stick
coating. Avoid using metal utensils when cleaning.
• Clean with a damp cloth and mild dish soap.
• Allow the cooking basket to air dry completely before
reinstalling, otherwise the glass may experience clouding.
Removable
glass lid
• Dishwasher safe
Cooking
chamber
• Clean with a damp cloth and mild dish soap.
• Always check the heating coil and cooking chamber walls
for oil spatter and food debris, and clean as needed.
• Ensure the heating coil is dry before turning on the grill.
• To remove baked-on grease and food residue from the
cooking chamber, spray with a mixture of baking soda
and vinegar and wipe clean with damp cloth. For stubborn
stains, allow the mixture to sit on the affected area for
several minutes before scrubbing clean.
Exterior
of cooker
• Clean with a soft, damp cloth or sponge. Wipe dry.
Power cord • Use a barely-damp cloth to wipe any particles off cord
ERROR CODES
Problem Cause Solution
E1
Temperature sensor issue Contact Consumer Care.
E2
Temperature sensor short circuit Contact Consumer Care.

25
User Manual
LEARN MORE
There’s a whole world of Instant Grill information and help just waiting
for you. Here are some of the most helpful resources.
Register your product
Instanthome.com/register
Contact Consumer Care
Instanthome.com/customer-care-center
support@instanthome.com
Instant Brands
®
Connect App with 1000+ recipes
Instanthome.com
iOS and Android app stores
Cooking charts and more recipes
Instanthome.com
How-to videos, tips and more
Instanthome.com
Replacement parts and accessories
Instanthome.com
Join the community
Product specifications
Model Volume Wattage Power Weight Dimensions
IDGR1000 4 Quarts
3.8 Litres
1700 W 120V/
60 Hz
18.7 lb
8.5 kg
in: 18.1 L x 18.8 W x 8.7 H
cm: 46.1 L x 42.8 W x 22.2 H

26
User Manual
WARRANTY
One (1) Year Limited Warranty
This One (1) Year Limited Warranty applies to purchases made from authorized retailers
of Instant Brands LLC (“Instant Brands”) by the original appliance owner and is not
transferable. Proof of original purchase date and, if requested by Instant Brands, return
of your appliance, is required to obtain service under this Limited Warranty. Provided the
appliance was used in accordance with the use & care instructions, Instant Brands will,
in its sole and exclusive discretion, either: (i) repair defects in materials or workmanship;
or (ii) replace the appliance. In the event that your appliance is replaced, the Limited
Warranty on the replacement appliance will expire twelve (12) months from the date of
receipt. Failure to register your product will not reduce your warranty rights. The liability
of Instant Brands, if any, for any allegedly defective appliance or part will not exceed the
purchase price of a comparable replacement appliance.
What is not covered by this warranty?
• Products purchased, used, or operated outside of the United States and Canada.
• Products that have been modified or attempted to be modified.
• Damage resulting from accident, alteration, misuse, abuse, neglect, unreasonable
use, use contrary to the operating instructions, normal wear and tear, commercial
use, improper assembly, disassembly, failure to provide reasonable and necessary
maintenance, fire, flood, acts of God, or repair by anyone unless directed by an
Instant Brands representative.
• Use of unauthorized parts and accessories.
• Incidental and consequential damages.
• The cost of repair or replacement under these excluded circumstances.
EXCEPT AS EXPRESSLY PROVIDED HEREIN AND TO THE EXTENT PERMITTED BY
APPLICABLE LAW, INSTANT BRANDS MAKES NO WARRANTIES, CONDITIONS OR
REPRESENTATIONS, EXPRESS OR IMPLIED, BY STATUTE, USAGE, CUSTOM OF TRADE
OR OTHERWISE WITH RESPECT TO THE APPLIANCES OR PARTS COVERED BY THIS
WARRANTY, INCLUDING BUT NOT LIMITED TO, WARRANTIES, CONDITIONS, OR
REPRESENTATIONS OF WORKMANSHIP, MERCHANTABILITY, MERCHANTABLE QUALITY,
FITNESS FOR A PARTICULAR PURPOSE OR DURABILITY.

27
User Manual
Some states or provinces do not allow for: (1) the exclusion of implied warranties of
merchantability or fitness; (2) limitations on how long an implied warranty lasts; and/or
(3) the exclusion or limitation of incidental or consequential damages; so these
limitations may not apply to you. In these states and provinces, you have only the implied
warranties that are expressly required to be provided in accordance with applicable
law. The limitations of warranties, liability, and remedies apply to the maximum extent
permitted by law. This limited warranty gives you specific legal rights, and you may also
have other rights which vary from state to state or province to province.
Product Registration
Please visit
www.instanthome.com/register to register your new Instant Brands
appliance. Failure to register your product will not diminish your warranty rights. You
will be asked to provide the store name, date of purchase, model number (found on the
back of your appliance) and serial number (found on the bottom of your appliance) along
with your name and email address. The registration will enable us to keep you up to date
with product developments, recipes and contact you in the unlikely event of a product
safety notification. By registering, you acknowledge that you have read and understand
the instructions for use, and warnings set forth in the accompanying instructions.
Warranty Service
To obtain warranty service, please contact our Consumer Care Department by email
to
support@instanthome.com. You can also create a support ticket online at
www.instanthome.com. If we are unable to resolve the problem, you may be asked to
send your appliance to the Service Department for quality inspection. Instant Brands
is not responsible for shipping costs related to warranty service. When returning your
appliance, please include your name, mailing address, email address, phone number,
and proof of the original purchase date as well as a description of the problem you are
encountering with the appliance.

NOTES
28
User Manual

NOTES
29
User Manual

Distributed by Instant Brands LLC
3025 Highland Parkway, Suite 700
Downers Grove, IL 60515 U.S.
instanthome.com
© 2022 Instant Brands LLC
140-8001-01-0101
INSTANT and INSTANT BRANDS
are registered trademarks of
Instant Brands Holdings Inc.