
Loading ...
Loading ...
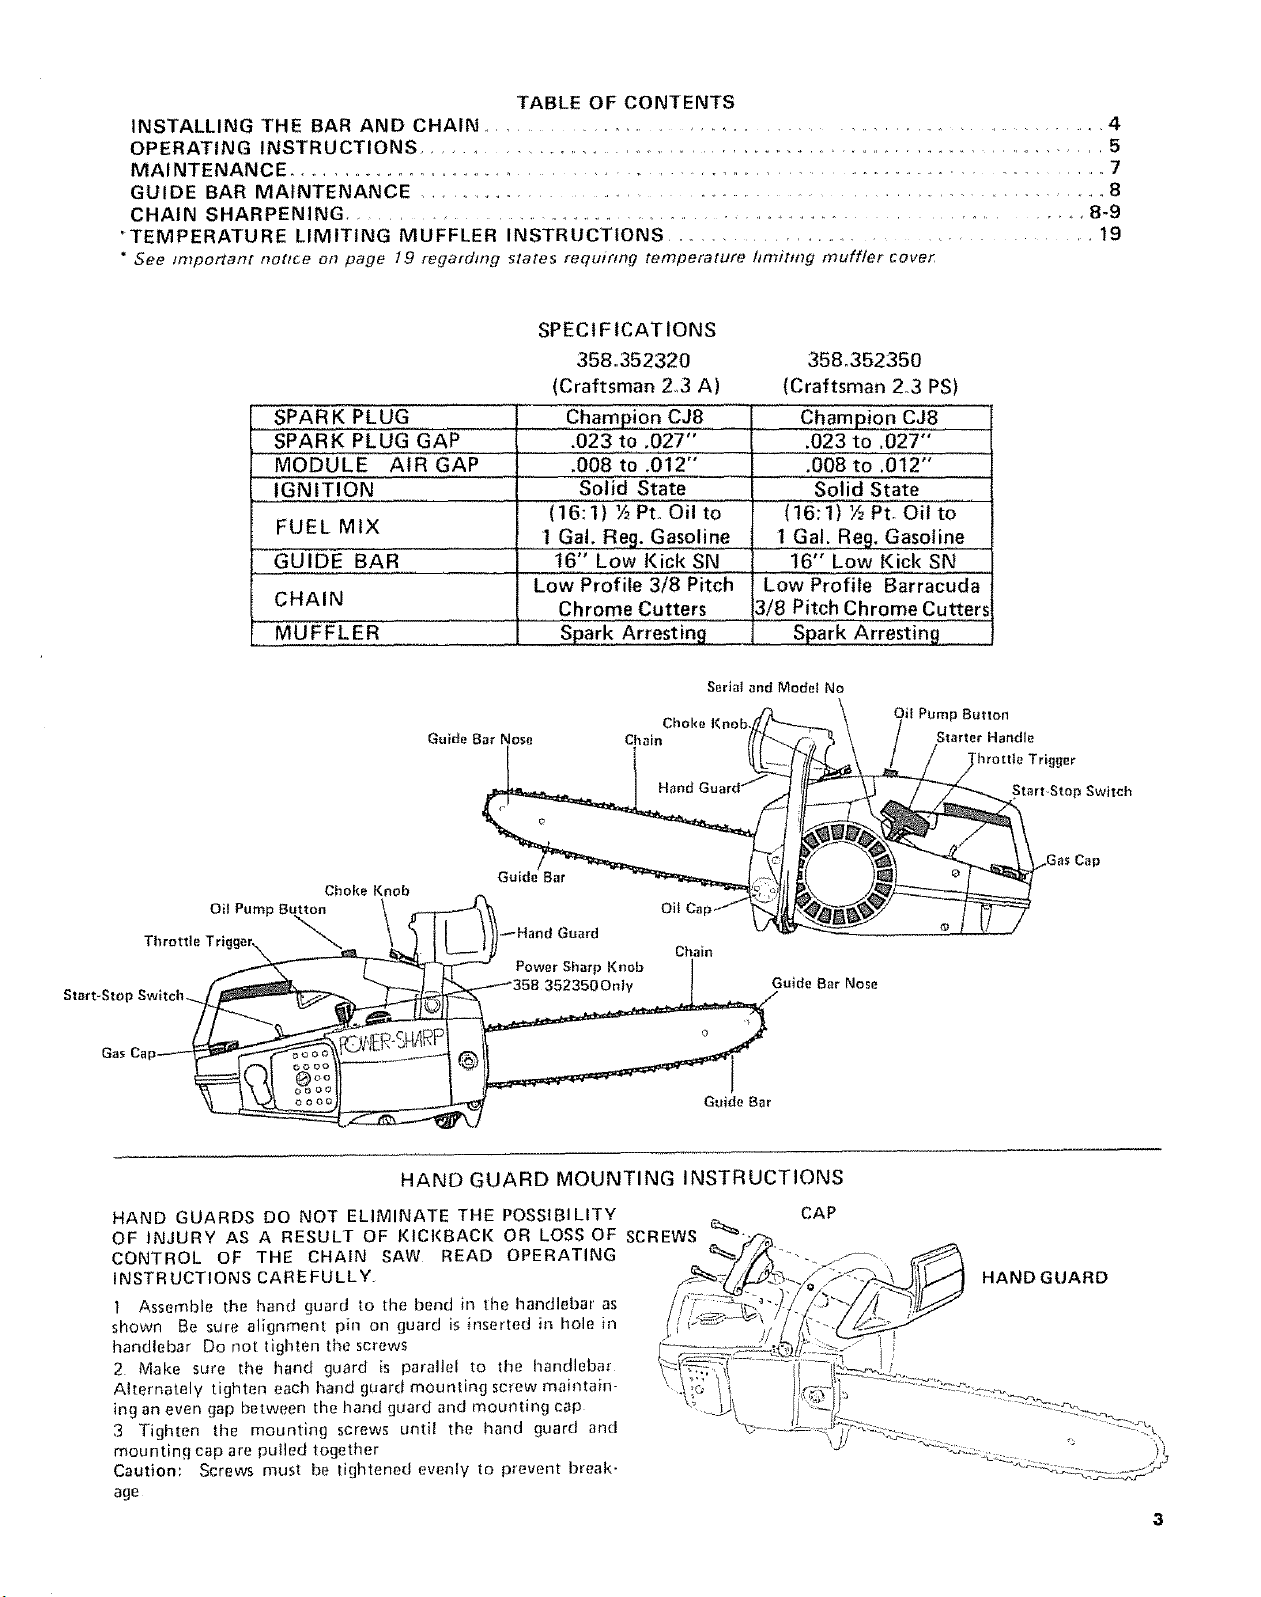
TABLE OF CONTENTS
INSTALLING THE BAR AND CHAIN .............................................................. 4
OPERATING INSTRUCTIONS ........ ......................................................................... 5
MAINTENANCE ........................................................................................ 7
GUIDE BAR MAINTENANCE .................................................................... 8
CHAIN SHARPENING ...................................................................... 8-9
"TEMPERATURE LIMITING MUFFLER INSTRUCTIONS ................................ 19
* See m_portant notice ot_ page 19 regarding states requiring temperature /#mitfng muffler cover
SPECI F ICAT IONS
SPARK PLUG
SPARK PLUG' 'GA'P
MODULE AIR GAP
IGNITION
FUEL MIX
GUIDE BA'R ...........
CHAIN
MUFFLER
358.352320
(Craftsman 2,,3 A)
....iChampion c J8
.023 to .027"
,008 to .012"
Solid State
(16:1) ½ Pt,, O'il to ............
I Ga!. Re9. Gasol!,,ne
16" Low Ki£!£ SN .............
LowProfile 3/8 Pitch
Chrome Cutters
Spark Arresting .
358 °352350
(Craftsman 2.3 PS)
Champio n CJ8
.023 to ,027"
.008 to .012"
Solid State ....
(!6:t) ½ Pt. oil to
,,,!, Gal. Re£_Gasolin e
16" Low Kick SN
Low Profile Barracuda
3/8 Pitch Chrome Cutter._
Spark Arresting
Serial and Model No
Ct_oke Knob
Oil Pump Button
Throttle Trio
Choke
Guide Bar Nose Chain
Gulde Bar Nose
_. Guide Bar
Oil PUmp Button
Starter Handle
_hrottle Trigger
_tart Stop Switch
,_Gas Cap
HAND GUARD MOUNTING INSTRUCTIONS
HAND GUARDS DO NOT ELIMINATE THE POSSIBILITY
OF INJURY AS A RESULT OF KICKBACI{ OR LOSS OF
CONTROL OF THE CHAIN SAW READ OPERATING
INSTRUCTIONS CAREFULLY
1 Assemble the hand guard to the bend in the handlebar as
shown Be sure alignment pin on guard is inserted in hole in
handlebar Do not tighten the screws
2 Make sure the hand guard is parallel to the handlebar
Alternately tighten each hand guard mounting screw maintain-
ing an even gap between the hand guard and mounting cap
3 Tighten the mounting screws until the hand guard and
mounting cap are pulted together
Caution: Screws must be tightened evenly to prevent break-
age
SCREWS e_
CAP
HANDGUARD
Loading ...
Loading ...
Loading ...