
Loading ...
Loading ...
ENGLISH
BASED ON: 1390430 Rev 04/21 A (3 of 12)
Inspect and familiarize yourself with the components
that need to be assembled onto the hard hat or safety
helmet, then follow the instructions below to install and
use the fan. DO NOT try to rework or substitute missing
or damaged components.
INSTALLATION (FIGs E, F, G)
The Cooling Fan can be set up in various configurations
to suit the user's needs. TABLE 1 and FIG. E illustrate
various combinations.
NOTE: Certain cap style setups
(E5 - E8) require reversing the hard hat's suspension.
See instructions on www.kleintools.com (reference the
model number found on the hard hat warning label inside
the shell).
1. Choose a configuration from the TABLE 1 and FIG. E,
based on the hard hat shell type you plan to use, and
locate the corresponding matching pair of ducts. Install
the square opening of both ducts to the fan’s duct ports
7
as shown (FIG. F).
2. Install the fan and battery into the hard hat accessory
mounts per the chosen configuration from TABLE 1.
Slide the components down until the release tab snaps
into the accessory mount (FIG. G).
3. Secure the clip located on the inside curve of the ducts
to the brim of the hard hat to maintain duct position (FIG.
G).
4. To connect the coiled USB-C to USB-C cable
16
between the
fan and battery, open the USB port covers on both the fan
11
and the battery
4
and attach the cable connectors as
shown. Firmly push in the connector until it stops.
5. Insert the Cable Clip
18
into the universal accessory slot on
the hard hat, then secure the cable into the clip
(FIG. G).
NOTE: While either end of the cable can be plugged into either
component, the coiled end is intended to attach to the battery.
NOTE: While both USB-C ports on the battery are usable,
using the one on the same side as the fan port is highly
recommended.
OPERATION
NOTE: It is highly recommended that a chinstrap be
used, even for hard hat models that do not include one,
especially on jobs at-height or requiring constant head
motion. The optional Klein Tools Chinstrap (Catalog no.
KHHSTRP) is available for Klein Tools hard hats that do not
include one with purchase. The chinstrap is included with
Klein Tools Safety Helmet models.
Press the Power On/Off / Speed Button
10
to turn on the fan.
Default startup speed is low; a second press will switch to high
speed, and a third press will turn the fan off.
NOTE: It could take 10-15 seconds (or more) to feel effects of
proper air circulation, especially in a very hot environment.
CHARGING THE MODULAR BATTERY
Observe the dedicated input and output ports for receiving and
providing power on the battery to ensure correct use. Refer
to both the battery and charging source manual for proper
charging instructions and requirements prior to charging.
CAUTION: The battery is equipped with USB-C ports
4
. To
avoid damaging the ports, DO NOT attempt to insert other cable
types, such as micro-USB or Apple
®
*
Lightning
®
*
cables.
• Disconnect the cooling fan or any other device from the
battery ports before charging.
• Connect the included USB-A to USB-C cable
17
to either
USB-C port
4
then connect the other end to the charging
source’s USB-A port.
• The Battery Status Indicator LEDs
3
will indicate the
charging status (see TABLE 2.)
• A full charge could take up to 2.5 hours, depending on
the charger’s output.
NOTE: Avoid leaving the battery
connected to the charger for prolonged periods when it is
not being charged. Always disconnect the battery from the
charger upon complete charge.
• Press the Battery Status Button
1
to check battery level
(see TABLE 3). Battery Status Indicator LEDs
3
will turn
on, and will automatically turn off after 5 seconds if the
Battery Status Button is not pressed again, or if no device is
connected for charging.
*Apple
®
and Lightning
®
are registered trademarks of Apple, Inc.
LEGEND
Not Illuminated Solid Green Solid Red Blinking
TABLE 2 - CHARGING STATUS TABLE 3 - CHARGE REMAINING
LED Status % Charged LED Status
Remaining Charge
Not illuminated
Not illuminated
Not illuminated
Blinking red
0% to 10%
charged
Solid green
Solid green
Solid green
Solid green
76% to 100%
charge remaining
Not illuminated
Not illuminated
Not illuminated
Blinking green
11% to
25%
charged
Not illuminated
Solid green
Solid green
Solid green
51% to 75%
charge remaining
Not illuminated
Not illuminated
Blinking green
Solid green
26% to
50%
charged
Not illuminated
Not illuminated
Solid green
Solid green
26% to 50%
charge remaining
Not illuminated
Blinking green
Solid green
Solid green
51% to
75%
charged
Not illuminated
Not illuminated
Not illuminated
Solid green
11% to 25%
charge remaining
Blinking green
Solid green
Solid green
Solid green
76% to
99%
charged
Not illuminated
Not illuminated
Not illuminated
Blinking red
1% to 10%
charge remaining
Solid green
Solid green
Solid green
Solid green
100%
charged
Not illuminated
Not illuminated
Not illuminated
Not illuminated
0%
charge remaining
CHARGING THE MODULAR BATTERY
Observe the input and output ports for receiving and
providing power on the battery to ensure correct use. Refer
to both the battery and charging source manual for proper
charging instructions and requirements prior to charging.
CAUTION: The battery is equipped with USB-C ports
4
.
To avoid damaging the ports, DO NOT attempt to insert other
cable types, such as micro-USB or Apple
®
Lightning cables.
• Disconnect the cooling fan or any other device from the
battery ports before charging.
• Connect the included USB-A to USB-C cable
17
to either
USB-C port
4
then connect the other end to the charging
source’s USB-A port.
• The Battery Status Indicator LEDs
3
will indicate the
charging status (see TABLE 2.)
• A full charge could take up to 2.5 hours, depending on
the charger’s output.
NOTE: Avoid leaving the battery
connected to the charger for prolonged periods when it is
not being charged. Always disconnect the battery from the
charger upon complete charge.
• Press the Battery Status Button
1
to check battery level
(see TABLE 3). Battery Status Indicator LEDs
3
will turn
on, and will automatically turn off after 5 seconds if the
Battery Status Button is not pressed again, or if no device is
connected for charging.
OPERATING INSTRUCTIONS
FREQUENTLY ASKED QUESTIONS (FAQs)
•
HOW DOES THE COOLING FAN WORK?
The cooling fan is designed to force air into the shell
or a focused area, such as the face or neck. When air
is directed into the shell, it forces stale heated air from
under the shell, replacing it with cooler air. Keeping the
fan running ensures the temperature under the shell is
maintained closer to ambient levels. Non-vented models
benefit greatly from this air movement due to lack of air
movement under the shell compared to a vented model.
Klein Tools has made it possible to configure the system
in 16 different ways, ensuring the user can find an optimal
setup for the job at hand!
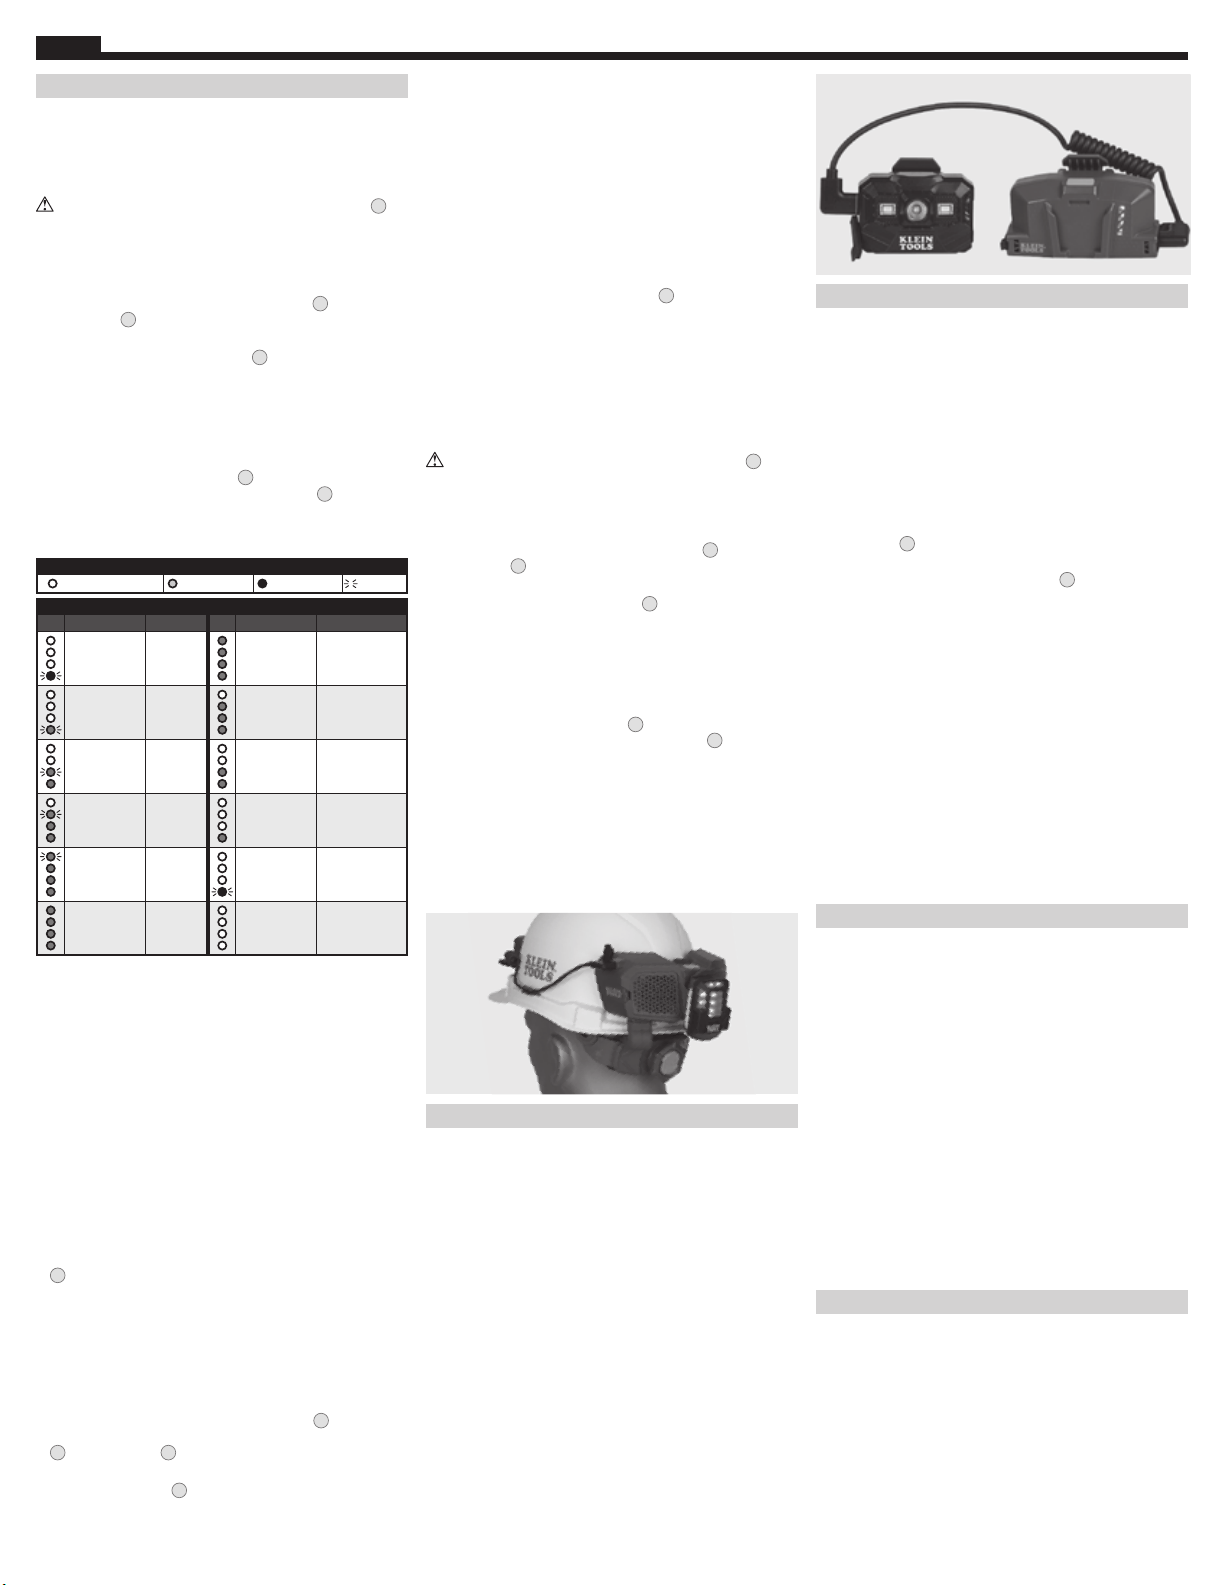
•
I
N WHAT WAYS CAN THE MODULAR BATTERY BE USED?
In addition to powering the Cooling Fan, the modular
battery can also charge or power other products along
with the fan. The battery has two USB-C ports that can be
used to simultaneously operate or charge two devices.
Klein Tools Headlamps (shown), Safety Lamp, and
other portable devices can all be charged.
NOTE: Some
devices cannot operate while being charged. Check the
speci cations for the device to be charged.
MOUNTING ADDITIONAL ACCESSORIES
Accessories can be mounted onto the fan or battery via Klein
Tools' patent-pending accessory mounts. A headlamp or safety
lamp can be attached to the accessory mount of the battery or
fan. For more information, see the REPLACEMENT PARTS AND
ACCESSORIES section .
CLEANING
COOLING FAN: Prior to cleaning, be sure fan is disconnected
from the battery. Use clean, dry, soft lint-free cloth to wipe down.
If any debris is stuck in the fan blades, ducts, or grille holes,
gently free any objects stuck on fan blades using a blunt wooden
pick. DO NOT use harsh cleaning chemicals, sharp metal picks,
abrasive brushes, and/or pressurized air to dislodge stuck debris
from the fan blades. The debris may become dislodged inside
the fans and permanently damage the fan and its electronics.
If necessary, remove and clean the grilles and ducts under
clean cool water (use mild soapy water, if needed) and air
dry before installing. DO NOT scrub with abrasive brushes,
sponges, and abrasive cleaners. To remove, push in the grille
release tab(s)
19
and pull back. To reinstall, locate and place
the grille onto the two locating slots on the fan housing and,
push grille inward until the release tab(s)
19
click into place.
Wipe down the cables with soft, clean, dry cloth. Inspect for tears,
cuts, cracks, corrosion, bent connectors, discoloration and other
such damage. Replace immediately if any such defect is seen. DO
NOT attempt to repair. Replace ONLY with Klein Tools replacement
parts.
BATTERY: Prior to cleaning, be sure battery is disconnected
from the cooling fan, any power source, or other devices.
Use clean, dry, soft-lint-free cloth to wipe down. DO NOT use
abrasive cleaners or solvents. DO NOT use sharp metal objects
to clean USB ports. Reinstall all port covers on unused ports.
Recharge as needed. There are no pre-designated intervals at
which to recharge as long as you are using regularly. Avoid
discharging completely on a regular basis, as this can impact
overall life. Regularly inspect ports and charging cable for any
debris, dirt, damage, and corrosion. DO NOT attempt to repair.
Replace battery or cables as needed.
STORAGE
Be sure battery and cooling fan are disconnected from one
another and any other power sources or devices. Store
components in a cool, dry place away from direct sunlight
when not in use. If storing for prolonged periods, the battery
should be charged periodically charged in order to maintain
battery life, once every 3 months is recommended.
NOTE: It is highly recommended to remove the fan and
battery from the hard hat or safety helmet prior to placing in
storage.
DO NOT leave inside a vehicle or other confined spaces
in temperature extremes, or in corrosive or unsanitary
environments that can lead to decrease in service life,
overheating, or fire. After taking out of storage,visually inspect
fan, battery and all accessories for any damage. Replace any
damaged parts as needed. It is recommended to clean each
component prior to use (See CLEANING section above).
Allow all components to return to ambient conditions before
recharging battery and/or operating.
REPLACEMENT PARTS AND ACCESSORIES
•
29025 - Replacement Modular Battery
•
60490 - Replacement Ducts, Charging Cables, Cable Clip
•
56048 - Rechargeable Headlamp, 400 Lumens, Auto-Off
Sensor
•
56062 - Rechargeable Headlamp/Worklight, 300 Lumens
•
56049 - Rechargeable Light Array Headlamp, 260 Lumens
•
60156 - Intrinsically Safe LED Headlamp
•
56063 - Safety Lamp
Loading ...
Loading ...
Loading ...