Loading ...
Loading ...
Loading ...
6
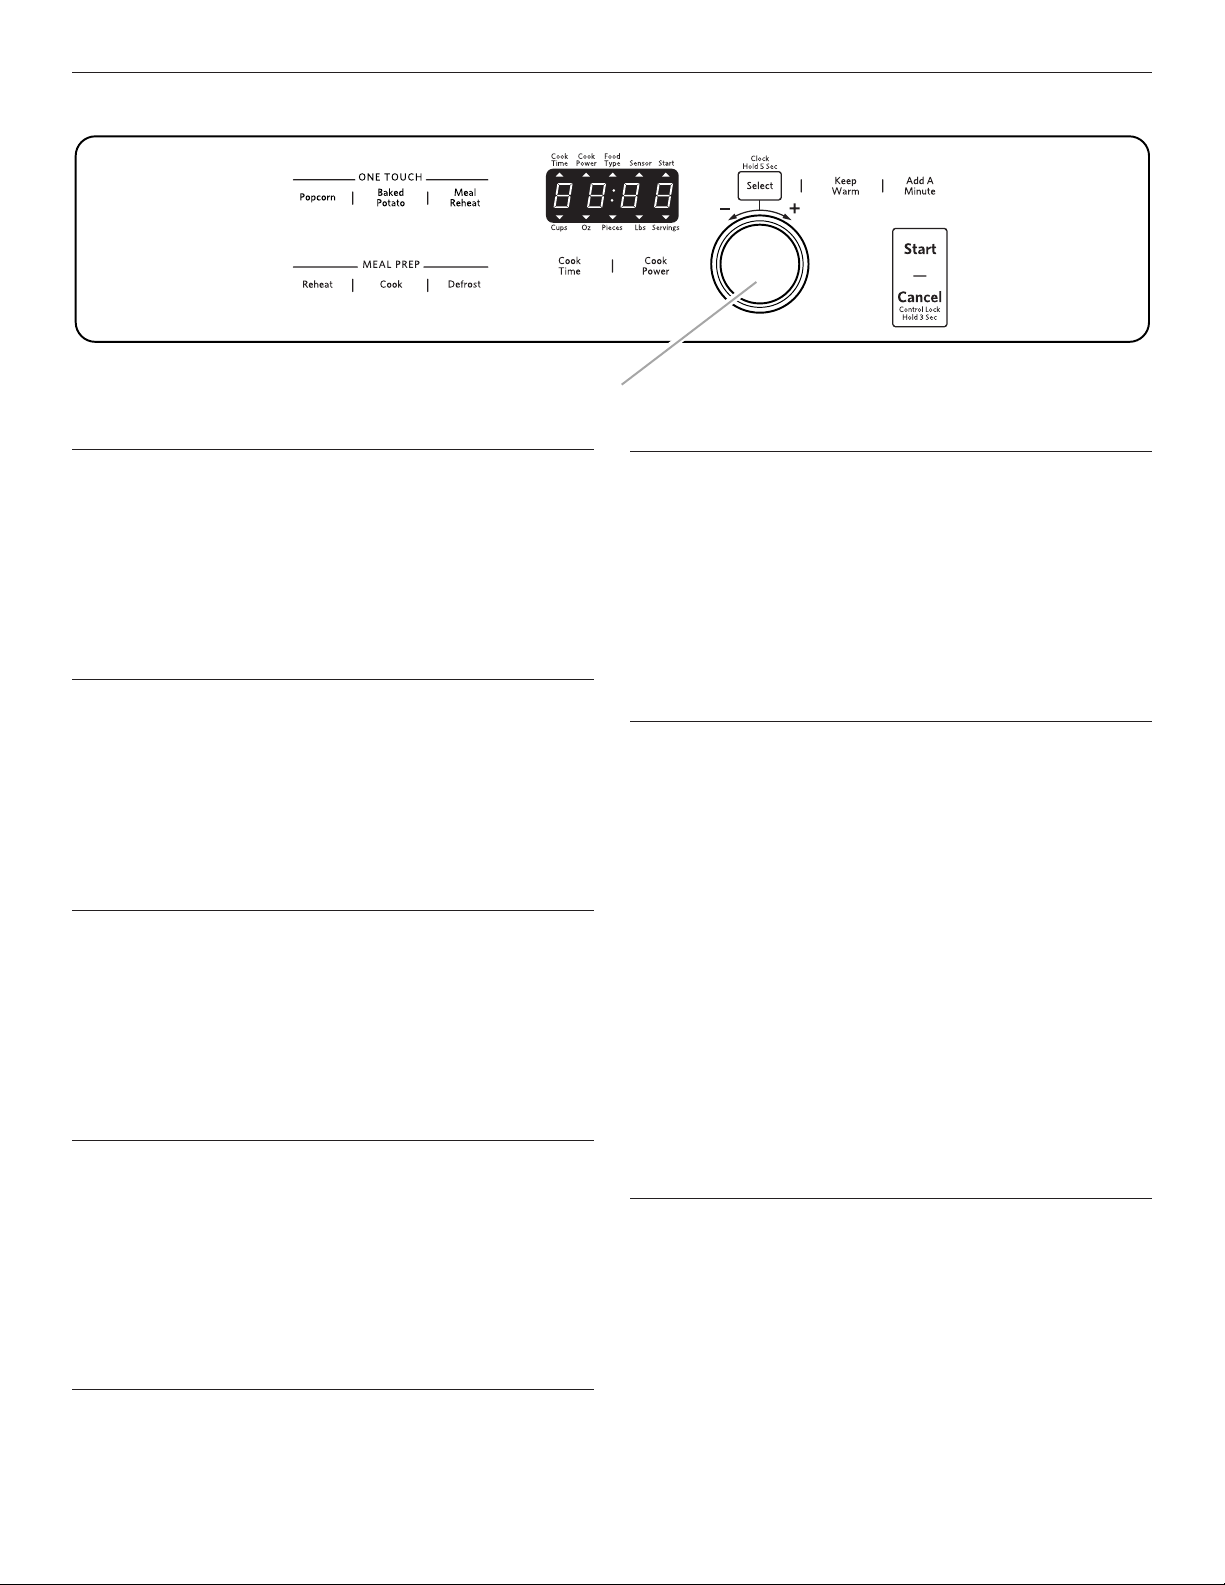
MICROWAVE OVEN CONTROL
Display
When power is first supplied to the microwave oven, a “:” will
blink in the display. Touch CANCEL to stop the blinking. If the
“:” blinks in the display at any other time, a power failure has
occurred. Touch CANCEL and reset the clock if needed.
When the microwave oven is in use, the display shows
cooking power, quantities, weights, and/or prompts. When the
microwave oven is not in use, the display shows the time of
day. When the microwave oven is sensing, sensor animation
(clockwise “racetrack” movement) will be active in the display.
Start
The Start keypad begins any function. If non-sensor cooking
is interrupted, touching START will resume the preset cycle. If
sensor cooking is interrupted, touching START will resume the
cycle only if the sensor already has estimated the cook time and
the countdown is active in the display.
NOTE: To avoid unintentional operation of the microwave oven,
a cooking function cannot be started if the microwave oven door
has been closed for about 1 minute or more. “DOOR” will appear
in the display until the door is opened and closed.
Cancel
The Cancel keypad clears any incorrect command and cancels
most functions except for the Control Lock and Demo mode.
It will not erase the time of day unless the display is in clock-
setting mode. See “Clock” section.
The microwave oven will also turn off when the door is opened.
Close the door and touch START to resume the cycle. If sensor
cooking is interrupted by opening the door while the sensor is
estimating the cook time and the sensor animation is active in
the display, the cycle will be canceled.
Add a Minute
The Add a Minute keypad automatically starts the microwave
oven at 100% power for 1 minute. Each additional touch of the
control will add 1 minute of cook time, up to a total cook time of
10 minutes.
Cook time may be added to a cooking cycle at the current power
level by touching ADD A MINUTE. During a manual cooking
cycle, each touch of the Add a Minute control will add 1 minute
of cook time, up to a total remaining cook time of 10 minutes.
The Add a Minute keypad will not add minutes to a cycle that
has a remaining cook time of 10 minutes or more.
Dial
Use the dial to select options, set the clock, set cook time and cook
power, select food type and amount/weight, and adjust doneness.
To Use: Push dial and release to pop it out. Repeat to return dial
to its flush position after each use to avoid breakage of the dial.
Select
Use the Select keypad to select a chosen function and to set
the following options:
■ Select a setting or food type and go to the next step.
■ Set or cancel clock. See the “Clock” section.
■ Set weight measurements to oz or lbs.
■ Set amount measurements to pieces, cups, or servings.
See the “Meal Prep” sections for details on using the Select
keypad with the automatic cooking, reheating, and defrosting
programs.
Clock
This is a standard 12-hour clock (12:00-11:59).
To Set:
1. Touch and hold SELECT for 5 seconds.
“12:00” will appear in the display with the hour (12) flashing.
If you are changing the time, the current set time will appear
with the hour flashing.
2. Turn the dial to set the hour.
3. Touch SELECT or START.
The “minutes” digits will flash in the display.
4. Turn the dial to set the minutes.
5. Touch SELECT or START to complete the setting.
To Cancel Clock:
1. Touch and hold SELECT for 5 seconds.
The clock-setting display will show.
2. Touch CANCEL.
The “:” will appear in the display.
The next time the clock is set, “12:00” will appear in the display
when the clock-setting mode is entered.
Tones
Tones are audible signals that may be turned off. These tones
indicate the following:
One tone
■ Valid entry (short tone)
Two tones
■ Reminder, repeat each minute after the end-of-cycle tones.
■ Hidden feature has been entered or exited.
Three tones
■ Invalid entry
A. Dial
A
Loading ...
Loading ...
Loading ...