Loading ...
Loading ...
Loading ...
8 9
FILLING THE WATER TANK
The Water Tank is under the Ice Drawer.
1. Remove the Ice Drawer and pour 0.58 gallon (2.2 liters) potable water into the Water Tank.
Slide in the Ice Drawer.
2. Put the Drip Tray in position.
Operation
IMPORTANT NOTE:
• Use filtered water for better tasting ice and less scale buildup in the Ice Maker.
• For consistently clean and fresh ice, change the water in the tank every 24 hours.
Before storing or non-use for an extended period of time, drain the water from the
tank and wipe it dry.
• To avoid damage to this Ice Maker, fill the Water Tank with room temperature or
cooler water. Do not use hot or boiling water.
• Monitor the water level in the tank and replenish the water periodically. When the
Water Tank has insufficient water, the “Water Shortage” indicator will light up and
the unit enters standby mode. After replenishing water, touch the “ICE” button
twice to start the ice making. If you prefer, wait 15 minutes, the Ice Maker will
resume to work automatically.
Drinking
Water
HOW TO MAKE AND USE ICE
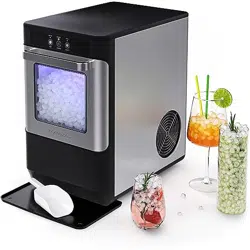
1. Before starting, check the Drainpipe behind the Ice Maker. Ensure the Water Drain Cap is
properly inserted into the Drainpipe.
2. Touch the “ICE” button. The “ICE” indicator will light up. After 5 seconds, the unit will
start flashing and begin making ice. If you touch the “ICE” button again, the unit will stop
making ice. You can check the ice quantity in the Ice Drawer through the Transparent
Window.
3. When the Ice Drawer is full, the “ICE FULL” indicator will light up and the unit will stop
making ice automatically.
4. While the Ice Maker is on, check the water level periodically. When the “WATER
SHORTAGE” indicator lights up, fill the Water Tank.
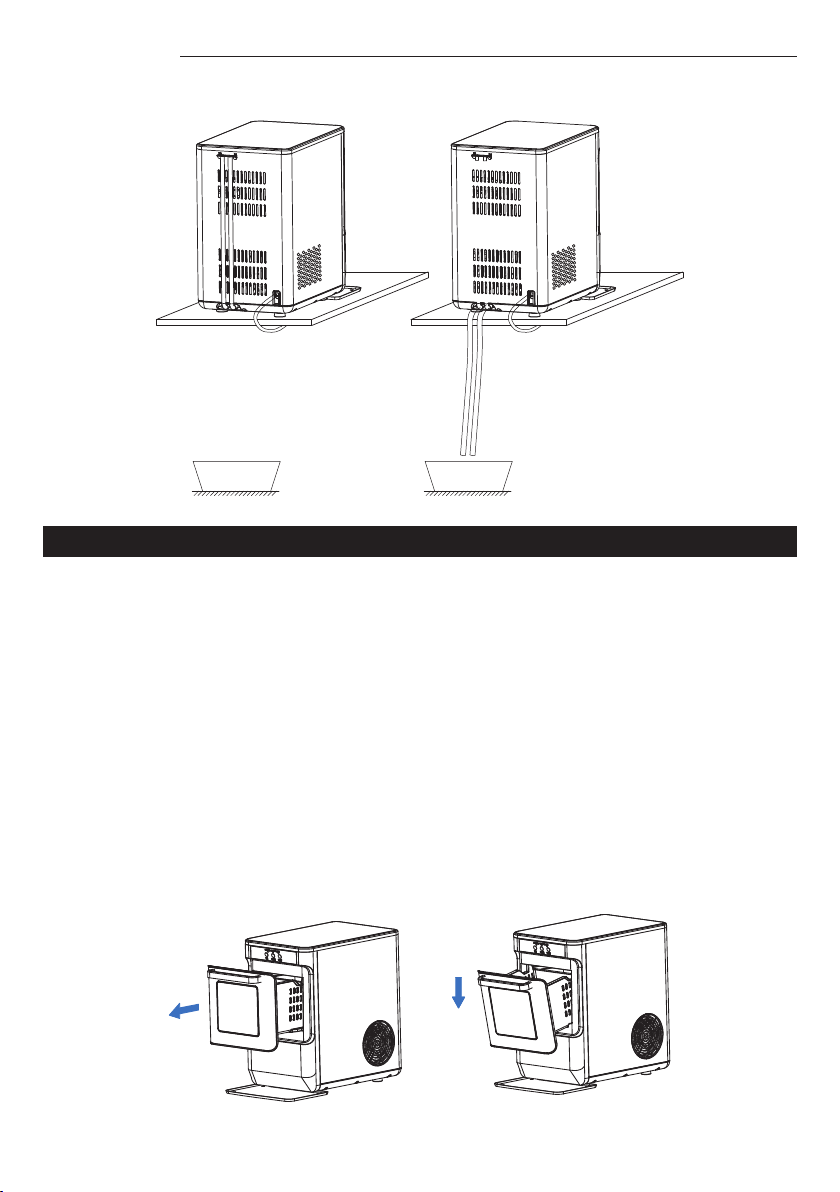
5. To Open the Ice Drawer: Hold the handle gently and pull it out horizontally until the back
of the Drawer contacts the front panel, then gently push it down. The Drawer will hang
at a slight angle.
6. To Close the Ice Drawer: Reverse the process. Hold the handle and place the Drawer
horizontally, then gently push it in place.
Operation
STARTING THE CLEANING PROGRAM
It is highly recommended to run the cleaning program before first use (or when the unit has
been unused for an extended period). This cleaning process will take about 20 minutes.
1. Plug in the Power Cord. The “POWER” indicator will light up.
2. Check the Drainpipe behind the unit. Ensure the Water Drain Cap is inserted into the
Drainpipe or the appliance will not work properly.
3. Touch the “CLEAN” button. “CLEAN” indicator will light up and flash after 5 seconds.
It will take at least 20 minutes to run the cleaning program. To stop the program, just
touch the “CLEAN” button again.
4. After the cleaning program is complete, move the unit to the edge of the surface while
making sure that the appliance is stable. Place a bowl or container under the appliance.
Release the Drainpipe from the back of the unit and pull out the plug from the Drainpipe.
This will cause the water in the tank under the Drawer and the evaporator to drain into
the water container. Reinsert the Drainpipe plug and replace the Drainpipe.
Loading ...
Loading ...
Loading ...