Loading ...
Loading ...
Loading ...
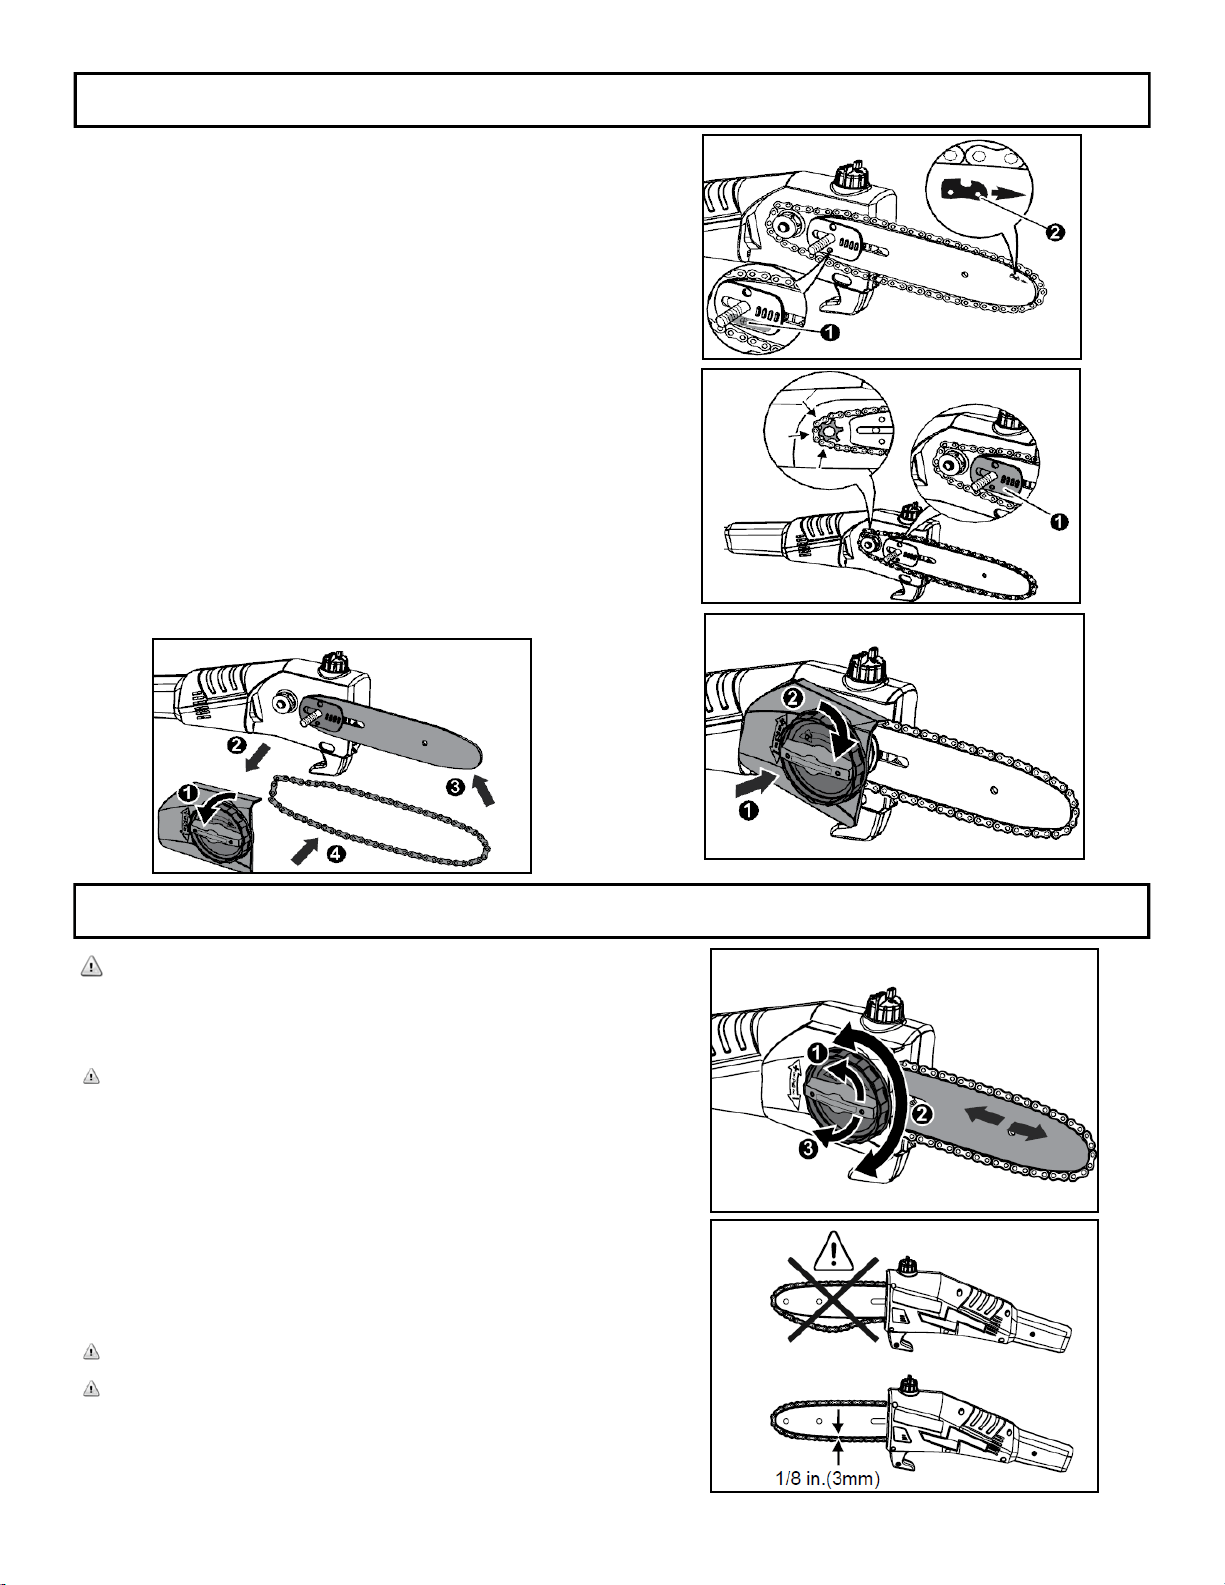
INSTALLING/REPLACING THE GUIDE BAR AND CHAIN
• Remove the battery pack from the pole saw
• Loosen the lock knob (Fig.1 ①) by turning
counter-clockwise.
• Remove the chain cover (Fig.1 ①) .
• Position the bar with the longitudinal hole on the thread-
ed bolt (Fig.1 ①).
NOTE: Ensure that the chain tensioning plate points forward
(Fig. 3 ① ).
NOTE: Check for correct seating of the guide screw on the
rear side of the bar in the guiding groove (Fig. 2 ① ).
• Push the bar as close as possible to the sprocket.
• Place the chain around the bar and the drive sprocket
(Fig. 1 ①).
NOTE: Ensure that the chain moves in the correct direction
(Fig. 2 ②).
• Check the position of the bar and chain on the tool (Fig.
3).
• Position the cover (Fig. 4 ① ) and tighten it with the
locking knob (Fig. 4 ① ).
7
LPS40820-1
Fig. 1
Fig. 2
Fig. 3
Fig. 4
TENSION THE CHAIN
WARNING: Always remove the battery pack from the
product when you are assembling parts, making
adjustments, cleaning, or when the product is not in use.
Wear safety gloves before any work on the chain.
NOTE: The cutting chain must not sag, however, it should
be possible to pull it about 1/8 in. (3mm) away from the bar
(Fig. 6).
• Screw the lock knob (Fig. 5 ①) out far enough to allow
rotation of the chain tensioner (Fig. 5 ①).
• Turn the chain tensioner clockwise to tension the chain
or counterclockwise to slacken it.
• Manually rotate the chain to check for fault-free
running.
• Tighten the lock knob again(Fig.5 ①).
NOTE: During breaking-in of a new chain, it should be
re-tensioned after no more than five cuts.
NOTE: Do not over-tension the chain as this will lead to
excessive wear and will reduce the life of the bar and
chain. Overtensioning also reduces the amount of cuts you
will get per battery charge.
Fig. 5
Fig. 6
Loading ...
Loading ...
Loading ...