Loading ...
Loading ...
Loading ...
Thetemperatureintheovenhasbeenpre-setatthefactory.Whenfirstusingtheoven,be
suretofollowrecipetimesandtemperatures.Ifyouthinktheovenistoohotortoocool,the
temperatureintheovencanbeadjusted.Beforeadjusting,testarecipebyusinga
temperaturesettingthatishigherorlowerthantherecommendedtemperature.Thebaking
resultsshouldhelpyoutodecidehowmuchofanadjustmentis needed.
INSTRUCTIONS PRESS
To adjust the oven temperature higher:
1. Press 0 for 6 seconds (Fig. 1). 0
2. To increase the temperature use the number pads to enter the
desired change. (example 30°F)_@ (Fig. 2). The _@
temperature may be increased as much as 35°F (19°C).
3. Press 40 to accept the temperature change and the display Q
will return to the time of day (Fig. 3). Press @ to reject the @
change if necessary.
To adjust the oven temperature lower:
1. Press ,O for 6 seconds (Fig. 4 ). 0
2. To decrease the temperature use the number pads to enter the
desired change (example-30°g) @@ and then press @@@
_ (Fig. 5). The temperature may be decreased as much as
35°F(19°C).
3. Press 10 to accept the temperature change and the display O
will return to the time of day (Fig. 6). Press @ to reject the @
change if necessary.
Note: The oven
temperature adjustments
made with this feature will
not change the Self-Clean
cycle temperature.
DISPLAY
Oven
Wire
Holde_
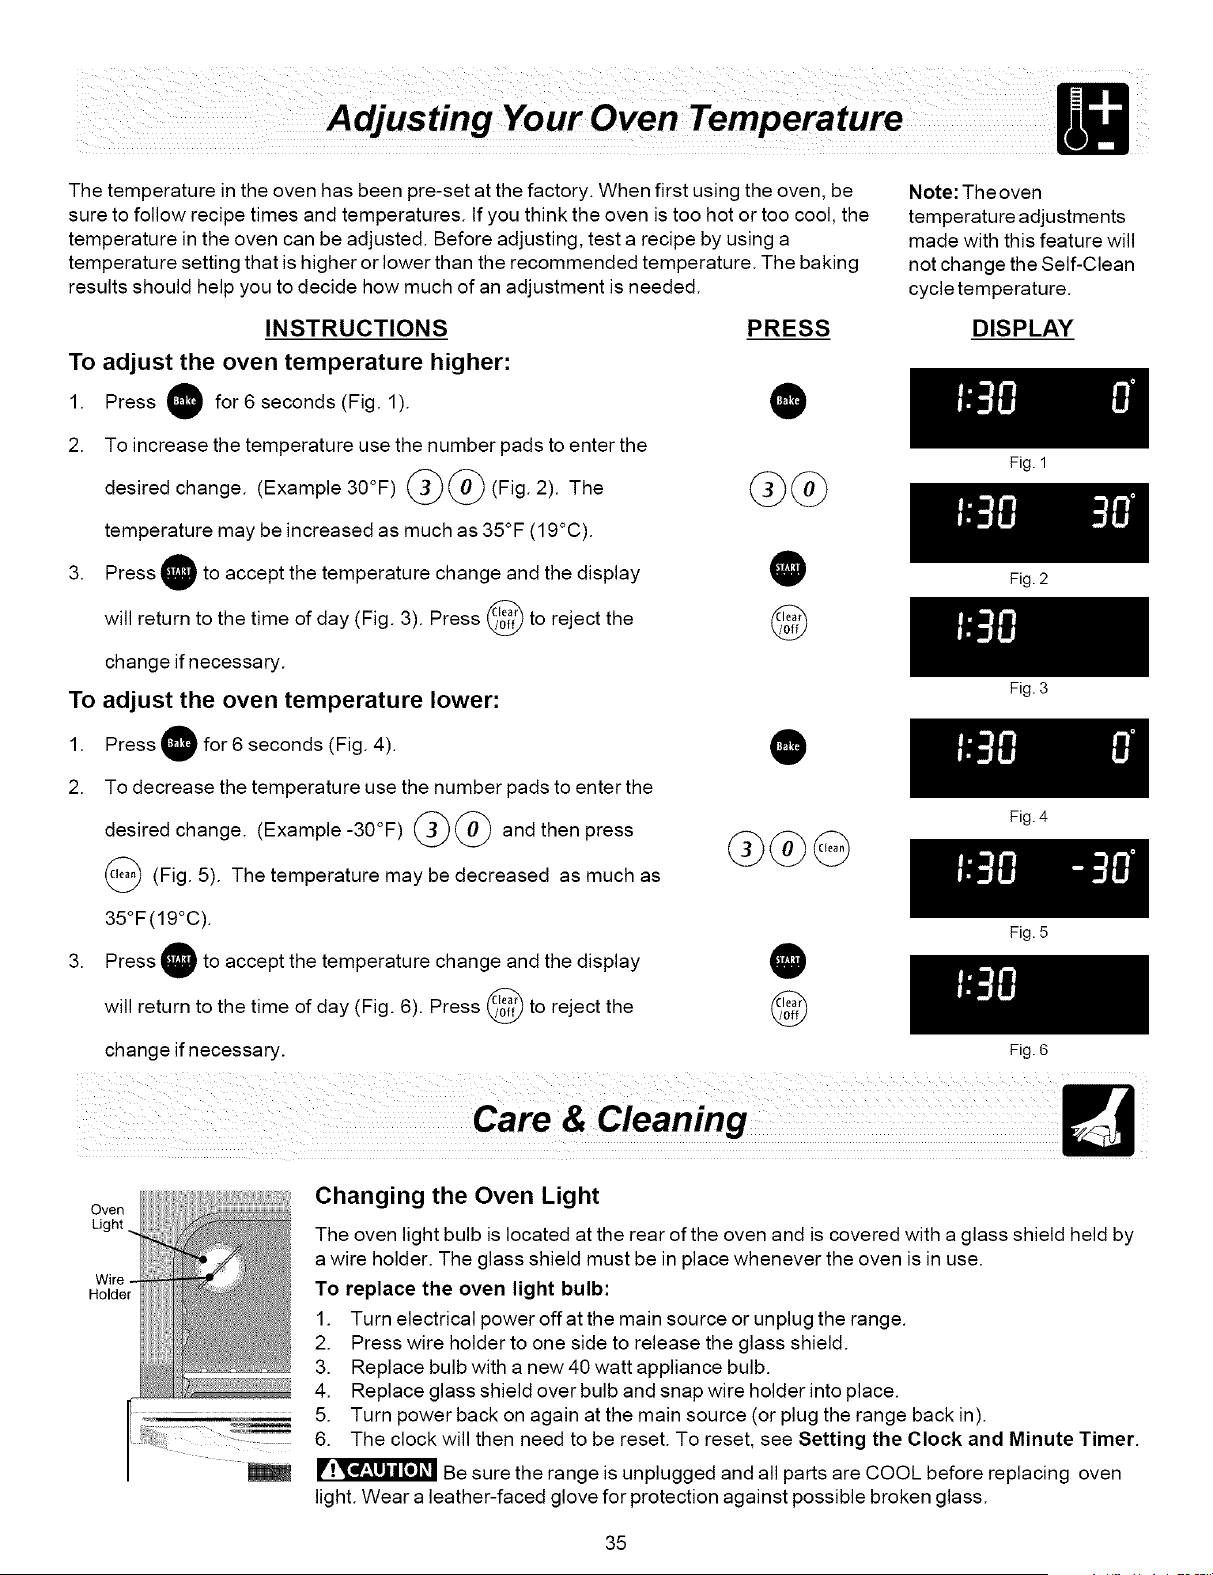
Changing the Oven Light
Fig. 1
Fig. 2
Fig. 3
Fig. 4
Fig. 5
Fig. 6
The oven light bulb is located at the rear of the oven and is covered with a glass shield held by
a wire holder. The glass shield must be in place whenever the oven is in use.
To replace the oven light bulb:
1. Turn electrical power off at the main source or unplug the range.
2. Press wire holder to one side to release the glass shield.
3. Replace bulb with a new 40 watt appliance bulb.
4. Replace glass shield over bulb and snap wire holder into place.
5. Turn power back on again at the main source (or plug the range back in).
6. The clock will then need to be reset. To reset, see Setting the Clock and Minute Timer.
Be sure the range is unplugged and all parts are COOL before replacing oven
light. Wear a leather-faced glove for protection against possible broken glass.
35
Loading ...
Loading ...
Loading ...