
Loading ...
Loading ...
Loading ...
en Installation instructions
20
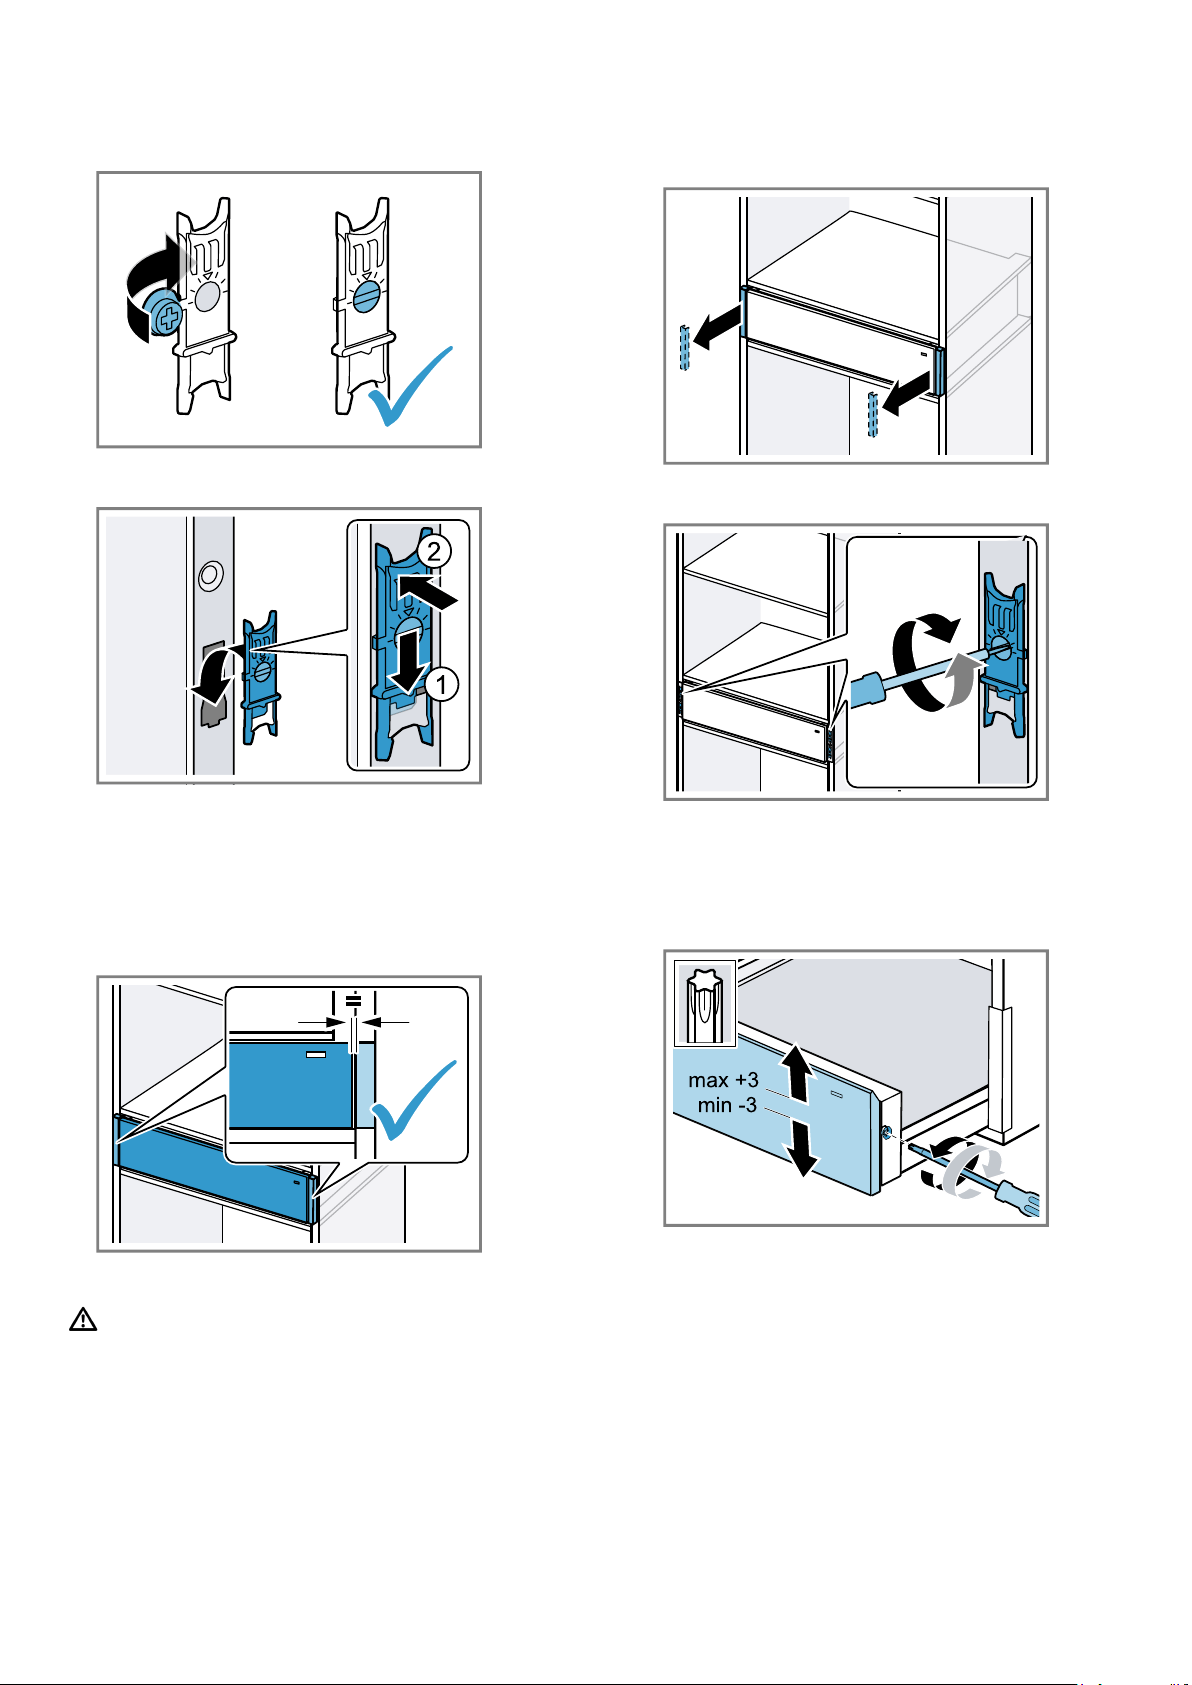
Inserting the design profiles
1.
Fold together the fastening elements.
2.
Hook the fastening elements into the openings at
the bottom and push down until they engage.
Insert the red fastening elements into the upper
opening.
Insert the green fastening elements into the lower
opening.
3.
Remove the protective film from the design profiles.
4.
Insert the design profiles on both sides of the appli-
ance.
5.
Check the clearances of the design profiles.
Adjusting design profiles
WARNING‒Risk of injury!
Parts that are accessible during installation may have
sharp edges and may lead to cutting injuries.
▶ Wear protective gloves.
ATTENTION!
Unsuitable tools may damage the surface of the appli-
ance.
▶ Only use plastic tools.
▶ Do not use pointed or sharp tools.
1.
Pull the design profiles forwards to remove them. If
necessary, carefully loosen and remove the design
profiles using a plastic tool.
2.
Adjust the fastening elements and re-attach the
design profiles.
Adjusting the appliance front
Adjust the appliance front upwards or downwards if ne-
cessary.
1.
Open the appliance.
2.
Undo the screws on the side of the front panel.
3.
Align the appliance front upwards or downwards.
Alignments of maximum -3 to +3mm are possible.
4.
Tighten the screws.
Combining the warming drawer with another
appliance
ATTENTION!
Sharp edges on the appliance may damage the front
panel of the warming drawer.
▶ Do not damage the front panel of the warming
drawer when sliding the appliance in.
1.
Only combine suitable appliances of the same
brand and series.
2.
Install the warming drawer first.
Loading ...
Loading ...
Loading ...