
User Manual
UHF Wireless Microphone System
UwMic9

Statement
Please read this manual carefully before use and operate and store in strict accordance with the
instructions provided. Please retain for future reference.
For any issues that cannot be resolved with the user manual, please refer to your retailer for help
or contact us at: [email protected].
Cautions
1. Take care not to use the unit underwater or unprotected in rainy conditions. Store in a cool, dry
place.
2. Designed for use and storage at normal temperatures. Do not move the unit from overheated
to cold conditions frequently, and keep away from heat sources such as heaters and ovens.
3. When in use, or when storing, avoid contact with dust and moisture.
4. Do not subject to device to violent collisions, as this can damage the device.
5. In order to avoid acoustic feedback, do not hold the microphone close to loudspeakers.
6. For optimal sound detection, do not hold your hand against the microphone head.
2
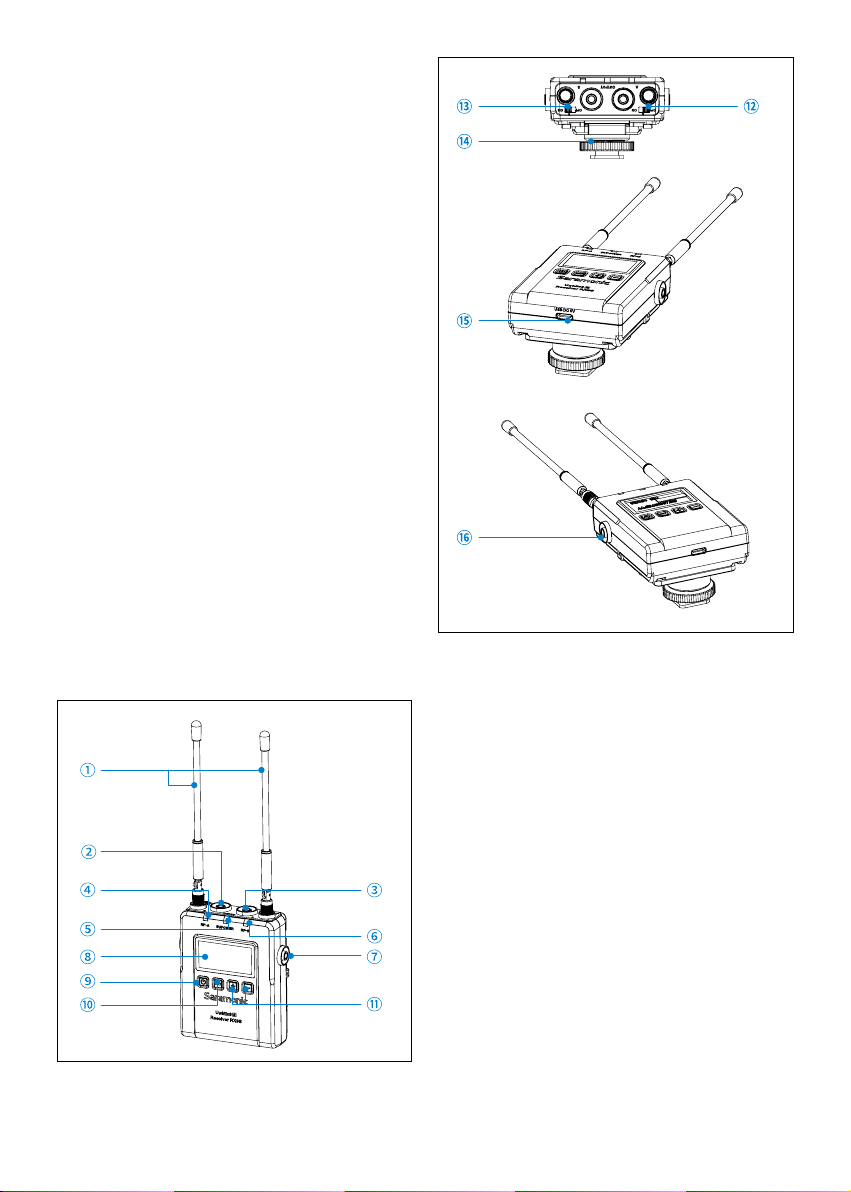
Detachable antennas
Group A output jack
Connect the RX9S to a video camera,
camcorder, mixer or amplifier with the
supplied output cables supplied.
Group B output jack
Connect the RX9S to a video camera,
camcorder, mixer or amplifier with the
supplied output cables.
RF-A indicator
The RF indicator displays the RF input level of
group A as follows:
Solid Blue: RF signal is strong.
Lights off: RF signal is disconnected.
IR/POWER indicator
Indicates the battery level as follows:
Solid blue: battery fully charged and
sufficient.
Solid Red: Battery low.
Charging Status:
Flashing Red: Charging.
General Introduction
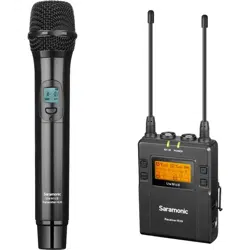
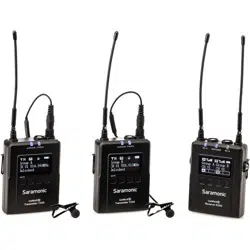
The Saramonic UwMic9S wireless microphone
system provides a premium 2-person wireless
audio solution for Broadcast & TV, ENG,
filmmakers, vloggers, mobile journalists and
content creators for a remarkable price. It is
an easy-to-use, high-quality and flexible UHF
system. The external input allows the receiver
to be connected to a mic or line level device,
such as a shotgun microphone, mixer, recorder
or music player to capture additional sound or
music. The system can be powered through its
USB-C ports, allowing it to run for numerous
hours on a USB-C 5V power bank.
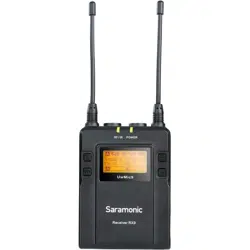
RX9S Portable Receiver
Introduction
The Saramonic RX9S is a camera-mountable
dual-channel UHF wireless receiver. It features
wide switching RF bandwidth, a high-contrast
OLED display and infrared synchronization
between transmitter and receiver. The two
detachable antennas can be rotated 360° for
better reception. The receiver's output can be
toggled between mono and stereo modes. The
low-cut function on the receiver minimizes low-
frequency rumble.
Product Structure
3
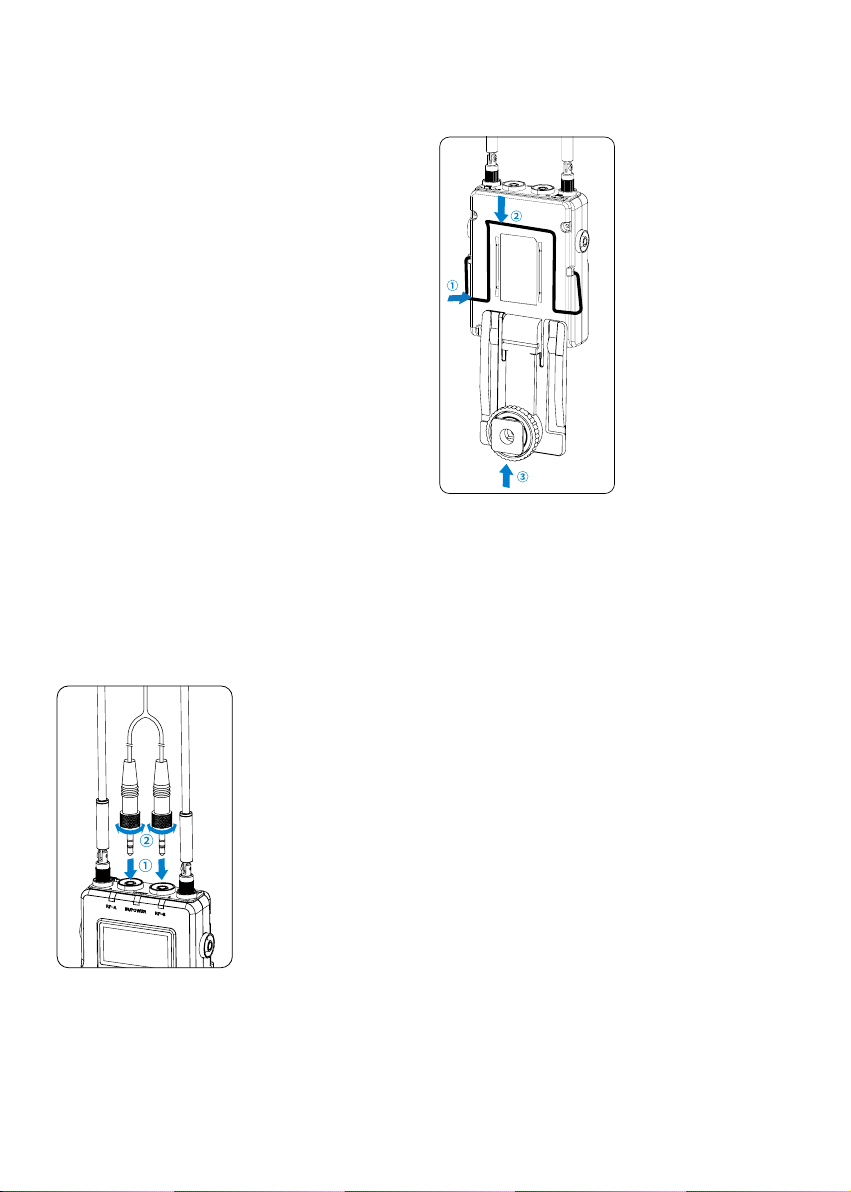
It is possible to attach a belt clip. Please Refer to
"Attaching Accessories" (page 7).
Attaching the shoe mount adapter.
Please attach the belt clip upside-down
before attaching the shoe mount adapter.
Push the bottom of the belt clip to make
some space between the belt clip and the
receiver.
Align the belt clip with the two vertical
grooves on the shoe mount adapter and
insert the adapter in the direction of the
arrow.
Push the shoe mount adapter in fully until the
belt clip fits into the horizontal groove on the
adapter’s holder.
RF-B indicator
The RF indicator displays the RF input level of
group B as follows:
Solid Blue: RF signal is strong.
Lights off: RF signal is disconnected.
MIC IN/LINE IN jack
Connect a 3.5mm microphone or a line level
device to receiver.
OLED display
Display menus, please refer to "OLED Display
Operation Guide" (page 4) for more details.
Power button
Long Press to turn the RX9S on or off.
SET button
Long press the SET button to change settings
on the display menu.
Then, short press the SET button to confirm
your setting change, or long press again to
exit without saving.
Selects functions or values shown on the
display.
ON/OFF switch A (for Group A)
ON/OFF switch B (for Group B)
Cold shoe mount adapter
USB-C charging port (DC 5V)
3.5mm headphone output
Connect headphones to monitor the audio.
Attaching Accessories
Connect the supplied cable to the output jack.
Choose the corresponding cable and plug into
the OUTPUT jack.
For a secure connection, turn to lock the
connector.
4
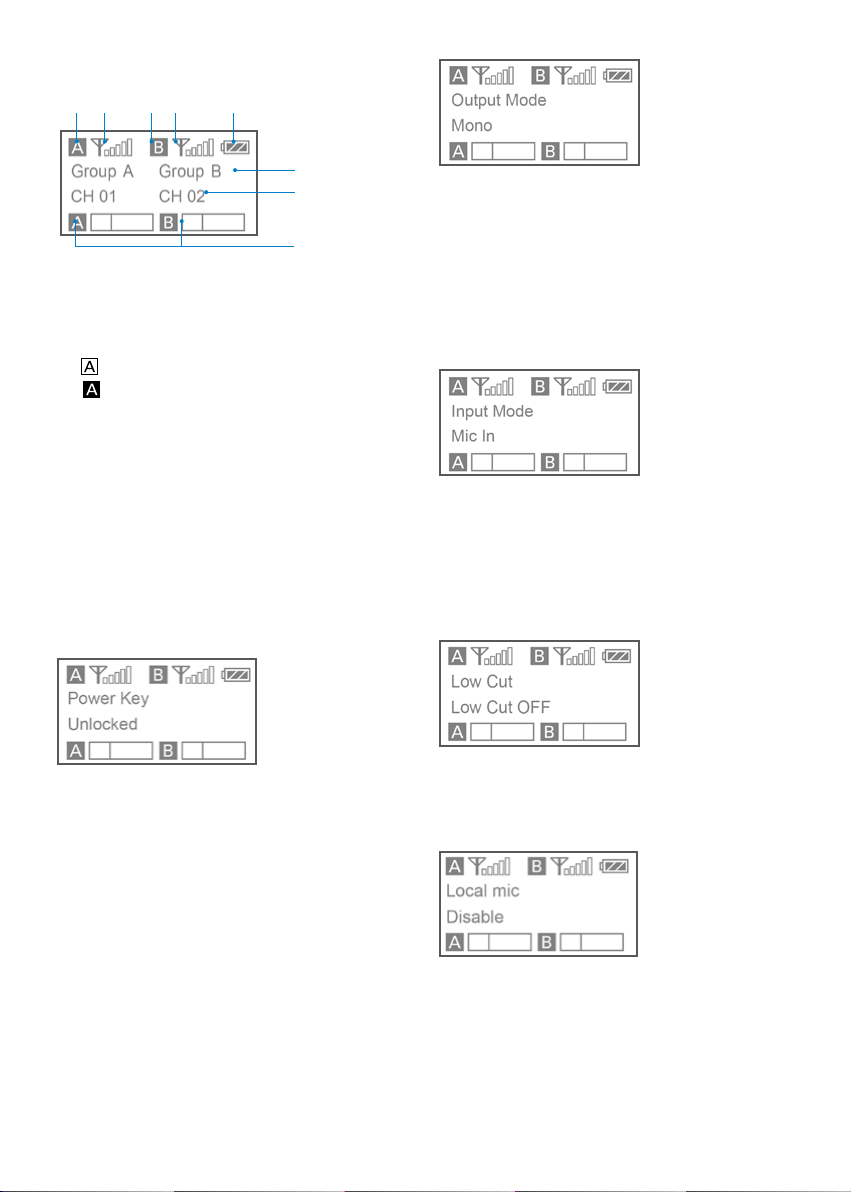
Output mode: The output mode can be set to
mono or stereo. When the output mode is in
mono, the audio from the left and right channel
will be mixed. When in stereo, receiver A's and
receiver B's audio output will be separated to
the left and right of the stereo output. If using
two transmitters, please make sure the ON/
OFF switch of the group A and B are set to ON.
System default is mono.
Input mode: The input mode can be set to Mic
in or Line in.
Mic in: for connecting a 3.5mm TRS microphone
to the receiver.
Line in: for connecting a line-level device to the
receiver.
System default: Mic in.
Low cut: Long press the SET button to turn the
low-cut function on or off.
To attenuate signals with frequencies lower than
150 Hz, the default is “Low Cut OFF.”
Local mic: Disable or enable the external input
by long pressing the SET button.
Enable: Allows the receiver to connect to an
external audio device.
Disable: The Mic/Line input jack of the receiver
cannot be used when set to “Disable.” Default is
“Disable.”
Home screen: If no operation is performed for
20 seconds on the other screens, the display will
automatically return to the home screen.
Group icon
Indicates the power of group A is turned off.
Indicates the power of group A is turned on.
RF level indicator
Indicates the current reception level.
Battery level indicator
Displays the battery level. Please charge the
devices immediately as soon as the indicator
starts flashing.
Name of the channel group
Current channel
Displays the current channel number.
Audio input level meter
Displays the audio input level.
Power key: Long press the SET button to
unlock or lock the power key. Lock the power
key to prevent the receiver being turned off
accidentally while in use.
• Unlocked: Long press the power key to turn
the receiver on or off (System default).
• Locked: The receiver will not be turned off
even after the power key is pressed.
OLED Display Operation Guide
5
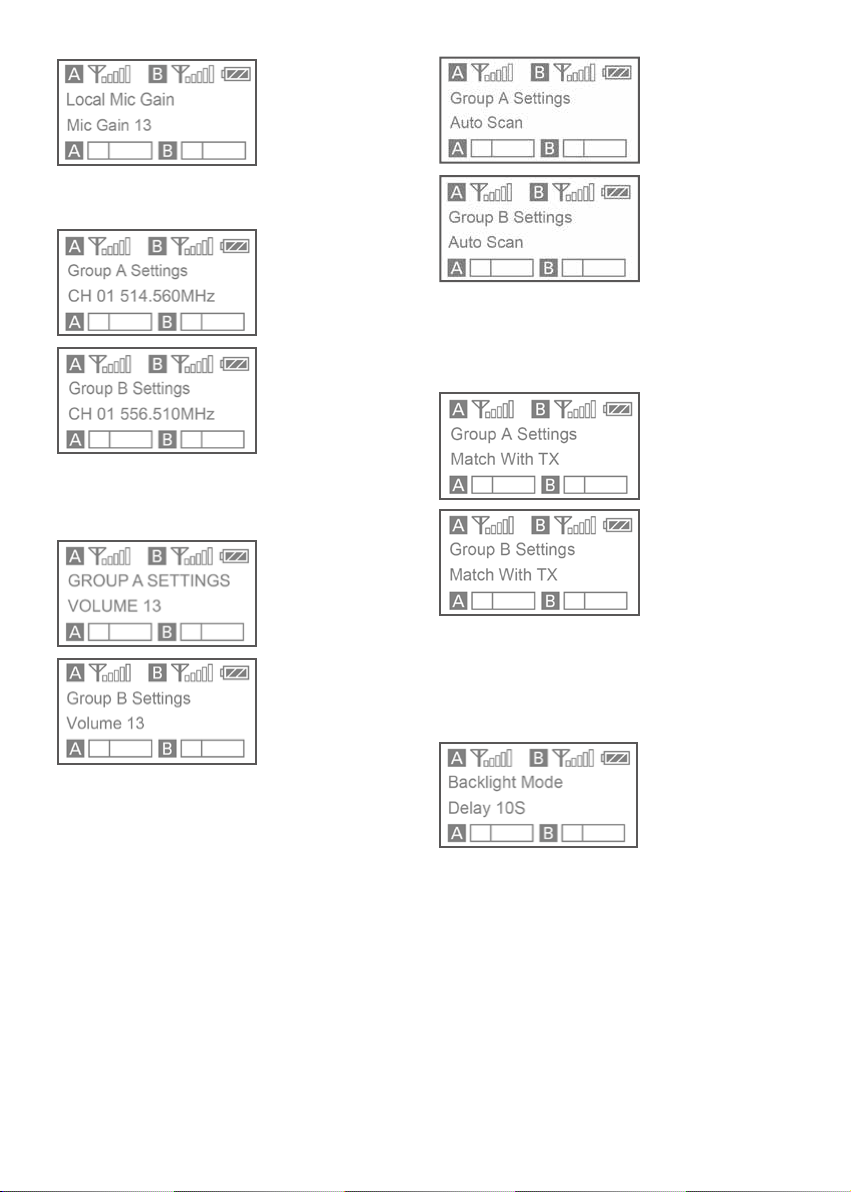
MIC GAIN: Adjust the external microphone’s
gain level (0-15). Default is “13”.
Select channel: For details of operation, please
refer to "Manually setting the receiver channel" (page
10).
Set output volume: Set the volume of output
audio within the range of 0 to 15. The setting
is retained even after the power is turned off.
Default volume is 13.
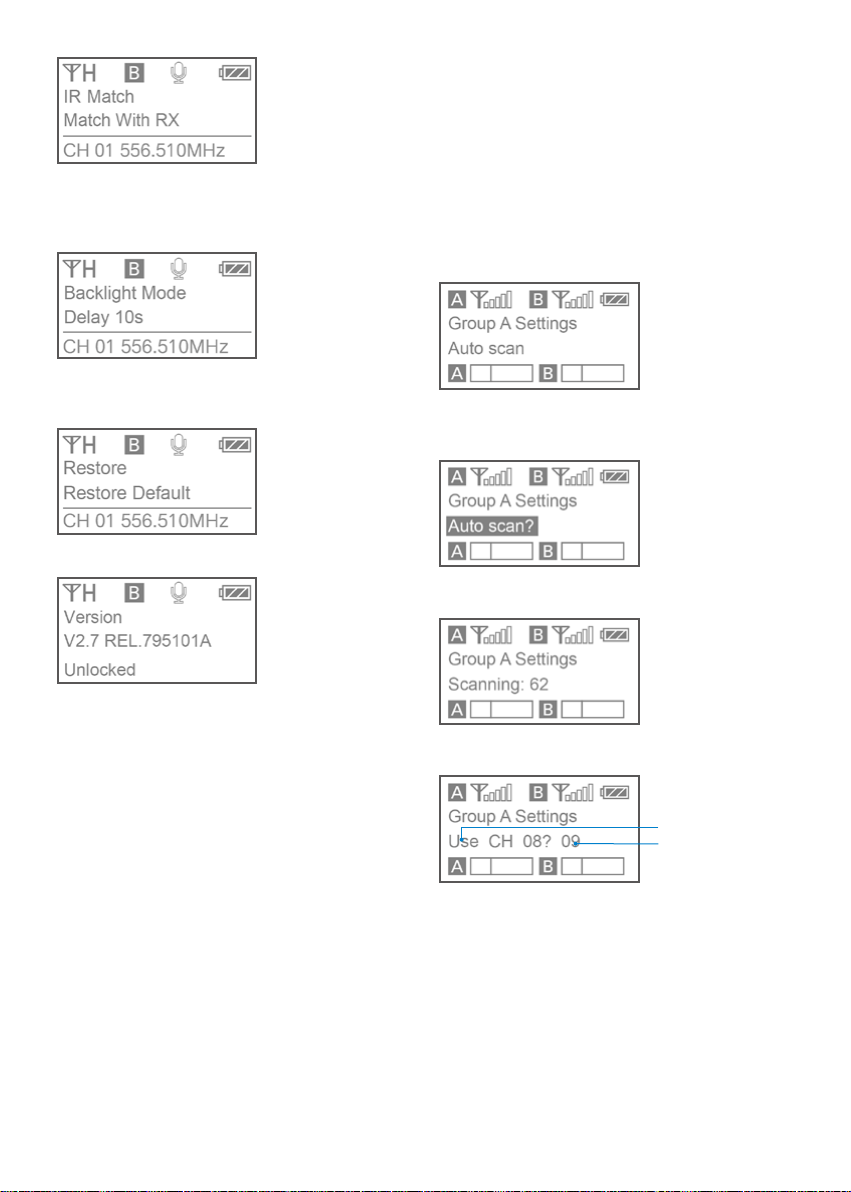
Auto scan function: Automatically scan an
available and clear channel. For details of
operation, please reter to "Using the auto scan
function" (page 9).
Infrared matching function: Match the receiver
and transmitter via infrared. For details of
operation, please refer to "Matching the receiver
and transmitter channel" (page 10).
Set backlight: Set the background LED light to
ON or Delay by 60, 30, or 10 seconds. Default
setting is "Delay 30s."
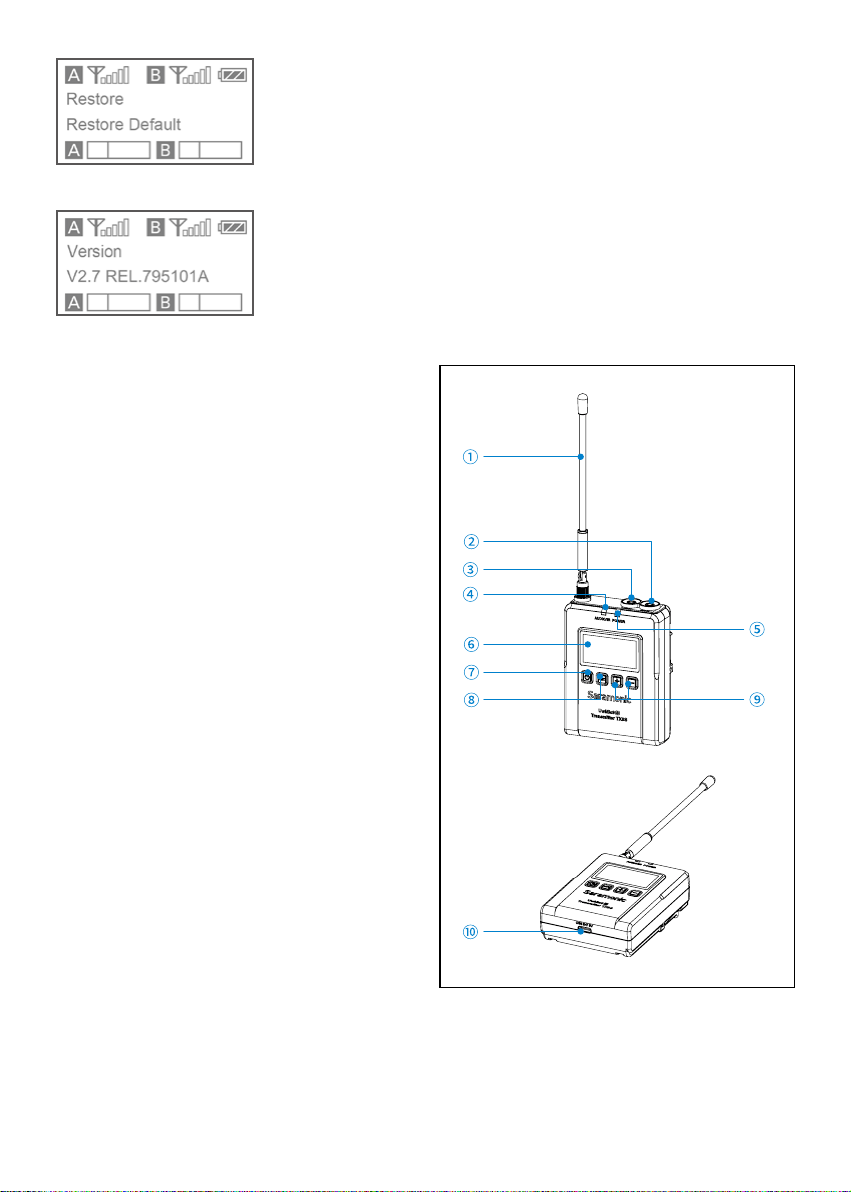
6
Restoring default setting
UwMic9S-RX9S Version
Body-pack Transmitter TX9S
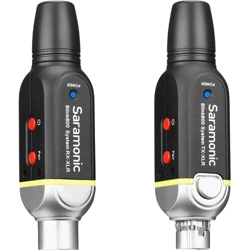
Introduction
The Saramonic UwMic9S-TX9S is a mountable
body-pack transmitter. It features an easy-to-
read OLED display, a detachable antenna and
built-in rechargeable battery. With the line
input and mic input jack, it can accept audio
from the included 3.5mm locking lavalier mic
or other line-level devices. A short press of the
power button mutes the mic between takes. The
locking function prevents the transmitter from
being muted or turned off accidentally.
Product Structure
7
Detachable antenna
MIC IN jack
Connects to the supplied 3.5mm lavalier
microphone.
LINE IN jack
Connects to the line level devices.
AUDIO indicator / IR (infrared detector)
AUDIO indicator: Indicates the audio input
level. IR (infrared detector): Receives the
frequency from the receiver.
Solid Blue: Audio input level is appropriate.
Flashing Red: Audio is muted (i.e. disabled).
For details on setting the mute function,
please refer to "Set Mute key" (page 8).
POWER indicator
Indicates the battery level as follows: Solid
Blue: Sufficient battery level.
Solid Red: Low battery.
Charging Status:
Flashing Red: Charging.
Solid Blue: Fully charged.
OLED display
For display menus, please refer to the "OLED
Display Operation Guide" (page 8) for more
details.
Power / Mute button
Power ON:
Press button for one second or longer
Power OFF:
Press button until it turns off
Mute ON/OFF:
Short press button
SET button
Long press the SET button to enter the
displayed menu. Then, short press the SET
button to confirm your option or long press
again to exit without saving.
+ or – button
Selects functions or values shown on the
display.
USB-C charging port (DC 5V)
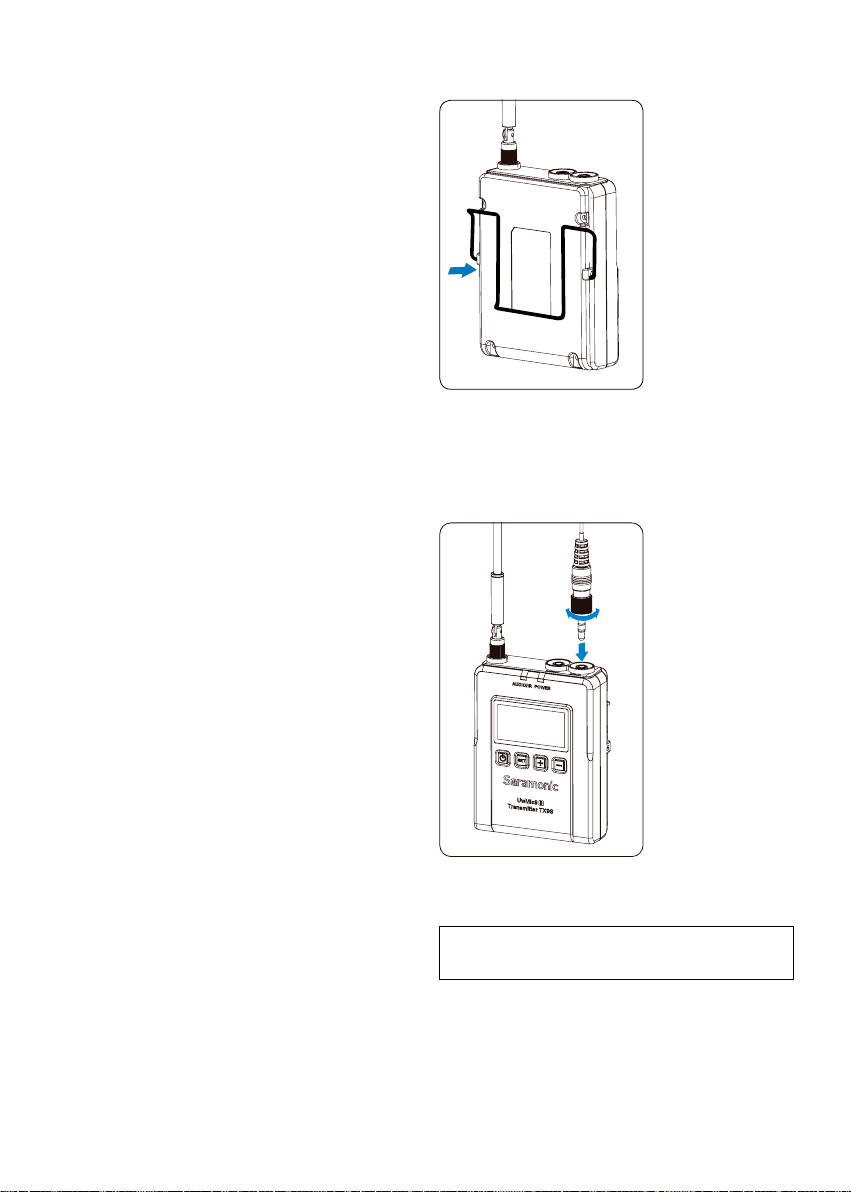
Attaching Accessories
1. Attaching a belt clip
Insert one end of the belt clip into one of two
holes on either side of the transmitter, and then
insert the other end into the hole on the other
side.
2. Connecting the microphone
For a secure connection, turn to lock the
connector.
Note: Please turn off the transmitter before
attaching or removing the microphone.
8
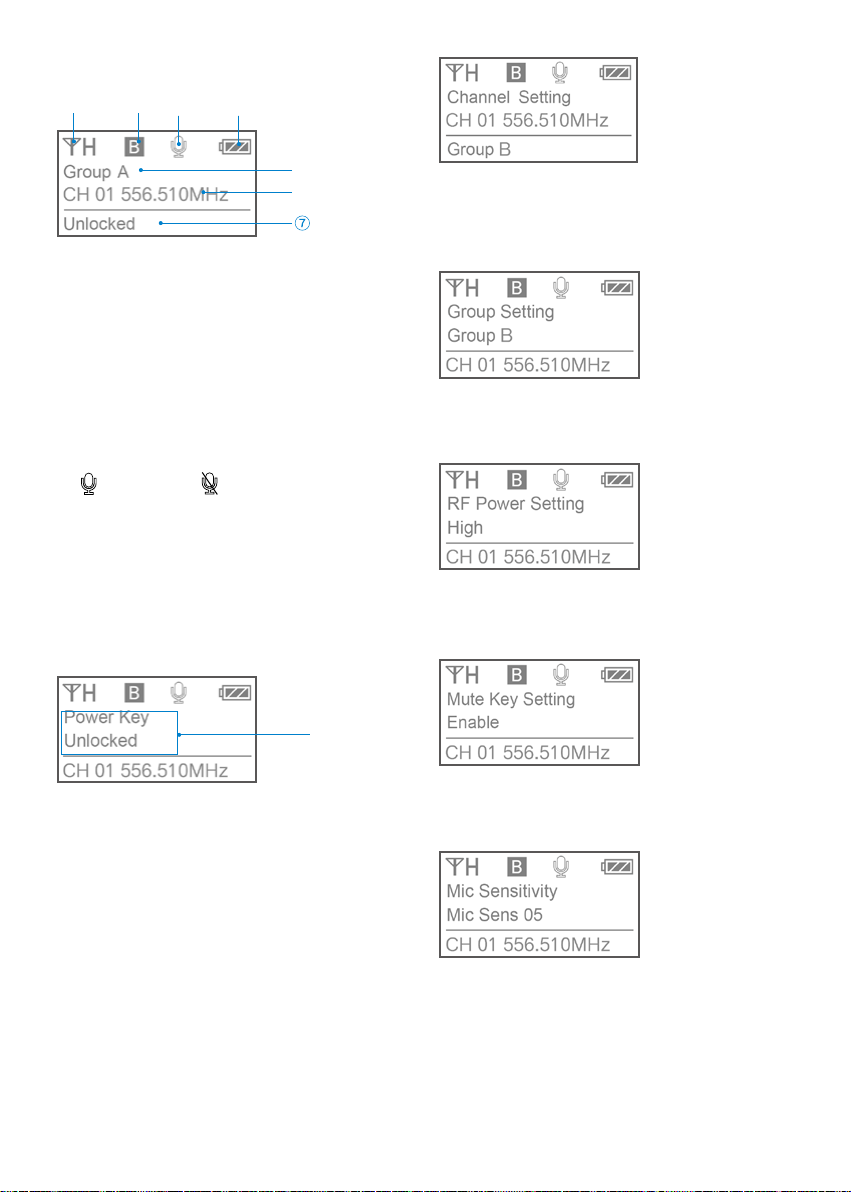
OLED Display Operation Guide
Home screen. If no operation is performed for
20 seconds on the other screens, the display will
automatically return to the home screen.
RF transmission power indicator:
indicates the current transmission power
level.
For details on setting the level, please see
"Select RF power level" (page 8).
Channel group indicator:
indicates the current group.
Mute indicator:
Mute OFF Mute ON
Battery level indicator:
Displays the battery level. Please recharge
the device immediately as soon as the
indicator starts flashing.
Name of the channel group
Channel and frequency:
Indicates the current channel and frequency.
The status of Power / Mute button.
Menu display section. Displays various
functions. Press the + or - button to switch functions.
Set Power key: Select Unlocked or Locked.
Set "Locked" to lock the power button to prevent
the unit being turned off or muted accidentally
while in use. Default is "Unlocked."
Select Channel: Long press the SET button to
enter the menu. Use the "+" and "-" to select
the channel you need and short press the SET
button to confirm.
Select Group: You can choose "A" or "B" channel
group. Each group has 96 channels. The default
is "Group A."
Select RF power level: You can set the
transmitted RF power to High, Medium or Low.
The default is "High."
Set Mute key: If you want to mute the audio,
please select "Enable" first and then short press
the power button. The default is "Enable."
Microphone Sensitivity Setting:
If you want adjust the microphone’s gain, you
can set the microphone’s gain from 00-08. The
default is "05".
9
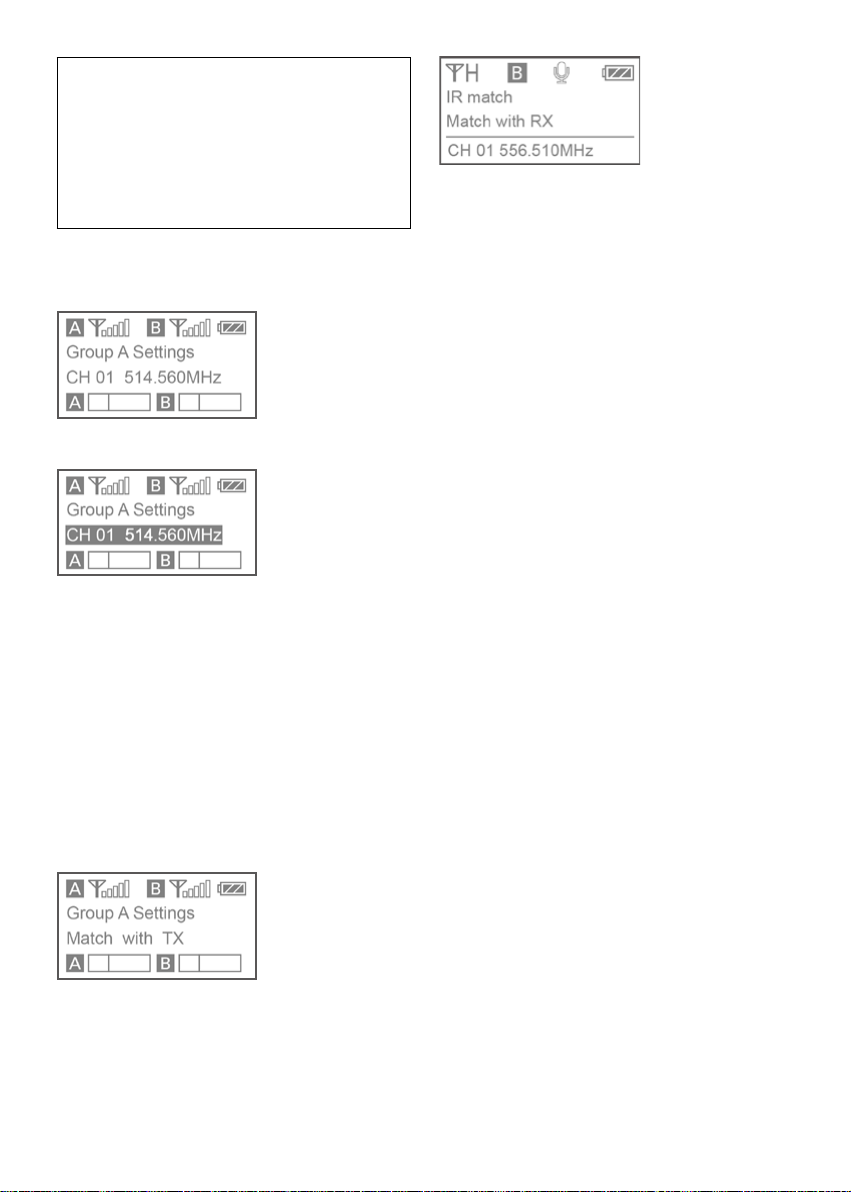
IR Match: Set to match with the receiver. The screen
will display "Matching" when in process. After
successful matching, it will read "Match success."
Set Backlight: Select ON or Delay by 10, 30, or
60 seconds. The default is "Delay 30s."
Restore default setting
UwMic9S-TX9S Version
Operation Guide
1. Connect the receiver to the microphone
input of a camera, camcorder or mixer with the
supplied cable.
2. Turn on the receiver by long pressing the
power button.
3. Set the channel of the receiver in two ways:
By using the auto scan function
Using the + or – button to display the auto scan
screen on the receiver.
Long press the SET button to select "Auto scan?"
Press the SET button to confirm.
A
B
The channel with the least noise and interference
will be displayed.
A. Indicates that the current channel with the
least noise is CH 08 and asks you if you would
like to use it. You can short press the SET button
to confirm the channel within 20 seconds or long
press the SET button to exit the displayed menu
without saving.
B. 20 second Countdown
10
Note:
After 20 seconds have elapsed, the display
returns to the home screen without saving.
Some noise may occur when power is
turned on, so it is possible to turn down
the audio input level of devices connected
to the receiver accordingly.
Manually setting the receiver channel:
Use the + or – button to display the channel
menu on the receiver.
Long press the SET button to select the menu.
Use the + or – button to select the desired
channel and confirm it by short pressing the SET
button.
4. Matching the receiver and transmitter
channel:
Infrared transmission is used to transfer the
frequency set on the receiver to a transmitter.
For the TX9S
• Turn on the transmitter and receiver.
• Use the + or – button to display the “Match
with TX” menu on receiver.
• Use the + or – button to display the "Match
with RX" menu on transmitter.
• Long press the SET button to select the menu
and then short press it to confirm.
• Place the infrared transmitter port on the
receiver near the infrared detector on the
transmitter.
• If "Sync Finished" is displayed on the
OLED screen, the frequency for use on the
transmitter is set.
• After matching successfully, press the SET
button on the receiver to return to the previous
menu.

11
Specification
Receiver RX9S
Channel number 96
Channel group A and B
Oscillator type PLL synthesizer
Audio output connector
RX9S: 3.5 mm mini jacks (A
and B channel output), 3.5mm
heaphone output
Audio input connector
RX9S: 3.5mm mini jack (MIC IN
/LINE IN jack)
Antenna 1/4
wire antenna
Audio output level –60 dBV
Headphone output level 30mW (16 Ω)
Receive frequencies 514 MHz - 596 MHz
Receive sensitivity -95 dBm
Signal-to-noise ratio 75 dB or more
Voice delay 12 ms
Reference deviation ±5 kHz (–60 dBV, 1 kHz input)
Frequency response 40 Hz to 18 kHz (+/-3dB)
Distortion 0.2% or less
Spur suppression -60 dB
Reference audio input level
–60 dBV (MIC input, 0 dB
attenuation)
Built-in battery capacity 2000mA
Power Requirements
Built-In Li-ion Battery or USB-C
DC 5V
Continuous use time 8 hrs
Dimensions RX9S: 220 *64*25 mm
Weight RX9S: 193g (6.8 .oz)
Operating temperature 0 °C to 50 °C
Storage temperature –20 °C to +55°C
Transmitter TX9S
Channel number 96
Channel group A or B
Oscillator type PLL synthesizer
Carrier frequencies 514 MHz - 596 MHz
Reference deviation ±5 kHz (–60 dBV, 1 kHz input)
Signal to noise ratio 75 dB or more
Spur suppression -60 dB
Voice delay 12 ms
Antenna 1/4
wire antenna
Audio input connector
TX9S: 3.5mm mini jacks (MIC IN
and LINE IN jack)
Reference audio input level
–60 dBV (MIC input, 0 dB
attenuation)
Distortion 0.2% or less
Built-in battery capacity 2000mA
Power Requirements
Built-In Li-ion Battery or USB-C
DC 5V
Continuous use time 8 hrs
Dimensions TX9S: 220 *64*25 mm
Weight TX9S: 157g (5.5 .oz)
Operating temperature 0°C to 50°C
Storage temperature –20°C to +55°C
List of contents
UwMic9S Kit1(TX+RX)
1×Body-pack transmitter: TX9S
1×Portable receiver: RX9S
1×DK3A Omnidirectional Lavalier Microphone
1×1'(30cm) SR-C2004 3.5mm TRS Male to Dual
Locking-type 3.5mm TRS Male Y-Cable
1×1.3' (40cm) XLR to 3.5mm TRS Locking-type
Plug Audio Cable
2×3.8'(1.2m) USB-C Charging Cables
1×2.6' (80cm) 3.5mm TRS Locking-type Plug
Audio Cable for Cameras
3×Antennas
2×Belt Clips
1×Cold Shoe Mount Adapter
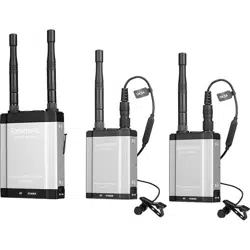
UwMic9S Kit2 (TX+TX+RX)
2×Body-pack transmitters: TX9S
1×Portable receiver: RX9S
2×DK3A Omnidirectional Lavalier Microphones
1×1'(30cm) SR-C2004 3.5mm TRS Male to Dual
Locking-type 3.5mm TRS Male Y-Cable
2×1.3' (40cm)XLR to 3.5mm TRS Locking-type
Plug Audio Cable
1×2.6' (80cm)3.5mm TRS Locking-type Plug
Audio Cable for Cameras
3×3.8'(1.2m)USB-C Charging Cables
4×Antennas
3×Belt Clips
1×Cold Shoe Mount Adapter