1
Installation Guide
1111 W. 35th Street, Chicago, IL 60609 USA • tripplite.com/support
Copyright © 2021 Tripp Lite. All rights reserved.
Español 7 • Français 13 • Русский 19
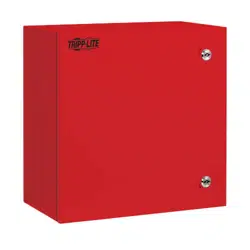
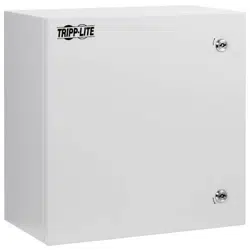
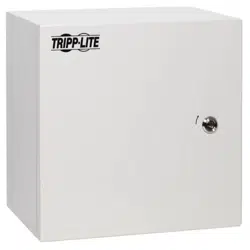
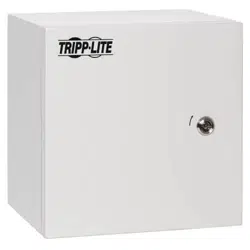
NEMA-4 Single-Lock
Metal Enclosure
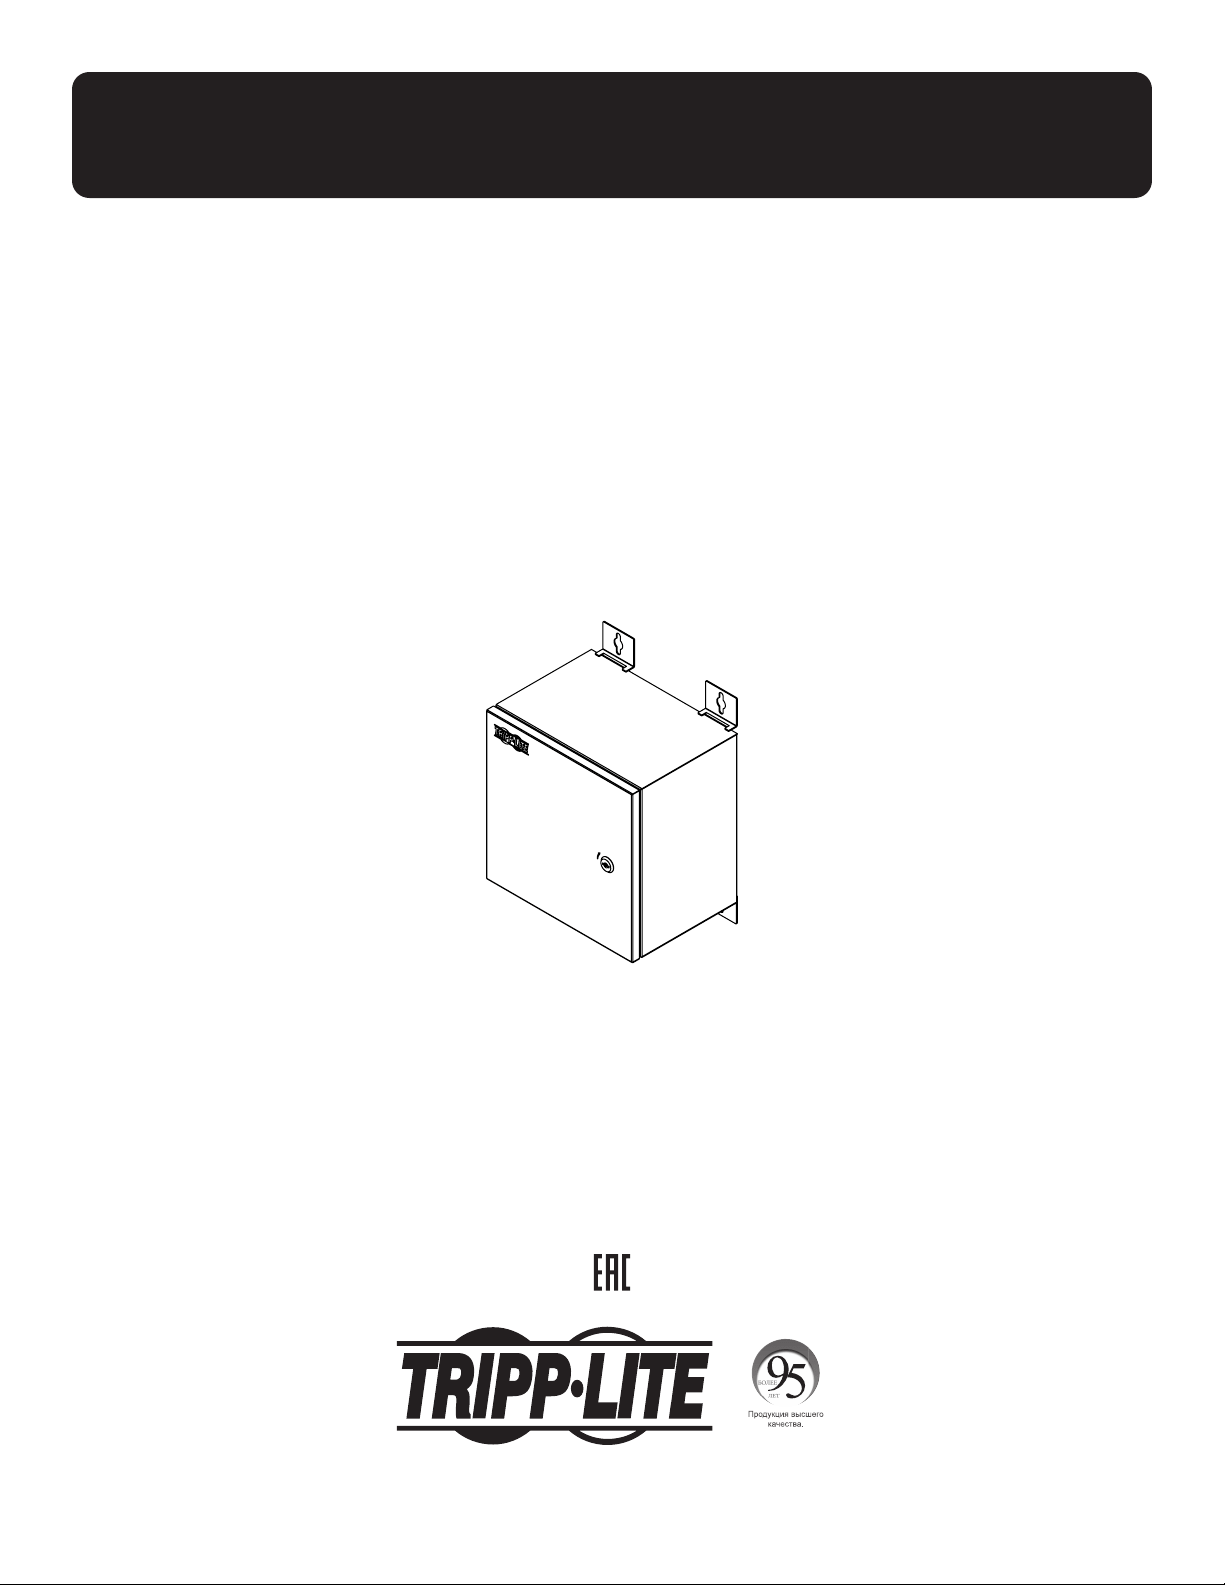
Models:
SRIN410106, SRIN4101010, SRIN410146, SRIN4101410,
SRIN412126, SRIN4121210, SRIN414146, SRIN4141410
Series Numbers: (AC0043, AC004C, AC004B, AC004A, AC0049, AC0048, AC0047, AC0046)
WARRANTY REGISTRATION
Register your product today and be
automatically entered to win an ISOBAR
®
surge protector in our monthly drawing!
tripplite.com/warranty
2
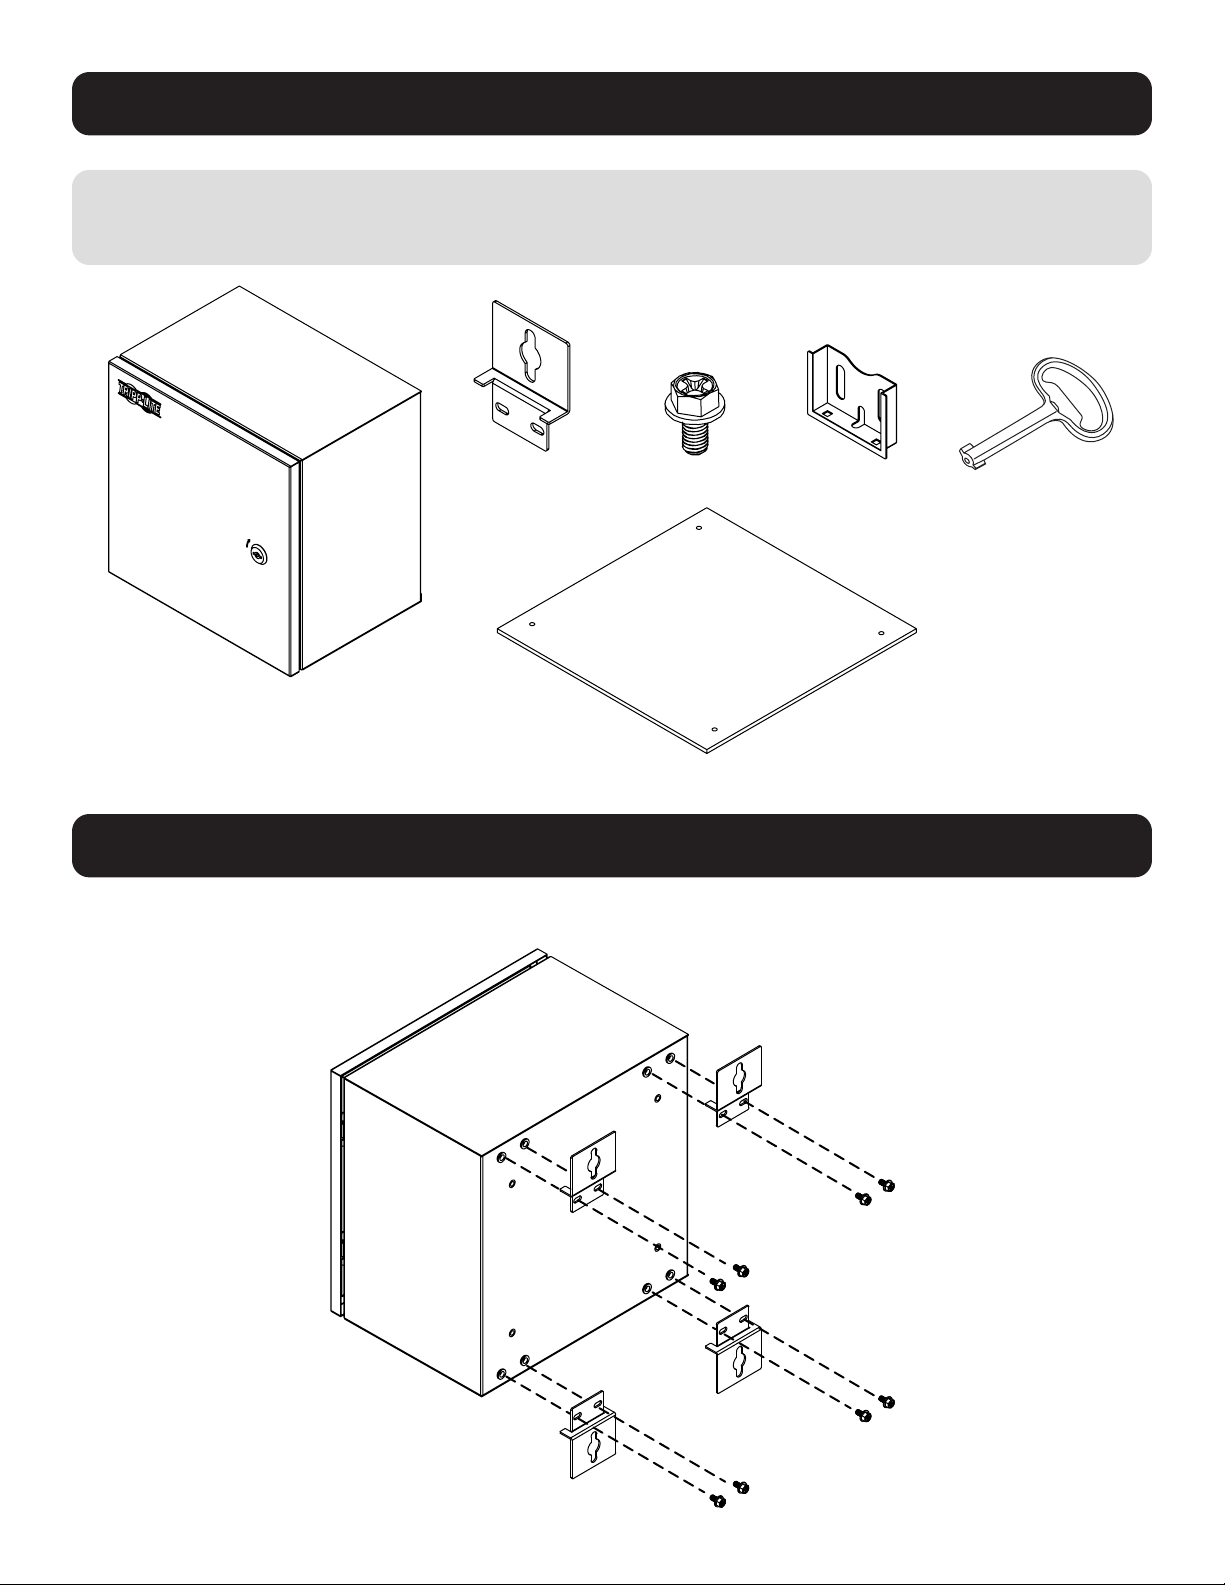
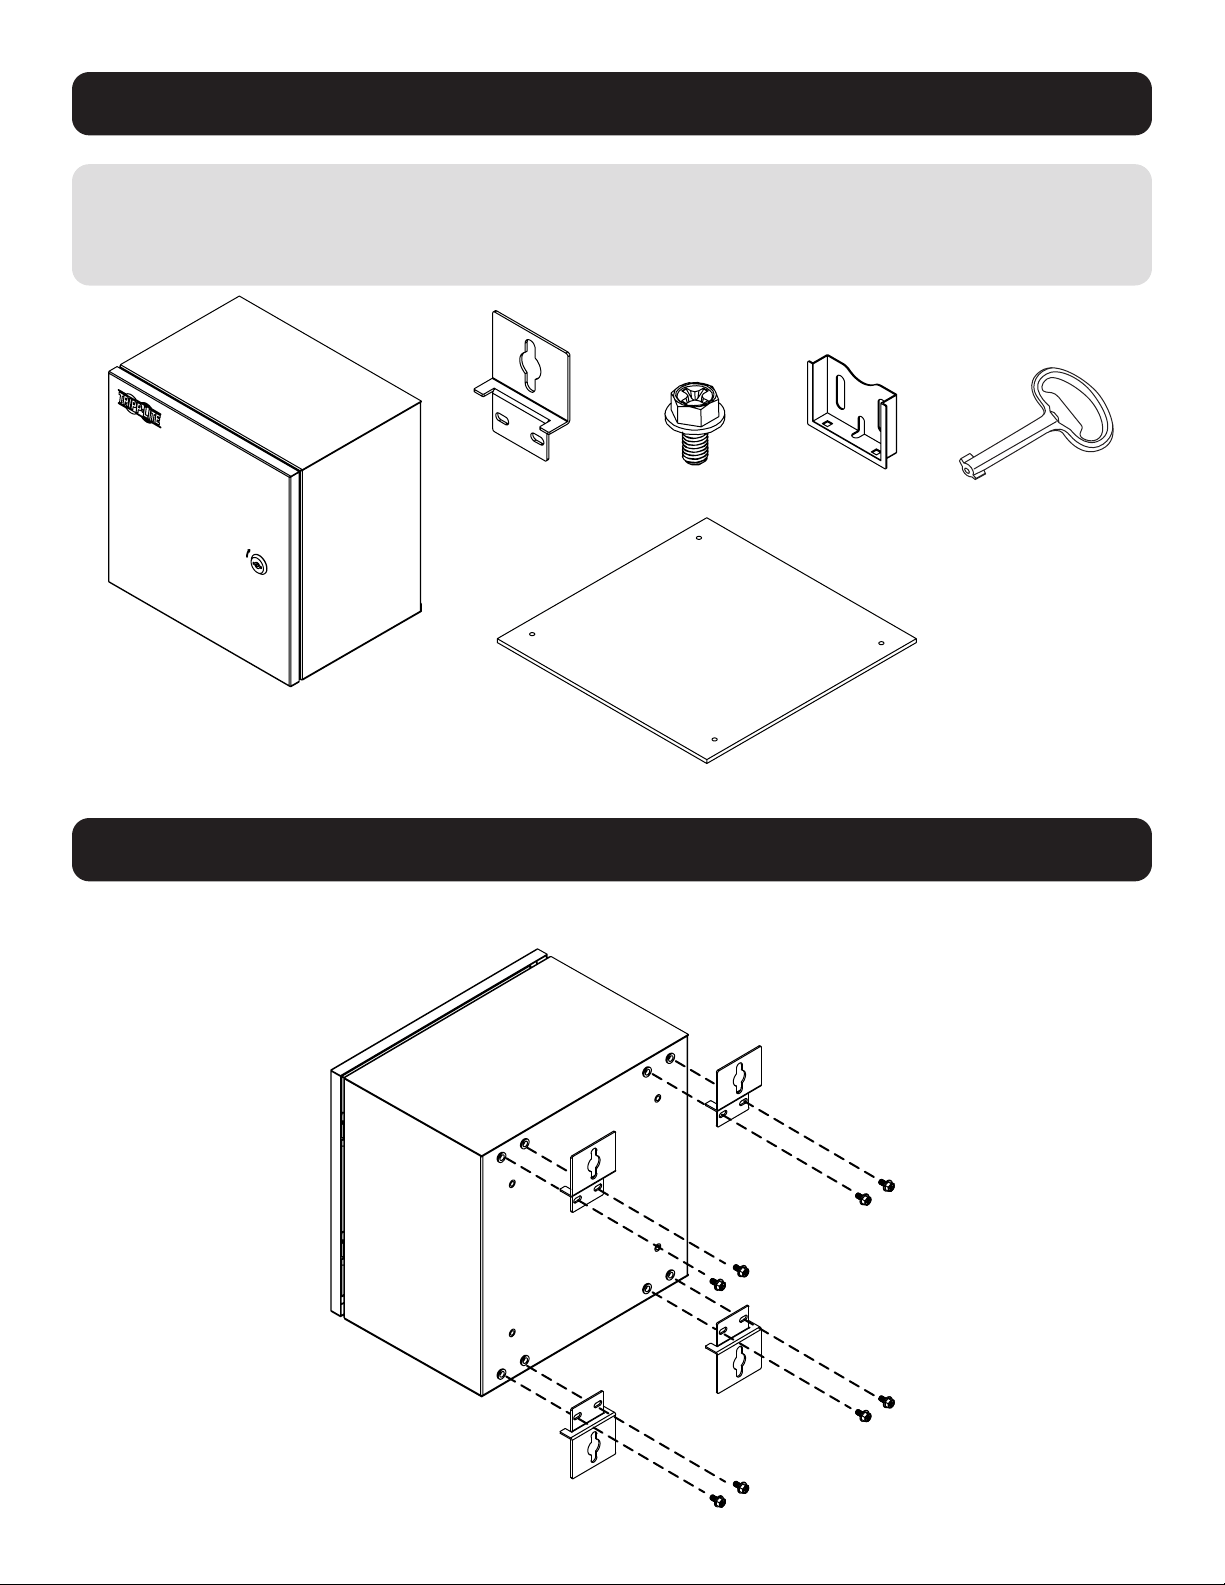
Components List
Installation
IMPORTANT:
Ensure you have received all parts according to the component checklist prior to installing. If any parts are
missing or faulty, visit tripplite.com/support for service.
x1
x4 x8 x1 x2
x1 (Metal)
x1 (Plastic)
1. Attach Mounting Feet to the Enclosure’s Rear Panel
Note: SRIN4141410 model shown. Enclosure
size and dimensions will differ by model.

3
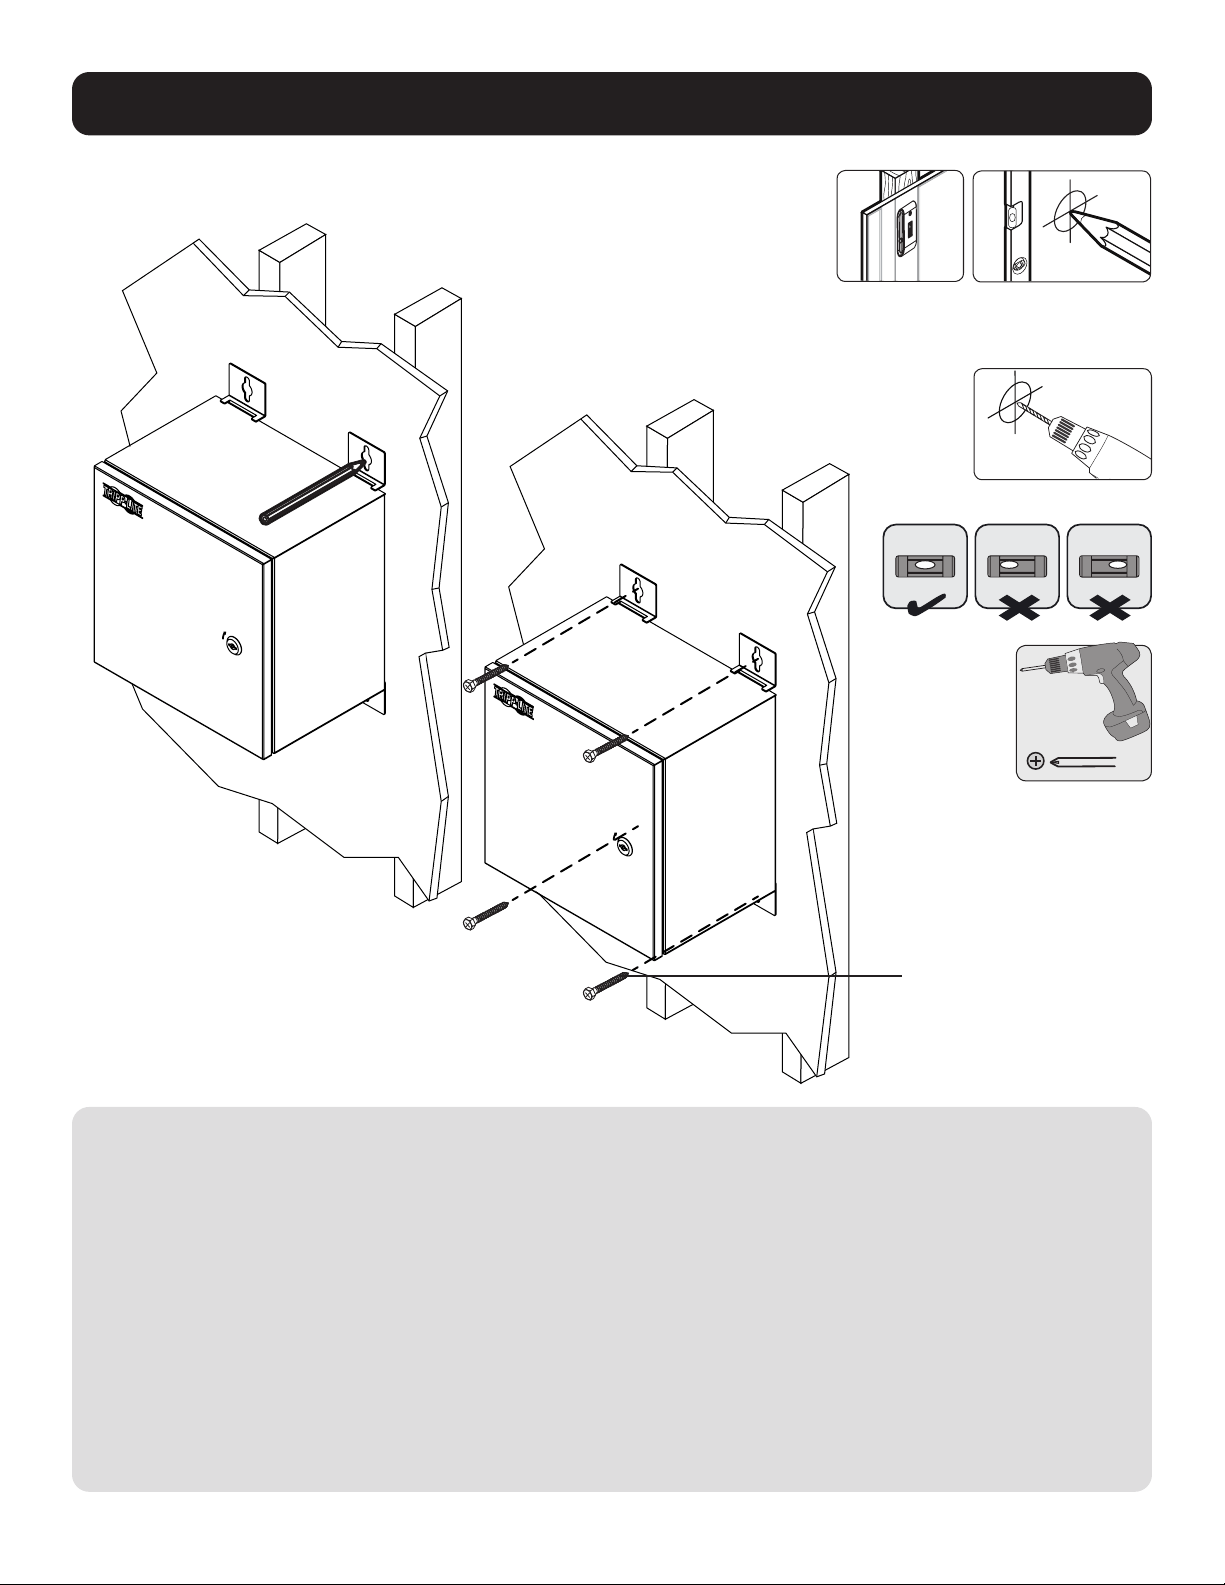
Installation
• Installers are responsible for providing wall-mounting hardware. Use a minimum of two #10 x 2” or larger screws
(not included) to secure the enclosure in place.
• Make sure mounting screws are anchored into the center of the studs. Use of a stud finder is highly recommended.
• If there is no stud at the mounting location, it is recommended you use four anchors to secure the enclosure in place.
Due to the weight of the enclosure, plastic expansion wall anchors are not recommended for drywall installations.
Suitable anchors include: threaded drywall anchors, threaded drywall toggles, sleeve-type hollow wall anchors
(a.k.a. molly bolts) or toggle bolts.
• If placing the enclosure over a telecommunications receptacle, remove the wall plate, then fasten the enclosure to the
wall. Once secured, fasten the wall plate over the receptacle.
• If no telecommunications receptacle is available, a surface mount box (or biscuit jack) and equipment cord can be
mounted inside the unit.
• Use an adhesive-backed surface mount box.
2. Mount Enclosure to Wall
Mark the exact
location of the
mounting holes
Attach the
enclosure to
the wall
Drill pilot holes
Find a wood stud
location for mounting
the enclosure
(Mounting Hardware
Not Included)

4
Installation
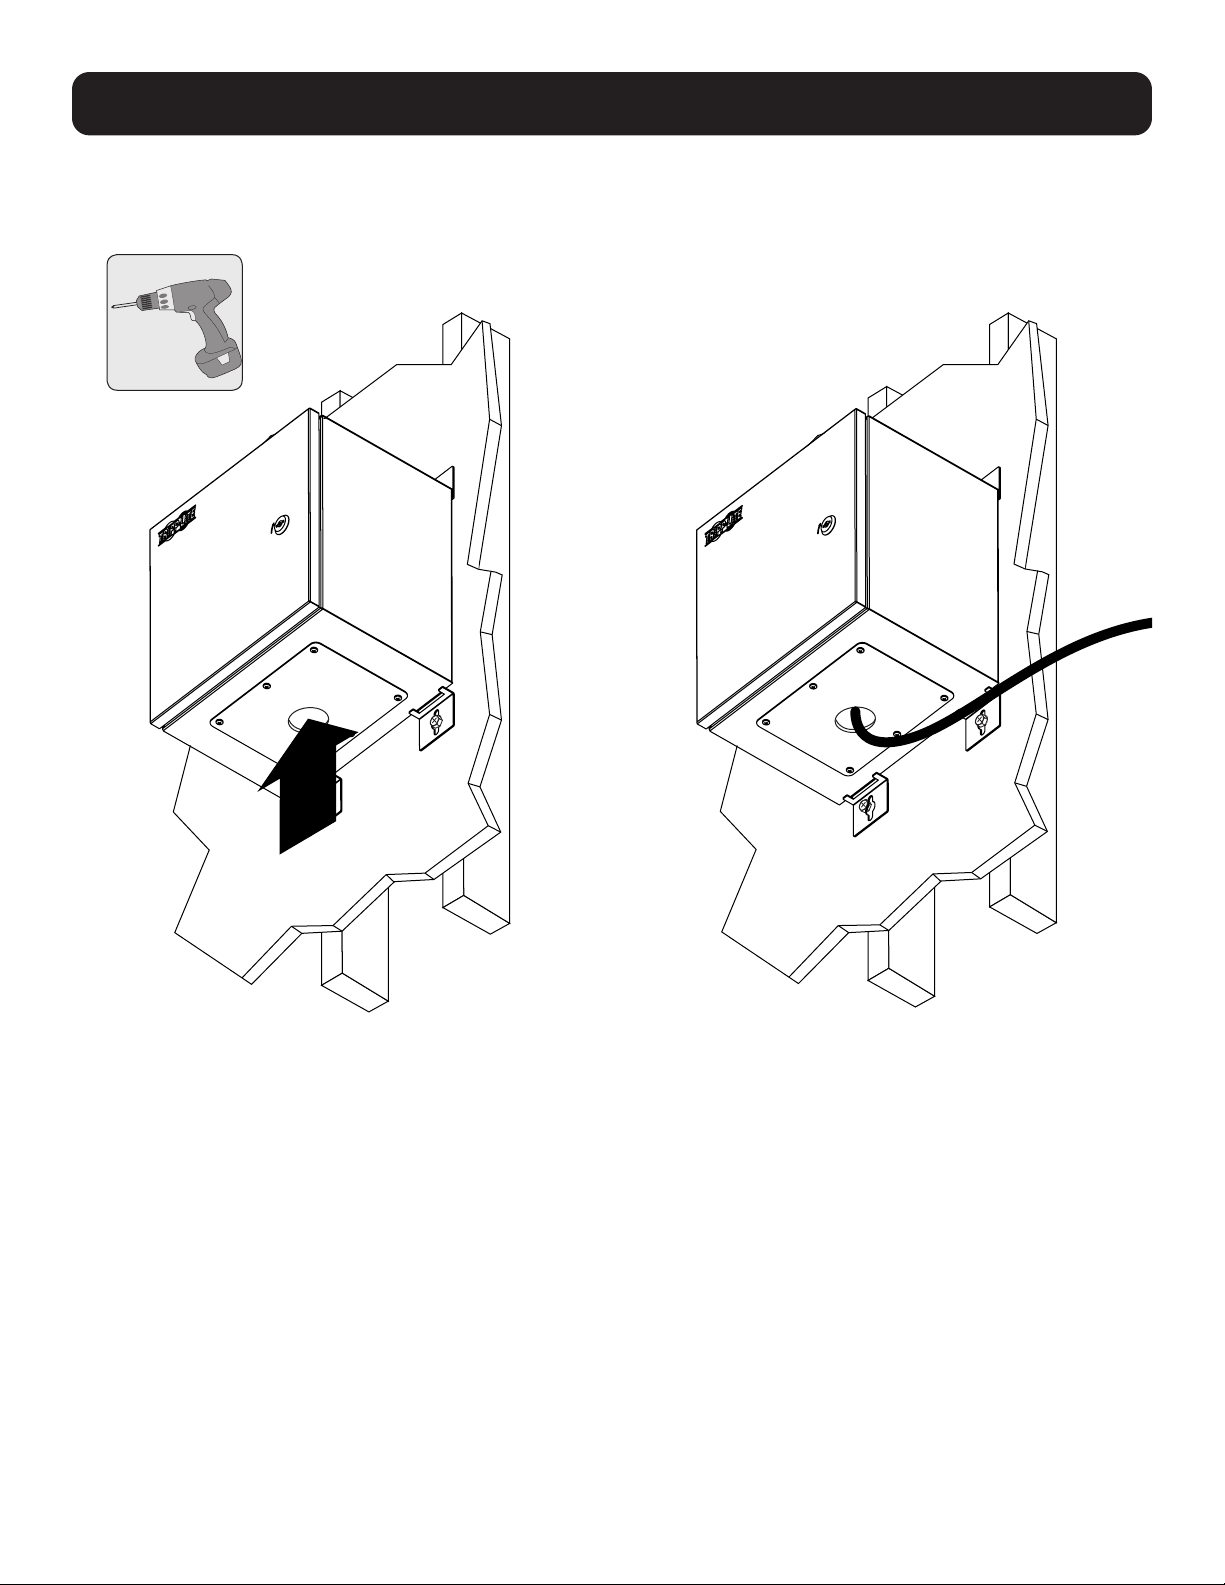
3. Use a Drill to Create a Bottom
Conduit Cutout
4. Run Data and Power Cable (If
Required) Through the Conduit
Cutout
Note: To maintain a NEMA rating, use sealed fit-
tings in the cutouts when connecting to conduit.
5
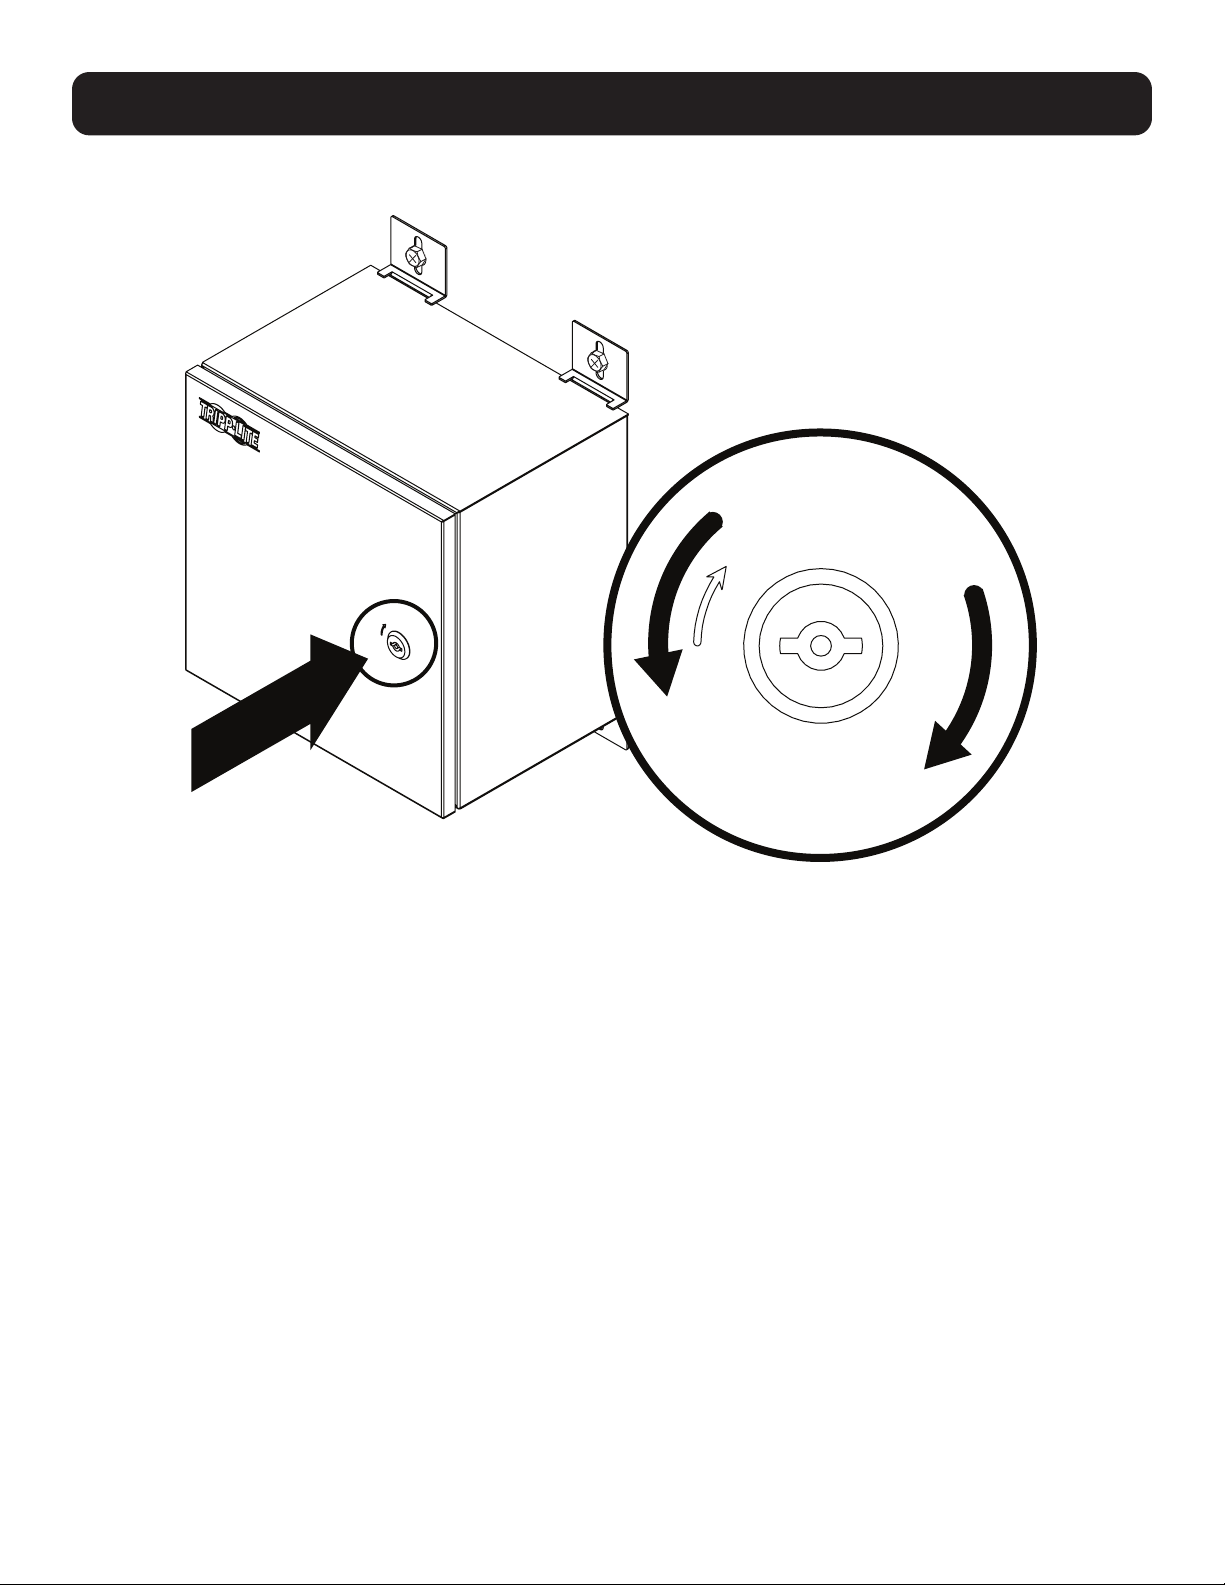
Installation
5. Secure the Enclosure Cover
LOCK
UNLOCK

6
Warranty and Product Registration
5-year Limited Warranty
Seller warrants this product, if used in accordance with all applicable instructions, to be free from original defects in material and
workmanship for a period of 5 years from the date of initial purchase. If the product should prove defective in material or workmanship within
that period, Seller will repair or replace the product, in its sole discretion.
THIS WARRANTY DOES NOT APPLY TO NORMAL WEAR OR TO DAMAGE RESULTING FROM ACCIDENT, MISUSE, ABUSE OR NEGLECT. SELLER
MAKES NO EXPRESS WARRANTIES OTHER THAN THE WARRANTY EXPRESSLY SET FORTH HEREIN. EXCEPT TO THE EXTENT PROHIBITED BY
APPLICABLE LAW, ALL IMPLIED WARRANTIES, INCLUDING ALL WARRANTIES OF MERCHANTABILITY OR FITNESS, ARE LIMITED IN DURATION
TO THE WARRANTY PERIOD SET FORTH ABOVE; AND THIS WARRANTY EXPRESSLY EXCLUDES ALL INCIDENTAL AND CONSEQUENTIAL
DAMAGES. (Some states do not allow limitations on how long an implied warranty lasts, and some states do not allow the exclusion or
limitation of incidental or consequential damages, so the above limitations or exclusions may not apply to you. This warranty gives you
specific legal rights, and you may have other rights which vary from jurisdiction to jurisdiction).
WARNING: The individual user should take care to determine prior to use whether this device is suitable, adequate or safe for the use
intended. Since individual applications are subject to great variation , the manufacturer makes no representation or warranty as to the
suitability or fitness of these devices for any specific application.
PRODUCT REGISTRATION
Visit tripplite.com/warranty today to register your new Tripp Lite product. You’ll be automatically entered into a drawing for a chance to win a
FREE Tripp Lite product!*
* No purchase necessary. Void where prohibited. Some restrictions apply. See website for details.
Tripp Lite has a policy of continuous improvement. Specifications are subject to change without notice. Photos and illustrations may differ
slightly from actual products.
1111 W. 35th Street, Chicago, IL 60609 USA • tripplite.com/support
20-12-303 93-3DAD_RevA

7
Guía de Instalación
1111 W. 35th Street, Chicago, IL 60609, EE. UU. • tripplite.com/support
Copyright © 2021 Tripp Lite. Todos los derechos reservados.
English 1 • Français 13 • Русский 19
Gabinete Metálico
con Cerradura Sencilla NEMA-4
Modelos:
SRIN410106, SRIN4101010, SRIN410146, SRIN4101410,
SRIN412126, SRIN4121210, SRIN414146, SRIN4141410
Números de Serie: (AC0043, AC004C, AC004B, AC004A, AC0049, AC0048, AC0047, AC0046)
8
Lista de Componentes
Instalación
IMPORTANTE:
Antes de proceder a instalar, asegúrese de haber recibido todas las partes de acuerdo con la lista de
comprobación de componentes. Si faltase alguna parte o estuviese dañada, visite tripplite.com/support para
solicitar servicio.
x1
x4 x8 x1 x2
x1 (Metal)
x1 (Plástico)
1. Fije las Patas de Instalación al Panel Posterior del Gabinete
Nota: Se muestra el modelo SRIN4141410.
El tamaño y dimensiones del gabinete variarán
según el modelo.
9
Instalación
• Los instaladores son responsables de suministrar los accesorios para instalación en la pared. Use como mínimo dos
tornillos #10 x 2” o más grandes (no incluidos) para fijar el gabinete en su lugar.
• Cerciórese que los tornillos de instalación estén anclados en el centro de los travesaños. Es muy recomendable usar un
detector de travesaños.
• Si no hay algún travesaño en el lugar de instalación, se le recomienda utilizar cuatro taquetes para fijar el gabinete
en su lugar. Debido al peso del gabinete, no se recomiendan taquetes de expansión de plástico para instalaciones en
tablarroca. Los taquetes adecuados incluyen: taquetes roscados para tablarroca, tornillos roscados tipo mariposa para
tablarroca, taquetes expansivos (también conocidos como tornillos molly) o tornillos de anclaje.
• Si coloca el gabinete sobre un receptáculo de telecomunicaciones, retire la placa de pared, luego fije el gabinete a la
pared. Una vez asegurado, fije la placa de pared sobre el receptáculo.
• Si no está disponible un receptáculo de telecomunicaciones, una caja de instalación sobre superficie (o conector sobre
superficie) y un cable de equipo pueden ser instalados dentro de la unidad.
• Use una caja de instalación sobre superficie con respaldo adhesivo.
2. Instalación del Gabinete a la Pared
Marque la posición
exacta de los orificios
de instalación
Coloque el
gabinete en la
pared
Perfore los orificios piloto
Localice un punto en el
travesaño de madera para la
instalación del gabinete
(No Incluye
Accesorios de
Instalación)

10
Instalación
3. Utilice un Taladro para Crear un
Recorte para Conducto Inferior
4. Conduzca el Cable de Datos y
Alimentación (Si se Requiere)
A Través del Recorte para el
Conducto
Nota: Para mantener una especificación NEMA, uti-
lice accesorios sellados en los recortes al conectar
a conductos.

11
Instalación
5. Asegure la Cubierta del Gabinete
BLOQUEAR
DESBLOQUEAR

12
Garantía
Garantía Limitada por 5 Años
El vendedor garantiza que este producto, si se usa de acuerdo con todas las instrucciones aplicables, estará libre de defectos en el
material y la mano de obra por un período de 5 años a partir de la fecha de compra inicial. Si el producto resultara defectuoso en cuanto a
materiales o mano de obra dentro de ese período, el vendedor reparará o reemplazará el producto a su entera discreción.
ESTA GARANTÍA NO SE APLICA AL DESGASTE NORMAL O A LOS DAÑOS QUE RESULTEN DE ACCIDENTES, USO INCORRECTO, USO
INDEBIDO O NEGLIGENCIA. EL VENDEDOR NO OTORGA GARANTÍAS EXPRESAS DISTINTAS A LA ESTIPULADA EN EL PRESENTE. SALVO EN
LA MEDIDA EN QUE LO PROHÍBAN LAS LEYES APLICABLES, TODAS LAS GARANTÍAS IMPLÍCITAS, INCLUIDAS TODAS LAS GARANTÍAS DE
COMERCIALIZACIÓN O IDONEIDAD, ESTÁN LIMITADAS EN CUANTO A DURACIÓN AL PERÍODO DE GARANTÍA ESTABLECIDO; ASIMISMO,
ESTA GARANTÍA EXCLUYE EXPRESAMENTE TODOS LOS DAÑOS INCIDENTALES E INDIRECTOS. (Algunos estados no permiten limitaciones en
cuanto a la duración de una garantía y algunos estados no permiten la exclusión o limitación de daños incidentales o indirectos, de modo
que es posible que las limitaciones anteriores no se apliquen a usted. Esta garantía le otorga derechos legales específicos y usted puede
tener otros derechos que pueden variar de una jurisdicción a otra).
ADVERTENCIA: Antes de usarlo, cada usuario debe tener cuidado al determinar si este dispositivo es adecuado o seguro para el uso
previsto. Ya que las aplicaciones individuales están sujetas a gran variación, el fabricante no garantiza la adecuación de estos dispositivos
para alguna aplicación específica.
Tripp Lite tiene una política de mejora continua. Las especificaciones están sujetas a cambio sin previo aviso. Las fotografías e ilustraciones
pueden diferir ligeramente de los productos reales.
1111 W. 35th Street, Chicago, IL 60609, EE. UU. • tripplite.com/support
20-12-303 93-3DAD_RevA

13
Guide d'installation
1111 W. 35th Street, Chicago, IL 60609 USA • tripplite.com/support
Droits d'auteur © 2021 Tripp Lite. Tous droits réservés.
Englissh 1 • Español 7 • Русский 19
Boîtier en métal NEMA-4
à une seule serrure
Modèles :
SRIN410106, SRIN4101010, SRIN410146, SRIN4101410,
SRIN412126, SRIN4121210, SRIN414146, SRIN4141410
Numéros de série : (AC0043, AC004C, AC004B, AC004A, AC0049, AC0048, AC0047, AC0046)

14
Liste des composants
Installation
IMPORTANT :
S'assurer d'avoir reçu toutes les pièces conformément à la liste de vérification des composants avant de
procéder à l'installation. Si des pièces sont manquantes ou défectueuses, visiter tripplite.com/support pour
obtenir de l'aide.
x 1
x 4 x 8 x 1 x 2
x 1 (métal)
x 1 (plastique)
1. Fixer les pieds de montage au panneau arrière du boîtier
Remarque : Modèle SRIN4141410 illustré. La taille et
les dimensions du boîtier varient selon les modèles.

15
Installation
• Les installateurs sont responsables de fournir la quincaillerie pour le montage au mur. Utiliser au moins deux vis n° 10 x
2 po ou de plus grande taille (non incluses) pour retenir le boîtier en place.
• S'assurer que les vis de montage sont ancrées au centre des montants. Il est fortement recommandé d'utiliser un
localisateur de montants.
• S'il n'y a pas de montants à l'emplacement d'installation, il est recommandé d'utiliser des ancrages pour retenir le boîtier
en place. En raison du poids du boîtier, les ancrages muraux à expansion en plastique ne sont pas recommandés pour
les installations sur des cloisons sèches. Les ancrages appropriés incluent : les ancrages pour cloisons sèches filetées,
les commutateurs pour cloisons sèches filetées, les ancrages muraux creux de type manchon (aussi appelés boulons à
gaine d'expansion) ou des boulons à ailettes à ressort.
• Si le boîtier est placé par-dessus une prise de télécommunication, retirer la plaque murale, puis fixer le boîtier au mur.
Une fois le boîtier fixé au mur, remettre la plaque murale sur la prise.
• Si aucune prise de télécommunication n'est disponible, une boîte de montage en surface (ou une prise biscuit) et le
cordon de l'équipement peuvent être montés à l'intérieur de l’appareil.
• Utiliser une boîte de montage en surface à revers adhésif.
2. Montage du boîtier au mur
Marquer
l’emplacement exact
des trous de montage.
Fixer le boîtier
au mur
Percer des avant-trous.
Trouver l'emplacement des
montants muraux en bois
pour monter le boîtier.
(quincaillerie de
montage non incluse)

16
Installation
3. Utiliser une perceuse pour créer
une découpe de conduite inférieure.
4. Acheminer le câble d'alimentation
et de données (le cas échéant)
dans la découpe de la conduite.
Remarque : Pour garder une capacité nominale
NEMA, utiliser des raccords étanches dans les
découpes au moment de connecter à la conduite.

17
Installation
5. Sécuriser le couvercle du boîtier.
VERROUILLER
DÉVERROUILLER

18
Garantie
Garantie limitée de 5 ans
Le vendeur garantit que ce produit, s'il est utilisé conformément à toutes les instructions applicables, est exempt de tous défauts de
matériaux et de fabrication pour une période de 5 ans à partir de la date d'achat initiale. Si le produit s'avère défectueux en raison d'un vice
de matériaux ou de fabrication au cours de cette période, le vendeur s'engage à réparer ou remplacer le produit, à sa seule discrétion.
CETTE GARANTIE NE S'APPLIQUE PAS À L'USURE NORMALE OU AUX DOMMAGES RÉSULTANT D'UNE MAUVAISE UTILISATION, D'UN ABUS OU
D'UNE NÉGLIGENCE. LE VENDEUR N'ACCORDE AUCUNE GARANTIE EXPRESSE AUTRE QUE LA GARANTIE EXPRESSÉMENT DÉCRITE DANS LE
PRÉSENT DOCUMENT. SAUF DANS LA MESURE OÙ CELA EST INTERDIT PAR LA LOI EN VIGUEUR, TOUTE GARANTIE IMPLICITE, Y COMPRIS
TOUTES LES GARANTIES DE QUALITÉ MARCHANDE OU D'ADAPTATION, SONT LIMITÉES À LA PÉRIODE DE GARANTIE CI-DESSUS ET CETTE
GARANTIE EXCLUT EXPRESSÉMENT TOUS DOMMAGES DIRECTS ET INDIRECTS. (Certains États ne permettent pas de limitations sur la durée
d'une garantie implicite, et certains États ne permettent pas l'exclusion ou la limitation des dommages fortuits ou consécutifs, de sorte que
les limitations ou exclusions susmentionnées peuvent ne pas s'appliquer à vous. Cette garantie vous accorde des droits légaux spécifiques,
et vous pouvez avoir d'autres droits qui varient d'une compétence à l'autre.)
AVERTISSEMENT : L'utilisateur individuel doit prendre soin de déterminer avant l'utilisation si cet appareil est approprié, adéquat et sûr pour
l'usage prévu. Puisque les utilisations individuelles sont sujettes à des variations importantes, le fabricant ne fait aucune déclaration ou
garantie quant à l'aptitude ou l'adaptation de ces dispositifs pour une application spécifique.
La politique de Tripp Lite en est une d'amélioration continue. Les caractéristiques techniques sont modifiables sans préavis. Les produits
réels peuvent différer légèrement des photos et des illustrations.
1111 W. 35th Street, Chicago, IL 60609 USA • tripplite.com/support
20-12-303 93-3DAD_RevA
19
Руководство по установке
1111 W. 35th Street, Chicago, IL 60609 USA • tripplite.com/support
Охраняется авторским правом © 2021 Tripp Lite. Перепечатка запрещается.
English 1 • Español 7 • Français 13
Металлический шкаф
NEMA-4 с одним замком
Модели:
SRIN410106, SRIN4101010, SRIN410146, SRIN4101410, SRIN412126, SRIN4121210,
SRIN414146, SRIN4141410
Номера серий: (AC0043, AC004C, AC004B, AC004A, AC0049, AC0048, AC0047, AC0046)

20
Перечень комплектации
Установка
ВНИМАНИЕ!
Перед началом установки убедитесь в наличии всех деталей согласно перечню комплектации. В случае отсутствия или повреждения каких-либо
деталей обратитесь за помощью на страницу tripplite.com/support.
1 шт.
4 шт. 8 шт. 1 шт. 2 шт.
1 шт. (металл)
1 шт. (пластмасса)
1. Прикрепите монтажные опоры к задней панели шкафа
Примечание. На иллюстрации показана модель SRIN4141410.
Размеры шкафа различаются в зависимости от модели.

21
Установка
• Ответственность за обеспечение оснастки для настенного крепления возлагается на установщика. Для крепления корпуса используйте
два винта #10 x 2” или большего размера (в комплект поставки не входят).
• Необходимо обеспечить ввертывание крепежных винтов по центру элементов каркаса. С этой целью настоятельно рекомендуется использование детектора
неоднородностей.
• При отсутствии элементов деревянного каркаса стены в месте монтажа рекомендуется осуществлять крепление корпуса с использованием анкеров. В связи
со значительным весом корпуса не рекомендуется использовать полимерные дюбели для крепления к гипсокартонным стенам. Подходящими анкерами
являются: резьбовые анкеры для гипсокартона, резьбовые дюбели для гипсокартона, анкеры гильзового типа для пустотелых стен (т.н. болты молли) или
анкерные болты со стопорными крыльями.
• В случае крепления корпуса поверх телекоммуникационной розетки снимите пластину, предназначенную для крепления к стене, а затем прикрепите
кронштейн к стене. Затем закрепите указанную пластину поверх розетки.
• При отсутствии телекоммуникационной розетки коробка для поверхностного монтажа (или литой разъем) и шнур для подключения оборудования могут
оставаться внутри монтируемого модуля.
• Используйте коробку для поверхностного монтажа с клейкой лентой на тыльной стороне.
2. Прикрепите корпус к стене
Разметьте точное
местоположение монтажных
отверстий
Крепление шкафа к
стене
Высверлите направляющие отверстия
Определите местоположение
элементов деревянного
каркаса для крепления корпуса
(Монтажные
приспособления в комплект
поставки не входят)
22
Установка
3. Высверлите отверстие снизу для подвода
кабелей
4. Проложите интерфейсный и питающий
кабели (при необходимости) через
высверленное отверстие
Примечание. Для сохранения уровня защиты NEMA следует
устанавливать в высверленные отверстия муфты с
уплотнителями при соединении с кабель-каналом.

23
Установка
5. Зафиксируйте крышку корпуса
ЗАКРЫТО
ОТКРЫТО

24
Гарантийные обязательства
Ограниченная гарантия сроком 5 лет
Продавец гарантирует отсутствие изначальных дефектов материала или изготовления в течение 5 лет с момента первой покупки данного изделия при условии его использования
в соответствии со всеми применимыми к нему указаниями. В случае проявления каких-либо дефектов материала или изготовления в течение указанного периода Продавец
осуществляет ремонт или замену данного изделия исключительно по своему усмотрению.
ДЕЙСТВИЕ НАСТОЯЩЕЙ ГАРАНТИИ НЕ РАСПРОСТРАНЯЕТСЯ НА СЛУЧАИ ЕСТЕСТВЕННОГО ИЗНОСА ИЛИ ПОВРЕЖДЕНИЯ В РЕЗУЛЬТАТЕ АВАРИИ, НЕНАДЛЕЖАЩЕГО ИСПОЛЬЗОВАНИЯ, НАРУШЕНИЯ
ПРАВИЛ ЭКСПЛУАТАЦИИ ИЛИ ХАЛАТНОСТИ. ПРОДАВЕЦ НЕ ПРЕДОСТАВЛЯЕТ НИКАКИХ ЯВНО ВЫРАЖЕННЫХ ГАРАНТИЙ ЗА ИCКЛЮЧЕНИЕМ ПРЯМО ИЗЛОЖЕННОЙ В НАCTОЯЩЕМ ДОКУМЕНТЕ.
ЗА ИСКЛЮЧЕНИЕМ СЛУЧАЕВ, ЗАПРЕЩЕННЫХ ДЕЙСТВУЮЩИМ ЗАКОНОДАТЕЛЬСТВОМ, ВСЕ ПОДРАЗУМЕВАЕМЫЕ ГАРАНТИИ, ВКЛЮЧАЯ ВСЕ ГАРАНТИИ ПРИГОДНОСТИ ДЛЯ ПРОДАЖИ ИЛИ
ИСПОЛЬЗОВАНИЯ ПО НАЗНАЧЕНИЮ, ОГРАНИЧЕНЫ ПО ПРОДОЛЖИТЕЛЬНОСТИ ДЕЙСТВИЯ ВЫШEУКАЗАННЫМ ГАРАНТИЙНЫМ СРОКОМ; КРОМЕ ТОГО, ИЗ НАСТОЯЩЕЙ ГАРАНТИИ ЯВНЫМ
ОБРАЗОМ ИСКЛЮЧАЮТСЯ ВСЕ ПОБОЧНЫЕ, СЛУЧАЙНЫЕ И КОСВЕННЫЕ УБЫТКИ. (В некоторых штатах не допускается введение ограничений на продолжительность действия тех или иных
подразумеваемых гарантий, а в некоторых — исключение или ограничение размера побочных или косвенных убытков. В этих случаях вышеизложенные ограничения или исключения
могут на вас не распространяться. Настоящая гарантия предоставляет вам конкретные юридические права, а набор других ваших прав может быть различным в зависимости от
юрисдикции).
ВНИМАНИЕ! До начала использования данного устройства пользователь должен убедиться в том, что оно является пригодным, соответствующим или безопасным для
предполагаемого применения. В связи с большим разнообразием конкретных применений производитель не дает каких-либо заверений или гарантий относительно пригодности
данных изделий для какого-либо конкретного применения или их соответствия каким-либо конкретным требованиям.
Компания Tripp Lite постоянно совершенствует свою продукцию. B связи с этим возможно изменение технических характеристик без предварительного уведомления. Внешний вид
реальных изделий может несколько отличаться от представленного на фотографиях и иллюстрациях.
1111 W. 35th Street, Chicago, IL 60609 USA • tripplite.com/support
20-12-303 93-3DAD_RevA