Loading ...
Loading ...
Loading ...
10
EN
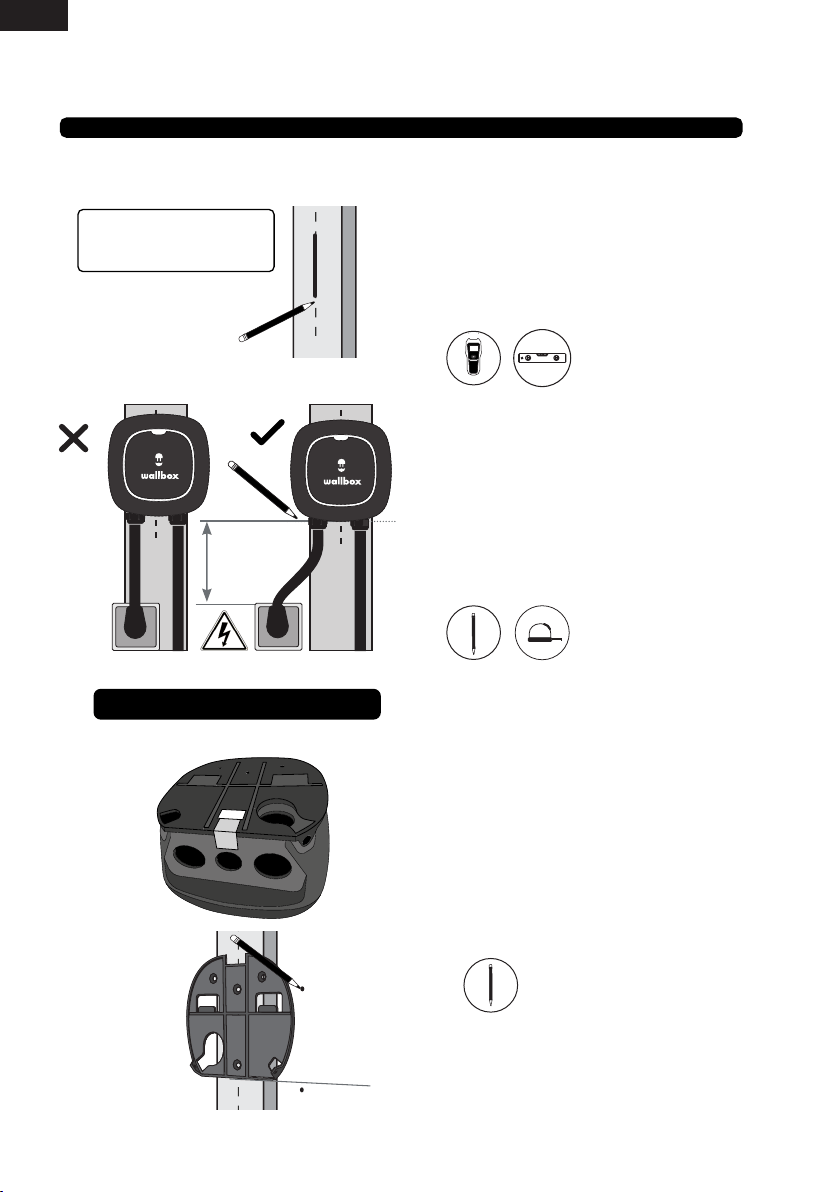
1. Using a wall stud nder, nd the wall stud
nearest to the NEMA outlet. Mark a vertical line
approximately 20” (50cm) in length in line with
the wall stud.
Alternately you may nd a suitable location on a
solid wall.
2. Ensure that the placement of the NEMA
outlet and your charger will allow for an adequate
connection of the 12” (30cm) NEMA cable.
4. Unplug your charger and carefully place it
back in the packaging box while you continue.
3. Carefully lift the charger from the box, plug
the NEMA cable into the outlet, and position the
charger centered on the vertical line. Position the
charger such that the NEMA cable has a gentle
curve and is not stretched. Mark a horizontal line
at the bottom of the charger.
Placement
Make sure the outlet is powered o!
Ensure the NEMA receptacle is correctly installed before connecting your charger. See instructions on Page 9.
≈ 8”
≈ 20 cm
INSTALLATION
NEMA Plug-in Installation
1. Remove the tape from the wall plate to
detach it from the charger.
2. Place the wallplate with the bottom edge
aligned with the horizontal line and the center
holes aligned with the vertical line. Mark the
location of the holes.
Installing the Wallplate
Follow our recommendations
for location and positioning
the charger in page 8
Loading ...
Loading ...
Loading ...