Loading ...
Loading ...
Loading ...
12 INSTALLATION
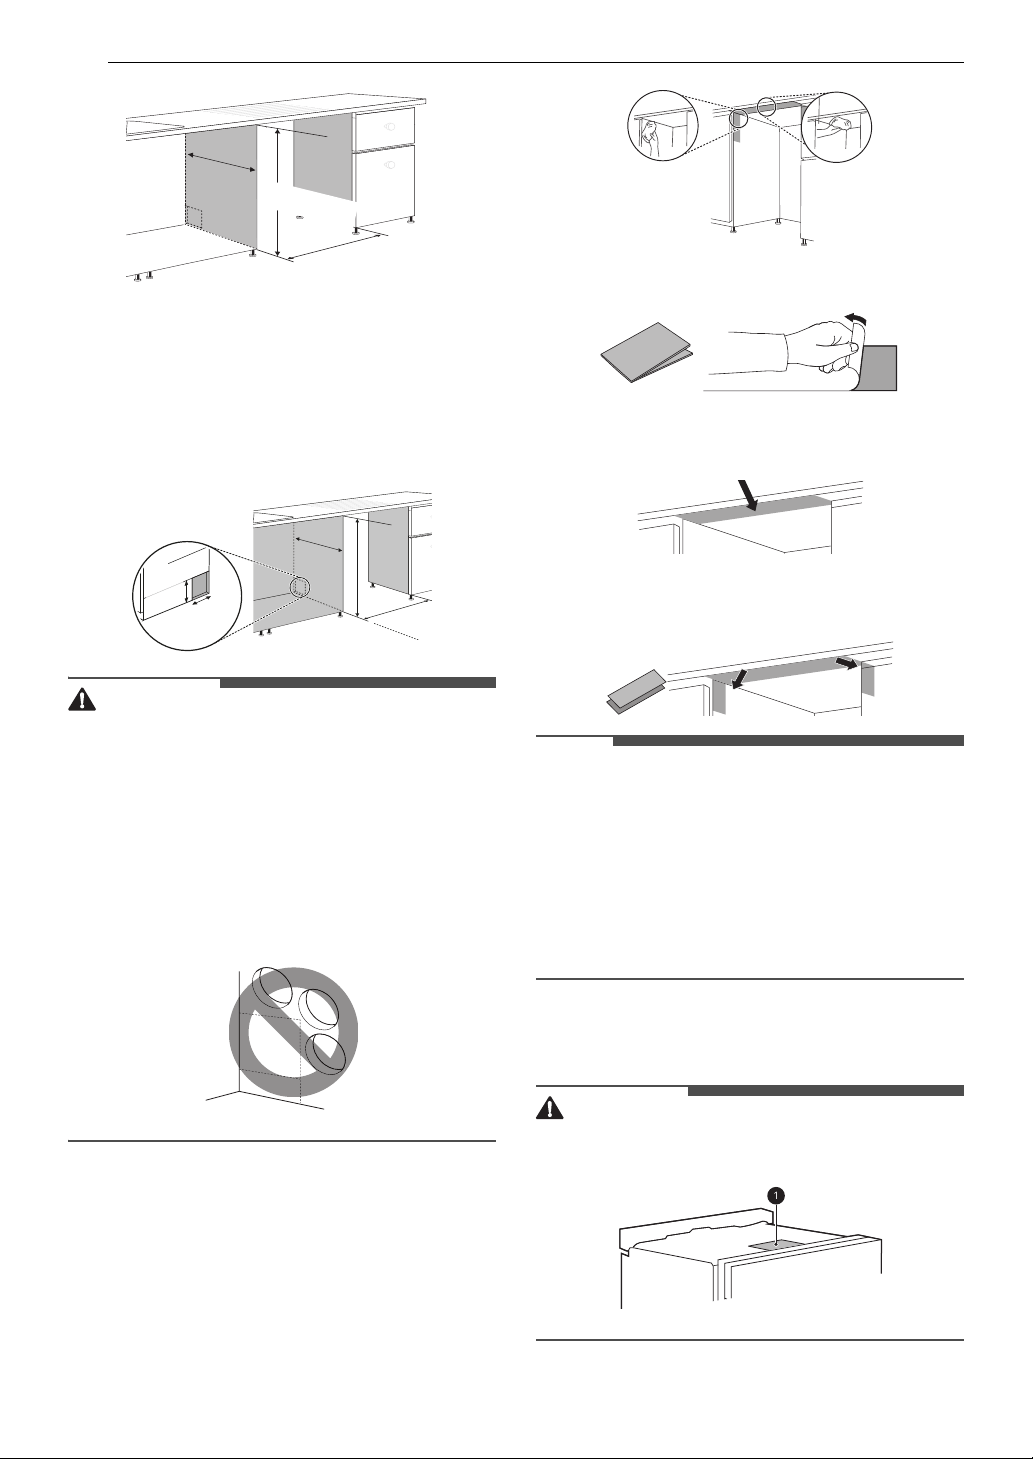
2 To allow for proper clearance of plumbing
and electrical, use the template included with
the literature to determine the clearance on
the side of the cabinet where the cabinet
meets the back wall. Using a 2 1/2” diameter
hole saw, drill a hole in the target area as
shown on the template.
WARNING
• Installation damage is not covered by the
warranty, and leaks caused by improper
installation may result in property damage.
• Do not use existing holes unless they are in the
target area.
• Failure to properly locate the hole for the water
and drain lines may prevent the dishwasher
from installing flush with the cabinets and could
result in kinked, pinched, crushed, stressed or
damaged lines.
Installing Moisture Barrier Tape
Install the moisture barrier tape to the underside
of the countertop to protect the surface from
condensation when the appliance is opened.
1 Clean and dry the area on the underside of
the countertop and the sides of the cabinet
opening where the tape will be applied.
2 Remove the protective film from the tape.
3 Install the tape on the underside of the
countertop.
4 Install the shorter pieces of tape on the sides
of the cabinet opening at the top.
NOTE
• Moisture barrier tape is included in the manual
assembly bag.
• If the countertop is made of granite or
waterproof materials, the moisture barrier tape
is not required.
• Condensation may occur on the underside or
along the front edge of the countertop when the
room temperature is low.
Preparing Dishwasher
WARNING
• Do not remove safety cover a. Removal can
result in fire, electric shock or death.
23 5/8" - 24"
(600 - 610 mm)
Min. 23 5/8"
(600mm)
32 1/4 " - 34 1/2 "
(820 - 876 mm)
Min.235/8"
(600mm)
23 5/8" -24"
(600-
610mm)
Min. 23 5/8"
(600mm)
32 ¼"-34½"
32¼"-3
4½"
(820 - 876 mm)
(820- 876mm)
32 ¼"-34½"
(820 - 876 mm)
4 "
(100 mm)
3 "
(75 mm)
Loading ...
Loading ...
Loading ...