Loading ...
Loading ...
Loading ...
Carefully unpack to fan and remove all of the
packaging materials.
Pick out the fan base and pole parts (10 – 12)
and remove the pole nut from the main pole.
Insert the main pole into the hole on the top of
the fan base and whilst holding it in place, turn
over to access underneath. Lock the main pole
into place by securing with the pole nut.
Tighten securely then turn the assembly the
right way up and sit on a flat surface.
Release fixing screw B and pull the inner pole
out of the main pole. Adjust to a favourable
height, then tighten it with fixing screw B.
Remove fixing screw A from the inner pole and
place the motor housing assembly on top.
Tighten with fixing screw A to secure into
place.
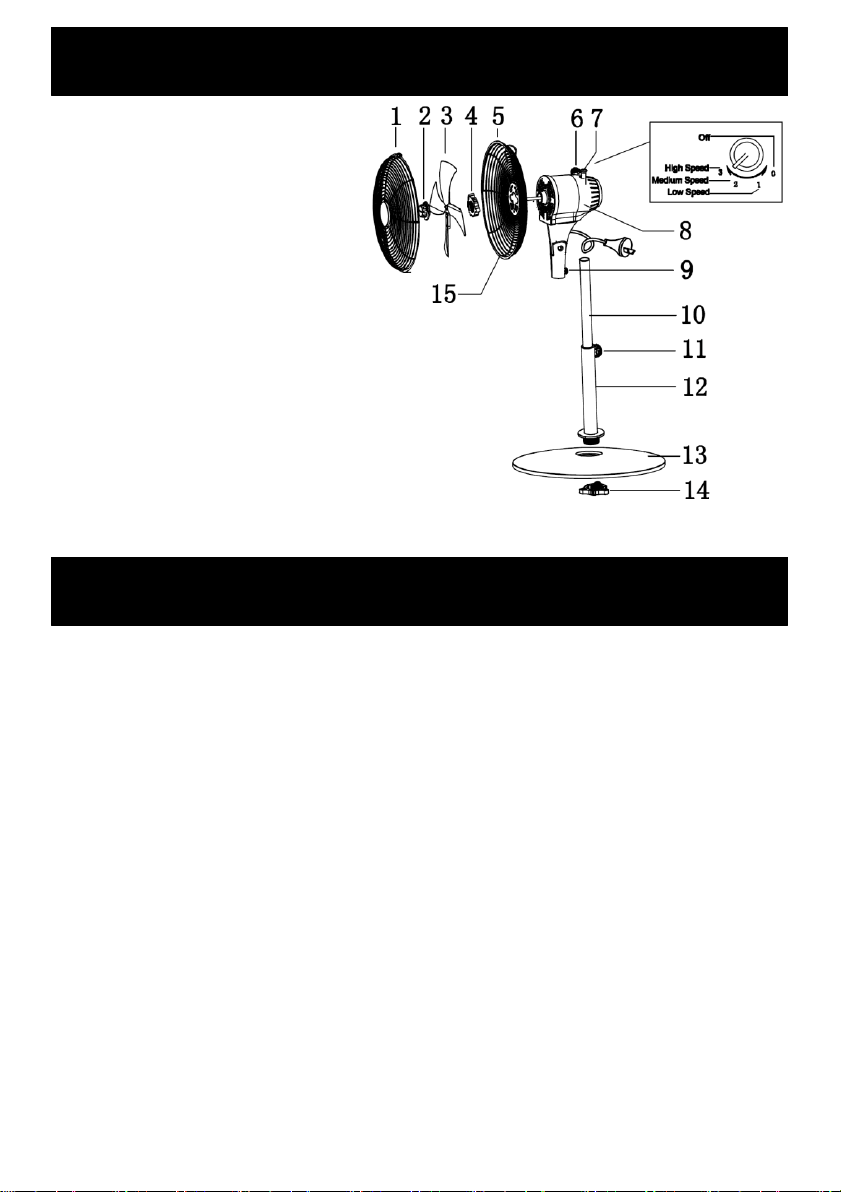
1.Front Grill
2.Blade Cap
3.Fan Blade
4.Guard Knob
5.Rear Grill
6.Control Switch
7.Oscillation Pin
8.Motor Housing
9.Fixing Screw A
10.Inner Pole
11.Fixing Screw B
12.Main Pole
13.Fan Base
14.Pole Nut
15.Safety Screw
Assembly
Components
Remove the blade cap and guard knob from
the shaft of the motor housing.
Secure the rear grill onto the motor shaft,
using the 3 pins to align it, keeping the carry
handle at the top. Screw on the guard knob
to keep the rear grill in place securely.
Push the fan blade onto the motor shaft until
fully seated and secure with the blade cap.
Open the guard clips around the front grill
and put into position, to match up with the
rear grill. The hook on the front grill should
hook over the top of the rear grill. Close all of
the guard clips and tighten the safety screw
at the bottom of the guard.
Loading ...
Loading ...
Loading ...