Loading ...
Loading ...
Loading ...
6727924 Rev. G 4/22 4 of 12www.airkinglimited.com
SECTION 10 (QFAMD only)
Setting the Controller (Energy Savings Mode Only)
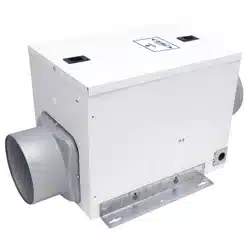
Figure 13
Control Cover Control Panel
If the main access panel has
not already been removed,
remove the screws securing
the access panel cover in
place and open the cover
to gain access. Locate the
control cover inside the unit.
To access the control panel,
pull the control cover down
from the top (Figure 13).
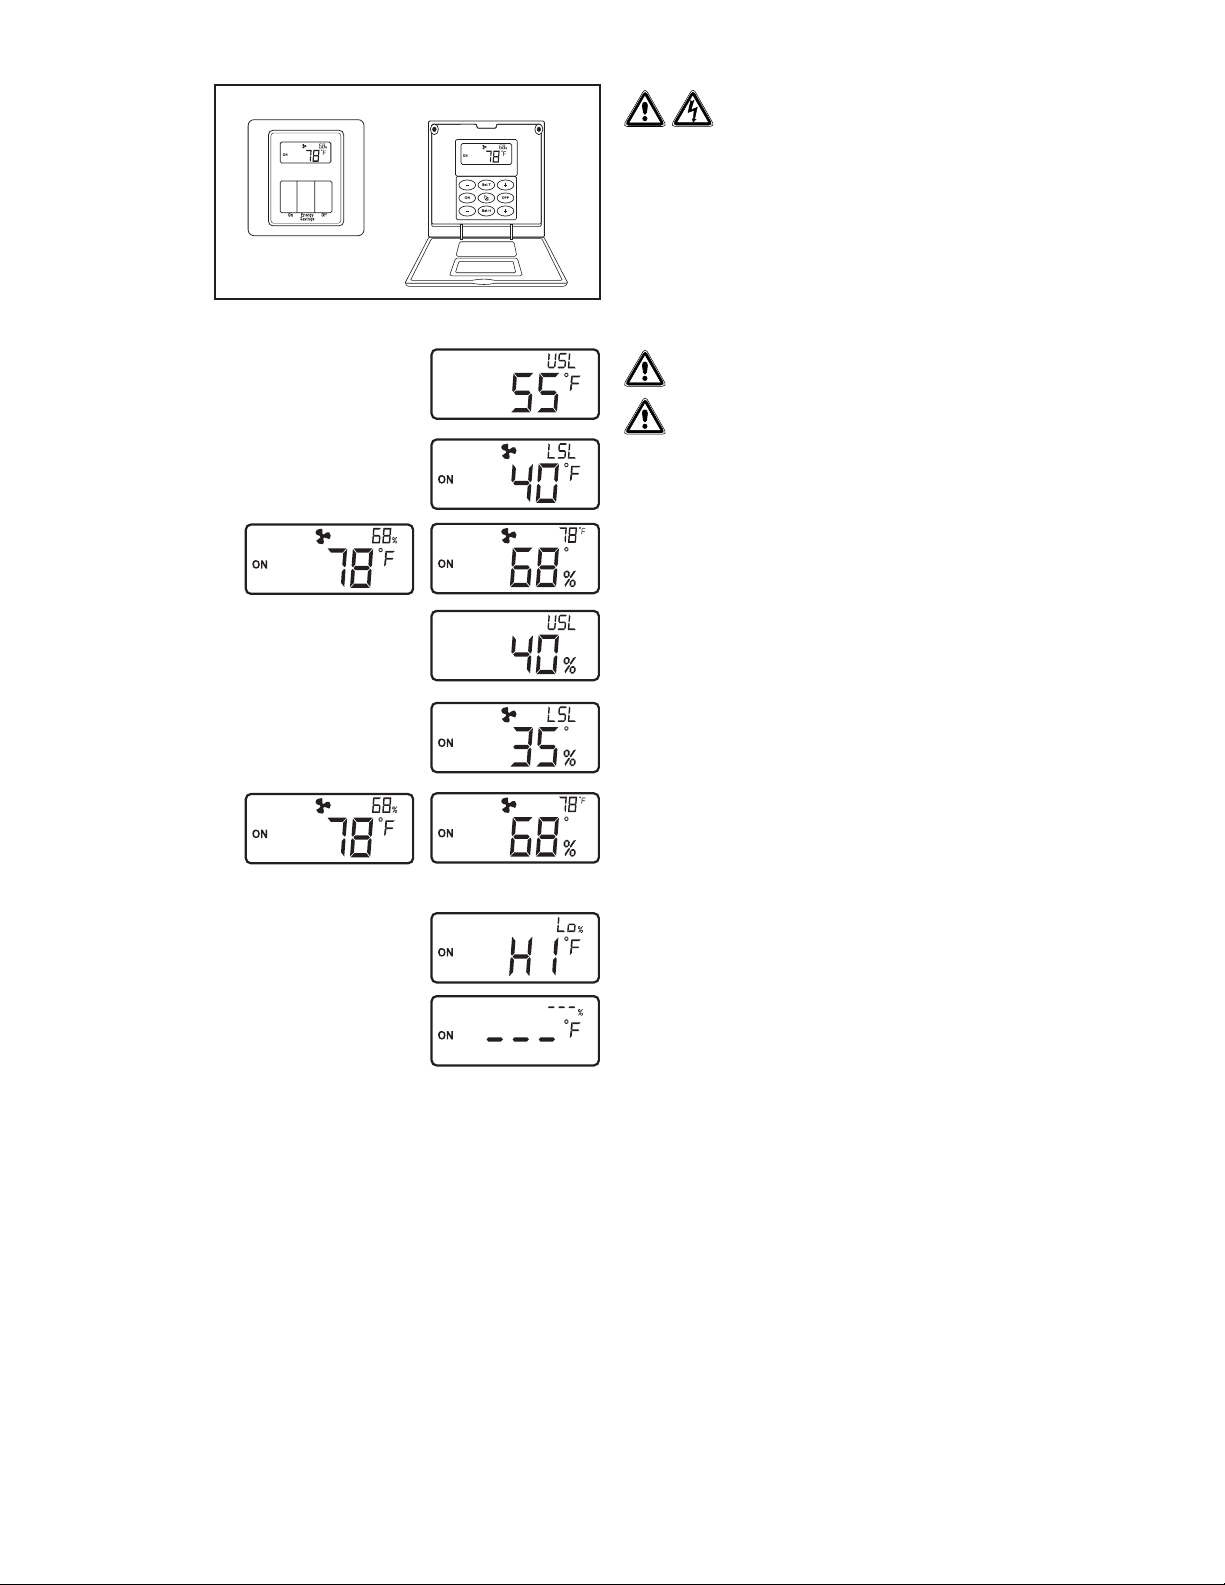
In the normal operation display, press and hold the “SetT” button for 5 seconds to switch the
temperature between Fahrenheit and Celsius units.
After pressing the “SetT” button, the display shows the setting
value of the upper limit temperature. The following figure is
displayed. Press the “-” or “+” buttons on both sides to adjust
the upper limit temperature value.
Pressing the “SetT” button again, the lower limit temperature
setting value is displayed on the display, as shown below.
Press the “-” or “+” buttons on both sides to adjust the
content of the lower limit temperature value.
After the setting is completed,
press the “SetT” button to return
to normal display.
Press the “SetH” button. The display shows the setting value of
the upper limit humidity. The following figure is displayed. Press
the “-” or “+” buttons on both sides to adjust the upper limit
humidity value.
After pressing the “SetH” button again, the lower limit humidity
setting value is displayed on the display, as shown on the right.
Press the “-” or “+” buttons on both sides to adjust the lower
limit humidity value.
After the setting is completed,
press the “SetH” button to return
to normal display. In the normal
operation display, press and hold
the “SetH” button for 5 seconds
to switch the display position of
temperature and humidity.
When the temperature is higher than 150°F (65°C), the display
will show “HI°F”. When the temperature is lower than 15°F
(-10°C), the display will show “Lo°F”; when the humidity is lower
than 10%, the display will show “Lo%”.
When the detection temperature sensor and humidity sensor are
abnormal, “---” is displayed.
To restore the factory setting, make sure the unit is in the “OFF” setting. Hold the Energy
Savings Button for approximately 5 seconds.
• Default temperature setpoint range: 40°F (Low) - 90°F (High).
Low temperature setpoint adjustment range: 32°F - 55°F (0°C - 10°C).
High temperature setpoint adjustment range: 65°F - 95°F (18°C - 35°C)
• Default humidity setpoint range: 30% (Low) - 65% (High).
Low humidity setpoint adjustment range: 10%-50%.
High humidity setpoint adjustment range: 55%-80%
SECTION 11
Use and Care
CAUTION: MAKE SURE POWER IS SWITCHED OFF AT SERVICE
PANEL BEFORE SERVICING THE UNIT.
1. Cleaning the Fan Assembly: Wipe all parts with a dry cloth or gently vacuum the fan.
NEVER IMMERSE ELECTRICAL PARTS IN WATER.
NOTE: If you notice a large amount of insects and debris in the insect filter, this could be a
sign that the intake weather hood (roof cap or wall cap) might be compromised and need
repair or replacing.
2. Optional Air Filter: If an optional air filter is installed, it should be checked every month
and replaced at least once every 3 months. Reverse the instructions in the SECTION 7 of
these instructions to remove filter.
CALIFORNIA RESIDENTS ONLY:
WARNING: THIS PRODUCT CAN EXPOSE YOU TO A CHEMICAL [OR
CHEMICALS] KNOWN TO THE STATE OF CALIFORNIA TO CAUSE CANCER.
WARNING: THIS PRODUCT CAN EXPOSE YOU TO A CHEMICAL [OR CHEMICALS]
KNOWN TO THE STATE OF CALIFORNIA TO CAUSE REPRODUCTIVE TOXICITY.
Loading ...
Loading ...
Loading ...