Loading ...
Loading ...
Loading ...
Front Tine Tiller » Operator's Manual
MAINTENANCE
Maintaining your
YARD
MAX
front
tine
tiller
will ensure long life
to
the machine
and
its components.
PREVENTIVE
MAINTENANCE
Clean the
tiller
underside
of
the tine shield after
each
use.
The
dirt
washes
off
tines easier
if
rinsed
off
immediately instead
of
after
it
dries.
1.
Turn
off
the engine
and
disengage all command levers. The
engine must
be
cool.
2.
Keep the engine's
throttle
lever in its SLOW position and
remove the spark plug
wire
from the spark plug
and
secure.
3.
Inspect the general condition
of
the
front
tine tiller. Check
for
loose screws, misalignment
or
binding
of
moving parts,
cracked
or
broken parts,
and
any
other
condition
that
may
affect its safe operation.
4.
Use
a soft brush, vacuum
or
compressed air
to
remove all
contaminants from the machine. Then
use
high quality light oil
to
lubricate all moving parts.
5.
Replace the spark plug wire.
\.
Never
use
a
"pressure
washer" to
clean
your unit.
Water
can
penetrate tight
areas
of
the
machine
and
its
transmission
case
and
cause
damage
to
spindles,
gears,
bearings,
or the
engine.
The
use
of
pressure
washers will result
in
shortened life and reduce
serviceability.
LUBRICATION
Remove the tine assemblies
to
lubricate the tine shafts
at
least
once every
season.
The worm gear housing
is
pre-lubricated
and
sealed at the factory.
At
the beginning
of
each
season,
make
sure there
is
enough lubricant inside the worm gear housing.
Use
portable tool lithium
#0
grease such
as
Lubricate 6300AA ,
Lubricate GR-132,
or
Multifak,
e.g.
EP-0.
1.
Remove right side tines
and
place the
tiller
on level surface.
Allow
the transmission
to
cool before filling
with
grease.
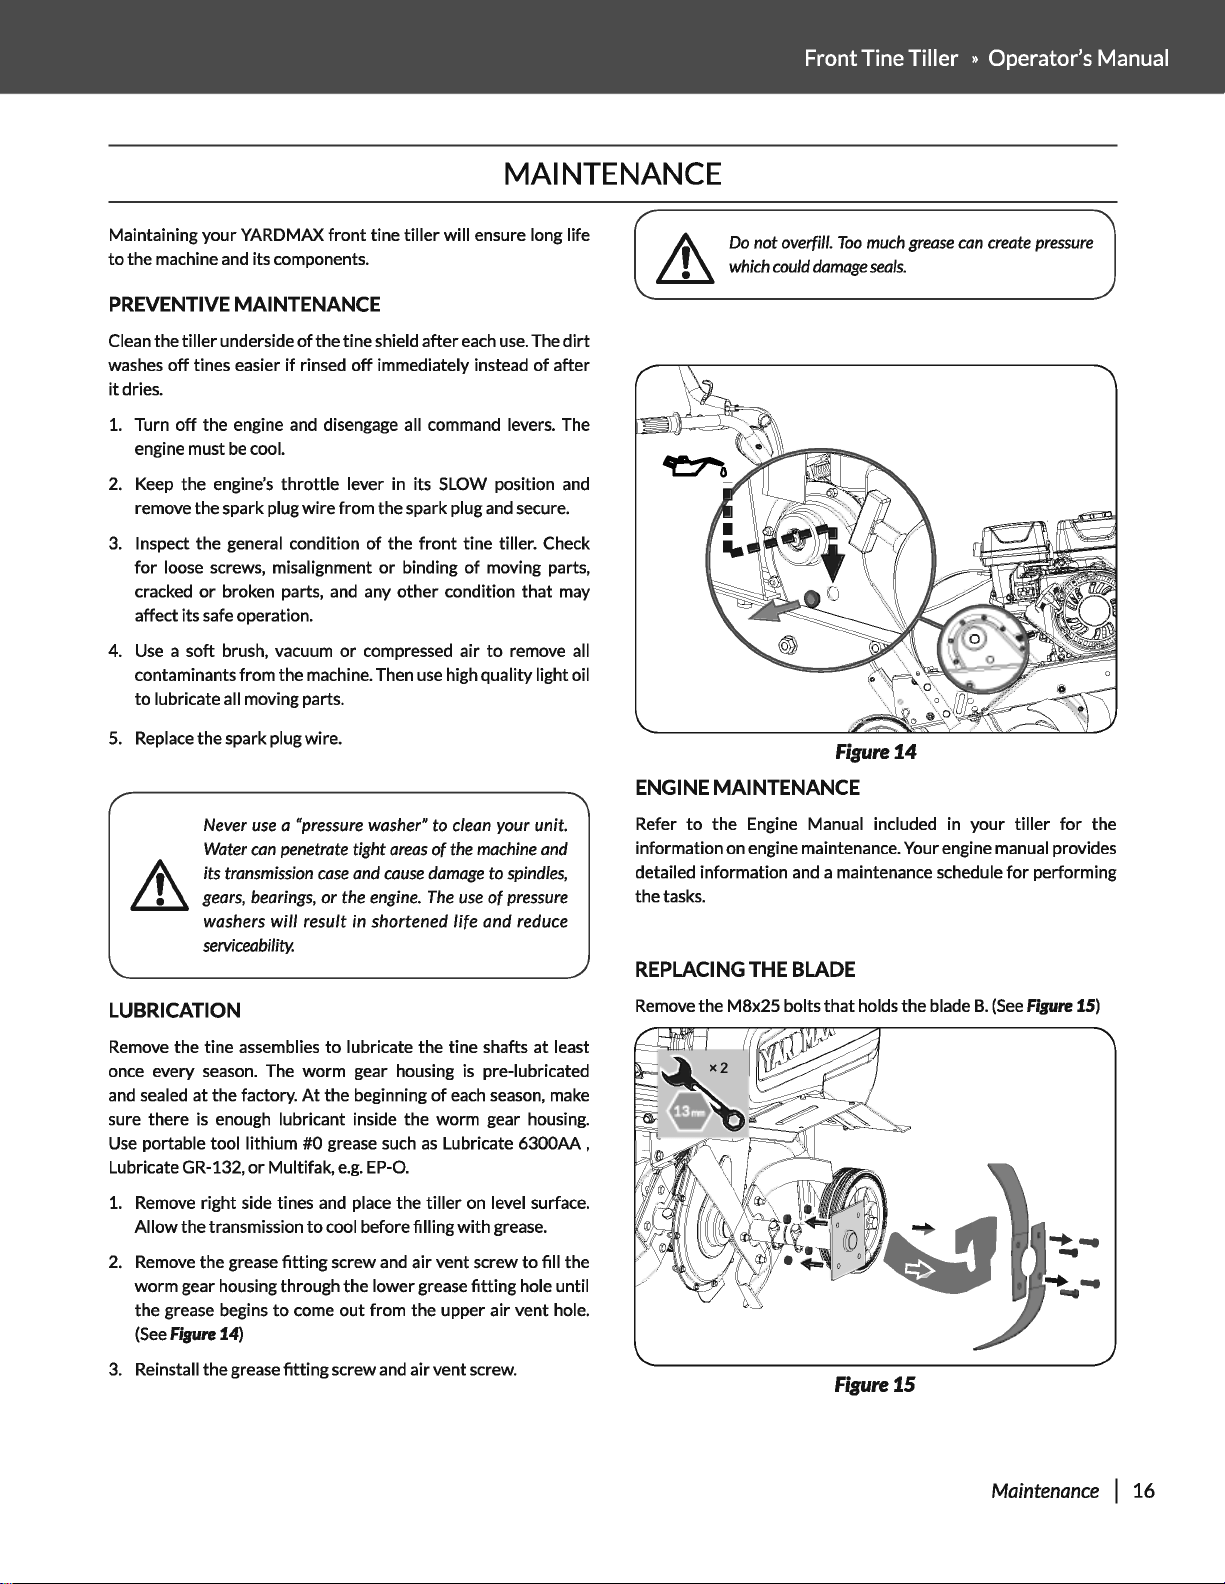
2.
Remove the grease
fitting
screw
and
air vent screw
to
fill the
worm gear housing through the lower grease fitting hole until
the grease begins
to
come
out
from the upper air vent hole.
(See
Fipre
14)
3.
Reinstall the grease fitting screw
and
air vent screw.
Do
not overfill.
Too
much
grease
can
create
pressure
which
could
damage
seals.
Figure14
ENGINE
MAINTENANCE
Refer
to
the Engine Manual included in your
tiller
for
the
information on engine maintenance. Your engine manual provides
detailed information
and
a maintenance schedule
for
performing
the tasks.
REPLACING THE BLADE
Remove the M8x25 bolts
that
holds the blade
B.
(See
Fipre
15)
Figure
15
Maintenance
I 16
Loading ...
Loading ...
Loading ...