Loading ...
Loading ...
Loading ...
The improved 2-step advanced water ltration system reduces impurities like
chlorine and calcium to make coffee taste better.
1. Soak the advanced water ltration cartridge in cold water for 5 minutes.
2. Rinse the soaked cartridge for about 1 minute.
3. Open bottom hatch where the cartridge goes and insert a new Advanced
Water Filtration cartridge. (Figure 1)
4. Close the hatch and place system in designated slot in water reservoir. Press
rmly in place. (Figure 2)
5. After 30 days or 30 uses (whichever comes rst), replace the Advanced
Water Filtration cartridge.
NOTE: When cleaning the coffeemaker, be sure to remove the Advanced Water
Filtration holder and cartridge.
GETTING STARTED CLEAN BEFORE FIRST USE
BREWING COFFEE
SETTING THE CLOCK
ADVANCED WATER FILTRATION SYSTEM
(Not included with all models)
Unpack your Coffeemaker
Unpack your coffeemaker and remove plastic bags, cartons and any tape on
the unit.
WARNING: KEEP PLASTIC BAGS AWAY FROM CHILDREN.
Plug in brewer into an outlet. Press the HR
and MIN buttons to set the clock. 5 seconds
of inactivity will set the clock at the time
selected.
1. Wash the Parts - Wash the Carafe and brew basket in a mixture of mild
detergent and water. Rinse each thoroughly.
2. Fill Water Reservoir - Fill the Water Reservoir with fresh water to the MAX
ll line.
3. Place Carafe - Set the Carafe on the Warming Plate.
4. Run a Cleansing Brew - Leave the Brew Basket empty. Press the BREW
NOW button once so that the Brew Now Indicator is illuminated to begin
the Cleansing Brew cycle. There will be an audible signal when the brewing
cycle is complete. Once the unit stops dripping, pour the hot water in the
carafe into the sink.
NOTE: Brew Basket and Carafe are top rack dishwasher safe.
Please note that when using extra
ne and decaf you may notice
some grounds in the carafe due to
the ltering process. If you nd this
bothersome, please increase the
coarseness of the grounds.
1. Fill Water Reservoir - Fill the
Water Reservoir with fresh water
to the desired amount. Use the
Water Window to check how
much water is in the reservoir.
2. Line the Brew Basket - Place
an 8-12 Cup Paper Filter or a
Reusable Coffee Filter (for best
results) inside the Brew Basket.
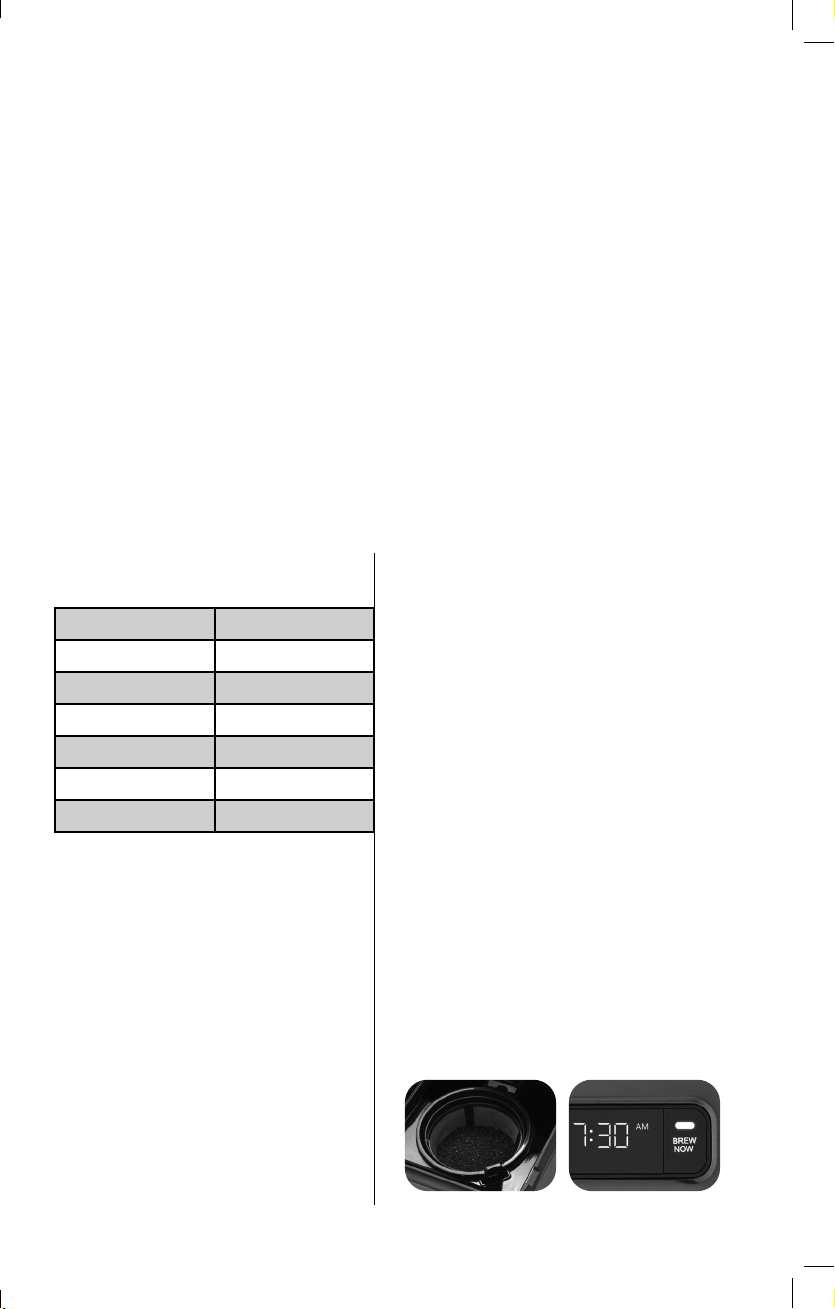
3. Add Coffee - Scoop the desired
amount of coffee into the Brew
Basket. (Figure 3) Refer to the
Coffee Measuring Chart for
guidance based on the number
of cups being brewed.
4. Place Carafe - Place the Carafe
on the warming plate.
5. Begin Brewing - Press the BREW
NOW button of the unit once
so that the Brew Now Indicator
is illuminated. (Figure 4). There
will be an audible signal when
the brewing cycle is complete
and the Brew Now Indicator
will remain illuminated for the
duration of the keep warm time.
NOTE: For a fresh cup, remember to
clean the Brew Basket between
each use.
Suggested Coffee
Measurement Chart:
Water to Brew Ground Coffee
14 cups = 70 oz. 11.5 tbsp.
12 cups = 60 oz. 9 tbsp.
10 cups = 50 oz. 7.5 tbsp.
8 cups = 40 oz. 6 tbsp.
6 cups = 30 oz. 4.5 tbsp.
4 cups = 20 oz. 3 tbsp.
(Figure 3)
(Figure 1) (Figure 2)
(Figure 4)
8 9
Loading ...
Loading ...
Loading ...