Loading ...
Loading ...
3
Installation Instructions
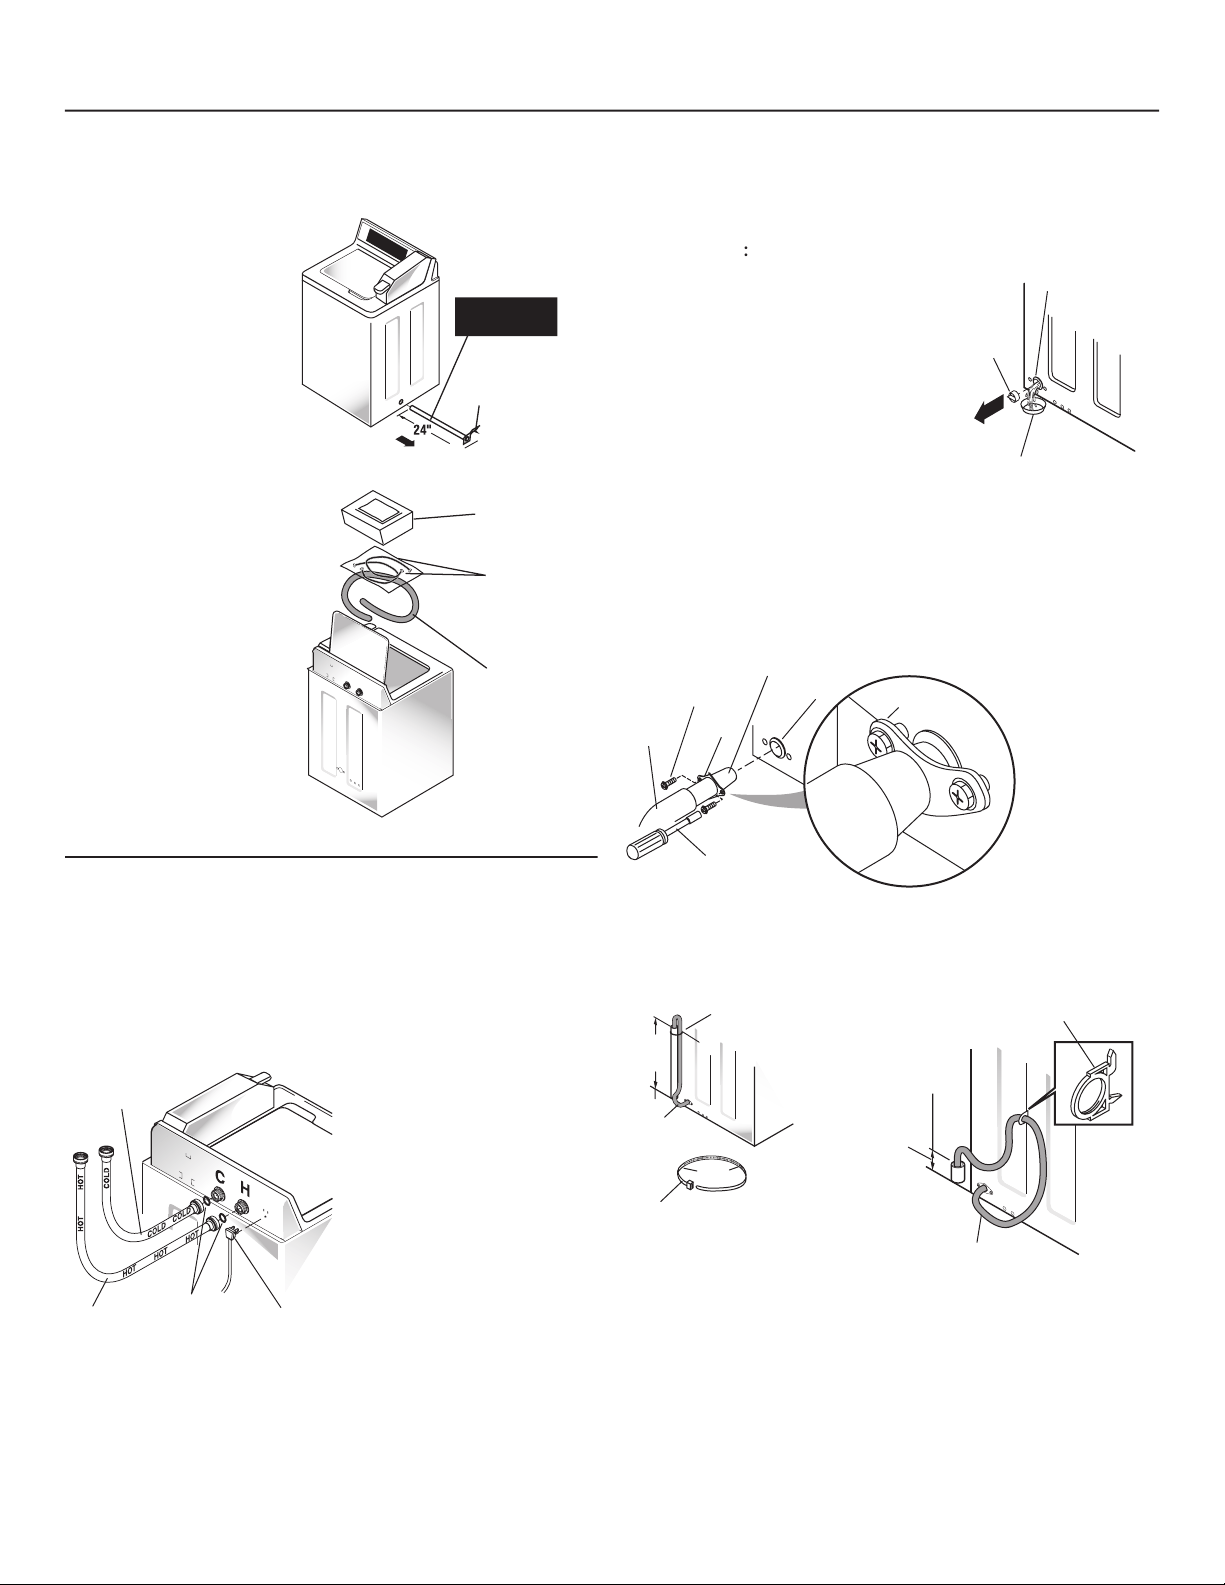
STEP 1
PREPARE WASHER FOR
INSTALLATION
• Grasp shipping rod on
lower right side (it has a
tag or strap), and pull
rod straight out and
discard.
• Remove inner pack and
installation accessories
from under lid. Drain
hose is in washer
basket.
• Move washer to
installation location for
remaining hose and
electrical preparation.
STEP 2
ATTACH FILL HOSES TO WASHER
Insert rubber washers into both hands of each fill hose. Attach
fill hose marked HOT to hot washer inlet valve. Attach fill hose
marked COLD to cold washer inlet valve. Couplings should be
hand tightened plus 1/2 turn with pliers.
Move Washer Close
to Final Position
Shipping
Rod
Remove
and Discard
Tag or
Strap
Inner
Pack
Drain
Hose
Parts and
Water
Hoses (2)
Rubber
Washers
Cold Water
Hose
Hot
Water
Hose
Hand Tighten Plus
1/2 Turn with Pliers
Electrical Cord
STEP 3
ATTACH DRAIN HOSE TO WASHER
• Make certain all installation items have been removed from
the washer basket.
•
IMPORTANT
:
If the red plug is
present in grommet, remove
red plug from drain hose port.
NOTE:
Some water may be
present, this is normal.
• Locate plastic drain hose
adapter. Place hose clamp over
drain hose end. Insert drain
hose adapter into bent end of
drain hose. Position clamp to
secure hose adapter to drain
hose. Push plastic hose clamp over hose adapter into
grooved slot.
NOTE:
This requires some force to install, and has a positive
click when forced into port. A positive click will ensure that
the proper amount of force has been applied.
• Push plastic conical end of drain hose adapter into washer
drain hose port. Insert two screws found in installation pack,
and drive screws to mount drain hose washer.
NOTE:
If drain hose facility does not meet the 30" minimum
standpipe height requirement, thread drain hose through
supplied antisiphon clip and mount to cabinet back as shown.
Mount antisiphon clip by inserting top clip into top mounting
hole and snap second clip into position.
Catch Container
Plug
Grommet
Nut Driver
Clamp
Screws (2)
Drain
Hose
Installed
Clamp
Hose
Adapter
Drain
Hose
Port
30"
Min.
Cable Tie
Drain
Hose
Cable Tie
RIBS ON
THE INSIDE
Drain
Hose
Less
Than
30"
Antisiphon Clip
Loading ...
Loading ...
Loading ...