
Loading ...
Loading ...
Loading ...
9
www.jbl.com
English
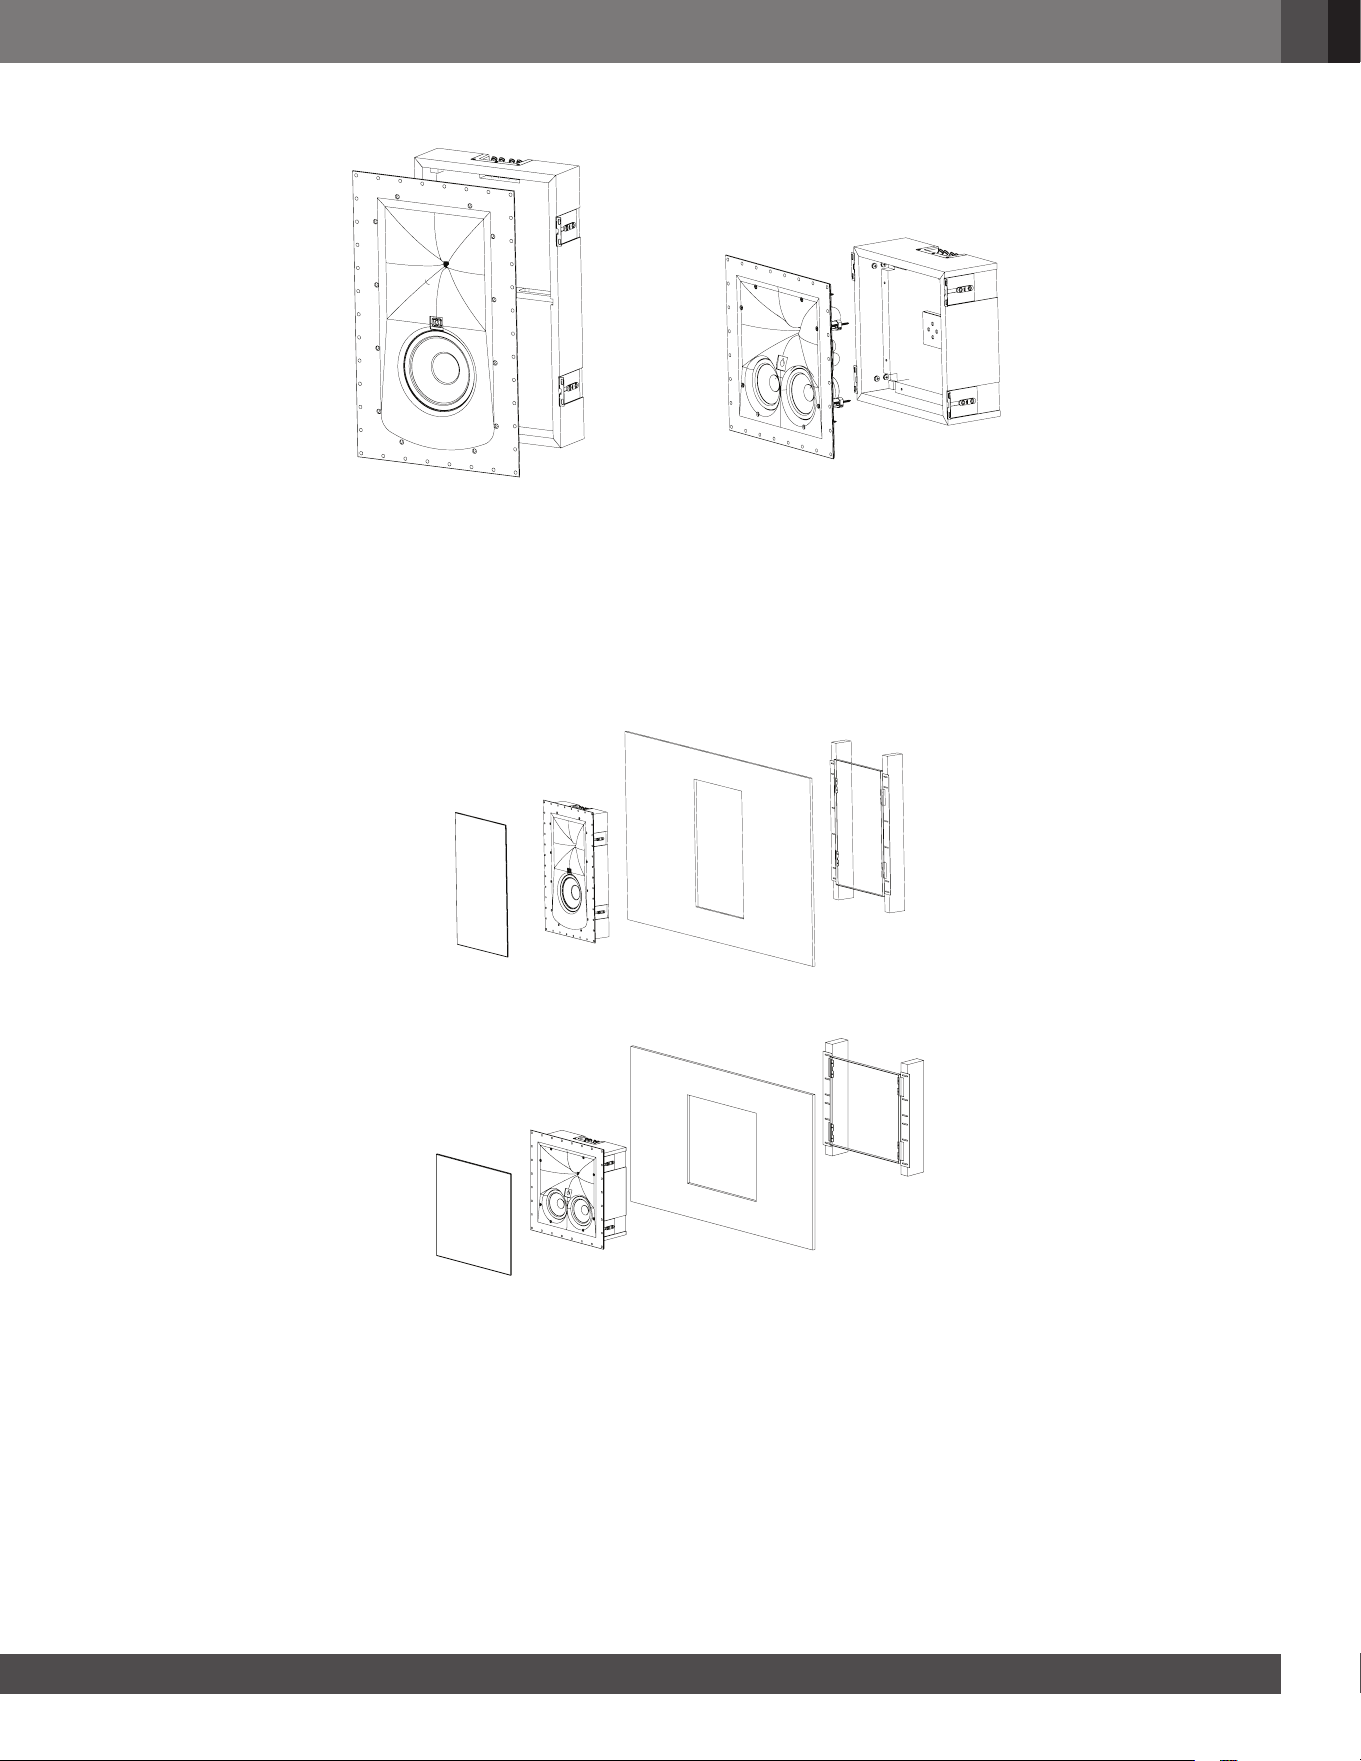
SCL-4 Flush-Mount Loudspeaker
Figure 13
or
SCL-3 Flush-Mount Loudspeaker
Figure 14
4. Start with tightening the center mounting screw. This can be used to hold the baffle assembly into the back box.
5. Secure perimeter baffle mounting screws and tighten (See WARNINGS concerning over tightening screws!).
6. Insert rubber logo base into designated area on top of the center mounting screw.
7. Remove JBL Logo adhesive back and insert Logo into rubber base with proper orientation.
8. Insert zero-bezel metal grill onto baffle. Magnets on the baffle will secure grill. Be sure the grille sits down to the
wall all the way around; a grille sitting up on the baffle could fall off during operation (See Figure 15 and 16).
SCL-4 Flush-Mount Loudspeaker
Figure 15
SCL-3 Flush-Mount Loudspeaker
Figure 16
BI-WIRING AND BI-AMPING
The bi-wire or bi-amp option is easy to set.
1. Make the choice to bi-amp or bi-wire, and cut two pair of wires for each bi-wired speaker.
2. Mark both ends of the wire pairs being used for the purpose, and then run the two sets of wire to the mounting
position.
3. Connect one + and - pair to the “HF” input, the other to the “LF” input.
4. Before installing the speaker that will be bi-wired or bi-amplified, remove the two blue jumpers (Bi-amp Jumper Hot
and Bi-amp Jumper Ground). Do this by squeezing the connectors for the jumpers just below where the wire is
crimped to the connector. This should release the connector lock. If this doesn’t work, slide the plastic boot back
onto the wire and depress the lever for the lock with a ballpoint pen or small tool while pulling gently on the wire.
5. Proceed to install the speaker normally following the instructions above.
Loading ...
Loading ...