Loading ...
Loading ...
Loading ...

8
installing. If the hood does not operate, check the circuit
breaker or house fuse. If the hood is still not working,
disconnect power supply and check the continuity of all wire
connections.
8. If hood is operating normally, connect three wires (black, white
and green) to house wires and cap with wire connectors.
9. Store wires in the wiring box.
Duct Work Installation
10. Determine and make all necessary cuts in the wall or ceiling
for the ductwork. Note: Install the ductwork before installing
the hood.
11. Use steel 8” round pipe to connect the ductwork above to the
exhaust of the hood. The hood is preinstalled with a
rectangular to 8” round transition (Refer to Figure 4). Use duct
tape to make all joints secure and air tight.
12. Please refer to local codes for the usage of a damper (not
included).
Hood Installation
NOTE: USE HAND TOOLS ONLY. DO NOT OVER TIGHTEN
SCREWS. IT MAY CAUSE DAMAGE TO THE HOOD.
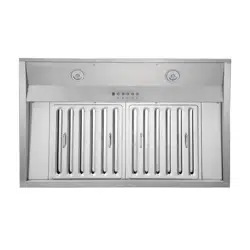
13. Remove the light panel by removing screws located at the
bottom of the hood (8 screws for 36” & 42” and 11 screws for
48”) Refer to Figure 5 as reference. Carefully remove the light
support panel.
14. Position the hood inside the custom wood frame, and secure
the hood to the front and rear stud support ( Refer to Figure 2)
by using the front and rear mounting holes (Screws included).
15. For a more secure installation, use the mounting holes located
on the side of the hood
16. Make sure hood is secure before releasing.
17. Re-install the light support panel. (Do not over tighten screws.)
CAUTION: MAKE SURE HOOD IS SECURE BEFORE
RELEASING
Final Assembly
18. Install the oil tunnel into recess support near rear of hood.
Refer to Figure 6.
19. Install baffle filters. Angle baffle filter toward back of hood
①. Push baffle filter up until almost level ②. Slide forward
into recess behind the front of hood ③. Lower baffle filter
④. Slide back until it fits into resting position ⑤. Refer to
Figure 7.
Figure 4
Figure 5
Figure 6
Figure 7
*Note: Sample image only. May not be actual model.
Loading ...
Loading ...
Loading ...