Loading ...
Loading ...
Loading ...
5
L30WD/L42CC Use/Install Manual
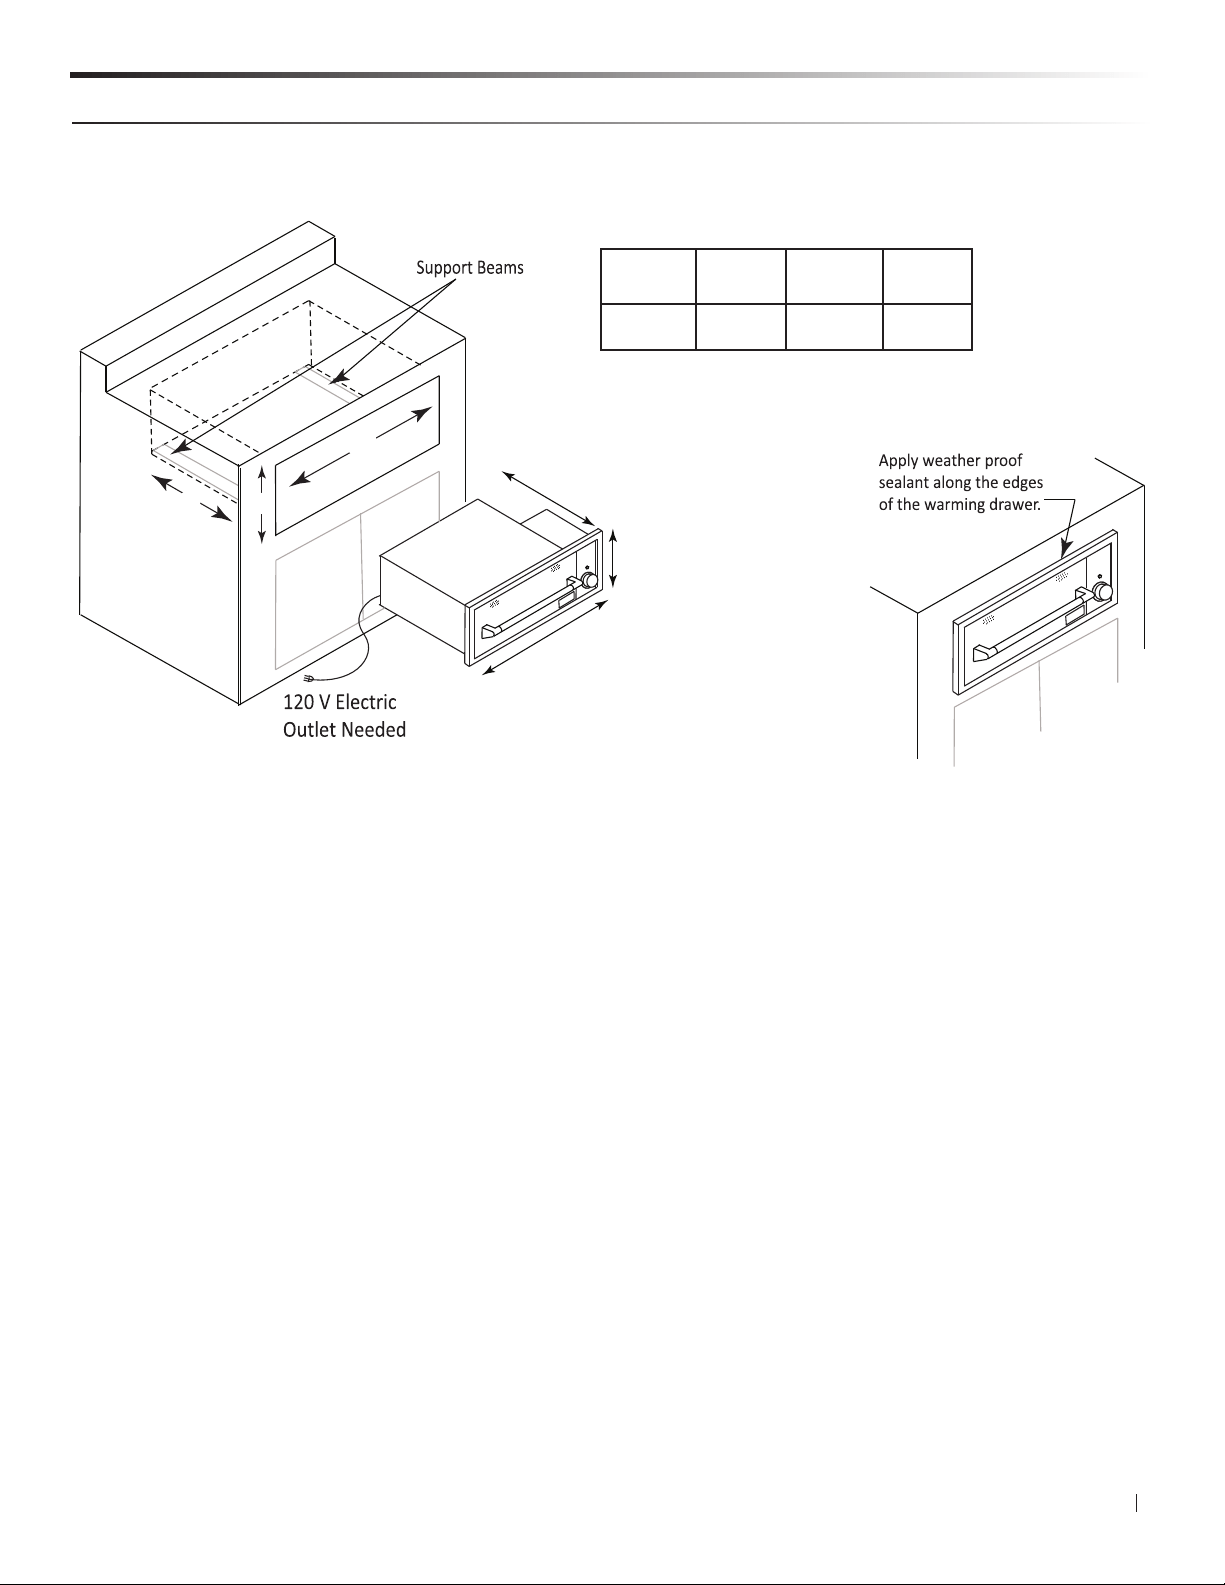
Installing the Warming Drawer - L30WD
W
D
H
Model W
(Width)
H
(Height
D
(Depth)
L30WD 28-1/2” 10” 20-1/2”
20”
11-1/2”
Cutout Dimensions
Typical Island Installation L30WD-1
1. Provide a 10” x 28 ½” cutout to the front of the island.
2. Provide support beams using metal studs.
3. Pull the drawer out of the drawer casing to gain access on the mounting holder at the front of the casing.
4. Insert the drawer casing into the island opening.
5. Secure the drawer casing with screws at the inside front top and bottom, using the pre-punched mounting holes.
6. Re-assemble the drawer section into the drawer casing.
7. Apply weather proof sealant along the edges of the warmer.
8. Plug-in the warmer to a weather proof, and properly grounded, electrical outlet.
9. If installing the unit directly under a grill, please allow 2-3/16" between the grill cutout bottom and the top of the
warming drawer cutout
• Be sure that the warming drawer is properly grounded and installed by a qualifi ed technician. The electrical cord has a
3 prong plug. Do not cut any of the prongs.
• Make sure that the island is free of cracks that would allow water or other liquids to get into the electrical controls.
• Keep the warming drawer away from water sprinklers.
• When not in use, cover the island to protect from rain and harsh weather.
• If installing the unit directly under a grill, please allow 2-3/16” between the grill cutout bottom and the top of the
warming drawer cutout.
IMPORTANT
30”
Loading ...
Loading ...
Loading ...