Loading ...
Loading ...
Loading ...
z_ WARNING: This hedge trimmer should NEVER be connected to the
power source when you are assembling parts, making adjustments, oiling
blades, cleaning or when it is not in use. Disconnecting the trimmer will
prevent accidental starting that can cause serious personal injury.
i _ CAUTION: ALWAYS make sure you support the weight of the hedge
trimmer by setting it down on a flat, dry surface before you assemble parts,
adjust handles or perform maintenance on the hedge trimmer.
i z_ WARNING: To avoid injury, ALWAYS turn off and disconnect the trimmer
from the power outlet BEFORE installing parts, cleaning the trimmer or making
any adjustments.
This product requires no assembly
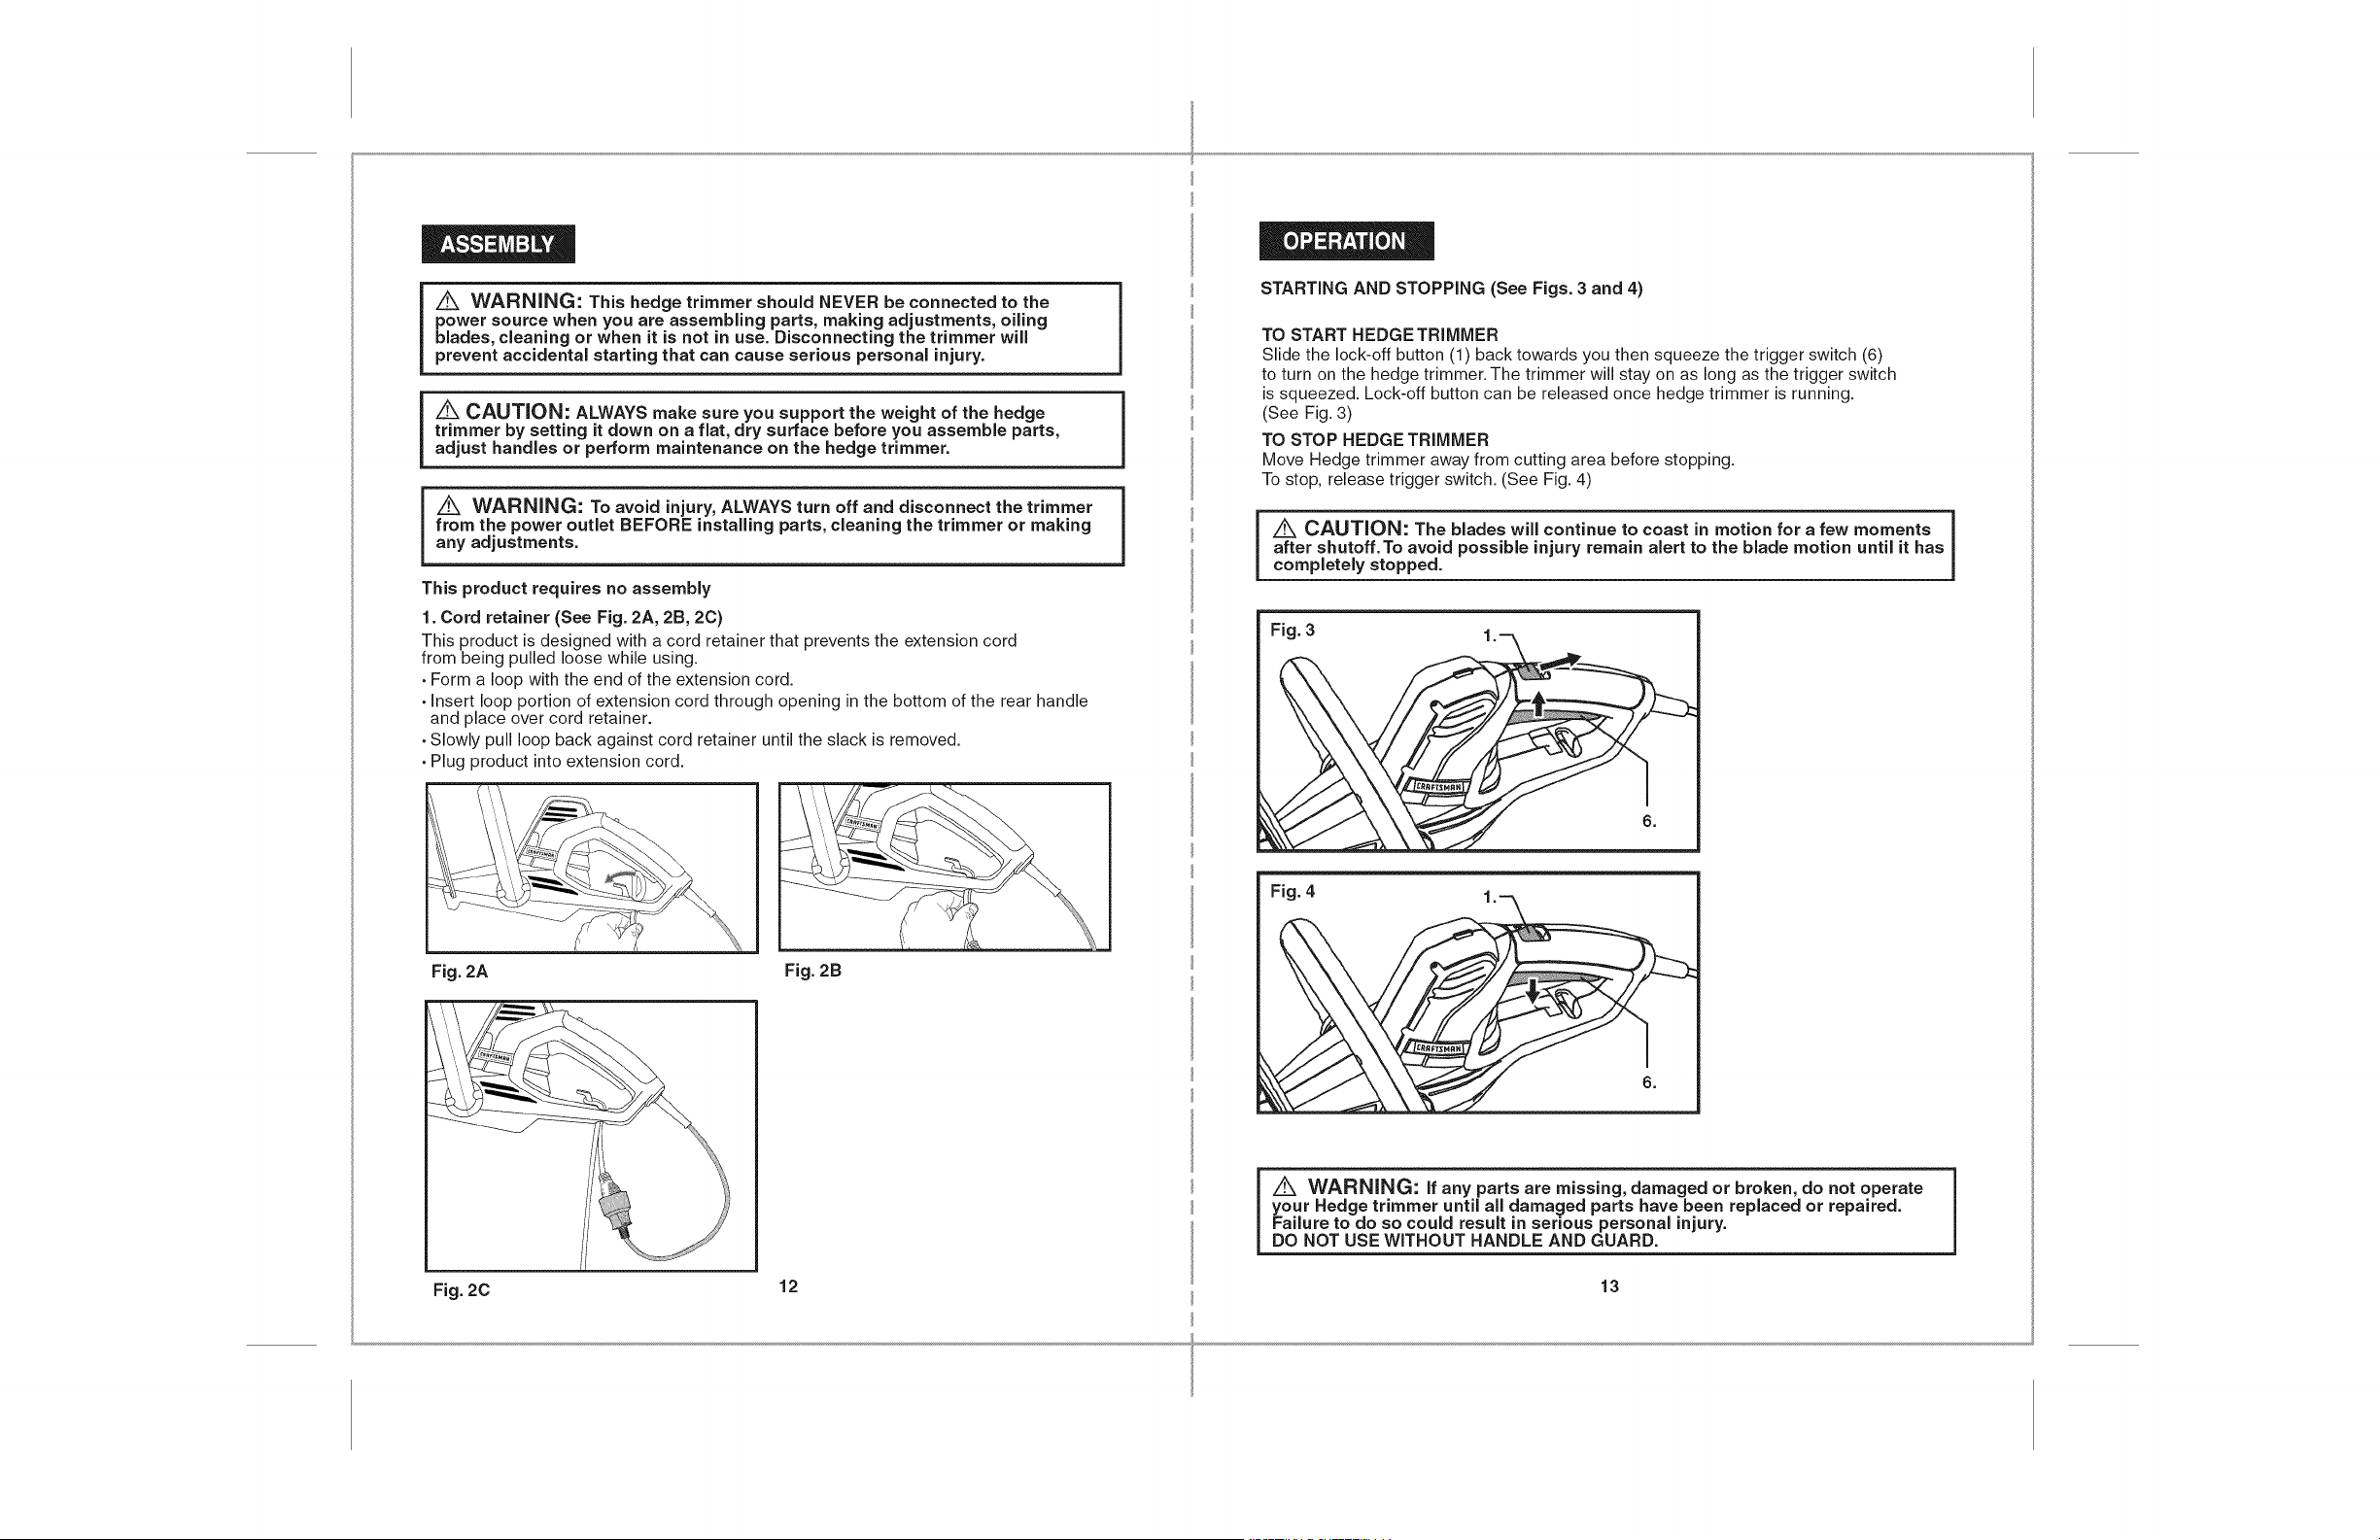
1. Cord retainer (See Fig. 2A, 2B, 2C)
This product is designed with a cord retainer that prevents the extension cord
from being pulled loose while using.
. Form a loop with the end of the extension cord.
. Insert loop portion of extension cord through opening in the bottom of the rear handle
and place over cord retainer.
. Slowly pull loop back against cord retainer until the slack is removed.
. Plug product into extension cord.
Fig. 2A Fig. 2B
STARTING AND STOPPING (See Figs. 3 and 4)
TO START HEDGE TRJlVIMER
Slide the lock-off button (1) back towards you then squeeze the trigger switch (6)
to turn on the hedge trimmer.The trimmer will stay on as long as the trigger switch
is squeezed. Lock-off button can be released once hedge trimmer is running.
(See Fig. 3)
TO STOP HEDGE TRIMMER
Move Hedge trimmer away from cutting area before stopping.
To stop, release trigger switch. (See Fig. 4)
[z_ CAUTION: The blades will continue to coast in motion for a few moments |
i
after shutoff.To avoid possible injury remain alert to the blade motion until it has
1
completely stopped.
Fig. 3
Fig. 4
A WARNING: If any parts are missing, damaged or broken, do not operate
your Hedge trimmer until aJl damaged parts have been replaced or repaired.
Failure to do so could result in serious personal injury.
DO NOT USE WITHOUT HANDLE AND GUARD.
Fig. 2C 12 13
Loading ...
Loading ...
Loading ...