
Loading ...
Loading ...
Loading ...
22
SERVICE AND MAINTENANCE
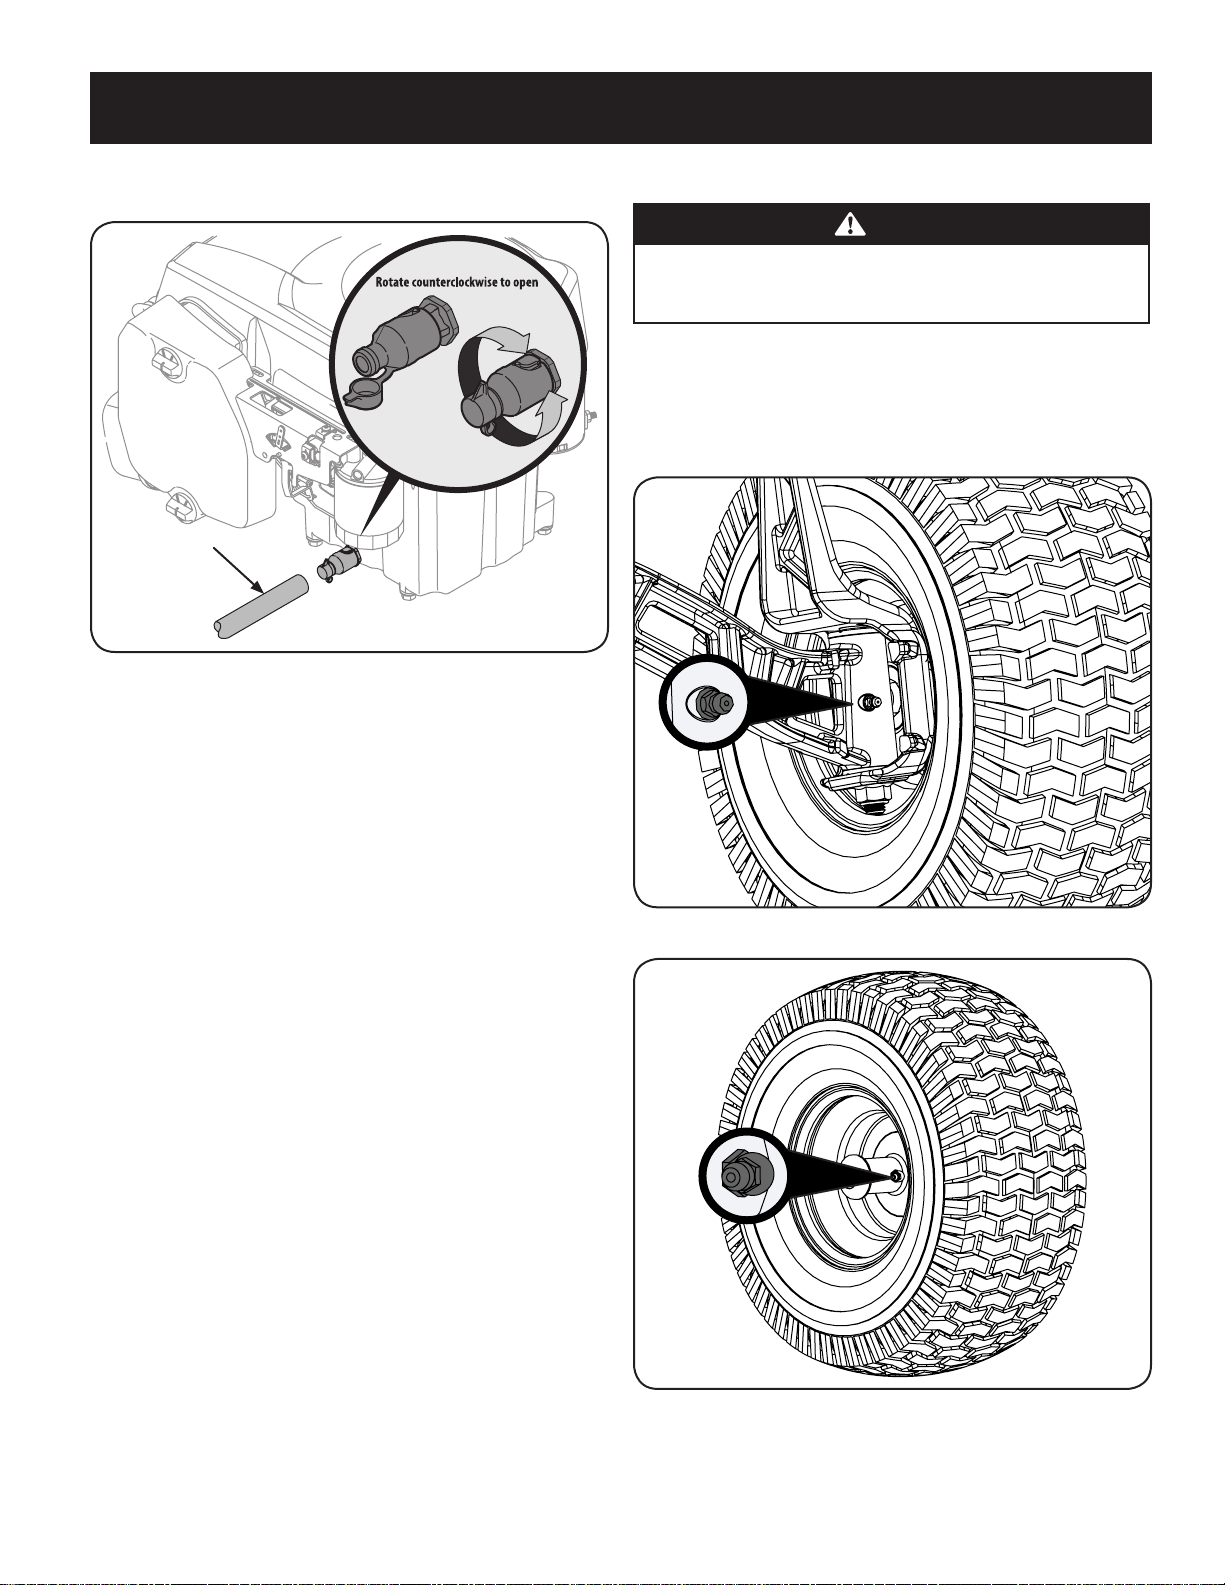
4. Pop open the protective cap on the end of the oil drain valve to expose the
drain port.
OPENED
CLOSED
Clear Oil Drain Tube
Figure 19
5. Remove the oil fill cap/dipstick from the oil fill tube.
6. Push the clear oil drain tube (packed with this manual) onto the oil drain
port. Route the opposite end of the tube into an appropriate oil collection
container with at least a 2.5 quart capacity to collect the used oil.
7. The engine is equipped with a twist-and-pull drain port. Turn the oil drain
valve ⁄-turn counter-clockwise, then pull outward to begin draining oil.
After the oil has finished draining, push the end of the oil drain valve back in
and turn ⁄-turn clockwise to secure it back in place. Re-cap the end of the
oil drain valve to keep debris from entering the drain port.
7. Replace the oil filter, and refill the engine with new oil as instructed in the
engine operator’s manual.
NOTE: Place an absorbent towel beneath the oil filter to keep oil off the clutch.
8. To refill the oil, re-install the plug at the end of the tube and refer to the
engine operator’s manual for refilling instructions, oil type and amount.
NOTE : Maintenance, repair, or replacement of the emission control devices
and systems which are being done at owner’s expense may be performed
by any engine repair establishment or individual. Warranty repairs must be
performed by an authorized dealer.
Hydrostatic Transmission
The hydrostatic transmission is sealed at the factory and is maintenance-free. The
fluid level cannot be checked and the fluid cannot be changed.
Hydrostatic Neutral Adjustment
If the tractor creeps forward or rearward when neither the forward nor reverse
pedal is depressed, contact your authorized dealer to have the neutral setting
properly adjusted.
Cleaning the Tractor
Any fuel or oil spilled on the machine should be wiped off promptly. Do NOT allow
debris to accumulate around the cooling fins of the engine, the transmission’s
cooling fan or on any other part of the machine.
Lubrication
WARNING
Before lubricating, repairing, or inspecting, always disengage the PTO,
set the parking brake, stop the engine and remove the key to prevent
unintended starting.
Front Wheels
Each of the front wheel axles and rims is equipped with a grease fitting. See Figure
20 for the location of the grease fitting on the axles and Figure 21 for the location of
the grease fitting on the rims. Lubricate with a No. 2 multi-purpose grease applied
with a grease gun after every 25 hours of tractor operation.
Figure 20
Figure 21
Loading ...
Loading ...
Loading ...