_e.com
©
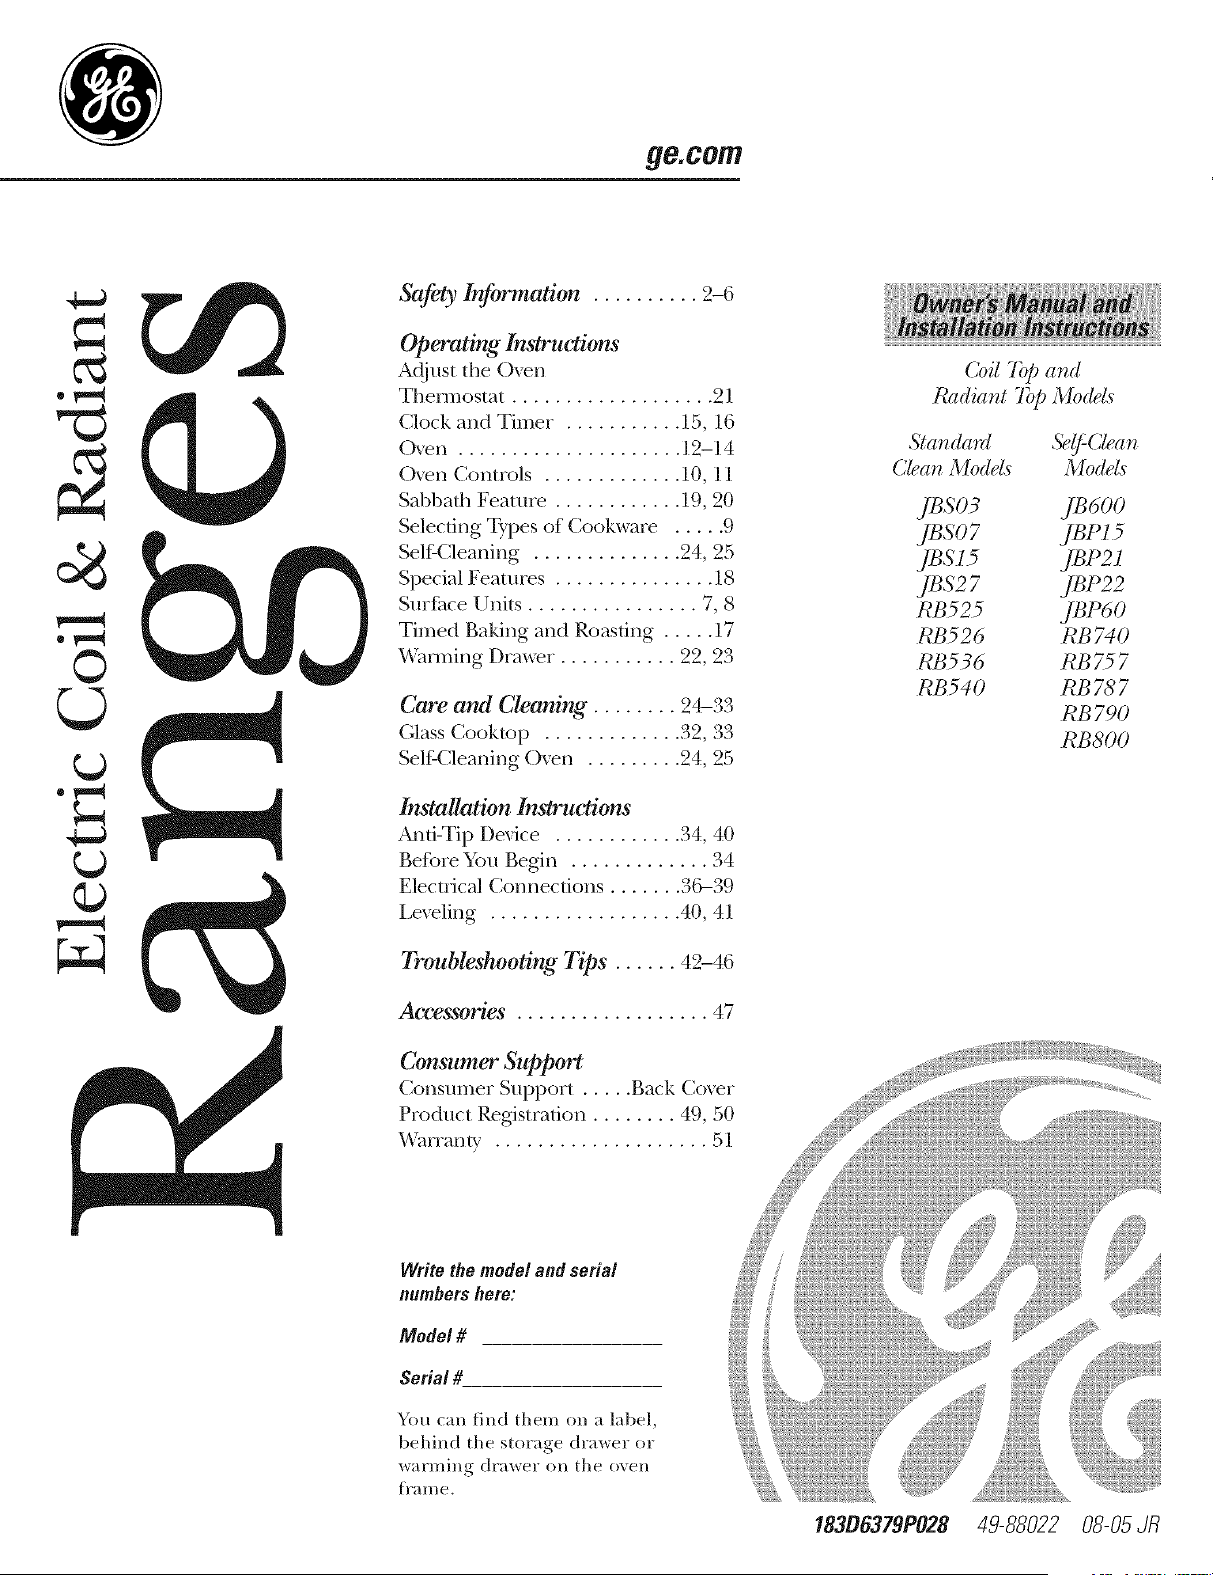
Safety Information .......... 2-6
Operating Instructions
Adjust the Oven
Thei_nostat ................... 21
Clock and Timer . .......... 15, 16
Oven ..................... 12-14
Oven Controls ............. 10, l l
Sabbafl) Feaulre ............ 19, 20
Selecting Types of Cookware ..... 9
Self Cleaning .............. 24, 25
Special Features ............... 18
Surfi_ce Units ................ 7, 8
Timed Baking and Roasting ..... 17
_\anning Drm,_r. .......... 22, 23
Care and Cleaning ........ 24-33
Glass Cooktop .............. _2, 33
Self:Cleaning O_en ......... 24, 25
Installation Instructions
Anti-Tip Device ............ 34, 40
gefbre You Begin ............. 34
Elecu_ical Connections ....... 36-39
Leveling .................. 40, 41
Troubleshooting Tips ...... 42-46
Accessories .................. 47
Consumer Support
Consumer Support ..... Back Cover
Product Registration ........ 49, 50
_\.manty .................... 51
Coil 7@ and
Radiator T@ Mo(tds
Star_dard 5?_:Clear_
Clear_Medals Medals
#eso3 je6oo
jeso7 jePz5
JBS l 5 JBP21
JBS2 7 JBP22
RB525 JBP60
RB526 RB740
RB536 RB757
RB 540 RB 78 7
RB790
RB800
Write the model and serial
numbers hem:
Model #
Serial #
You can find them on a label,
behind the storage drawer or
warming drawer on the (Well
i]'al//e.
18306379P028 49-88022 08-05 dR
?:7 2111
iillili!lii{!
r.J
w
m
w
m
1=
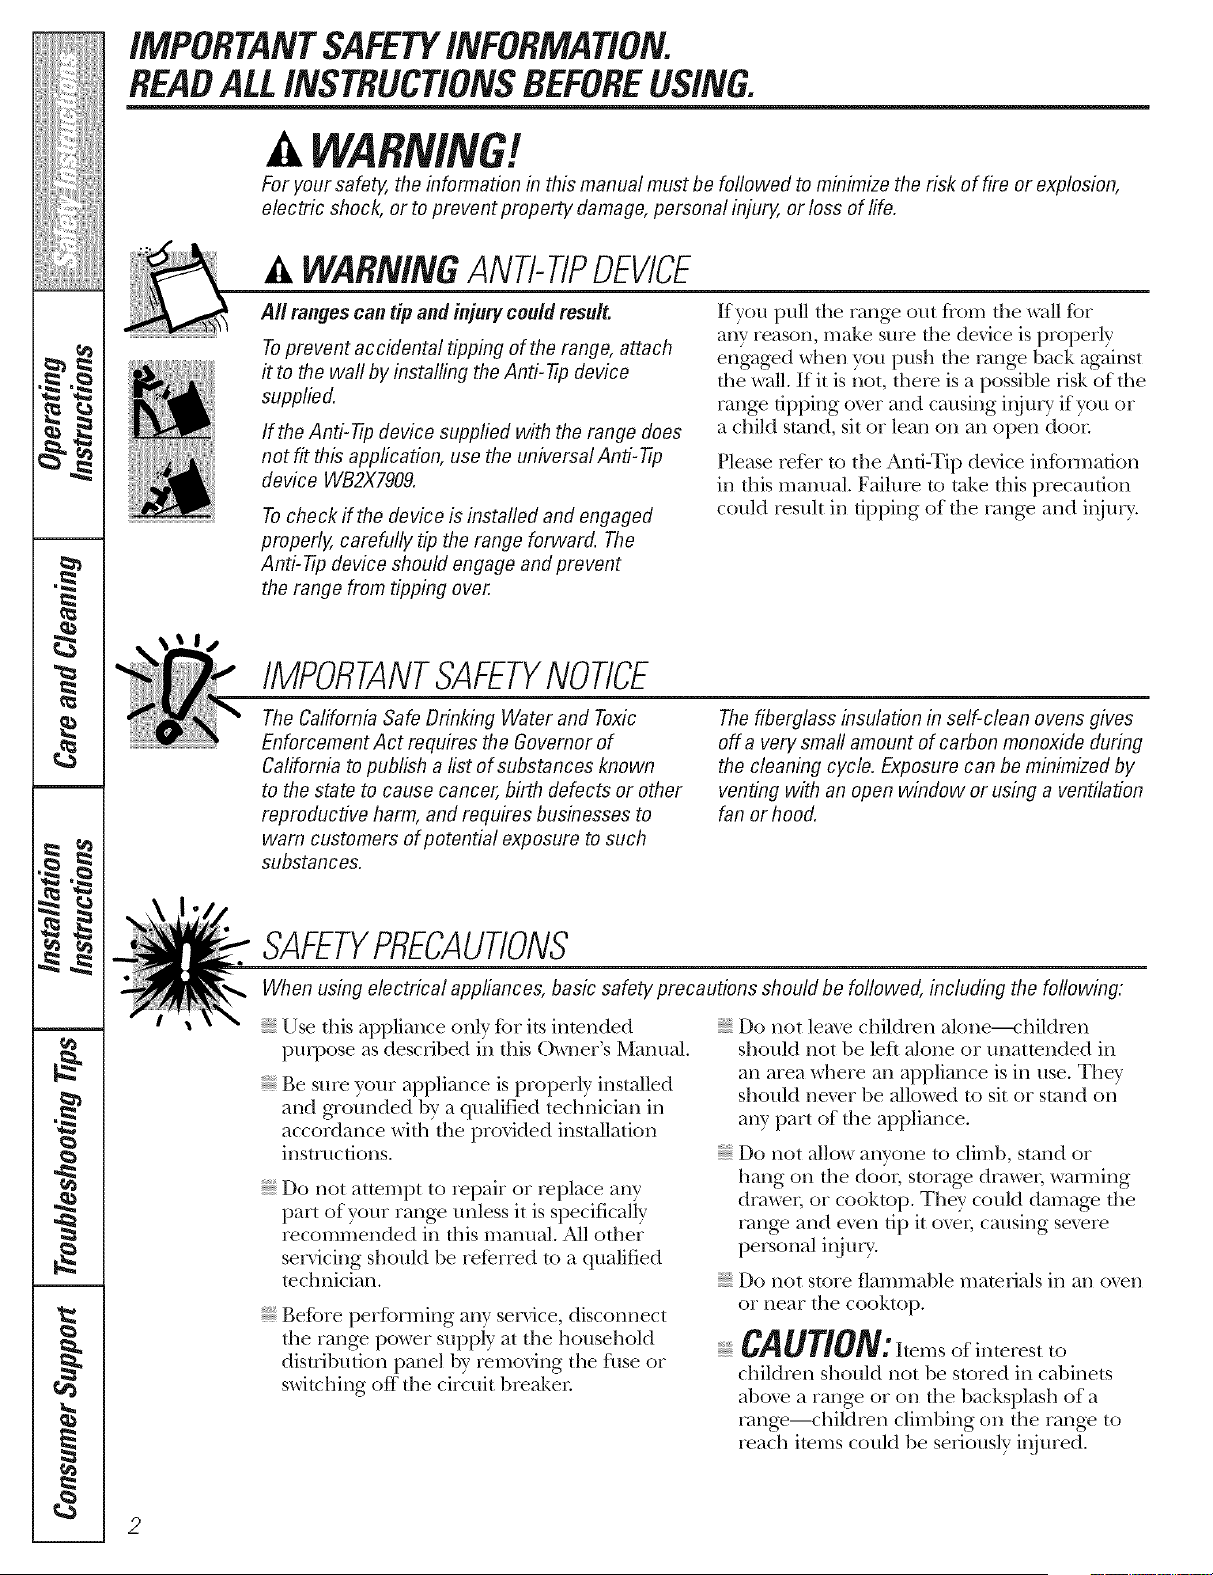
iMPORTANTSAFETYiNFORMATION.
READALLiNSTRUCTiONSBEFOREUSING.
For your safety, the information in this manual must be followed to minimize the risk of fire or explosion,
electric shock, or to prevent property damage, personal injury, or loss of life.
WARNINGANti-TIPDEVICE
All ranges can tip and injury could result.
Toprevent accidental tipping of the range, attach
# to the waft by installing the Anti-77p device
supplied.
If the Anti--tip device supplied with the range does
not fit this application, use the universal Anti-7ip
device WB2X7909.
To check ff the device is instated and engaged
properly, carefully tip the range forward. The
Anti--tip device should engage and pravent
the range from tipping over.
If you pull d_e range out flom d_e wall fbr
any reason, make sure fl_e device is propedy
engaged when you push the range back against
the wall. If it is }_ot, there is a possible _isk of fl_e
range tipping over and cruising iqjury if you or
a child stand, sit or lean on an open doo_:
Please refbr to the Anti-Tip device in%_3nation
in this manual. Failure to take this precaution
could result in tipping of the range and injury.
IMPORTANTSAFETYNOtiCE
The Californb Safe Drinking Water and Toxic
Enforcement Act requires the Governor of
Californb to publish a list of substances known
to the state to cause cancer, birth defects or other
reproductive harm, and requires businesses to
warn customers of potential exposure to such
substances.
The fiberglass insulation in self-clean ovens gives
off a very small amount of carbon monoxide during
the cleaning cycle. Exposure can be minimized by
venting with an open window or using a ventilation
fan or hood.
SAFETYPRECAUtiONS
When using electrical appliances, basic safety precautions should be followed, including the following."
iiiiiiiii_i;_ii_i
iiiiiiiii_i;_ii_i
iiiiiiii;_ii_;_i;_;i
iiiiiiii;_ii_;_i;_;i
Use this appliance only for its intended
purpose as described in this ()wrier s Man ual.
Be sure your appliance is properly installed
and grounded by' a qualified technician in
accordance with the provided installation
instructions.
Do not attempt to repair or replace any
part of your range tmless it is specificaliy
recommended in this manual. All other
servicing should be referred to a qualified
technician.
Be%re per%rming any' service, disconnect
the range power supply at the household
disnJbution panel by removing the fl_se or
switching off the circuit breaker.
Do not lem_e children alone---<hildren
should not be left alone or unattended in
an area where an appliance is in use. They
should never be allowed to sit or stand on
any part of the appliance.
Do not allow anyone to climb, stand or
hang on the do(m storage drawe_; wanning
drm,_; or cooktop. They' could damag_ the
range and even tip it o_[; causing severe
personal injury.
Do nOt store flammable materials in an o_n
or near the cooktop.
CA UTION: Items of interest to
children should not be stored in cabinets
above a rang_ or on the backsplash of a
range--children climbing on the range to
reach imms could be seriously i_iured.
2
_e.COITI
COOKMEATANDPOULTRYTHOROUGHLY,,,
Cookmeat andpoultry thoroughly--meat to at least an INTERNALtemperatureof 160°Fandpoultry to at least an
INTERNALtemperatureof 180°ECookingto thesetemperaturesusuallypmtects against foodbomeillness.
SAFETYPRECAUTIONS
iiiiiiiii+++++i+ii+i
iiiiiiiii+++++i+ii+i
iiiiiiii;_ii+_;i
iiiiiiiii+++++i+iiii
Never wear loose-fitting or hanging garments
while using the appliance. Be carefifl when
reaching for imms stored over the range.
Flammable material couM be ignimd if
brought in contact with hot surfi_ce units
or heating elements and may cause se_re
bums.
Use only di T pot holders--moist or damp
pot holders on hot surfi_ces may result in
burns from smam. Do not let p(>t holders
touch hot surfime units or heating elements.
Do not use a towel or other bulky' cloth.
For your safety, hexer use your appliance
fbr wanning or heating the room.
Do not let cooking grease or other flammable
materials accumulate in or near the range.
Do not use wamr on grease fires. Never pick
up a flaming pan. Turn the controls ott:
Smother a flaming pan on a surfime unit by
covering the pan complemly with a well-
fitting lid, cookie sheet or fiat tray. Use a
multi-purpose dry chemical or fbam-b,'pe
fire extinguishen"
Flaming grease outside a pan can be put
out by covering it with haking soda or,
if m ailable, by using a multi-purpose di T
chemical or fbam-type fiIe extinguisher
Flame in the o_n or wanning drawer
can be smothered complemly by' closing the
door and mining the o\_n offor by using a
muhi-purpose dry chemical or fbam-ty'pe fire
extinguisher.
Do not touch the surfi_ce units, the heating
elements or the inmrior surfi_ce of the oven.
These surfi_ces may he hot enough to burn
even though they _re dark in colon During
and alter use, do not touch, or let clothing
or oilier flammable materials contact, the
surfime units, areas nearby the surfime units
or any' inmrior aiea of the OXeIl; allow
sufficient time fbr cooling first.
Pomnfiallv hot surfimes include the cooktop,
areas timing the cooktop, oxen vent opening,
surfi_ces near file opening, crevices around
the o\>n door and metal trim parts above
the door
REMEMBER: The inside surfime of the o_en
may be hot when the door is opened.
Do not store or use combustihle mamrials,
_tso]ine or other flammable xapors and
liquids in the vicinity' of this or any other
appliance.
Keep the hood and grease filters clean
to maintain good _enting and to mold
grease fires.
Never block die vents (air openings) of the
range. They provide the air inlet and outlet
that are necessary fbr the range to operate
properly with correct combustion. Air
openings are locamd at the rear of the
cooktop, at the top and bottom of the oxen
door, and at the bot/om of the range trader
the v_rming drav_>r or storage drav_>n
3
+i!i:2!+iii+++++[
!li+_++ii;i{i+iiiili
= u
m
g
m
?:2 2111
iillili!lili!
r.J
w
m
w
m
iMPORTANTSAFETYiNFORMATION.
READALLiNSTRUCTiONSBEFOREUSING
OVEN
Stand away flom the range when opening
the o_en door Hot air or steam which
escapes can cause bums to hands, face
and/or eyes.
Do not heat unopened food containers.
Pulling out the shelf to the stop-lock is a
comenience in lifting heavv fbods. It is also
a precaution against burnsflom touching
hot surfi_ces of the door or o_en walls.
_\3_en using cooking or roasting bags in the
Pressure could build up and the container
could burst, causing an i_iury.
Kee I) the oven vent unobstructed.
Keep the o_n flee flom grease buildup.
Place the oven shelf in the desired position
while the o\>n is cool. If shelves must be
handled when hot, do not let pot holder
contact the heating elements.
oven, follow the manufhcturer's directions.
Do not use the oven m dry newspapecs.
If overheated, they can catch on fire.
Do not use fl_e oven ff)r a storage area.
Items stored in an oven can ignite.
Do not lem'e paper products, cooking
umnsils or fbod in the o_>n when not in use.
SELF-CLEANINGOVEN
Do not clean the door gasket. The door
gasket is essential %r a g_)od seal. Care
should be taken not to rub, damage or
mo,_ the gasket.
Clean only parts listed in this Owner's
Manual.
Do not use oxen cleaners on selfklean
models. No commercial oven cleaner or
o_n liner protective coating of any kind
should be used in or around any part of
the oven. Residue flom oven cleaners will
damage the inside of the o_n when the
selfklean cycle is used.
Be%re selfkleaning the o_en, remo_e the
broiler pan, grid and other cookware.
Be sure to wipe up excess spillag_ be%re
starting the selfkleaning operation.
If the selfkleaning mode malflmctions,
turn the oven off and disc(mnect the power
supply. Hme it serviced by a qualified
technician.
• _ke the sheh.'es out of the oven be%re
you begin the selfklean cycle or they
may discolor.
4
ge.com
WARMINGDRAWER(onsomemode/s)
The puq)ose of the wanning drm,ver is DOnot touch the heating element or the interior
to hold hot cooked fbods at serving surface of the warming drawer. These surfi_ces
temperature. ,Mways start wifll hot _od; may' be hot enough to bum.
cold fbod cannot be healed or cooked
in tl/e wanning drawer.
iiiiiiiii_i;_ii_i
Do not use tile wanning drmver to dry
newspapers. If o_erheated, they can catch
Oil flre.
Do not ]eme paper products, cooking
mensils or fbod in tile warming drawer
when not in use.
Nexer leave jars or cans of fi_t drippings in
or near your wanning drmver
Alwavs, keep wooden and plastic utensils
and canned fbod a safe distance away flom
your wanning drinker.
iiiiiiiii_i_i_iiiiii
iiiiiiiii_i;_ii_i
REMEMBER: Tile inside surfime of the
wanning drawer may be hot when the
drawer is opened.
Use care when opening die drays>i: Open
the drawer a crack and let hot air or steam
escape befbre removing or replacing fbod.
Hot air or smam which escapes can cause
burns to hands, fi_ce and/or eyes.
Do not use aluminum fbil to line the drawer
Foil is an excellent heat insulator and will
trap heat beneath it. This will upset tile
perfbrmance of tile drawer and it could
damage tile interior finish.
Do not warm %od in the wam_ing drmver
fbr more than two hours.
SURFACEUNITS--ALLMODELS
Use proper pan size-select cookwaro having fiat bottoms largo enough to cover the surface unit
heating element. The use of undersized cookwaro will expose a portion of the surface unit to direct
contact and may result in ignition of clothing. Proper relationship of cookwaro to surface unit will also
improve efficiency.
Never leave tile surfi_ce units unattended at
high heat settings, goilo_ers cause smoking
and greasy spillo_ers that may catch on fire.
iiiiiiiii_i_i_iiiiii
Only certain types of glass, glassXeramic,
earthem._;_re or oilier gtazed containers are
suitable fbr cooktop service; others may
break because of the sudden chang> in
temperature.
iiiiiiiii_i_i_iiiiii
To minimize d_e possibility' of bums,
ignition of flammable mamrials and spillage,
the handle of a container should be mined
toward the center of the range without
exmnding o_r nearby surfime units.
Alwavs turn the surfi_ce traits off belL)re
remo_qng cookware.
Do not flame fbods on the cooktop, lfvou
do flame fbods under tile hood, turn tile
fill/ Oil.
Keep an eye on %ods being flied at high or
medium high heat settings.
Foods %r flTing should be as dry as possible.
Frost on flozen %ods or moisture on flesh
fbods can cause hot fi_t to bubble up and
over the sides of the pan.
Use little fi_t %r effectixe shallow or deep fi_t
fl?ing. Filling the pan too fldl of fi_t can
cause spillo_ers when food is added.
K a combination of oils or fi_ts will be used in
flying, stir together befbre heating, or as fi_ts
meh slowly.
Always heat fi_t slowly, and watch as it heats.
Use a deep fi_t them_ometer whenexer
possible to prevent o_erheating fi_t beyond
the smoking point.
= u
m
m
g
m
m
?:,7 ,',"2111
iillili!lii{!
r.J
w
m
w
m
r4_
iMPORTANTSAFETYiNFORMATION.
READALLiNSTRUCTiONSBEFOREUSING
RADIANTSURFACEUNITSron
Use care when touching the cooktop. The glass surface of the cooktop will retain heat after the controls
have been turned off.
Avoid scratching the glass cooktop. The
cooktop can be scratched with imms such as
sharp insuuments, rings or other jewel U and
rivets on clothing.
Large scratches or impacts to glass doors
or cooktops can lead to hroken or shattered
glass.
Do not operam fl_e radiant surfitce units if
the glass is broken. Spi]lo_rs or cleaning
solution may penetram a broken cook/op
and creak a risk of electrical shock. Contact
a qualified mchnician immediam]y should
your glass cooktop become broken.
iiiiiiiii_i;_ii_i
Clean the cook/op with caution. If a _._>t
spong> or cloth is used to wipe spills on a
hot surfi_ce unit, be carefld to a\_id steam
burns. Some cleaners can produce noxious
fmnes if applied to a hot surfime.
NOTE" _\_ recommend that you avoid wiping
any surfime unit areas m_fil they hax_ cooled
and the indicator light has gone off. Sugar
spills are the exception to this. Please see
Cleaning the glass cooktop section.
*¢\_en the cooktop is cool, use only the
recommended cleaning cream to clean
the cooktop.
Nexer use the glass cooktop surfi_ce as a
cutting board.
Do not place or store items that can melt or
catch fire on the glass cooktop, e_en when it
is not being used.
To axoid possible damage to the cooking
surfi_ce, do not apply cleaning cream to the
glass surfime when it is hot.
After cleaning, use a dry cloth or paper towel
to remoxe all cleaning cream residue.
Be carefld when placing spoons or other
stirring utensils on the glass cooktop surfi_ce
when it is in use. They may become hot and
could cause bums.
Read and follow all inst, uctions and
warnings on the cleaning cream lahels.
Do not lift the cooktop. Lifting the cooktop
can lead to damage and improper operation
of the range.
COILSURFACEUNITSfort
iiiiiiiii_i_i_iiiiii
iiiiiiiii_i;_ii_i
iiiiiiiii_i;_ii_i
Clean the cooktop with caution. If a
wet sponge is used to wipe spills on a hot
cooktop, be carefid to avoid steam bums.
To avoid the possibility' of a bum or electric
shock, ah.vays be certain that the controls for
all surfime units are at the OFFposition and
all coils are cool before attempting to lift or
remo_ a unit.
Do not immerse or soak the remox ahle
surfi_ce units. Do not put them in a
dishwasher
iiiiiiiii_i_i_iiiiii
iiiiiiiii_i_i_iiiiii
Be sure the drip pans and the _,>nt duct are
not covered and are in place. Their absence
during cooking could damag> range parts
and wiring.
Do not use aluminum foil to line d_e drip
pans or anw.vhere in the oven except as
described in this manual. Misuse could
_esult in a shock, fi_e hazard or damag>
to the rang>.
READANDFOLLOWTHISSAFETYINFORMATIONCAREFULLY.
SAVETHESEINSTRUCTIONS
Usingthe surface units. Re.co,,
Throughout this manual, features and appearance may vary from your model.
OFF
6
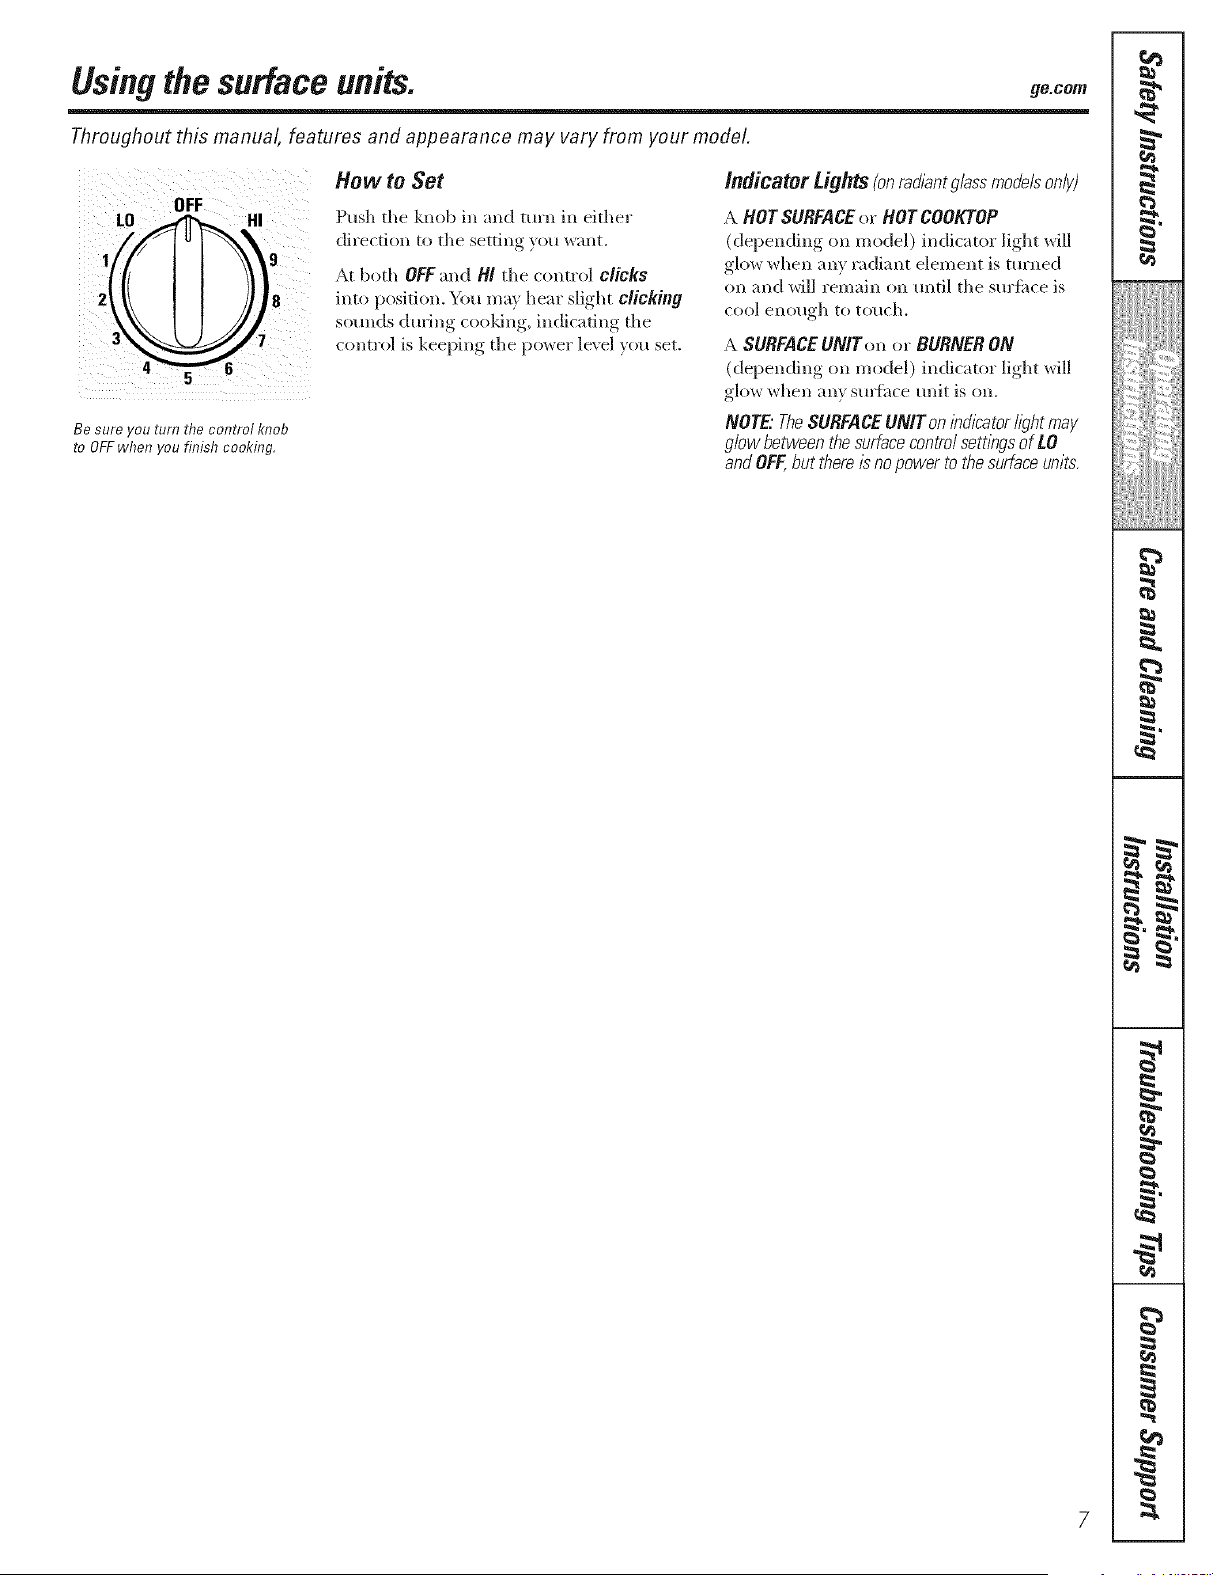
Be sure you turn the control knob
to OFFwhen you finish cooking,
How to Set
Push the knob in and turn in either
direction to the setting you want.
At both OFF and Hi tile control clicks
into position. You may hear slight clicking
sounds during cooldng, indicating the
control is keeping tile power ]e\ el you set.
indicator Lights(onrad/antglassmodelsonly)
A HOT SURFACEor HOT COOKTOP
(depending on model) indicator light will
glow when ally radiant element is turned
on and will remain on until tile surtime is
COOlenough to touch.
A SURFACEUNtron or BURNER ON
(depending on model) indicator light will
glow when ally sulihce unit is on.
NOTE"TheSURFACEUNtr on /bd/2atorI/_?htmay
glow between the surfacecontrol sett/bgsof LO
andOFF,but there/2 no power to the surface units.
=.
_4
€
=.
=.
€
{1
i
w
m
€
€
i
€
€
M
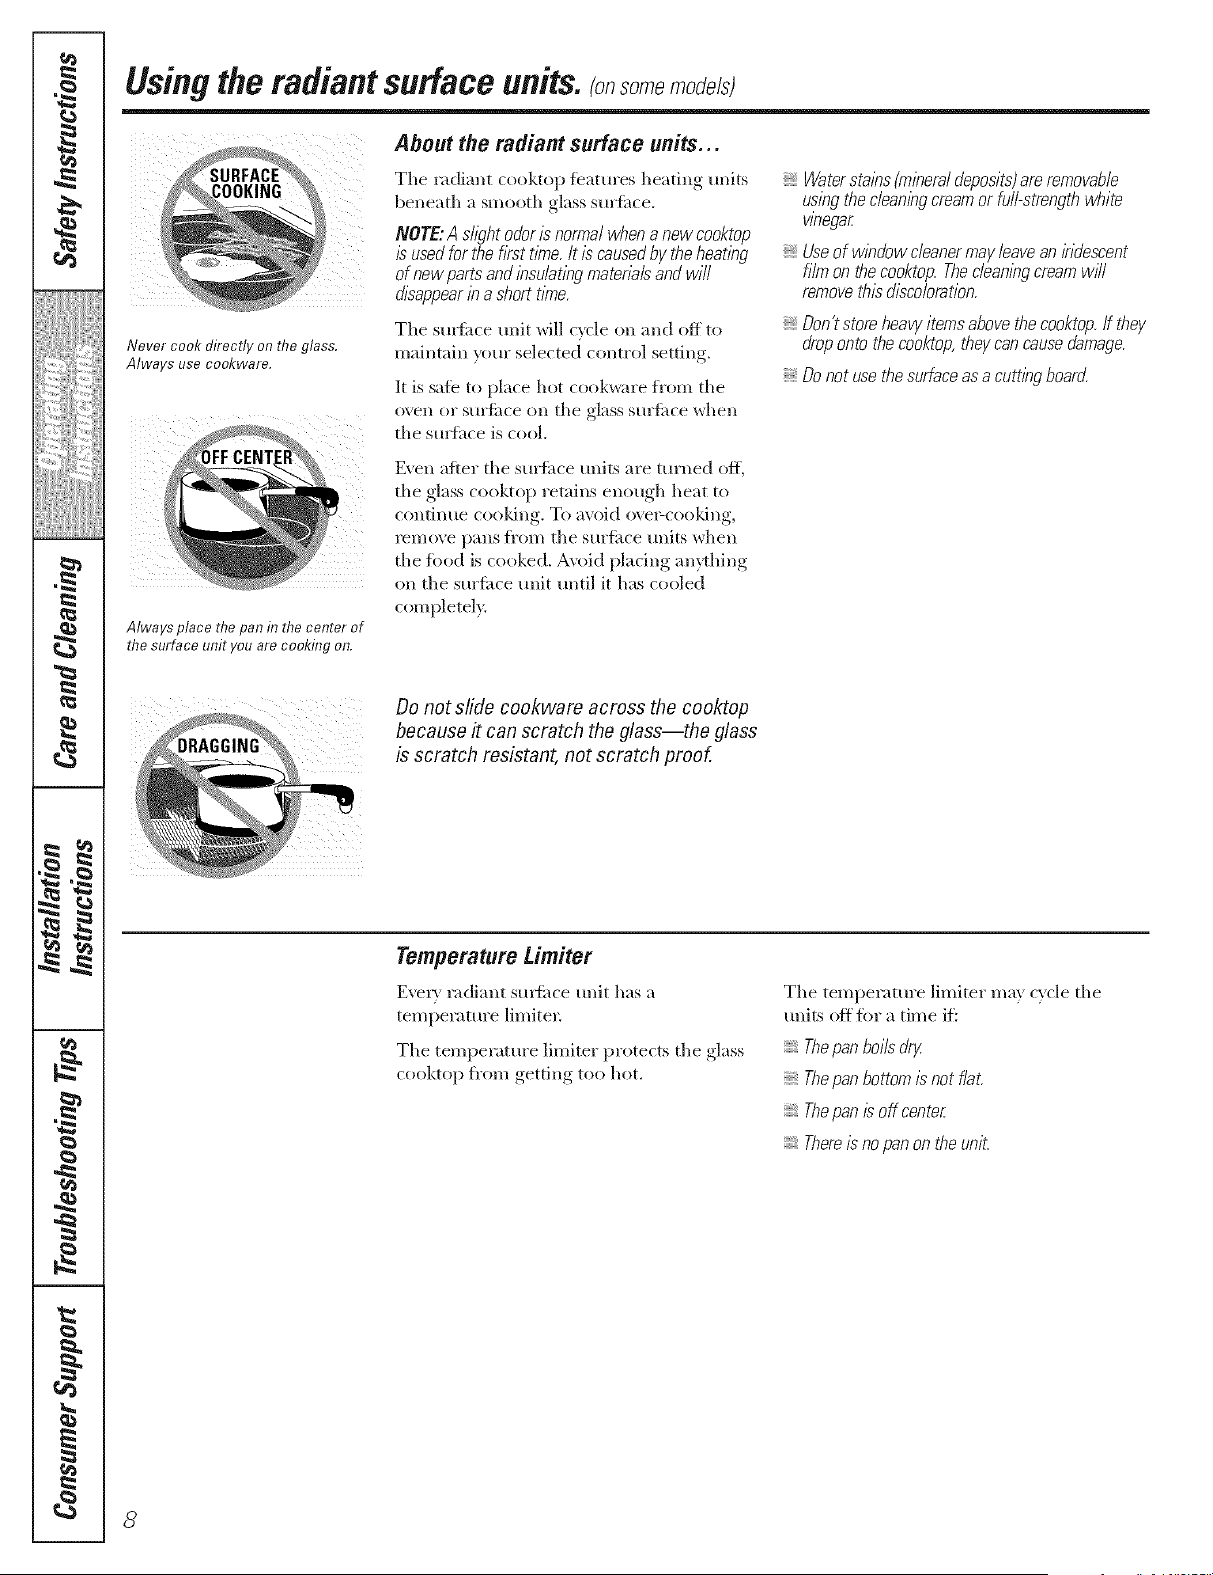
Never cook directly on the glass.
Always use co&ware.
Always place the pan in the center of
the surface unit you are cooking on.
8
Usingtheradiantsurface units, somemode/sI
About the radiant surface units...
Tile radiant cooktop featm'es heating units
beneath a smooth glass surfime.
NOTE:Ash_?htodor/snormalwhenanewcooktop
/susedforthe firsttbTe./t /scausedby theheatbg
of newpartsand/bsu/at/bgrnatena/sandwill
disappearb ashort t/riTe.
The sm{i_ce unit will cxcle on and off to
maintain }ore" selected control setting.
It is safe to place hot cook_<u'e from tile
oven o1" S[ll'fitce Oil tile glass S[ll',4ilce xdlen
tile suHhce is cool.
Watersta/bs(rn/beral deposits)are removable
us/bgthe clean/hgcream or full-strength white
wnegar
Useof w/bdow cleanermay leavean/bdescent
filrn on the cooktop. Theclean/bgcmarn w#l
remove this discoloration.
Don?storeheavy/ternsabovethecooktop.If they
dropontothecooktop,theycancausedamage.
Donot usethesurfaceasa cutt/hgboar(Z
Even after tile sm'fime units are turned ofl_
tile glass cooktop retains enough heat to
continue cooldng. To avoid ove>cooldng,
remove pans fi'om tile surfitce tlnits when
tile fbod is cooked. A\oid plating anprhing
on the surfime unit until it has cooled
completel>
Do not slide cookware across the cooktop
because it can scratch the glass--the glass
is scratch resistant, not scratch proof.
Temperature Limiter
E_vIy radiant sm_ilce unit has a
temperature limited:
The temperature limiter protects tile glass
cooktop fi'om getting too hot.
The temperature limiter may cycle tile
units ()if fi)r a time ifi
Thepan boils dr/
Thepan bottom/s not flat.
Thepan /L_off center
There/sno pan on the unit.
Selectingtypes of cookware, ge.co,,
The following information will help you choose cookware which will give good performance on glass cooktops.
iiii il; i / ii i
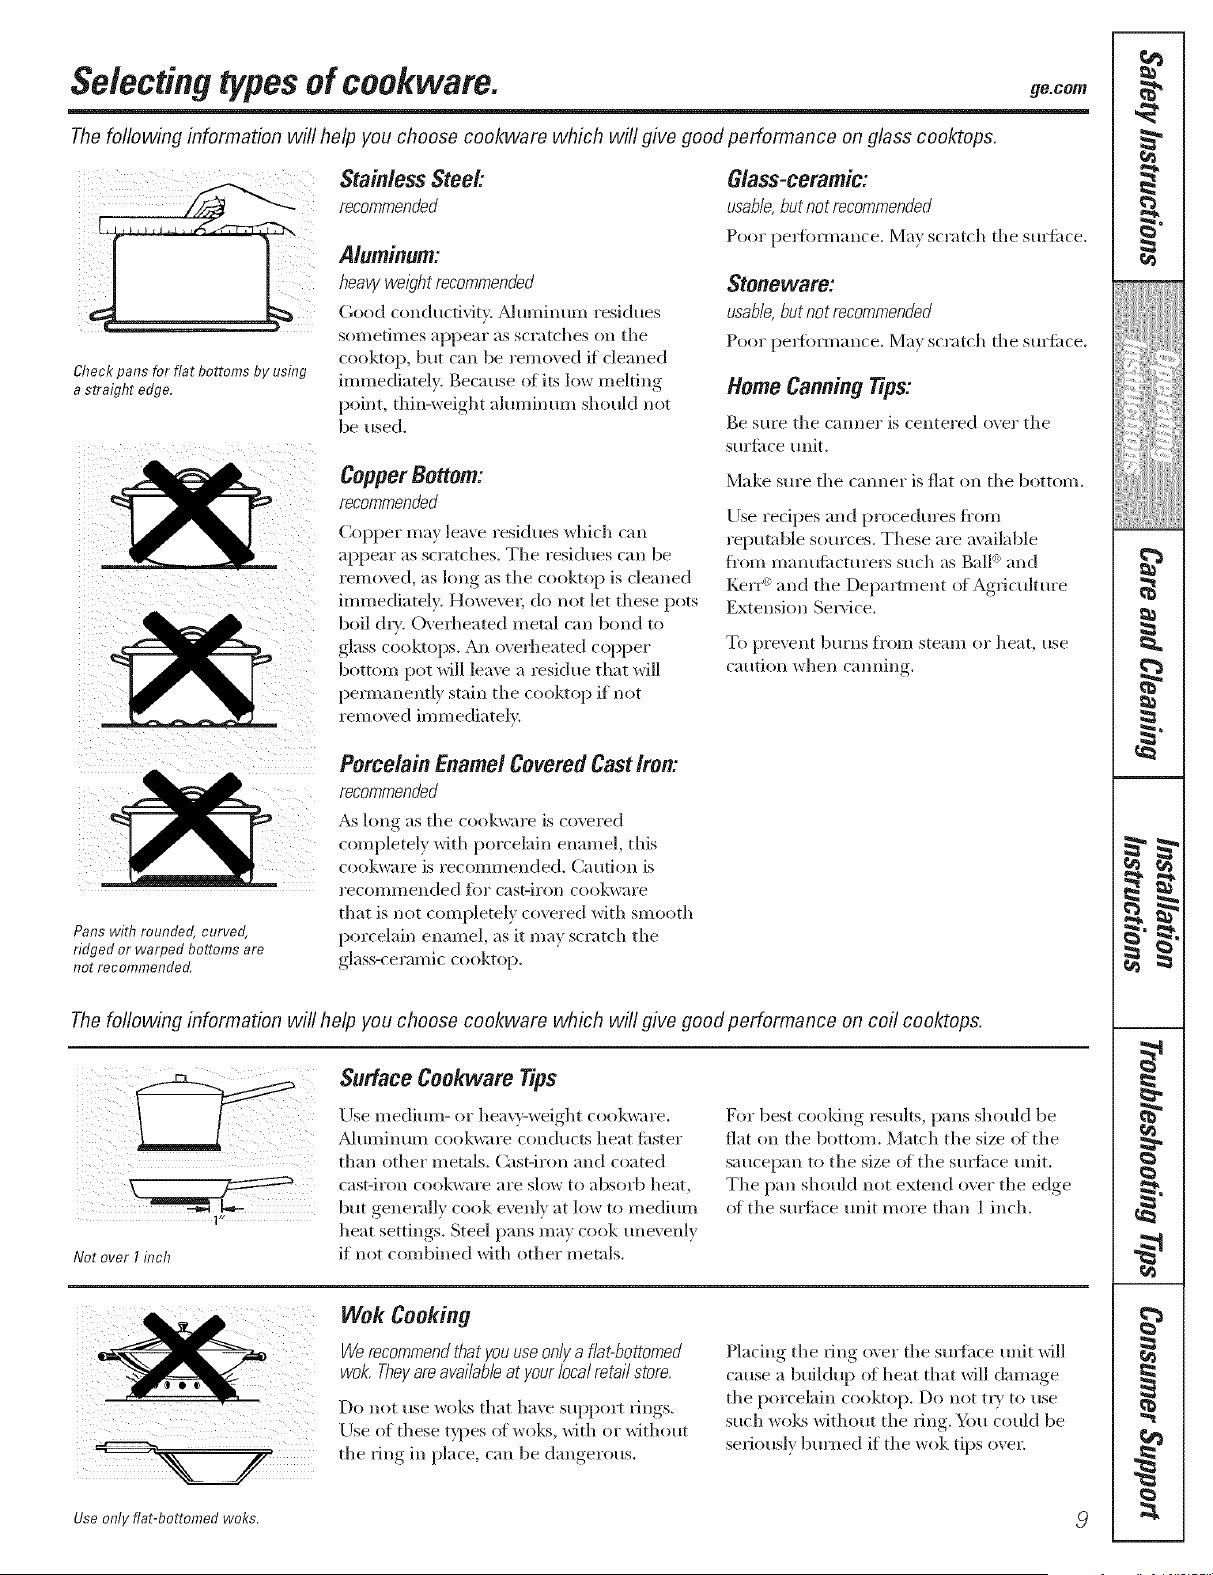
Check pans for flat bottoms by using
a straight edge.
Stainless Steel:
recommended
Aluminum:
heavy weli?ht recommended
Good conductivity. _duminum residues
sometimes appear as scratches on tile
cooktop, bill can be I'el/l()\ ed if cleaned
immediately. Because ot its low melting
point, thin-weight ahm/inum should not
be used.
Copper Bottom:
recommended
Copper may leave residues which can
appear as scratches. Tile residues call be
iemoved, as king as tile cooktop is cleaned
immediately. HoweveL do not let these pots
boil d_'. Ovei'heated metal can bond to
glass cooktops. All overheated copper
bottom pot will leave a l'esidue that will
permanently stain tile cooktop if not
rein o\vd imm ediatel>
Glass-ceramic:
usable,butnot recommended
Poor pe_fbl_nance. Ma_ scratch tile sm'fi_ce.
Stoneware:
usable,but not recommended
Poor pe_tkmnance. Ma,_ scratch tile sm'tilce.
Home Canning Tips:
Be Stll'e tile (;lllllel" is Celltel'ed ovel" tile
sm'titce unit.
Make sm'e tile caroler is fiat on tile bottom.
Ijse recipes and procedures ti'om
repntable somces. These are available
Kom manuti|cturers such as gall <_and
Ke*F _ and tile Depamnent of Ag*{culture
Extension Sel_'ice.
To pi'e_ent btLl'llS fl'()lll stean/of heat, use
carillon vvhell C'lllllill *
Pans with rounded, curved,
ridged or warped bottoms are
not recommended,
Porcelain Enamel Covered CastIron:
recommended
_s long as tile cookware is coveled
completely with porcelain enamel, this
cook\vai'e is i'ecolllI/lended. Catltion is
I'eCOlllI/lended IS)l" casviron cookwai'e
that is not completely covered with smooth
porcelain enamel, as it may scratch the
glass-ceramic cooktop.
The following information will help you choose cookware which will give good performance on coil cooktops.
1"
Not over I inch
Surface Cookware Tips
IJse medium- (>r hea\rv-weight cookware.
A]tllllintllll cookware condtlcts heat fi_ster
than other metnls. Cast-iron and coated
cast-iron cookware are slow to absoi'b heat,
but geneivdly cook evenly at low to medium
heat settings. Steel pans may cook une\ enly
if not combined with other metals.
For best cooldng results, pans should be
fiat on tile bottom. Match tile size ot tile
saucepan to tile size (fftile sm_ime unit.
Tile pan should not extend over tile edge
(ff tile smfi_ce unit more than 1 inch.
Wok Cooking
Werecommendthat youuseon/j/afiat-bottomed
wok. Thej/ are available at j/our local retail store,
Do not use woks that have suppolq_ l_ings.
rise of these t}l)es of woks, with (',r without
tlle _ing ill place, call be dangerous.
Placing tile ring o\el" tlle sulthce unit will
cause a buildup of heat that will damage
tile porcelain cooktop. Do not t W to use
such wol<s without tlle ;ing. You could be
sel_ionsly bm'ned if tile wok tips ovel:
Use only flat-bottomed woks,
q
6
m
m
t
m
q
m
I
m
q
I
{a
m
=
d
=
=
q
I
.g
h
w
m
I
r4_
#.
Usingthe oven controls. (onsomemode/st
Throughout this manual, features and appearance may vary from your model
OVEN CONTROLS
ONTROLS
OvenControl,Clockand TimerFeaturesand Settings
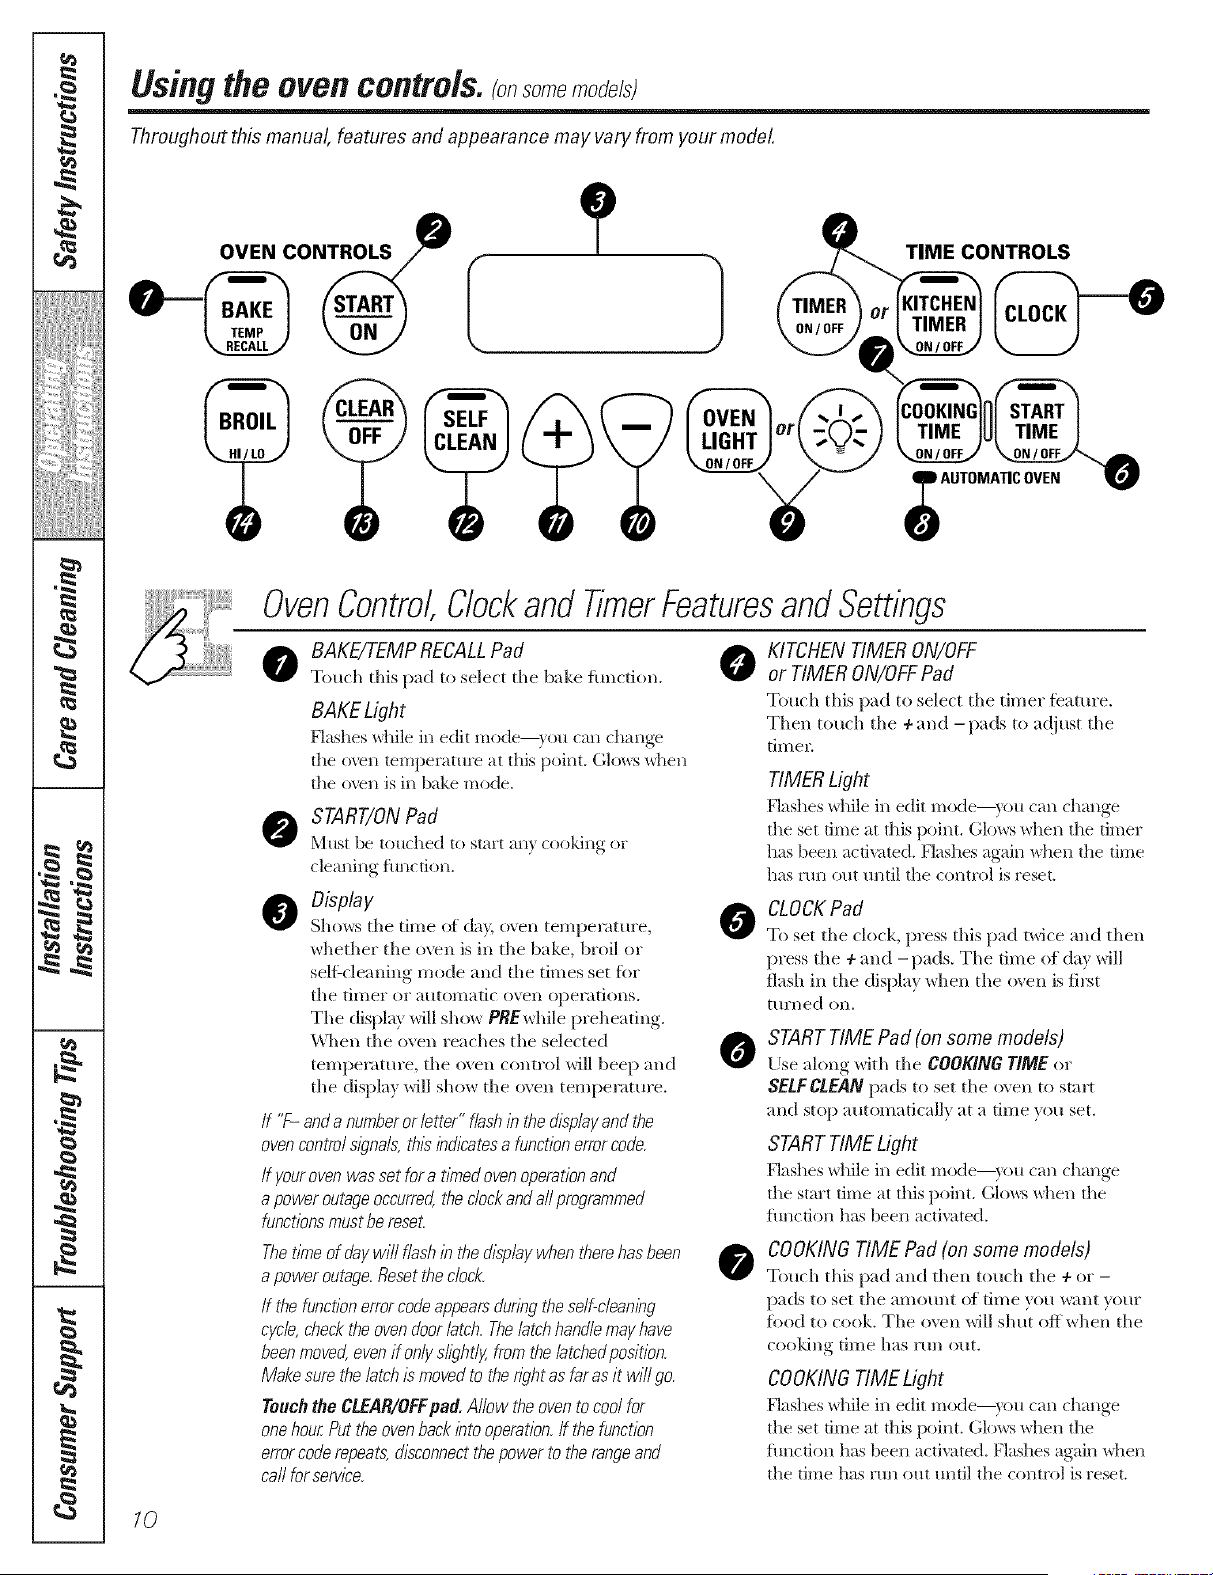
o AKE/TEMP RECALLPad 0
To/uh this pad to select tile bake function.
BAKELight
F]ashes _]lile ill edit Illode--}oH (}lIl (}l}lI_ge
tile ()veil temperature at this point. Glows when
the oven is h_ bake mode.
START/ON Pad
Must be touched to start any cooking or
cleaning function.
O Display
Shows tile time (ff day, o_en temperatm'e,
whether the oven is ill tile bake, broil or
sell:cleaning mode and tile times set for
tile tiI/ler el atltOlllatic ()veil opel';ltions.
The display will sh( )_r PREwhile preh eating.
\'\qlen tile oxen ieaches the selected
temperature, tile oxen control will beep and
_gJ
tile display will show tile o\ ell tempemtm'e.
/f "F- anda numberor letter"flashInthed/splayandthe
ovencontrolsignals,th/2bd/?atesa functionerrorcode.
If yourovenwassetfora tithedovenoperationand
apoweroutageoccurred,theclockandall programmed
functionsmustbereset.
Thet/Theof daywill flash/bthed/splaywhentherehasbeen
apoweroutage.Resettheclock.
If the functionerrorcodeappearsdunngtheself-clean/by
cycle,checktheovendoorlatch.Thelatchhandlemayhave
beenmoved,evenif onlyslightly,fromthelatchedposit/on.
Makesurethelatch/smovedto thenghtasfaras it will go.
Touchthe CLEAR/OFFpad. Allow theoventocoolfor
onehourPuttheovenbackbto operation,ff thefunction
errorcoderepeats,disconnectthepowerto therangeand
call forsorvlco.
KITCHEN TIMER ON/OFF
or TIMER ON/OFF Pad
T(_uch this pad to select tile timer feature.
Then touch tile ÷ and -pads to a(!just tile
timel:
TIMER Light
Flashes \dfile ill edit mode--y()u can change
the set time at this point. Glows when the timer
has been activated. Flashes again when the time
has mn out tmtil the control is reset.
CLOCKPad
To set tile clock, press this pad twice m_d then
press the ÷ and -pads. Tile time of day will
flash ill the display when tile ()','ell is first
ttlrlled on.
START TIME Pad (on some models)
Use along with tile COOKINGTIME or
SELFCLEANpads to set tile oven to start
and stop automatically at a time you set,
START TIME Light
Flashes \dfile ill edit mode--y()u can change
the start time at this point. Glo_vs_d_en tile
flmcfion has been activated.
COOKINGTIME Pad (on some models)
Touch this pad and then touch tile + or -
pads to set tile ;lillOtlllt (1[ time you w;|nt VO/lr
filed to cook. Tile oven will shut off when tile
¢()()killg tillle has r[lll gilt.
COOKINGTIME Light
Flashes \dfile ill edit mode--y()u can change
the set time at this poim. Glows _d_en the
flmction has been activated. Flashes again when
tile time has run out until tile control is reset.
10
_e.com
OvenControl,Clockand TimerFeaturesand Settings
@
0
0
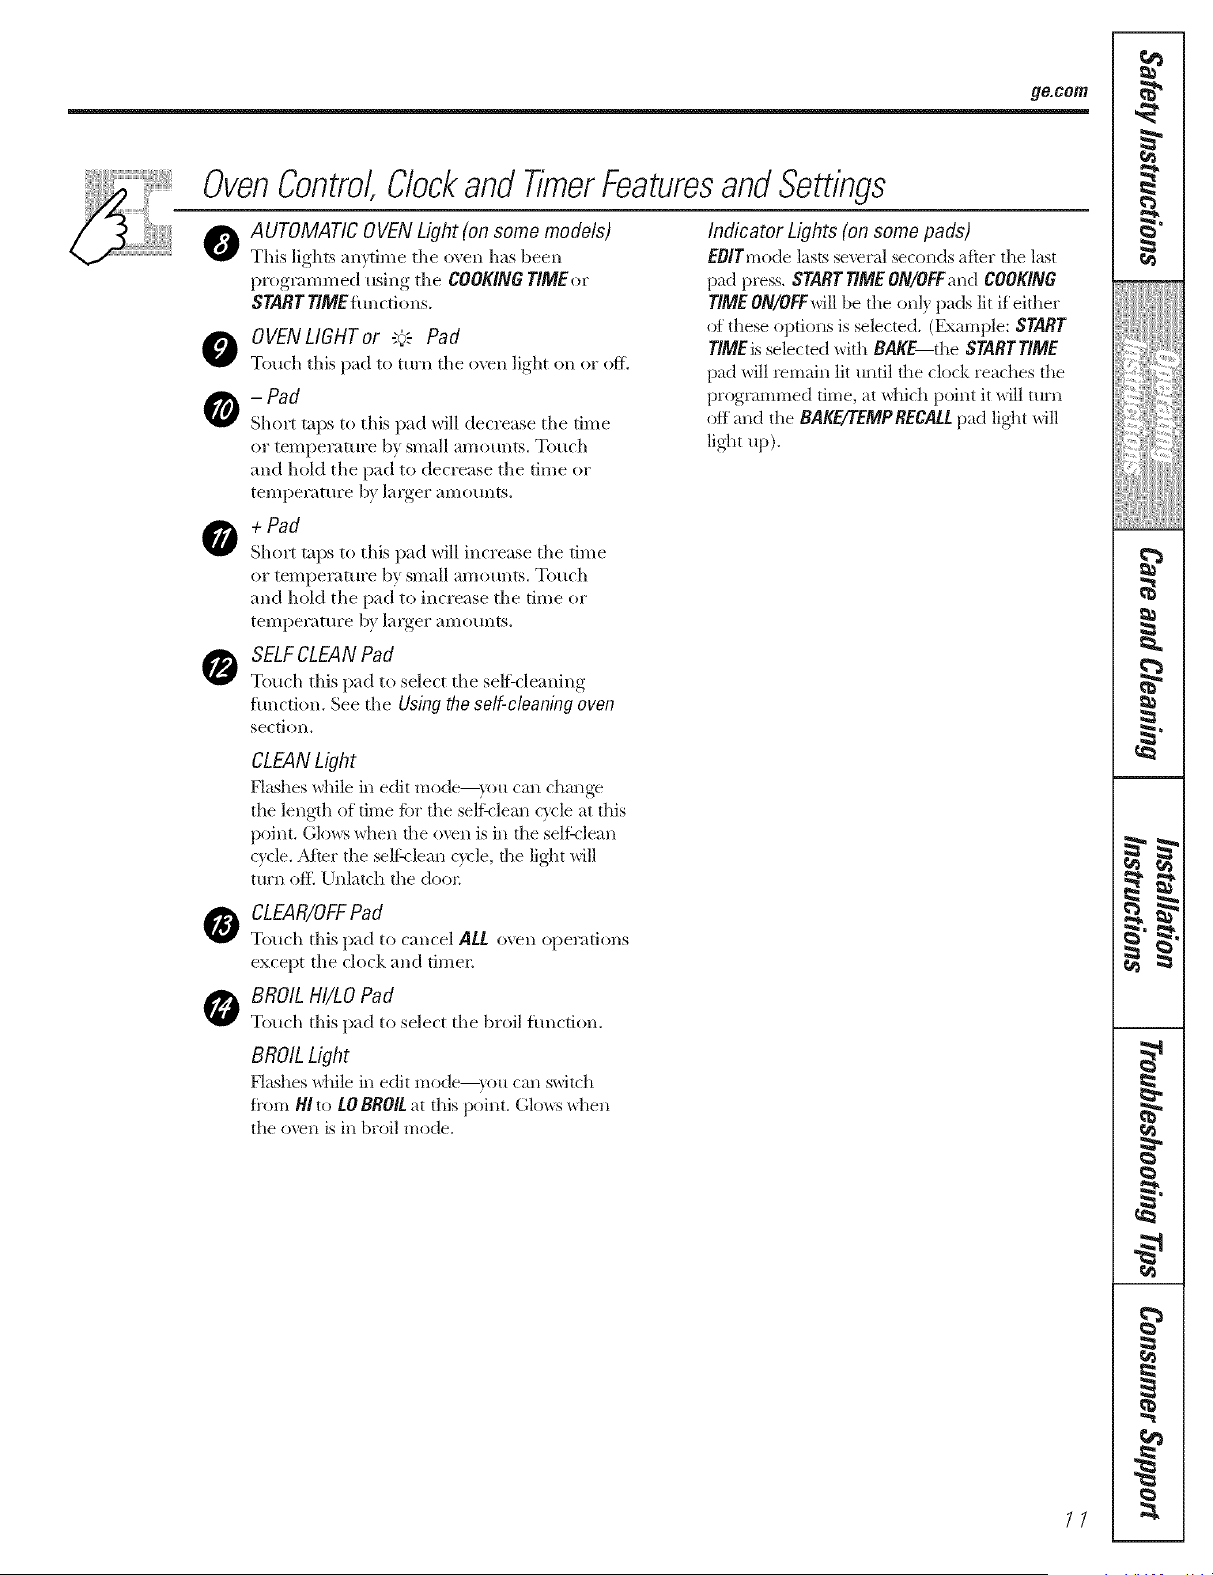
AUTOMATIC OVEN Light (on some models)
This lights am¢inle tile ()veil has been
l)I°graramed, usino,,_ tile COOKINGTIMEor
START TIME it m ctions.
OVENLIGHT or "+': Pad
Touch this pad to turn tile oven light on or off.
-Pad
Short taps to this pad will decrease tile time
or temper;|mre by small amounts. Touch
and hold the pad to decrease tile time or
temperature 1U larger amounts.
Indicator Lights (on some pads)
EOITmode lasts several seconds after the last
padpl'ess.STARTTIMEON/OFFand COOKING
rIME ON/OFFwill be the only pads lit if either
of these options is selected. (Example: START
rlMEis selected with BAKE the STARTTIME
pad will remain lit until the clock reaches tile
proglammed time, at which point it will turn
off and the BAKE/TEMP RECALLpad ligtlt will
light up).
+ Pad
Short taps to this pad will increase tile time
or tempeiamre by small amounts. Touch
and hold tile pad to increase tile time or
teI//per;fft/re by largel" aI//(s/lnts.
SELFCLEAN Pad
Touch this pad to select the self:cleaning
function. See tile Using the self-cleaning even
sectioll.
CLEANLight
Flashes while in edit mode--you can change
tile length of time tbr the seltklean c}vle at this
point. Glo_:s when tile (_Xre*_iS i*_the self:_lean
wcle. _M_er the selt_lean wcle, dae light will
turn of*_ Unlatch the dool:
CLEAR/OFFPad
Touch this pad to cancel ALL o\vn operations
except tile clock and timer.
BROIL HI/tO Pad
Touch this pad to select tile broil fim(tion.
BROIL Light
Hashes while ill edit Illo(te--}_stl call swJtc}l
fi'om HI to tO BROIL at this point. Glo_:s _daen
tile ()veil is ill broil mode.
77
q
1
6
m
m
t
m
q
1
m
I
m
q
I
m
N
m
m
m
I
=
N
d
=
=
q
N
I
M
h
B_
m
1=
Usingthe oven.
Clock and Kitchen _':---- - -- ' _Hm_rlonsomemoaelst
KITCHEN TIMER ON/OFFPad
Touch this pad to select the timer featm'e.
CLOCKPad
Touch this pad before setting tile clock.
Display
O Shows tile time of da} and tile time set for tile time_; cook time or start time.
Appearance may vary.
SET÷t-Pads
These pads allo_ )ou to set the dock and time_:
i i
i_i ii
(On some models
appearance will vary)
Oven Temperature Knob (onsomemodels)
Turn this knob to the setting you want.
Tile o\en c}cling light comes on during cooldng.
(On some models
appearance will vary)
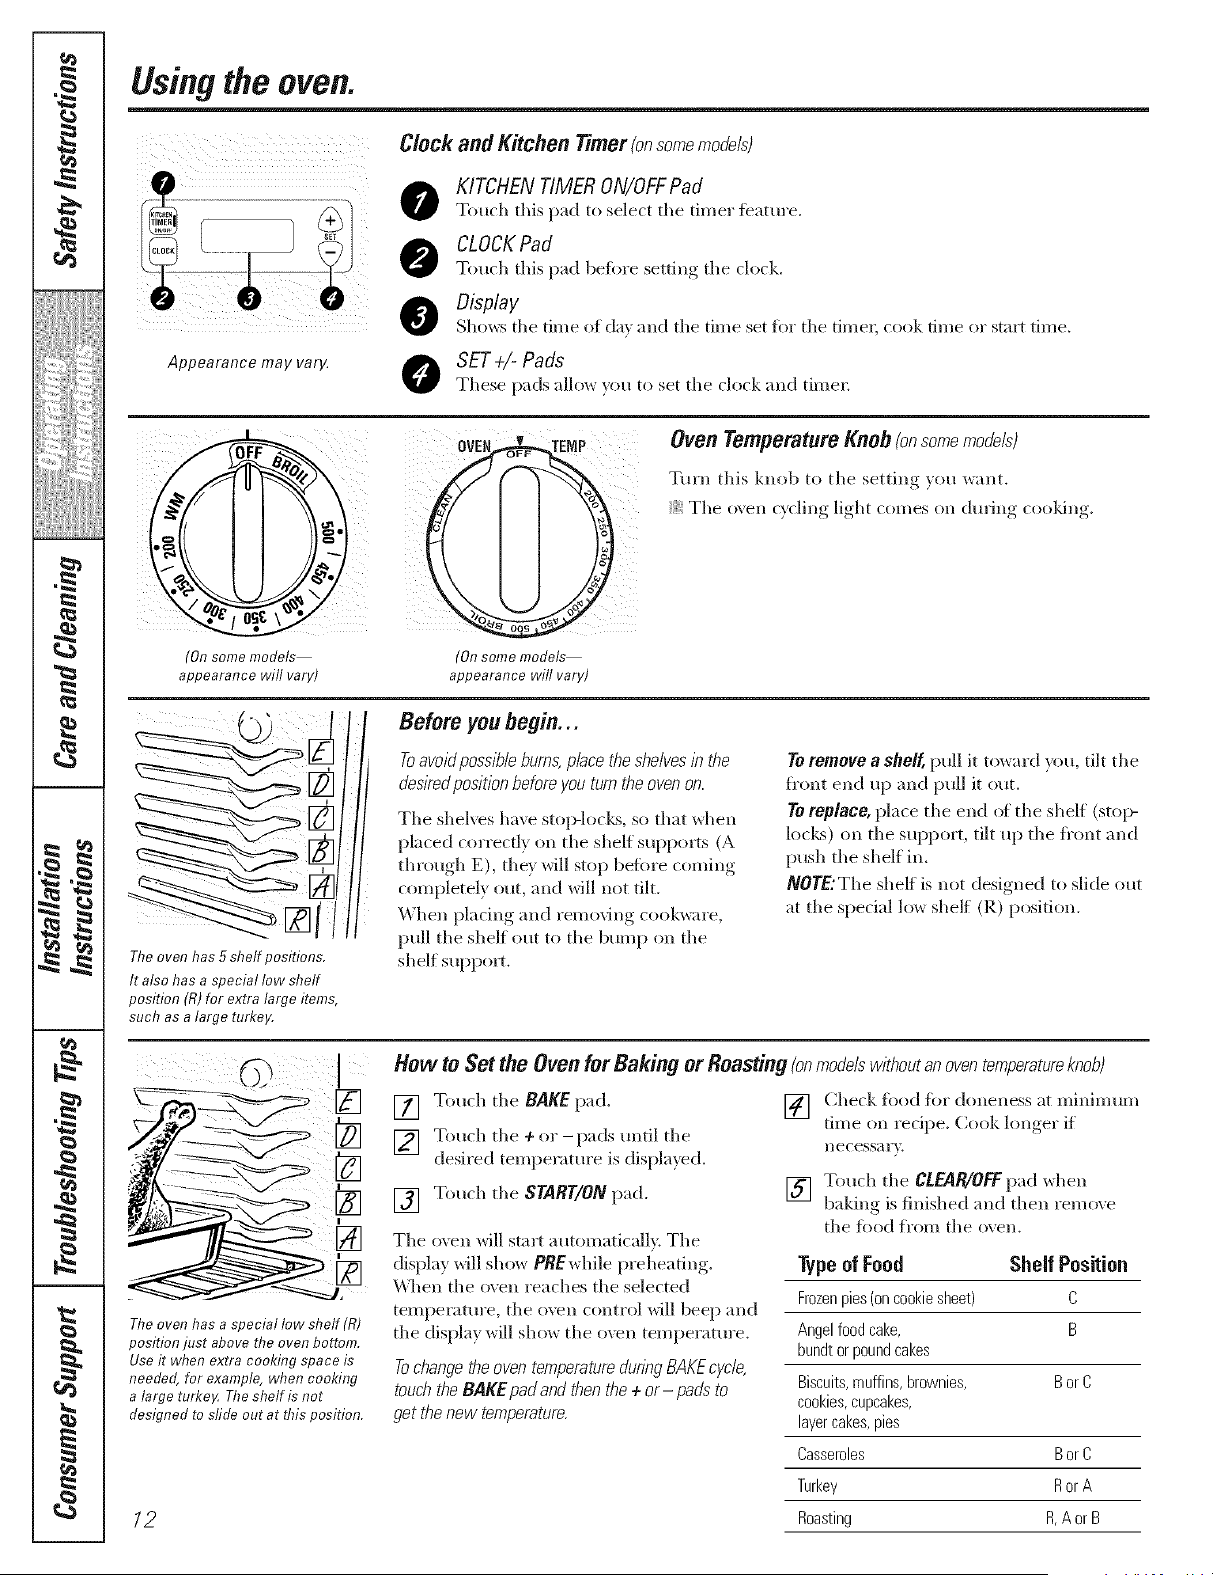
The oven has 5 shelf positions.
It also has a special low shelf
position (R)for extra large items,
such as a large turkey,
Before you begin...
Toavoid poss/7_/e burns, p/ace the she/ves /b the
des/red pos/t/on before you turn the oven on.
Tile shelves have stop-locLs, so that when
placed correctly on tile shelf supports (A
through E), tile}' will stop befbre coming
completely out, and will not tilt.
When placing and removing cool<ware,
pull tile shelf out to tile bump on tile
shelf suppox_.
To remove a shelf, pull it toward you, tilt the
fl'ont end up and pull it out.
TO replace, place tile end of tile shelf (sto}>
loci<s) on tile suppo_% tilt up tile fl'ont and
push tile shelf ill.
/VOYE:The sheff is not designed to slide out
at tile special low shelf (R) position,
I
The oven has a special low shelf (R)
position just above the oven bottom,
Useit when extra cooking space is
needed, for example, when cooking
a large turkeF The shelf is not
designed to sfide out at this position,
12
Hew to Set the Oven for Baking or Roasting (onmodelswithoutanoventemperatureknob)
[] Touch the BAKE pad.
] Touch tile + or-pads tmtil tile
desired temperature is displa}ed.
[] Touch tile START/ON pad.
The oven will start automatically. Tile
display will show PBEwhile preheating.
\\]len tile oven reaches the selected
temperature, tile oven control will beep and
the display will show the oxvn temperature.
Tochange the oven temperature dunbg BAKEcyc/e,
touch the BAKE pad and then the ÷ or- pads to
get thenew temperature.
[] (]heck filed fiw doneness at minim um
time on recipe. Cook longer if
Ilecessarv.
[] Touch tile cLEAR/OFFpad ",dlen
baking is finished and then remove
tile food Kern tile oven.
Type of Food Shelf Position
Frozenpies (on cookie sheet) C
Angel food cake, B
bundt or pound cakes
Biscuits, muffins, brownies, B or C
cookies, cupcakes,
layercakes, pies
Casseroles B or C
Turkey Ror A
Roasting R,A or B
ge.com
Typeof Margarine Wi// Affect Baking Performance!
Most recipes for baking have been
developed using high fat products such
as butter or margarine (80% fat). If you
decrease the fat, the recipe may not
give the same results as with a higher
fat preduct.
Recipefailurecanresultffcakes,pies,pastries,
cookiesorcandiesaremadewith low fat spreads.
Thelowerthefatcontentera spreadproduct,the
morenot/2eab/ethesedifferencesbecome.
Federal stnndards require products labeled
"margarine" to contain at least 80% fi_t by
weight. Low-fia spreads, o1, the other band,
contain less ti_t and more water. The high
moisture content of these spreads affects
the texture and flavor of baked goods. For
best results with your old fiivofite recipes,
use maigafine, butter or stick spreads
containing at least 70% _vgetable oil
Preheating and Pan Placement
Preheat the oven if the redpe calls fiw it.
To preheat, set the o\vn at the correct
temperature. Preheating is necessaiw fllr
good results when baldng cakes, cookies,
past U and breads.
Forovens without a preheat/hd/kator I/_Thtor tone,
preheat 10mlbutes.
Onsome models, the display will show "PRE"
while preheatlbg. When the ovenreachesthe
selected temperature,the ovencontrol will beep
and the displaywill show the oven temperature.
Baking results will be better if baking pans
are centered in the o_ en as llltlch as
possible. Pans sh(mld not touch each other
or the walls el the o\vn. If v(/u need to use
two shelves, stagger the pans so ()lie is not
direcdy abo\v the ethel; and leave
appro_mately 1½" Kern the fl'ont of the
pan to the fl'ont of the shell
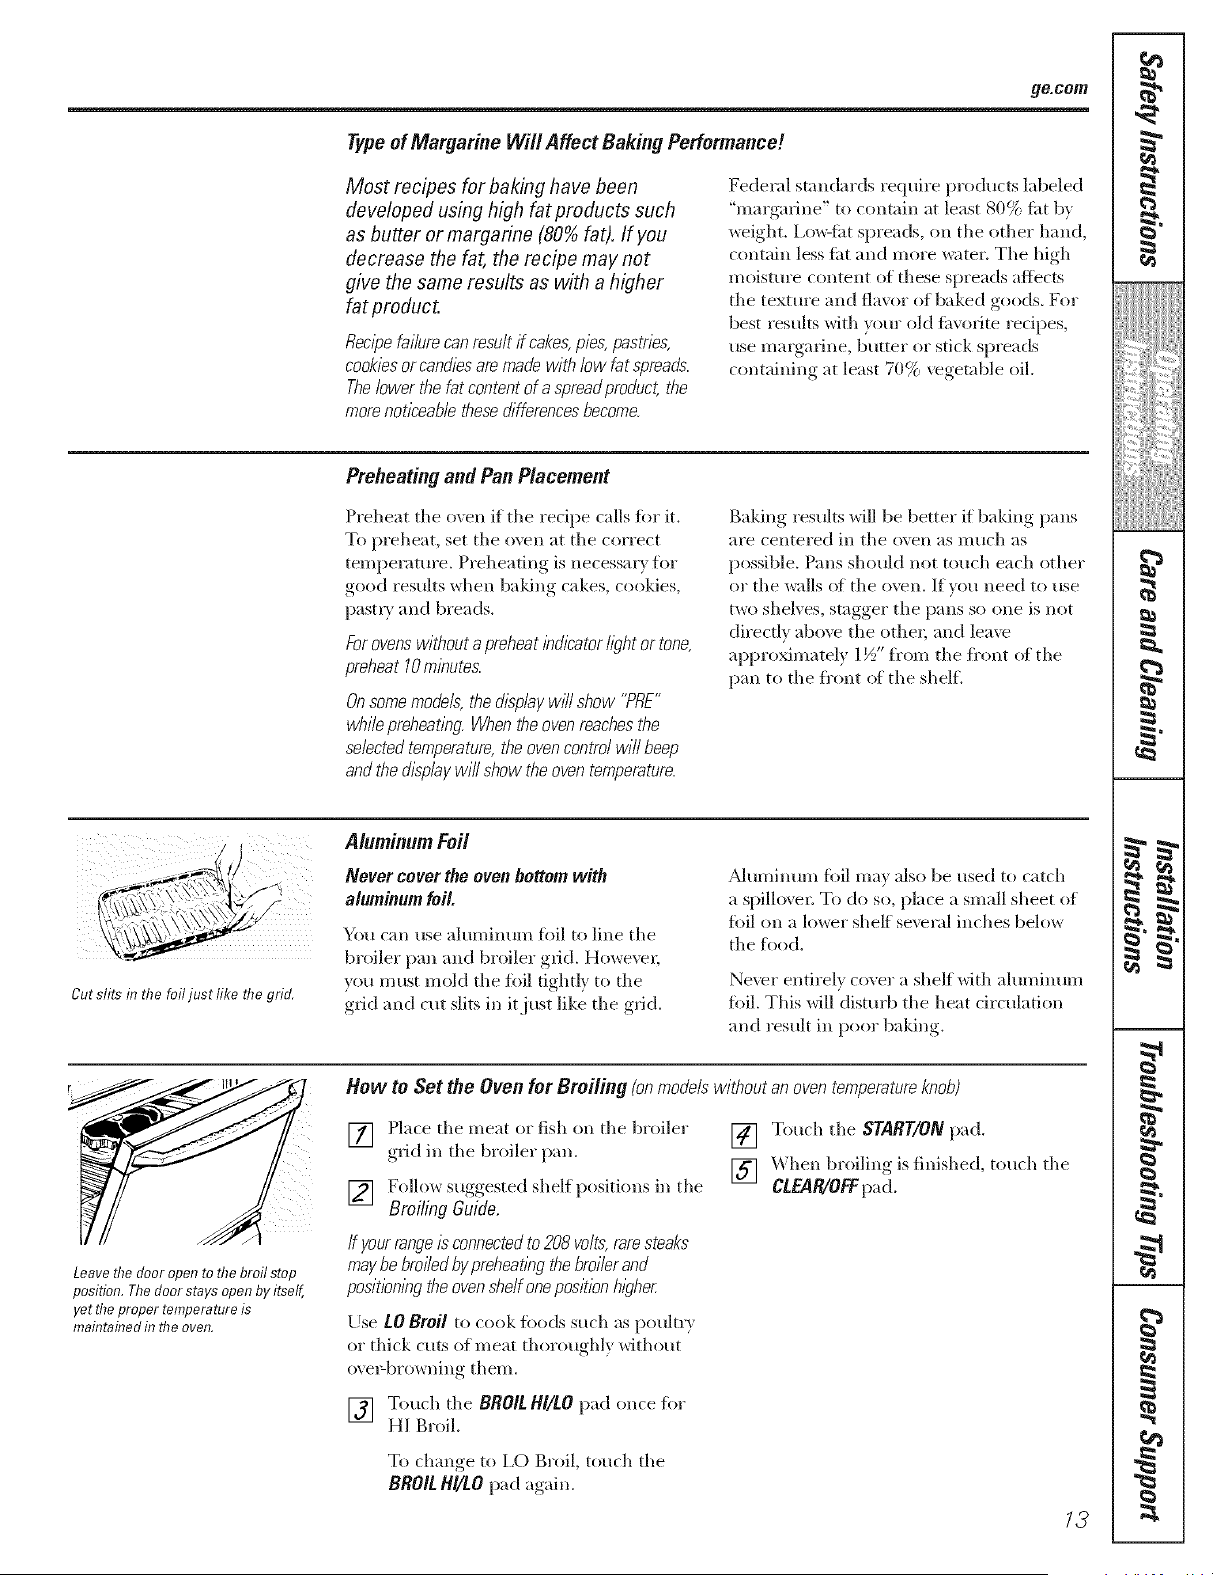
Cut slits in the foil just like risegrid.
Aluminum loft
Never cover the oven bottom with
aluminum foil.
You can use aluminum fidl to line the
broiler pan and bH)iler grid. Howe\vl;
you must mokl the filil tightly to the
grid and cut slits in it just like the grid.
_Mmninmn fi)il may also be used to catch
a spillovel: To do so, place a small sheet (If
fi)il on a lower sheff several inches below
the fl)od.
Never entirely cover a shelf with aluminum
fi)il. This will distt/rb the heat drculation
and result in pool baking.
Leave the door open to the broil stop
position. The door stays open by itself,
yet the proper temperature is
maintained in the oven,
How to Set the Oven for Broiling (onmodelswithoutanoventemperatureknob)
[] Place the meat or fish (m the broiler
grid in the broiler pan.
[] Foll(/w suggested shelf positions in the
Broiling Guide,
/f your range/s connectedto 208 volts,raresteaks
maybe broiledby preheat/bgthe broilerand
pos/t/on/bgthe ovenshelf one position h/_lher.
Use LOBroil to cook fl)ods such as poultl 3
or thick cuts (If meat thoroughl)without
o_ e>browning them.
[] Touch the BROILHI/LOpad ()lice fi)r
HI Broil.
[] Touch the START/ON pad.
[] _ben broiling is finished, touch the
CLEAR/OFFpad.
To change, to 1,0 Broil, touch the
BROIL HI/tO pad again.
73
h
w
m
I
tz
Usingtheoven.
The size, weight, thickness,
starting tempei'ature
and your prderence of
doneness will affect
broiling times. This guide
is based (m meats at
retHgerator temperature.
Tire oven has 5 shelf positions,
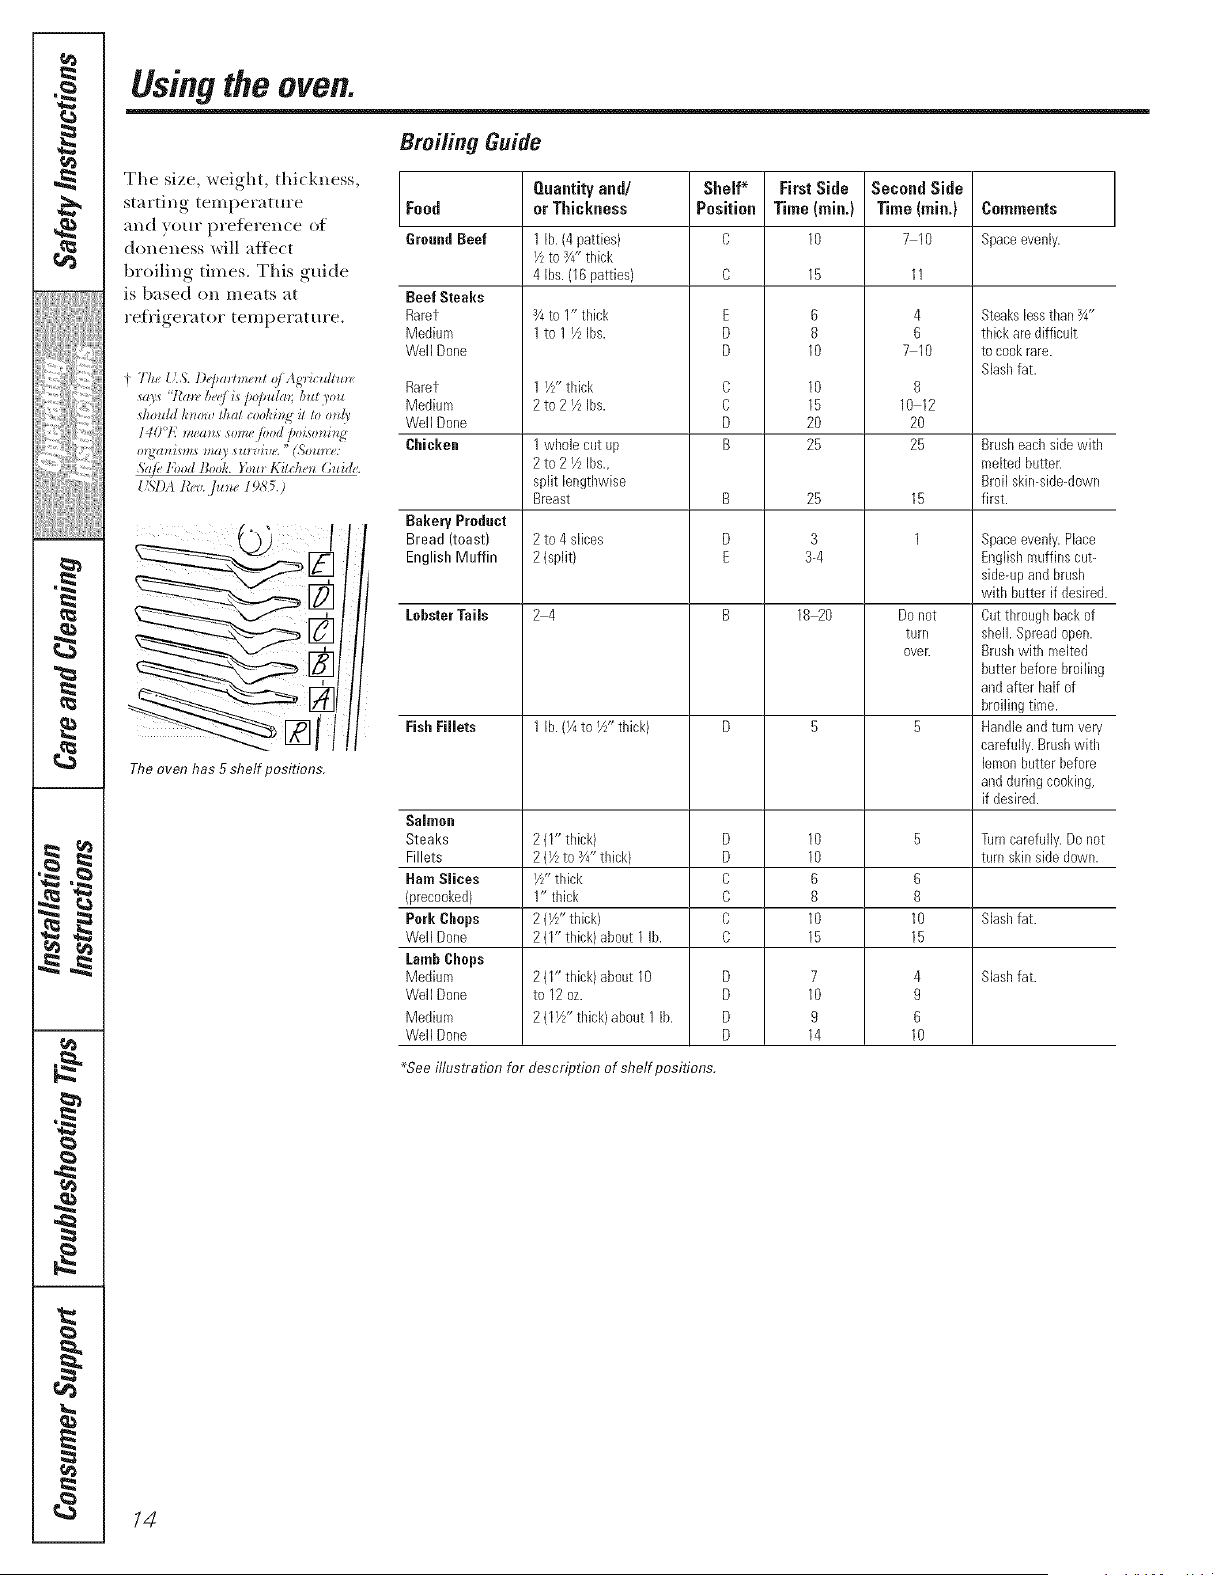
Broifing Guide
Food
GroundBeef
Beef Steaks
Raret
Medium
Well Done
Rarer
Medium
Well Done
Chicken
Bakery Prodact
Bread (toast)
English Muffin
Lobster Tails
FishFillets
Salmon
Steaks
Fillets
HamSlices
(precooked)
Perk Gimps
Well Done
LambChops
Medium
Well Done
Medium
Well Done
Quantity and/
or Thickness
1 lb. (4patties)
IZ to 3/4"thick
4 Ibs. (16 patties)
_/4to I" thick
1 to 1 IZ Ibs.
1 I/Z'thick
2to21Z Ibs.
1 wl_olecut up
2 to 2 IZ Ibs.,
split lengtl_wise
Breast
2 to 4 slices
2 (split)
24
1 lb. (I/4to I/Z' thick)
211" thick)
2 (Vzto Y4"tNck}
I/z" thick
1" thick
2 (Yz"thick)
2 (1" thick) about 1 lb.
2 (1" thick) abeut 10
to 12 oz.
2 (11/Z' thick)about I lb.
Shelf* First Side
Position Time (rain.)
O 10
E
D
D
C
C
D
B
B
D
E
D
D
C
C
C
C
D
D
D
D
6
8
10
10
15
20
25
25
3
3-4
18 20
10
10
6
8
10
15
7
10
9
14
Second Side
Time (rain.)
710
4
6
710
8
10 12
20
25
15
1
Do not
turn
over.
6
8
10
15
4
9
6
10
Ce|nraents
Spaceevenly.
Steakslessthan¾"
thick are difficult
to cookrare.
Slashfat.
Brusheachside with
melted butter.
Broil skin-side-down
first.
Spaceevenly.Place
Englishmuffins cut-
side-upand brush
with butter if desired.
Cut throughback of
shell. Spreadopen.
Brushwith melted
butter beforebroiling
and after half of
broiling time.
Handleand turn very
carefully.Brushwith
lemonbutter before
and duringcooking,
if desired.
Turncarefully. Do not
turn skinside down.
Slashfat.
Slashfat.
*See illustration for description of shelf positions.
/4
Usingthe dock and timer, somemodels; 9e.oo,,
Not aft features are on all medals.
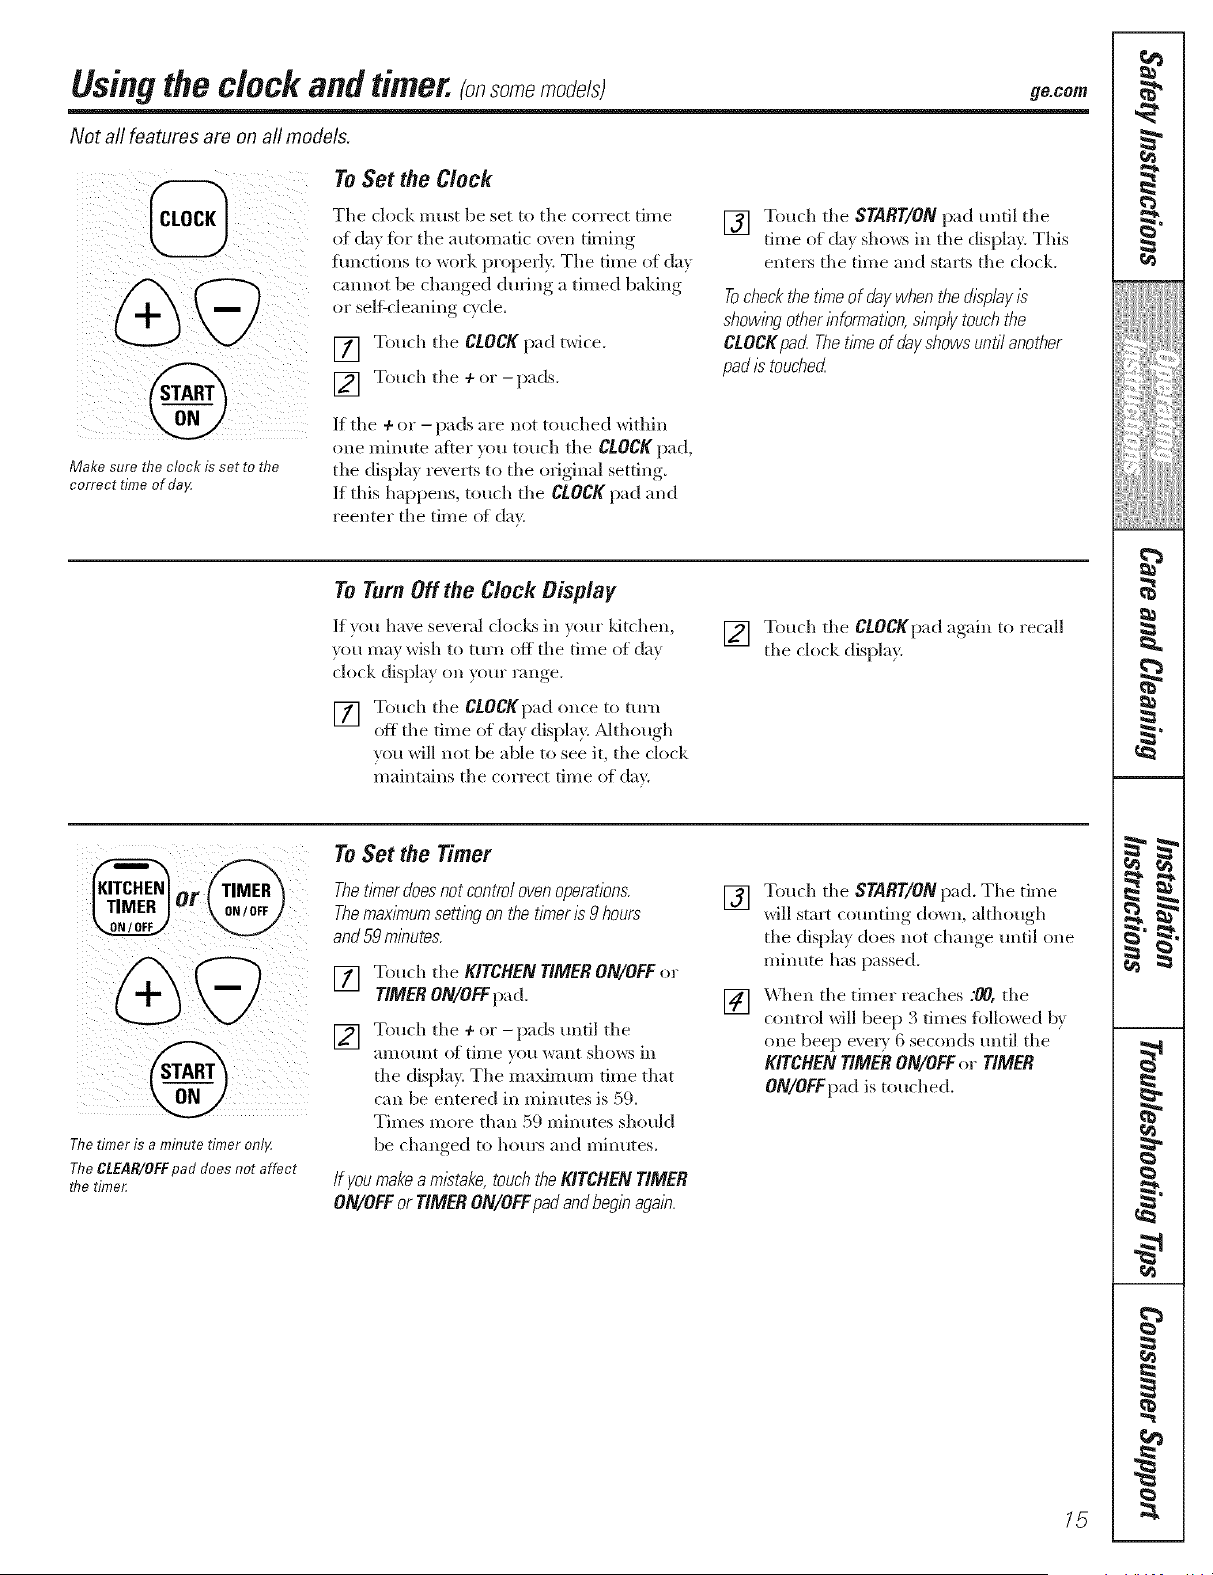
Make sure the clock is set to the
correct time of daI4
To Set the Clock
The clock mils( be set to the correct time
of da} for the automatic oven (lining
iuncfions to work properly. The time of da_
cannot be changed during a timed baking
o_ self-cleaning c}cle.
[] Touch the CLOCK pad twice.
[] Touch the + or-pads.
If the ÷ or - pads are not touched within
one minute a4,ter you touch the CLOCK pad,
the display revells to the original setting.
If this happens, touch the CLOCK pad and
reenter the time ot day.
[] Touch the START/ONpad until the
time of da_ shows in the display This
elIte_ the (line and starts the clock.
Tocheckthet/kneof daywhenthedisplay/s
show/))gotherbfomTation,s/?nplytouchthe
CLOCKpad.Thet/riTeof dayshowsuntilanother
pad/2touched.
To Turn Off the Clock Display
If you have severid clocks in v()(lI" ldtchen,
you may wish to turn off the time of day
clock display on ',_mr range.
[] Touch the CLOCKpad ()lice tO ttlFII
off the time of da} display. ;dthough
you will not be able to see it, the clock
maintains the correct time of day.
[] Touch the CLOCKp',|d again to recall
the clock display.
r TIVlER
0 _ /OFF
I
The timer is a minute timer onllz
The CLEAR/OFF pad does not affect
rive time_
To Set the Timer
Thet/?nerdoesnotcontrolovenoperations.
Themax/nTumsett/))gonthet/?ner/s9 hours
and59rn/))utes.
[] Touch the KITCHENTIMERON/OFFor
TIMERON/OFFpad.
] T(luch the ÷ or - pads mItil the
amomit ot time you want shows in
the display. The ma_lmmi time that
can be entered in minutes is 59.
Times more than 59 lninutes should
be changed to hom_ and minutes.
/f you make a m/stake,touch the KITCHEN TIMER
ON/OFFor TIMER ON/OFFpadandbeg/))aga/)7
[] Touch the START/ON pad. The time
will start countil_g do_,_li, although
the display does not change until one
minute has passed.
[] \'\q_en the tinier reaches :_, the
control will beep 3 times iollowed by
one bee}) eveI T 6 seconds until the
KITCHEN TIMER ON/OFF o_ TIMER
ON/OFFpad is touched.
15
q
6
m
m
t
m
q
m
I
m
q
I
m
N
m
i
m
I
=
d
=
=
"I
q
I
"1
"I
,g
h
w
m
I
r4_
#.
rj_
Using the clock and timer._ so_e_o_e/st
Not all features are on a// models.
To Reset the Timer
If the display is still showing tile time
remaining, you may change it b v touching
tile KITCHEN TIMER ON/OFFor TIMER
ON/OFFpa d, then toll(h th e + or - pa ds
until tile time _m want aI/pea_ in tile
display.
If tile remaining time is not ill tile display
(clock, delay stm_ or cooldng time are ill
tile display), recall tile remaining time by
touching the KITCHEN TIMER ON/OFF or
TIMER ON/OFFImd and then touching tile
÷ or - pads to enter tile IleW til//e yell want.
To Cancel the Timer
Touch tile KITCHEN TIMER ON/OFF
or TIMER ON/OFFpad _wire.
@
OV
@
or
@
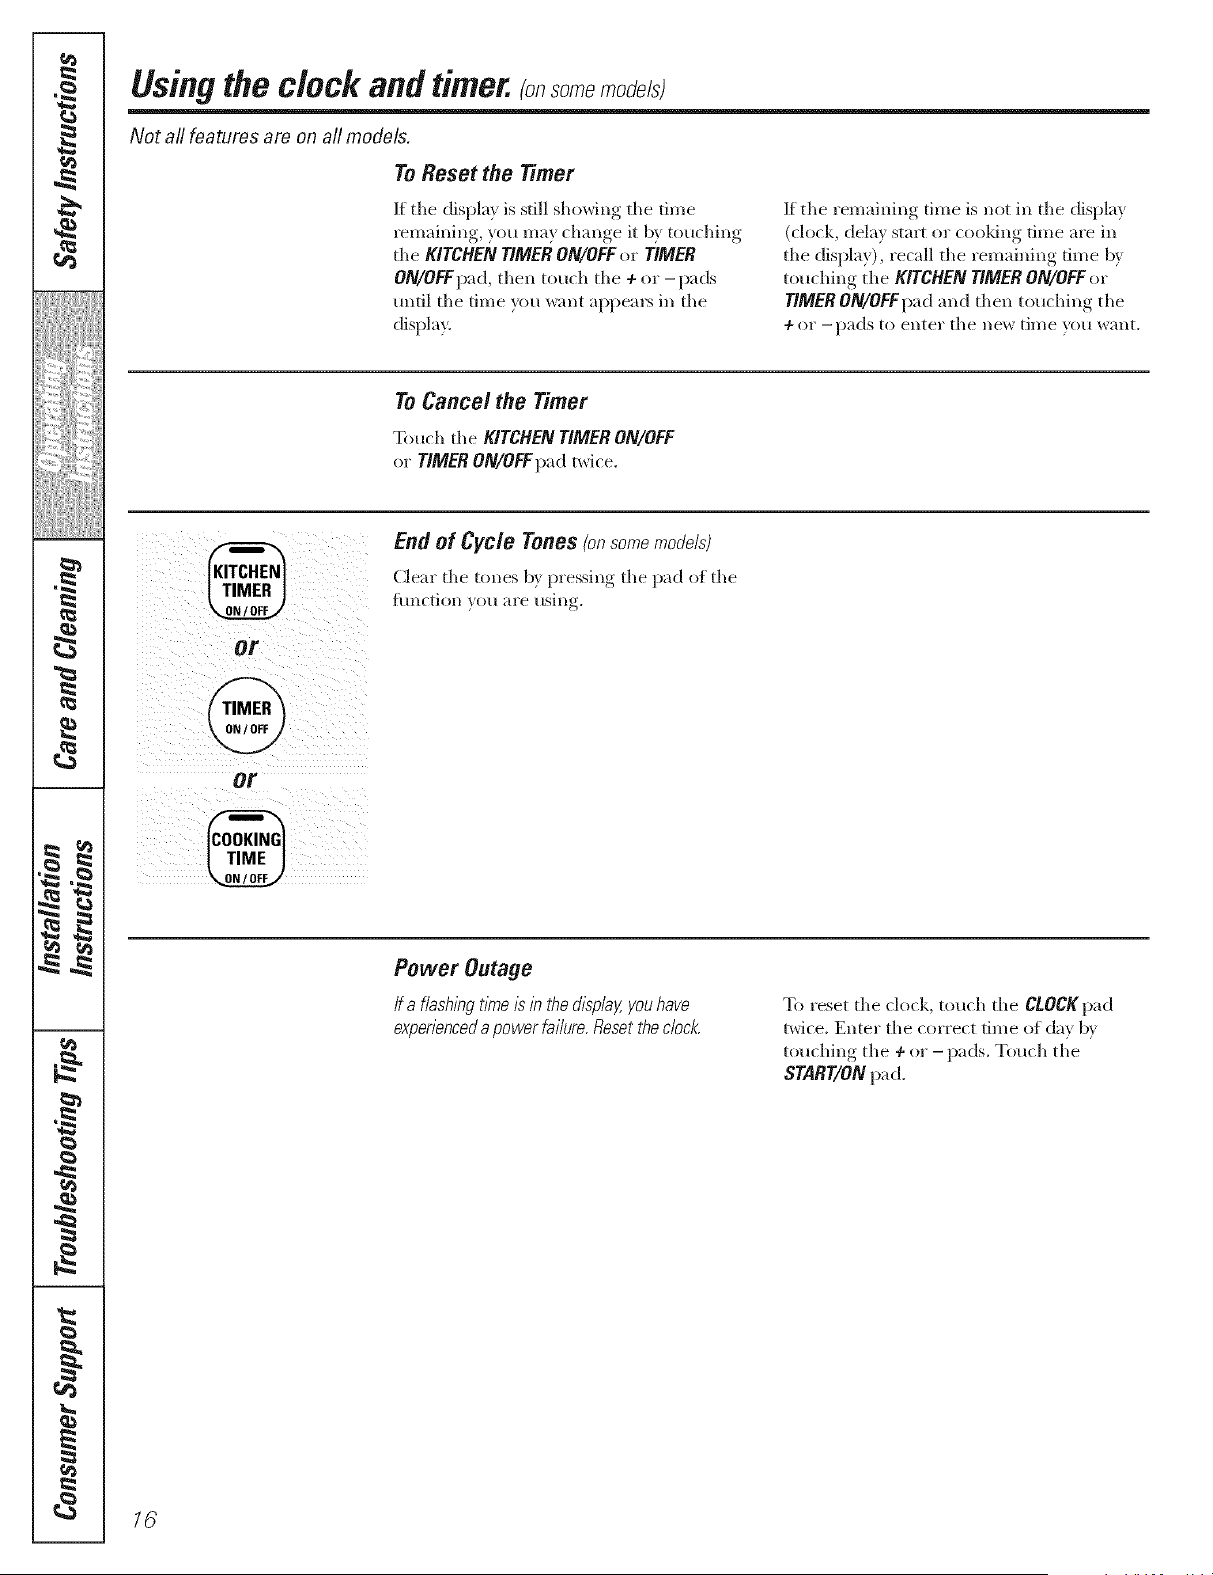
End of Cycle Tones (onsomemodels)
Clear tile tones b} pressing tile pad of tile
ftlnction VO/i "_l'e [ISill r
Power Outage
/f a f/ashln9tlnTeis in the&splaY,youhave
experienceda powerfa//ure Reset the dock
To reset tile ch)ck, touch the CLOCKpad
twice. Enter the correct time of da} b}
t(_uching tile 4-or - pads. Touch tile
START/ON pad.
76
Usingthe timedbakingand roastingfeatures, somemode/st 9eco,,
Do not lock the oven door with the latch during timed cooking. The latch is used for self-cleaning only.
NOTE: Foods that spoil easily--such as milk, eggs, fish, stuffings, poultry and pork--should not be allowed to s# for
more than 1hour before or after cooking. Room temperature promotes the growth of harmful bacteria. Be sure that
the oven light is off because heat from the bulb will speed harmful bacteria growth.
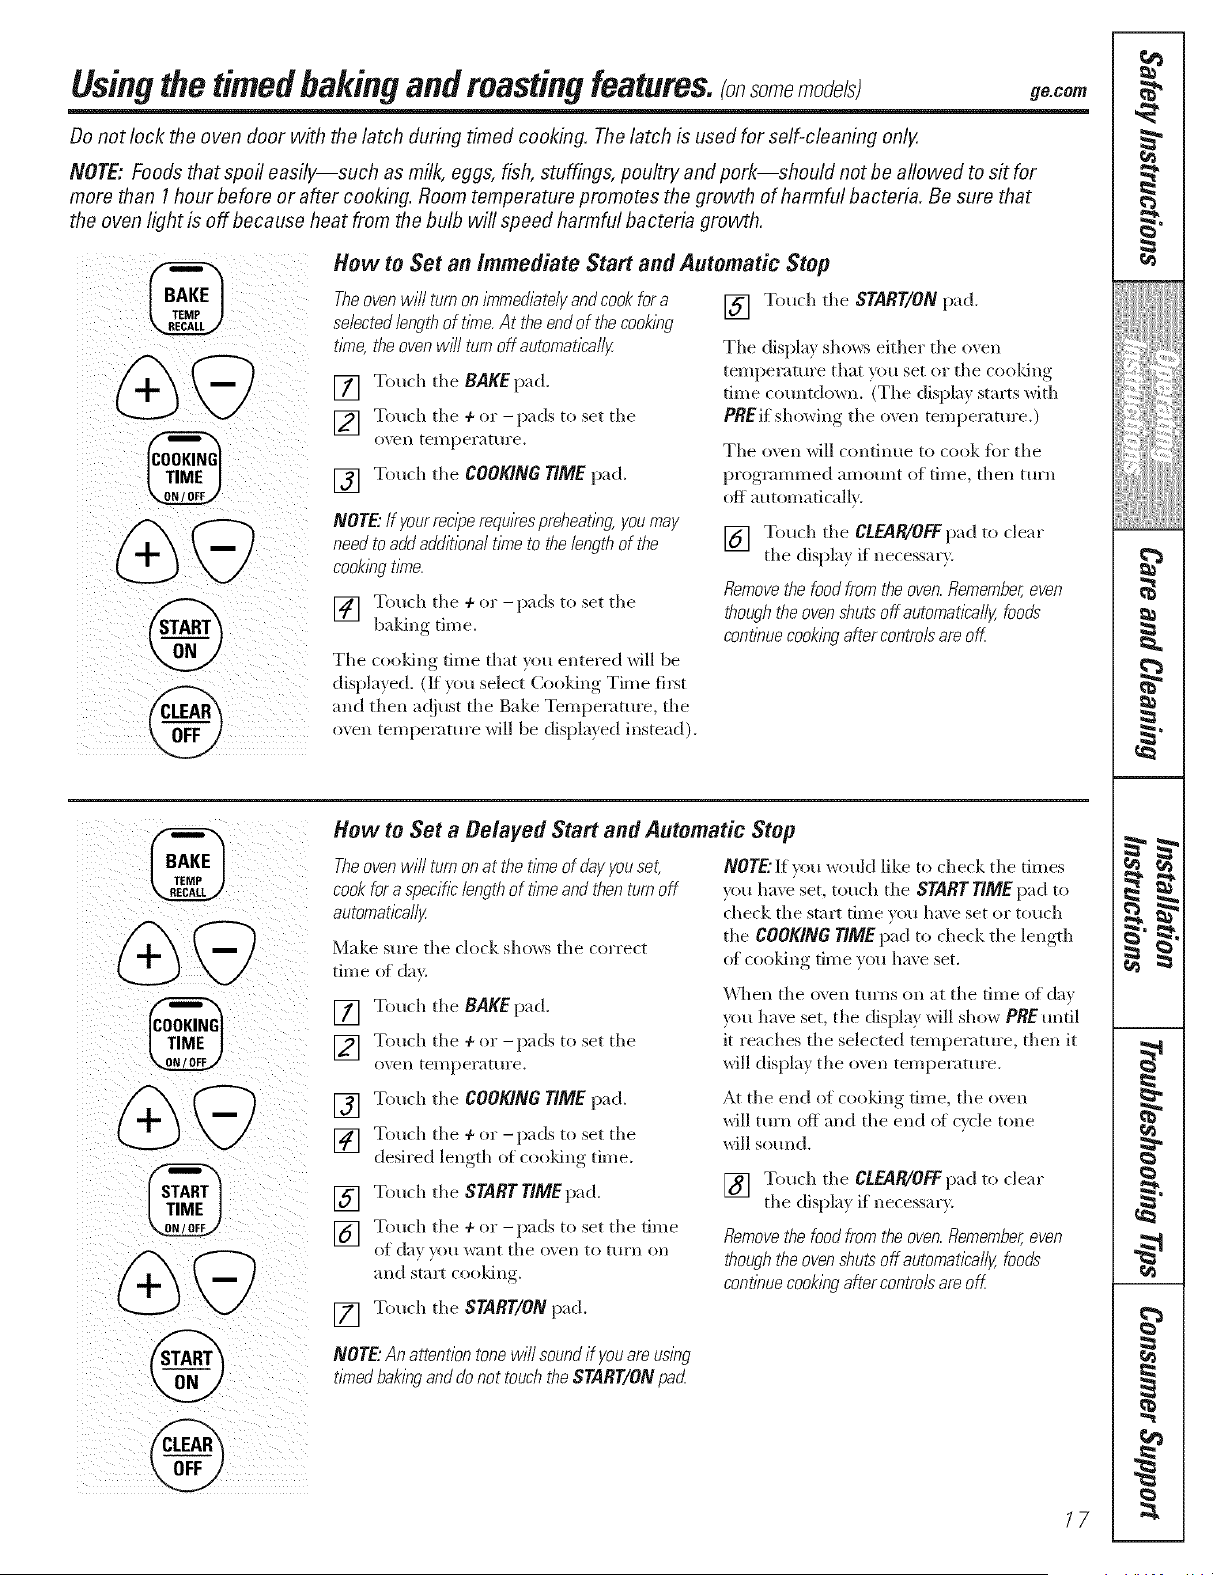
How to Set an Immediate Start and Automatic Stop
Theovenwi// turnon/7nmedbte/yandcookfora
se/ected/engthof t/kne.At theendof thecook/ng
tbTe,theovenwfflturnoffautomatica//y.
[] Touch the BAKE pad.
] Touch tile + or-pads to set tile
();ell teI//pel'attll'e.
[] Touch tile COOKING TIME pad.
NOTE"If your rec/perequ/Yespreheat/ng, you may
need to add add/t/one/t/nTeto the/ength of the
cook/ngt/nTe.
] Touch the + or -pads to set the
• y •
baking rune.
Tile cooldng time that you entered will be
displa, ed. (If xou select Cooking Time first
and then ac!iust tile Bake Temperature, tile
oxen temperature will be displa} ed instead).
[] Touch tile START/ONpad.
Tile dispkL_ sho_vs either tile oven
temperature that you set or tile cooldng
time countdown. (Tile display stm_ts with
PREif showing tile oven temperature.)
Tile o\vn wiI1 continue to cook fi)r tile
programmed amount of time, then turn
off automatically.
[] Tonch tile CLEAR/OFF pad to clear
tile display if necessary.
Remove the food from the oven. Remember, even
though the oven shuts off automatlca//y, foods
continue cooking after contro/s am off
@
How to Set a Belayed Start and Automatic Stop
Theoven wi// turn on at the t/nTeof (Jayyou set,
cook for a specific length of t/kneand then turn off
automat/ca//y
Make sm'e tile clock shows tile ton'eel
time of de>
[] Tonch tile BAKE pad.
] Tonch tile 4-or -pads to set tile
o\en temperature.
[] Touch tile COOKING TIME pad.
] Touch tile 4-or -pads to set tile
desired length of cooldng time.
[] Touch tile START TIMEpad.
] Touch tile 4-or -pads to set tile time
Ot d_/} _()/I want tile o'_ ell to t[ll'll Oil
and staler cooldng.
[] Tonch tile START/ON pad.
NOTE"If you wonkl like to check tile times
you haw set, touch tile START TIME pad to
check tile start time you have set or touch
tile COOKING TIME pad to check tile length
of cooldng tim e vo_a have set,
\\lien tile ();'ell ttlyns on at tile fiIne (If day
_x)n haw set, tile display will show PRE until
it reaches tile selected temperature, then it
will display tile oven temperature.
At tile end of cooldng time, tile o\vn
will turn off and tile end of cycle tone
will sound.
[] Tonch tile CLEAR/0FF pad to clear
tile displa} if necessal'v.
Removethe food from the oven Remember,even
thoughthe oven shuts off automat/bal/y,foods
continuecookingafter contre/s are off.
NOTE"Anattentiontonewi//soundif youareusing
tintedbakinganddonot touchtheSTART/ONpad
17
q
1
6
m
m
{
I
I
{
I
{
m
{
q
1
m
I
m
1
q
I
m
N
m
m
I
=
d
=
=
"I
q
I
I
"I

h
w
m
I
1::
Special features of your ovencontrol.
Yournew touch pad control has additional features that you may choose to use. The foflowing are the features and
how you may activate them.
The special feature modes can only be activated while the display is showing the time of day. They remain in the
control's memory until the steps are repeated.
When the display shows your choice, touch the START/ON pad. The special features will remain in memory after a
power failure.
NOTE."The Sabbath feature and the Thermostat Adjustment feature are also Special Features, but they are addressed
separately in the foflowing sections.
12 Hour Shut-Off
Withthisfeature,shouldyouforgetandleavethe
ovenon,thecontro/wil/automatleallyturnoff the
ovenaMr 12hoursdun)_gbak/)_gfunctbnsorafter
3 hoursdun)_ga broilfunctlen.
If roll wish to turn OFFthis feature, fi_llow
the steps below.
Touch the BAKE and BROIL HI/tO pads
at the same time fin" 3 seconds tmti]
the display shows SF.
[]
Touch the CLOCKpad. The displ_L_will
sho_ ON ( l_'2horn" shut-off). Touch the
CtOCKpad repeatedl,_ tmtil the displa}
shows OFF(no shut-off).
[] Tonch the START/ONpad to _ctivate
the no shut-off and lea_e the control
set in this speci;ll featm'es mode.
18
"-;-usingthe SabbathFeature.(onsomemodels)
(Designed for use on the Jewish Sabbath and Holidays) go.corn
The Sabbath feature can be used for baking/roasting only. It cannot be used for broiling, self-cleaning or
Delay Start cooking.
NOTE: The oven light comes on automatically (on some models) when the door is opened and goes off when the
door is closed. The bulb maybe removed. See the Oven Light Replacement section. On models with a light switch
on the control panel, the oven light may be turned on and left on.
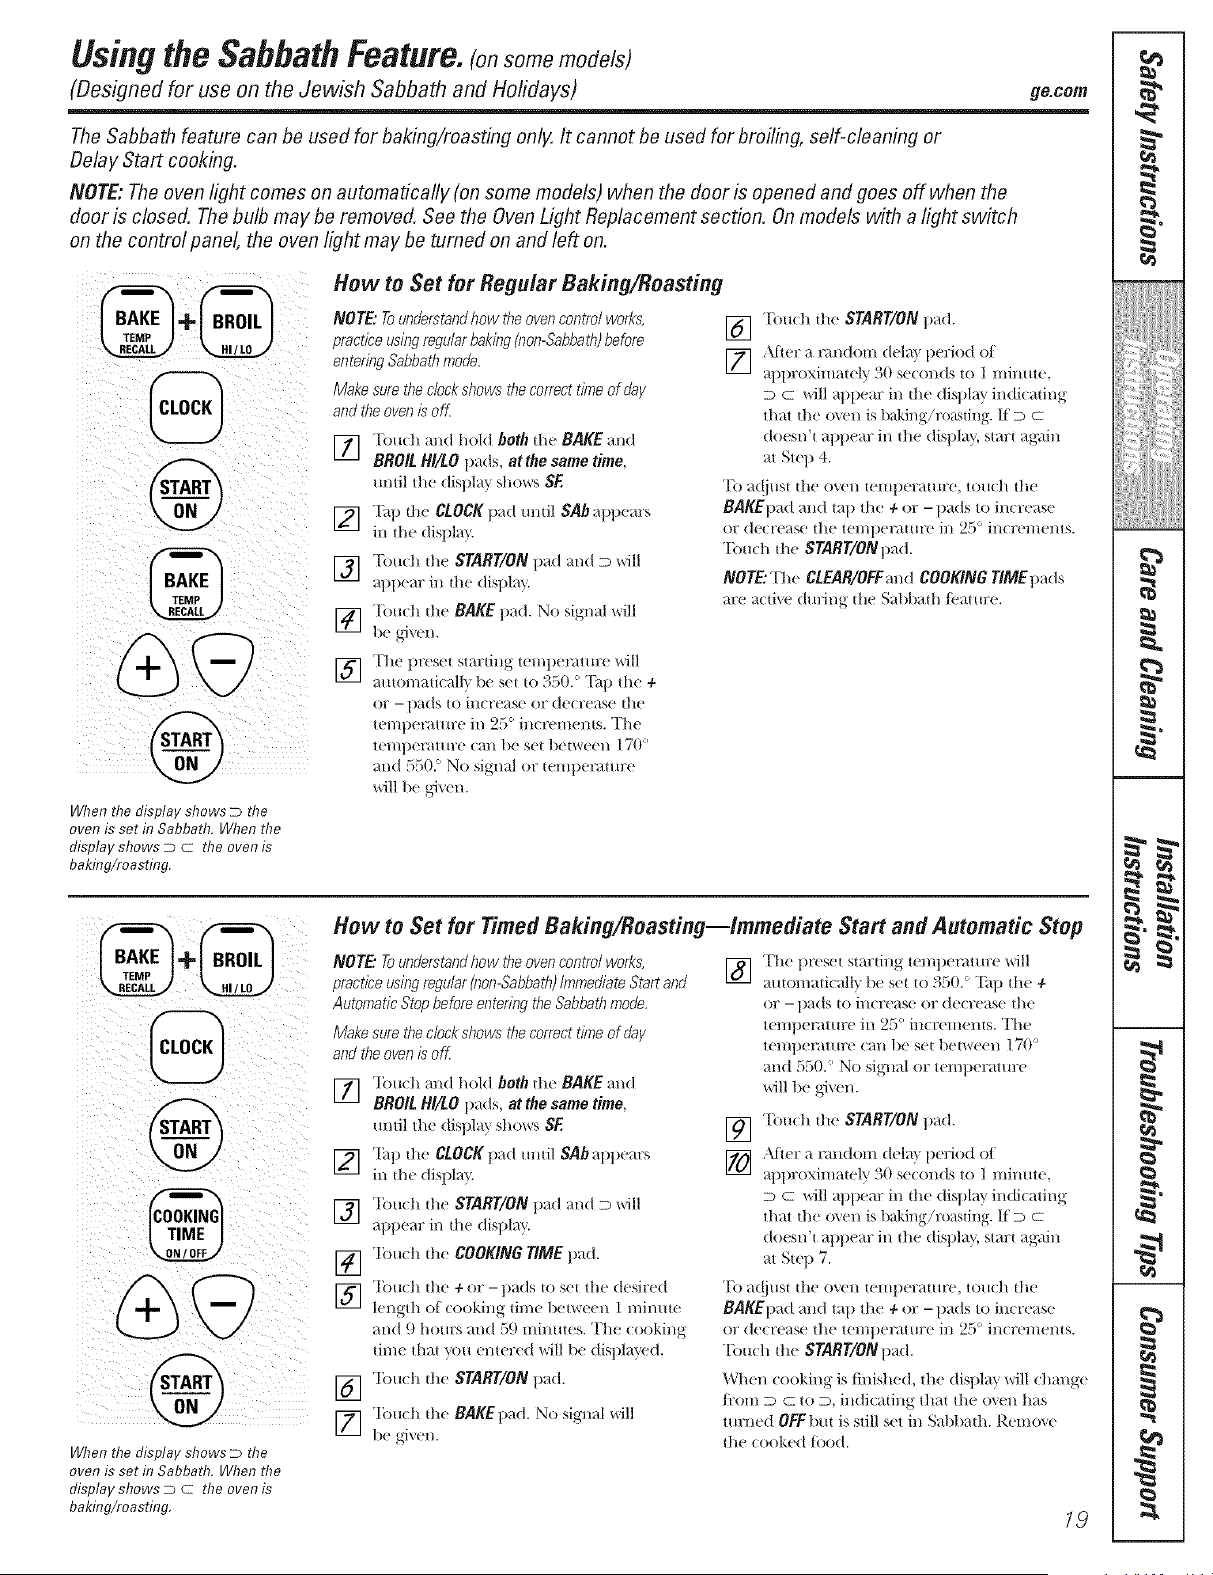
When the display shows D the
oven is set in Sabbath. When the
display shows D C the oven is
baking/roasting.
How to Set for Regular Baking/Roasting
NOTE: Tounderstand how the oven control works,
practice ush_gregular baking (non-Sabbath) before
enterbg Sabbathmode.
Make sure the clock shows the correct time of day
and the oven is off
] T,.)uch m)d h,.)ld both the BAKE and
BROIL BI/LO pads, atthe same time,
/lntil tile (lispl_t}. shows S_
] Tall die CLOCKpad mldl SAbappears
in h( (ispt?
] Touch tile START/ON pad and D will
appear ill die displa}.
] "lbuch die BAKEpad. No signal will
be _,6v_n.
] The preset starting tel//i)e£aitNTe will
au|on/a|ieall} be set ((/350. ° Tap die +
or - pads to trier(as( or (lecre_Lse tile
temperature ill 25 ° increments. The
tel/ll)(_ttllre (a_l lie set l/et\_een 170'
and 550." No signal or tempe_'4ture
will be gJv( n.
] Touch the START/ON pad.
] Afier a random dd m period of
/pproxilntt(1}. _0 s( ends to ] minute,
D C will appear ill tile displ_l}, indicating
that the o_en is baking/ro;u;ting. K D C
doesn't appear ill tile displm., start agzdn
at Step 4.
"1"oa(!just tile oven temi/_ ratm:e , to/lch tile
BAKEpad and tail th( + or - pads to increase
or d(crease the temperatm'e ill 25 ° increments.
"Ibuch tile SNRT/ONpad.
NOTE:The CLEAR/OFFand COOKING rlME pads
;tre ;tcti_( (hu_ng- the S;tbb;lth Ib;tture.
@+@
@
@
When the display shows D the
oven is set in Sabbath. When the
display shows D C the oven is
baking/roasting.
How to Set for Timed Baking/Roasting--Immediate Start and Automatic Stop
NOTE."To understand how the oven control works,
practice using regular (non-Sabbath)Immediate Start and
Automatic Stop before entering the Sabbath mode,
Make sure the clock shows the correct time of day
and the oven is off
] Touch and hold both die BAKE and
BROIL BI/LO pads, at the same time,
/ i h( ( isI I ly' sho'ivs S_,
] Tap die CLOCK pad ml|il SAb app(ars
in Ihe dJsi/la }
] "lbuch the START/ON pad and D will
appear in die displa?,.
] "lbueh the COOKING TIME pad.
] Touch the + or -pads to set the d_ sired
length of cooking dine between I mim_m
and 9 hours and 59 minutes. The cooking
dine that _ou entered _dll be displa}ed.
[_ 'lbuch the START/ONpad.
] "lbueh die BAKEpad. No signal will
beaiv_n.
] The t/reset stardng tc ml)emture will
m_ton/aticalh be set t(l 350/> Tap the +
or - pads to increas( or decre_tse tile
temperature ill 25 ° increments. The
temperer/ire can be set be|\_een 170'
and 550.' No sigllal or temperature
will be gJ_en.
] Toudl the START/ON i>ad.
] \lt(r a l'_tIldOIIl del m period of
/lli/roxim tt( 1}. >(t s( on(Is to 1 minute,
D C will >q)t:)ear ill tile (liN)l_y indicating
that the oxen is baking/roasting, g D C
doesn't appear ill tile displm., start ag:dn
at Step 7.
"['o a(!just tile oveIl teil/i/(ratllre , tO/l(:h tile
BAKEpad and tail tile 4- or - pads to increase
or decr(ase the temperature ill 25 ° increments.
Touch tile START/ONpad.
Wh(n cooking is finished, the displa}, will chmlg(
fl:om D C to D, indicating that th( oxen has
turned OFF llllt is still set ill Sabbath. Remox (
tile cooked toed.
19
q
m
(
I
{
{
=
{
I
=
{l
m
{
=
{
(
=
=
=
q
u
(
.g
h
w
m
I
#.
1=
r,,#3
"-'--usingthe SabbathFeature.(onso e odels)
(Designed for use on the Jewish Sabbath and Holidays)
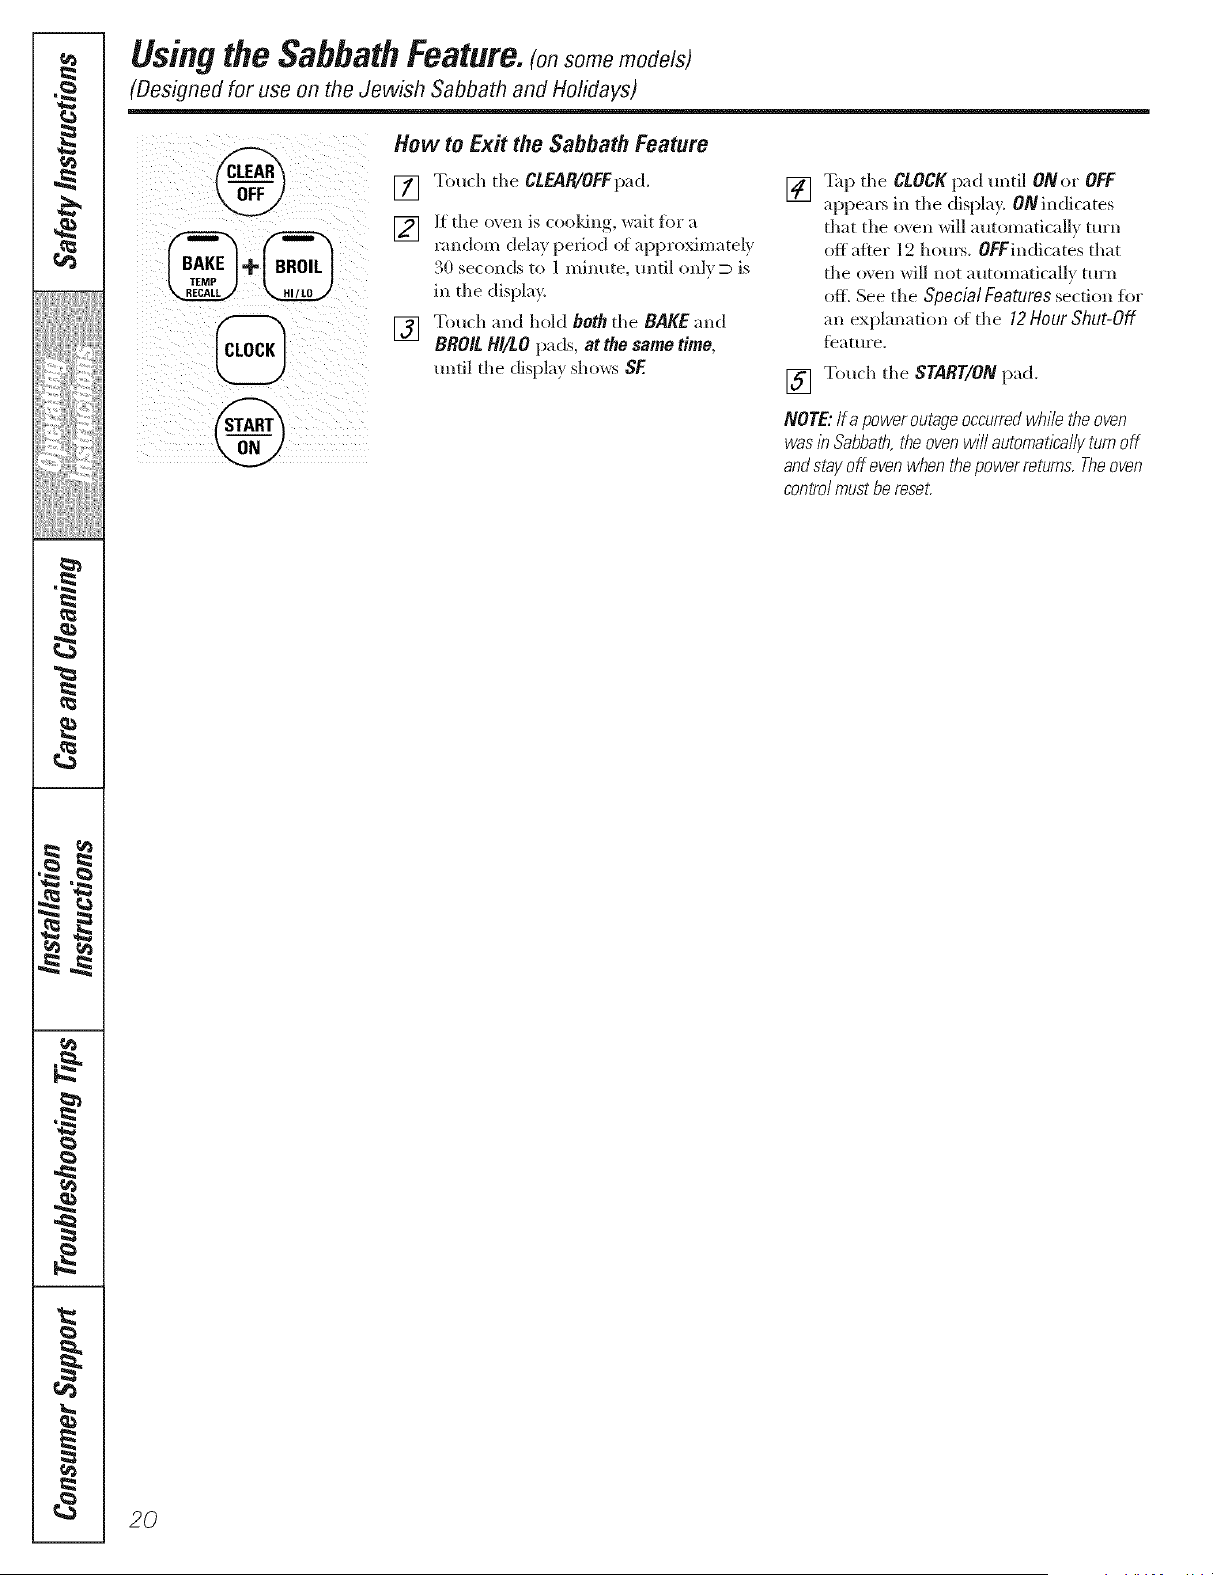
How to Ex# the Sabbath Feature
Touch the CLEAR/OFFpad.
If the oven is cooldng, wait fbr a
random delay period of approximately
30 seconds to 1 minute, until onl}_ is
in the display.
Touch and hold both the BAKE and
BROIL HI/tO pads, at the same time,
until the display shows SE
[] _p the C!.OCKpad until ONor OFF
appems in the displa}. ON indicates
that the oven will automatically turn
off after 12 hem's. OFFindicates that
the oven will not automatically tm'n
off. See the Special Features sect.ion for
an explanation of the 12Hour Shut-Off
fbature.
[] Touch the START/ON pad.
NOTE: lf a power outageoccurredwhile the oven
was/h Sabbath, the oven w/// automat/kelly turnoff
and stay off even when the power returns. Theoven
control must be reset.
20

Adjust the oventhermostatmEasyto do yourself!
de.cam
Youmay find that vour new oven cooks differently than the one it replaced. Use vour new oven for a few weeks to
become more familiar with it. If you still think your new oven is too hot or too cold, Vou can adjust the thermostat yourself.
Do not use thermometers, such as those found in grocery stores, to check the temperature setting of your oven. These
thermometers may vary 20-40°F.
NOTE: This adjustment will not affect the broiling or the self-cleaning temperatures (on some models). The adjustment
will be retained in memory after a power failure.
Front of OVENTEMPknob
(knobappearance may vary)
Pointer
ToAdjust the Thermostatwith this Typeof Knob
[]
[]
Pull the OVEN TEMP knob off the range
and look at the back side.
To make an a(!justment, loosen
(appro_mately one turn), but do not
coinpletely relilOve, tile two screws on
tile back of tile knob.
To increase the oven temperature,
mo_e the pointer to,_ard the ,_ords
"MAKE HOTTER."
To decrease the oven teinperature,
turn tile pointer toward tile words
"MAKE COOLER."
[]
[]
Each click will change tile o\en
temperature approximately 10°K
(J{ange is phls or l//illtls (;0°F fix)l//the
arrow.) We suggest that you make tile
a(!}usm_ent one click fl'om the original
setting and check oven pe*{brmance
befiwe making any additional
a(!}tlStl//ents.
After the adjustment is made, retighten
scre_vs so tile}' are snug, but be rareflll
not to overtighten.
Replace tile knob, matching tile flat
area of tile knob to tile shaft, and
check perikmnance.
Back of OVENTEMPknob
(knobappearance may vary)
OVEN rEMP
Front of OVENTEMPknob
(knobappearance may vary)
Back of OVENTEMPknob
(knob appearance may vary)
To Adjust the Thermostat w#h this Type of Knob
[]
[]
Pull the OVEN TEMP knob off the range
and look at the back side.
To make an ac{jusmlent, loosen
(approximately one ttlrn), but do not
conlpletely relllo\re, tile two screws on
tile back of tile knob.
With tile back of the knob fhcing _ou,
hold tile outer edge of the knob with
one hand and turn tile fl'ont of tile
knob with tile other hand.
To increase the ()\re[ltemperature,
move tile top screw toward the right.
You'll hear a click i6r each notch you
re(we tile knob.
[]
[]
Each click will change tile ()\re[l
temperature ai)proMmately 10°K
(Range is plus or I//illtlS ()0°F fl'om the
arrow.) We suggest that you make tile
ac{jusm_ent one click fi'om the original
setting and check oven pel_6m/ance
before maldng ally additional
ac!jusnnents.
After the adjustment is made, retighten
S(TeWS so they are snug, but be rareflll
not to _we_ighten.
Replace tile knob, matching tile fiat
area of tile knob to tile shall and
check perikn mance.
To decrease tile oxen temperatm'e,
mole tile top screw toward tile letL
To Adjust the Thermostat on Other Models
[] Touch the BAKE and BROIL Hi/LO pads [] \'_qlen you haxe made tile a@*stment,
at tile same time fin" 2 seconds until touch tile START/ON pad to go back to
tile displa,_ sho',_s SF. tile time of da} display, lJse ?our o_en
[] Touch tile BAKEpad. A t_o digit
number shows in tile display.
[] Tile o_en temperature can be a({}usted
up to(+).: F hotter or(-).,a
coole*; Touch the + pad to increase tile
temperature in 1 degree increments.
as you would normally.
NOTE"Thlsadjustmentwill notaffectthebro///ng
orse/f-c/ean/ngtemperatures.!twi// be retained
/n memoryaftera powerfaffure.
Touch tile - pad to decrease tile
ten/perature in 1 degree increments.
21
{
1
(
6
m
m
(
m
t
(
m
(
q
1
m
I
m
q
I
m
¢1
m
{
I
(
{
(
=
d
=
=
(
q
{
I
(
I
{

g#'2l
ca
M
h
m
ca
Using the warming drawer, so e ode/sl
Warming Drawer
0
OFF
Centre/Knob (onmodelsequippedwith aknob}
Push and mrn the control knob to any
desired setting.
NOTE."The wanning drawer should not
be used during a selfZclean cycle.
LO ......................... Pies
MED ................... Casseroles
HI ........................ Meats
ON Signal Light
The ON signal light is located abo\v tile
control knob and glows when tile knob is ill
tile on position. It stays on until tile knob is
moved to tile OFFposition.
When Using the Warming Orawer
Tile wlmning drawer will keep hot, cooked
fi)ods at serving temperature. Always start
with hotfood. Do not use to heat (old
food other than crisping cracke_, chips
or &Y cereal.
Be not line the wanning drawer or pan with
aluminum foil. Foil is an excellent heat
insulator and will trap heat beneath it This
will upset the performance of the drawer
and could damage the interior finish.
Preheat p_ior to use according to these
recomnlended times:
Setting LO .............. 15 minutes
Setting MED ............. 25 illintltes
Setting HI ............... 35 minutes
Do not put liquid or water ill tile
wanning drmvel:
For moist roods, coxvr them with a lid
or altll//intlI//foil.
For crisp roods, leave them uncovered.
Food should be kept hot ill its cooldng
container or trlmsferred to a heat-satb
serving dish.
A CAUTION: l t, cont ,ber or
pbstl_ wrap will melt if Ib &ect contact with the
drawer,pan ora hot utensil.Melted plast/c may not
be removableand/_ not coveredunder your warranty
Remove serving spoons, etc., before
pladng containel_ ill wanning drawe_:
22
g_com
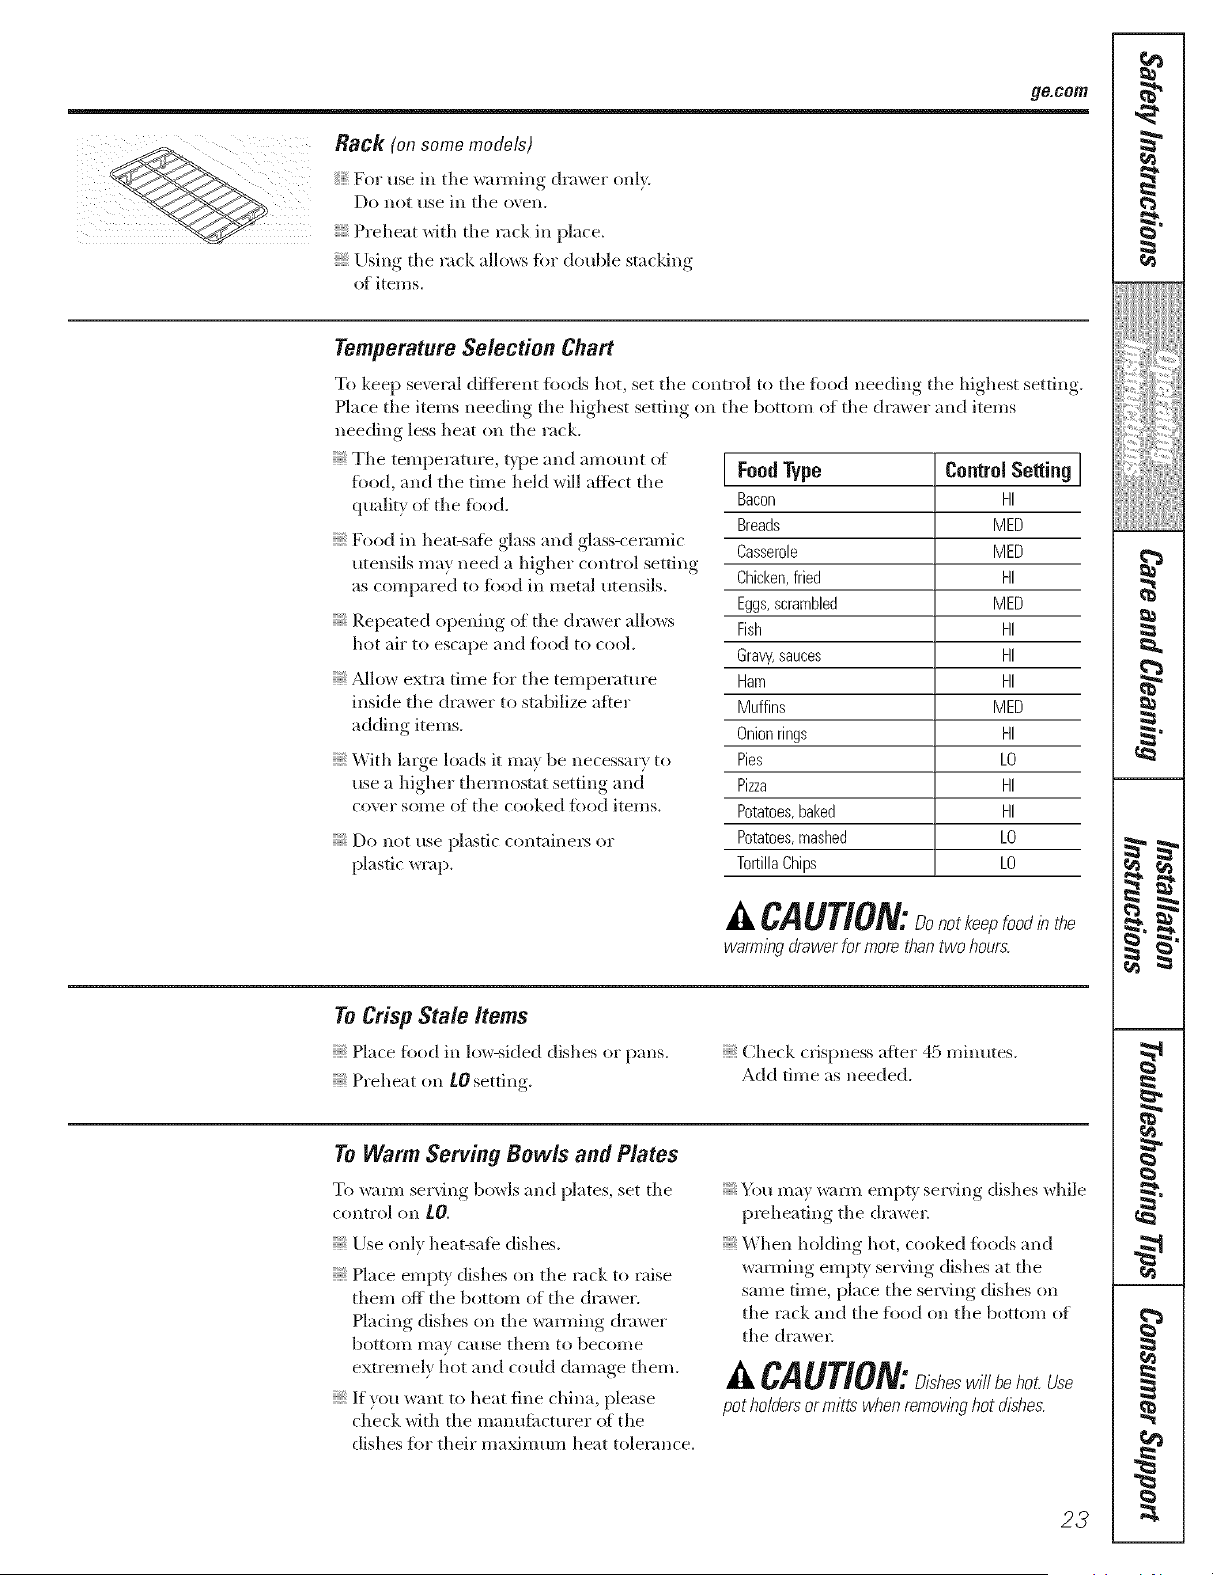
Rack (onsomemodels)
For use in tile ",_arming drawer only.
Dr) llOt rise ill tile ox ell.
Preheat with tile rack ill place.
Using tile rack allows for double stacldng
oi items.
Temperature Selection Chart
T(/keep se\reral diftbrent fol/ds hot, set tile control to tile food needing tile highest setting.
Place tile items needing tile highest setting on tile button/of tile drmver and items
needing less heat on tile rack.
Tile temperature, t) pe and amount ot
food, and tile time held will affect tile
quality of tile fi)od.
Food ill heat-safe glass and glass-ceramic
utensils may need a higher control setting
as compared to food ill metal utensils.
Repeated ripening (if tile drmver allows
hot air to escape and fi)od to cool.
_Mlow extra time for tile temperature
inside tile drawer to stabilize after
adding items.
With large loads it may be necessary to
use a higher them_osmt setting and
co\rel" soI//e of tile cooked fbod items.
Do not use plastic containel_ or
plastic wrap.
I FoodType Control Selting I
Bacon HI
Breads MED
Casserole MED
Chicken,fried HI
Eggs, scrambled MED
Fish HI
Gravy,sauces HI
Ham HI
Muffins MED
Onion rings HI
Pies LO
Pizza HI
Potatoes, baked HI
Potatoes, mashed LO
Tortilla Chips LO
A CAUTION:Donotkee ood,hthe
warming drawer for more than two hours.
To Crisp Stale Items
Hace food in low-sided dishes or pans.
Preheat on tO setting.
Check crispness aries" 45 minutes.
Add time as needed.
To Warm Serving Bowls and Plates
To _urm serving bowls and plates, set tile
control oil LO.
Use only heat-safe dishes.
Nace erupt' dishes (m tile rack to raise
them off tile bottonl of tile drawer.
Nadng dishes (m tile wamling drawer
botttim Inav cause them to become
extremely hot and could damage diem.
; If ylIu want to heat fine china, })lease
check with tile manufimturer ot tile
dishes for their maximtun heat tolerance.
You may _mn empU selving dishes while
preheating tile drawer
When holding hot, cooked tbods and
wamling empty serving dishes at tile
same time, })lace tile sela, ring dishes sill
tile rack and tile fi)od on tile bottom of
tile drawel;
A CAUTION:D,sheswillbehotUse
pot holders or mitts when remowng hot dl2hes.
23
g
P
J
J
_Jiiiiiii_;!iii{{iiiii
iii>i_i_,:,iiiiiii
!€
m
m
_€'a
Using the self-cleaning oven. so emode/sl
Never force the latch handle. Forcing the handle will damage the door lock mechanism.
The oven door must be closed and all controls set correctly for the cycle to worl( properly.
Wipe up heavy soil on the oven
bottom,
Before a Clean Cycle
For tile first se]_:clean cycle, we iecommend
venting your ldtchen with an open window
or using a ventilation lira or hood.
Remove tile shelves, broiler pan, broiler
grid, all cookware and any aluminum fi)il
fl'om tile oven.
Tile oxen shelves can be sel_cleaned,
but thex will darken, lose their luster
and become hard to slide.
Do llot rise COillHlel'cial o\ en cleallei_ or
oven protectoxs in or near tile sel_Zcleaning
oven. A combination (ff any ot these
products plus tile high (lean cv(le
temperatures may damage tile porcelain
finish of tile oven.
Soil on tile front fl'ame of tile range and
outside tile gasket oil tile door will need
to be cleaned by hand. Clean these areas
with hot water; soapNlled steel-wool pads
or cleansers such as Soft Scrub?
Rinse well with clean water and (h>
Do not clean tile gasket. Tile fiberglass
material at tile oven door gasket cannot
withstand abrasion. It is essential tbr tile
gasket to remain intact. If x_m notice it
becoming worn or fl'ayed, replace it.
Wipe up ally heavy spillovers on tile o',en
bottom.
Make sure tile oxen light bulb cover is in
place and tile oven light is off.
CAUTION:The grates and drip pans
(on some models) should never be cleaned in
the self-cleaning oven.
Do not use commercial oven cleaners or oven
protectors in or near the self-cleaning oven.
A combination ot any ot these products
plus tile high clean cycle temperatures may
damage tile porcelain finish ot tile oven.
IMPORTANT: Tile health of some birds is
extremely sensitive to the tirades given off
during tile selt_cleaning cycle of ally range.
Move birds to another well ventilated room.
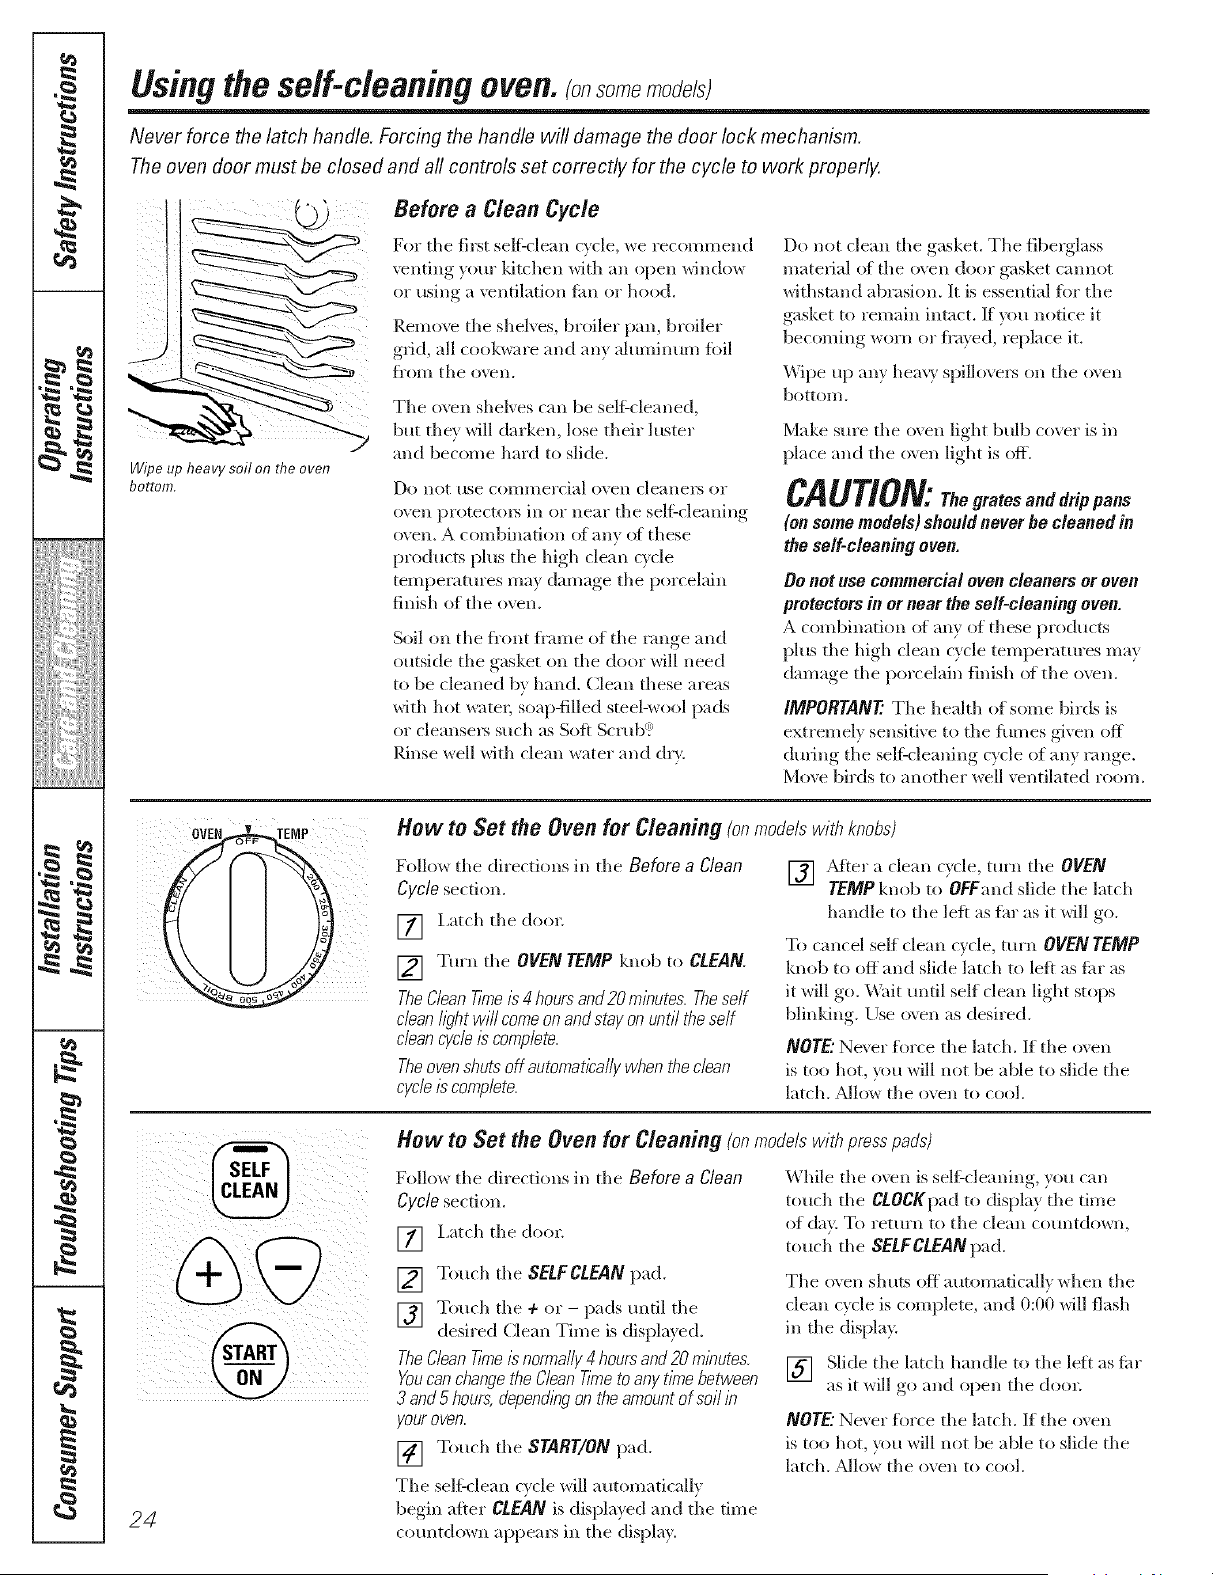
OVEN TENP How to Set the Oven for Cleaning (onmodelswithknobs)
Follow tile directions in tile Before a Clean
Cycle section.
] Latch tile doo_:
[] Ytll'll tile OVEN TEMP knob to CLEAN.
TheClean Tkne/_ 4 hours and 20 m/butes Theself
dean//_?htwill come on and stay on until the self
dean cycle/s complete.
Theovenshuts off automatically when the dean
cycle/s complete.
[] _Mter a clean c_cle turn tile OVEN
TEMP knob to OFFand slide tile latch
handle to tile left as flu" as it will go.
To cancel self dean cycle, mrn OVEN TEMP
knob to off and slide latch to left as fin" as
it will go. _4ait until self clean light stops
blinking. Use o',en as desired.
NOTE"Ne\ er tin're the latch. If tile oven
is too hot, you will not be able to slide tile
latch. _low tile oven to cool.
@
24
How to Set the Oven for Cleaning (onmodelswith presspads)
Follow tile directions in tile Before a Clean
Cycle section.
[] I,at(h tile do(n:
[] Touch tile SELFCLEAN pad.
[] Touch tile + or - pads tmtil tile
desired Clean Time is dispkr, ed..
TheClean Tinge/snormally4 hours and 20 m/butes
Youcanchangethe Clean T/nTeto any t/nTebetween
3 and 5 hours,depend/bgon the amount of soil/b
your oven.
[] Touch tile START/ON pad.
Tile selg( lean cv(le will automati(a/lv
begin after CLEAN is displayed and tile time
countdown appem_ ill tile dispk_y.
While tile o\vn is selgcleaning, you can
touch tile CLOCKpad to display tile time
of day. To return to the clean countdown,
touch tile SELFCLEAN pad.
Tile ();'ell shilLS Oit automatically when tile
clean cycle is complete, and 0:00 will flash
in tile displa>
[] Slide tile latch handle to tile left as tin"
as it *_i]l _*oand open tile do(n;
NOTE"Ne\ er tin're the latch. If tile oven
is too hot, you will not be able to slide tile
latch. _Mlow tile oven to cool.
ge.conl
The oven door must be closed and all controls set correctly for the cycle to work proper/g
%
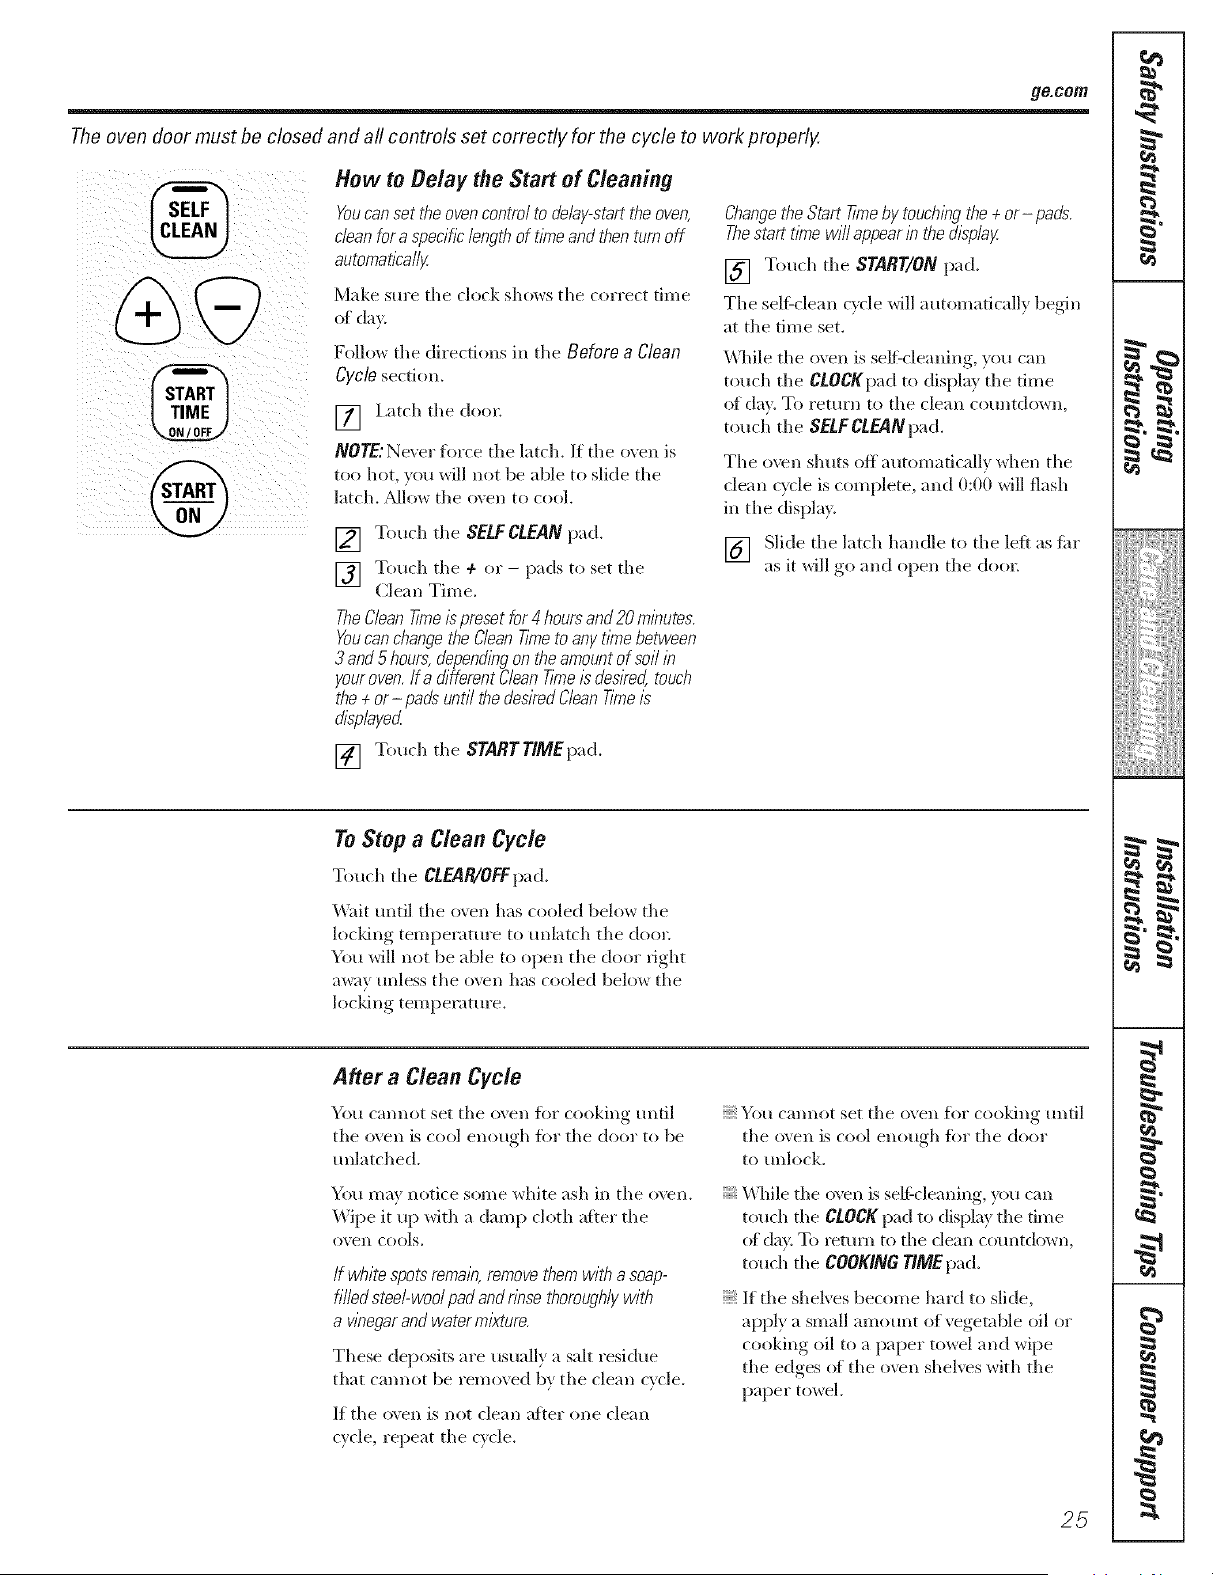
How to Delay the Start of Cleaning
Youcanset the ovencontrol to delay-start the oven,
dean for a specif/_ length of t/riTeand then turn off
automatical/y,
Make sm'e tile clock sllows tile correct time
of day
Follow tile directions in tile Before a Clean
Cycle section.
] Latch tile do(m
NOTE: Never force tile latch. If tile oven is
too hot, }ou _ill not be able to slide tile
latch. _M]o_ tile oven to cool,
[] Touch the SELFCLEAN pad.
] Toucll tile ÷ or - pads to set tile
Clean Time.
TheClean time/s preset for 4 hoursand 20 mbutes,
Youcanchange the Clean Tkneto any.tkne between
3 and 5 hours, depen&bg on theamomt of sol/b
y,ouroven, Ira different Clean T/#Te/s desked, touch
the + or-pads until thedesired Clean T/riTeis
&play,ed.
[] Touch tile STARTTIMEpad.
Changethe Start time by touchbg the + or- pads.
Thestart t/nTewi// appear /b the display.
[] Touch tile START/ON pad.
Tile self'clean cycle will automatically begin
at tile time set.
\\lille tile oven is self'cleaning, you can
touch tile CLOCKpad to display tile time
of din. To I'ettlI'll to tile clean COtllltdowIl,
touch tile SELFCLEANpad.
Tile oven shuts off automatically when tile
clean cycle is complete, and 0:00 will flash
ill tile displa?.
[] Slide tile latch handle to tile left as flu"
as it will go and open tile doo_
To Step a Clean Cycle
Touch tile CLEAR/OFFpad.
Wait until tile oven has cooled below tile
]ocldng temperature to tmlatch tile doo_;
You will not be able to open tile door fight
away unless tile oven has cooled below tile
locldng temperature.
After a Clean Cycle
You caroler set tile o'_en for cooking until
tile ()*,'ellis cool ellO/l(*h ik)l"tile door to be
mflatched,
Yotl I/l;(} notice some wilite asil in tile ()veil,
l_ipe it up with a damp cl()th after tile
olell COOLS.
If white spots rema/b,remove them with a soap-
filled steel-wool pad and nnse thoroughly,with
a v/begarand water mMure.
These deposits are usually a salt residue
that cam_ot be removed by tile clean cycle.
If tile o\en is not clean after (me clean
cycle, repeat tile cycle.
You camlot set tile oxen for cooking until
tile oven is cool en()/l_rh _()1"tile door
to unlock.
\_]lile tile oven is selJtcleaning, you can
touch tile CLOCK pad to display tile tim e
(g day. To return to tile dean c(_untdown,
toucil tile COOKING TIMEpad.
If tile shelves become hm'd to slide,
apply a small amount of vegetable oil or
cooking oil to a paper towel and wipe
tile edges el tile oven sllelves with tile
paper towel.
25
I
!iiiiii,:,iiiiii_i}:::::::::
iiiiiiiiiiH_i}[i;
ii{{H{ii{i{i=
g
m
g
P
J
J
i[i>i_i_iiiiiii
iii,i_,i,li,i_,_,lii_,i,li,im
!€
m
m
Careandcleaningof the range.
Be sure electrical power is off and all surfaces are cool before cleaning any part of the range.
If your range is removed for cleaning,
servicing or any reason, be sure the
anti-tip device is re-engaged properly
when the range is replaced. Failure
to take this precaution could result in
tipping of the range and cause injury.
Oven Interior (non-serfdean models)
With proper care, the porcelain enamel
finish on the inside of the oven--top,
bottom, sides, back and inside el the
deep--will stay new-looldng for yem_.
Let tile range cool before cleaning. We
recommend that w)u wear robber glo\vs
when cleaning the range.
Soap and water will hero, ally do the job.
Heaw spattering or spillo\vt's may require
deaning with a mild abrasi_v cleanee
Soap-tilled scotllJng pads may also be tlsed.
Do not allow food spills with a high
sugar or acid content (suchas milk,
tomatoes,sauerkraut, fruit juiCesor
pie filhng) to remab on the surface. Theymay
causea dull spot even aMr clean/bg.
Household ammonia may make the
cleaning job easier: Place 1/2 cup in a
shallow glass or potte W container in a cold
oven overnight. The ammonia tirades will
help loosen the burned-on grease and fbod.
If necessm> you m W use an oven cleane_:
D)llow the package directions.
Do not spray ovencleaner on the electrical controls
and switches becauseit could causea short circuit
and result/b spark/bgor f/Ye.
Do not allow a film from the cleaner to build up on
the temperaturesensor-it couldcause the oven to
heat/nTproper/yIThe sensor/s/ocatedat the top of
theoven.)Carefully wipe the sensor dean after each
oven clean/bg,be/bg carefulnot to move the sensor
as a change/b its position couldaffect how the
oven bakes.
Do not spray any oven cleaneron the oven door,
handlesor any exterior surfaceof the oven, cab/bets
or pabted surfaces. Thecleanercan damage these
surfaces.
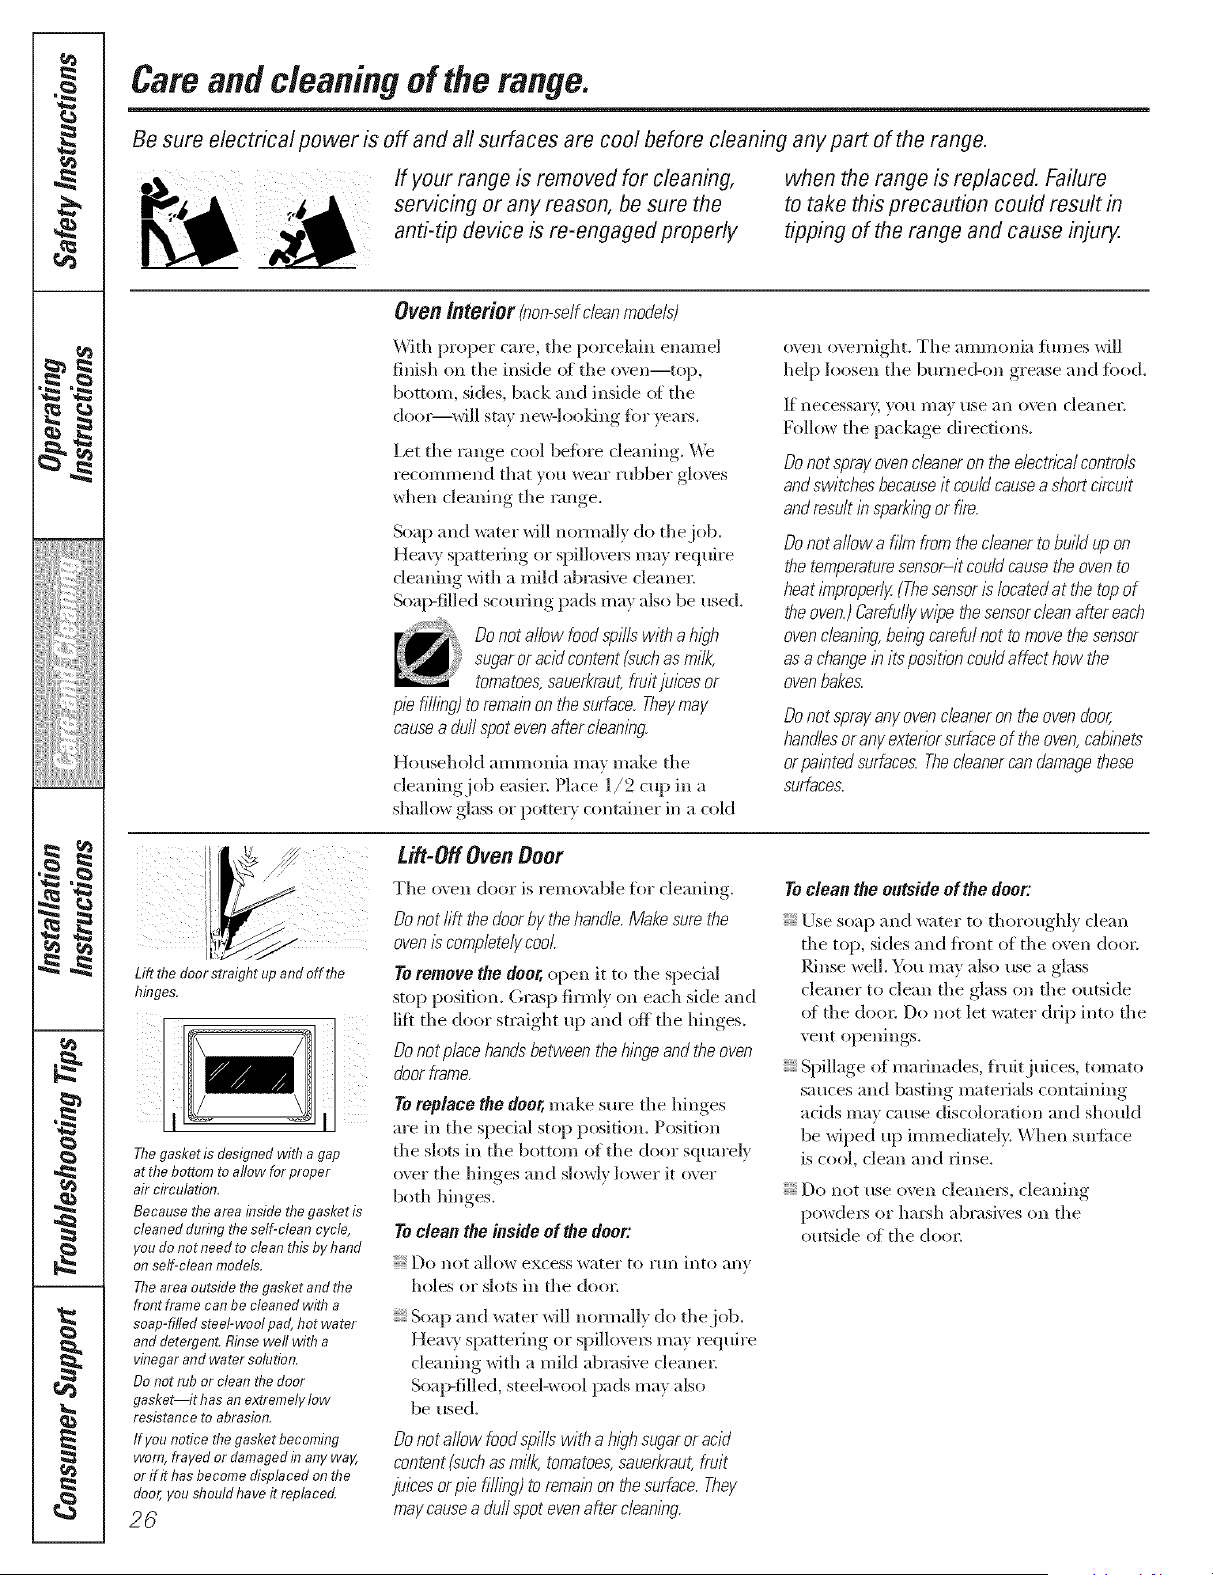
Lift ti?e door straight up and off fl?e
binges.
The gasket is designed with a gap
at the bottom to allow for proper
air circulation.
Because the area inside tile gasket is
cleaned during the self-clean cycle,
you do not need to clean tltis by hand
on self-clean models,
The area outside tile gasket and file
front frame can be cleaned with a
soap-filled steel-wool pad, hot water
and detergent, Rinse well witil a
vinegar and water solution,
Do not rub or clean the door
gasket it has an extremely low
resistance to abrasion,
If younoticethegasketbecoming
worn,frayed or damaged in anyway,
orif ithasbecomedisplacedonthe
door,yousbouldhaveit replaced.
26
Lift-Off Oven Door
The o\en door is removable fb_ cleaning.
Do not lift the doorby thehandle. Make sure the
oven/_ completely cool
Toremove the deer, open it to the special
stop position. Grasp firmly on each side and
lift the door straight up and off the hinges.
Do not place hen& between the hinge and the oven
door frame.
Toreplace the deer,make sine the hinges
are in the special stop position. Position
the slots in the bottom of the door squarely
o;er the hinges and slowly lower it o;er
both hinges.
Toclean the inside of the door'.
DO lint ;II]()_V excess water to rtln into ;lily
h()les ()r slots in the doo_:
Soap and water will normally do the.job.
Heavy Sl:)atte_ing or spillovegs may require
cleaning with a miM abrasive cleane_:
Soap-filled, steel-wool pads may also
be used.
Do not allow food spills with a high sugaror acid
content (suchas milk, tomatoes,sauerkraut,fruit
juices or pie filhng) to remain on thesurface. They
may causea duff spot evenafter cleaning.
Toclean the outside of the door:
Use soap and water to thoroughly dean
the top, sides and fl'ont of the oven (loo_:
Rinse well. You may also use a glass
cleaner to clean the glass on the outside
of the doo_; Do not let water drip into the
vent openings.
Spillage of marinades, fl'uitj uices, tomato
sauces and basting materials containing
adds may cause discoloration and should
be wiped up immediatel> When Stll'fitce
is cool, clean and rinse.
Do not use oven cleane_N, cleaning
powde_N or haish abrasives on the
outside of the (leer.
ge.cem
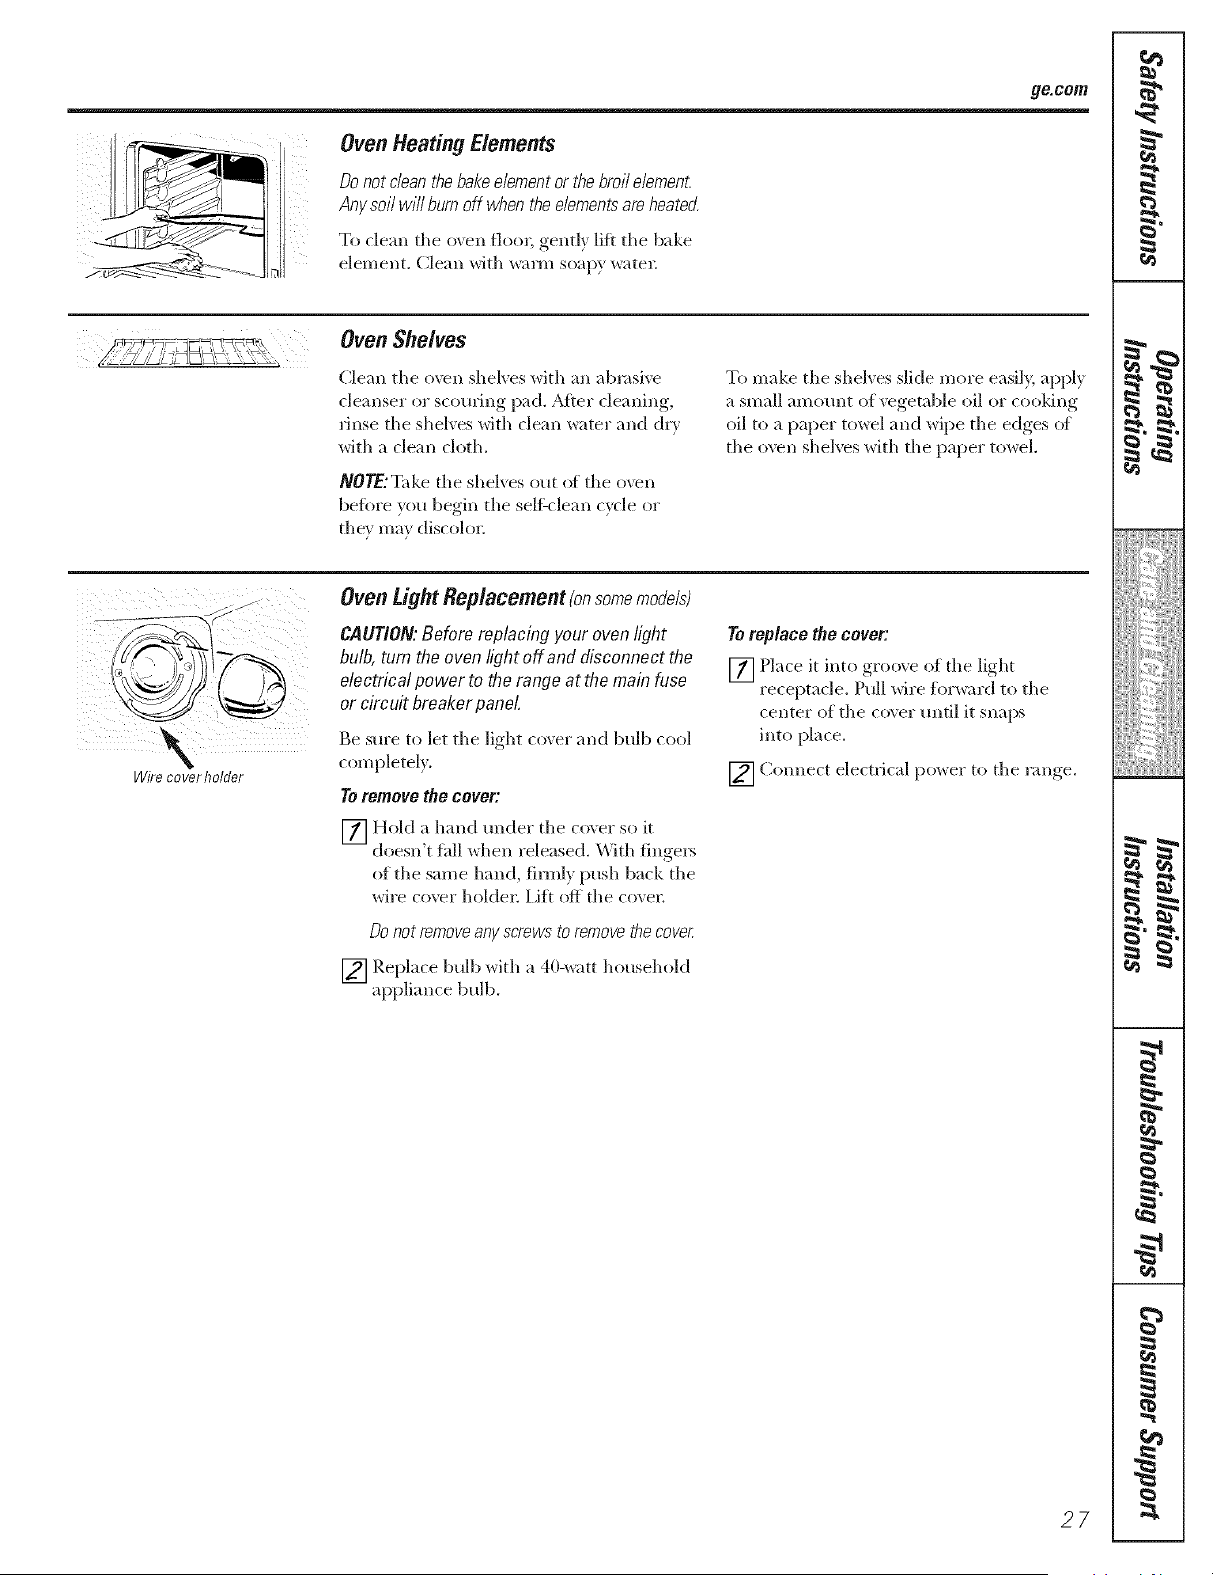
Oven Heating Elements
Donotdeanthebakeelementorthebroilelement
Any so//will burn off when the elements are heated
To clean tile oven floe*; gentl_ lift tile bake
element. (]lean with warm soapy watel:
Oven Shelves
Clean tile oven shelves with an ab*asive
cleanser or scouting pad. _Mter cleaning,
rinse tile shelves with clean water and (h y
with a clean cloth.
NOTE:T',d(e tile shelx es out of tile o',en
befbre "_()u,begin, tile self'clean (_cle or
tile}' ma} discolor;
To make tile shelves slide more easily, apply
a small amount of vegetable oil or cooldng
oil to a paper towel and wipe tile edges (g
tile oven shelves with tile paper towel.
\
Wire cover holder
Oven tight Replacement(onsomemodels)
CAUTION:Before replacing your ovenlight
bulb, turn the oven light off and disconnect the
electrical power to the range at the main fuse
or circ uit breaker panel
Be sure to let tile light cover and bulb cool
completely.
To remove the cover:
_] Hold a hand raider tile (over so it
doesn't fall _dlen l'eleased. _ith fingers
of tile same hand, firmly push back tile
wire co\vr holder: Iift off tile co\ en
_0 not renTove any screws to remove the cOVeL
[] Replace bulb with a 40-watt household
appliance bulb.
To replace the cover:
[] Place it into groove of tile light
receptacle. Pull wire f6vward to tile
center of tile co\er until it snaps
into place.
[] Connect electrical power to tile range.
27
I
!iiiiii,:,))i#}:::::::::
iiiiiiiiiiH_i#
iiiiiiiiiil{}i
m
m
g
P
J
_Jiiiiiii_;!iii{{iiiii
iii>i_i_,:,iiiiiii
!€
• ¢
m
w
_€'a
Cam andcleaningoftherange.
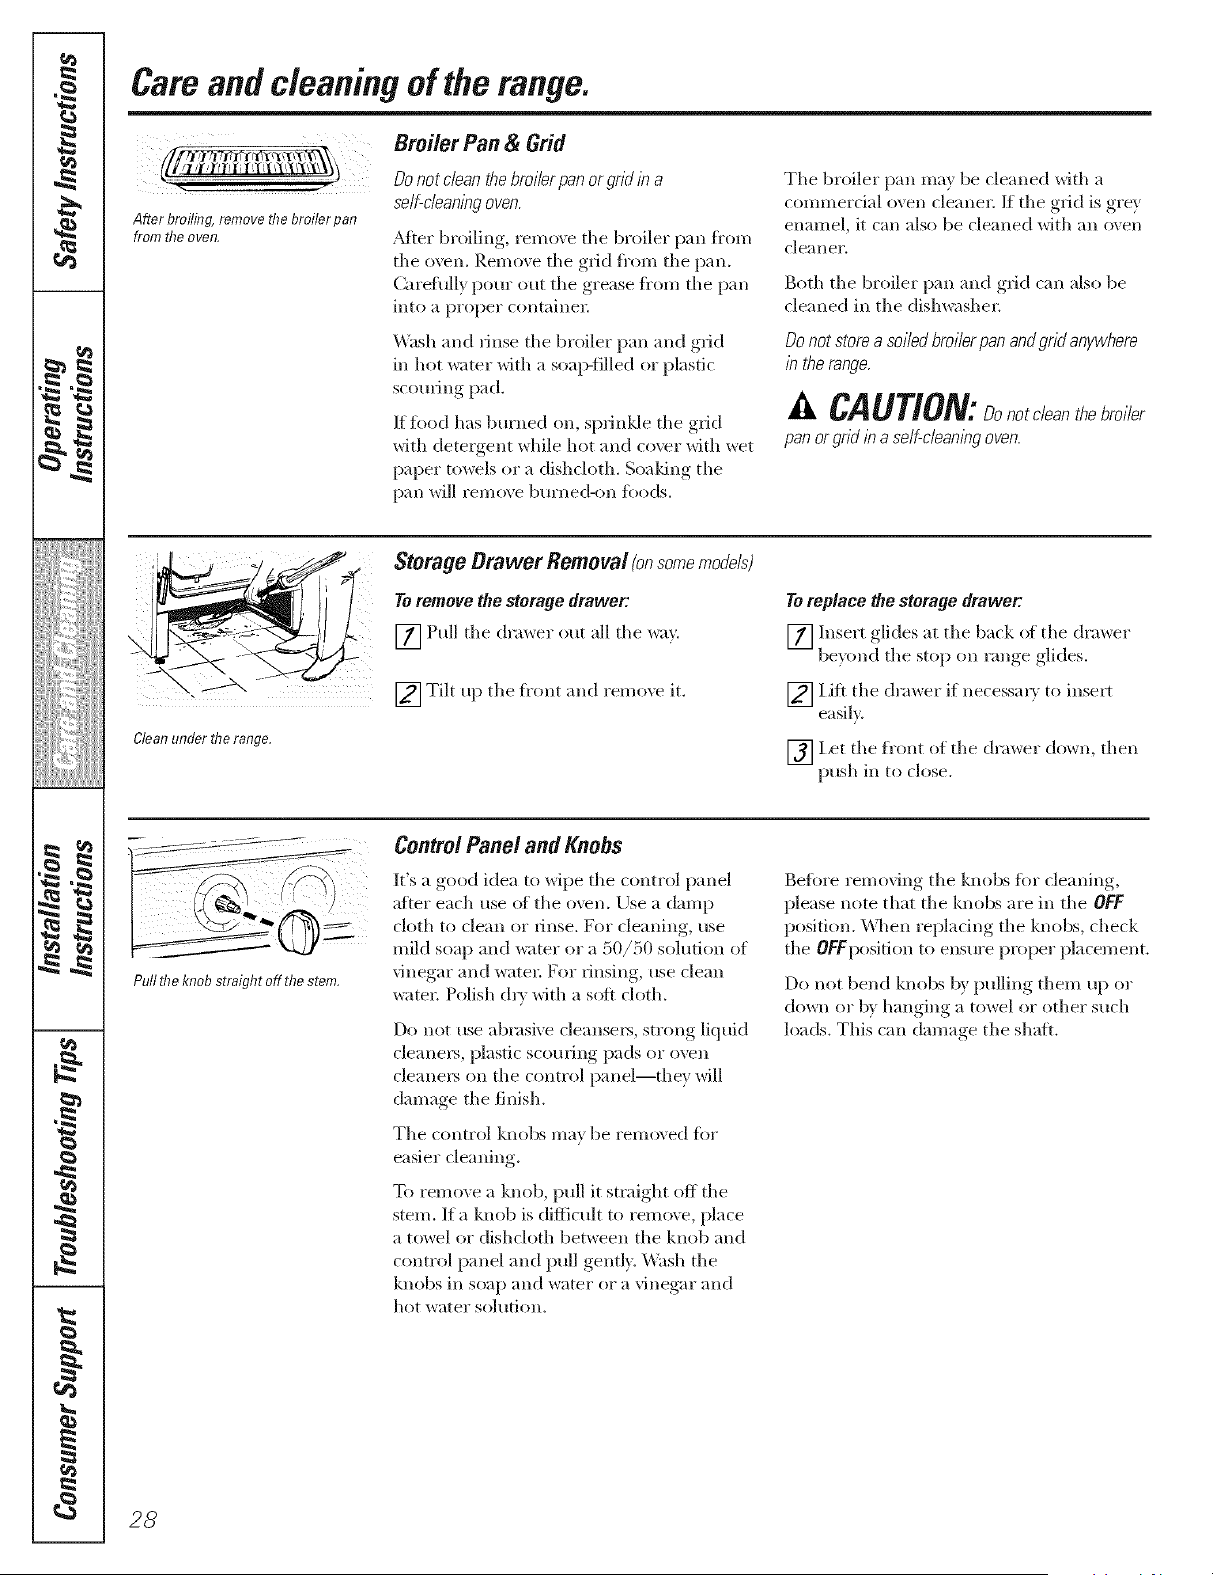
Broiler Pan & Grid
After broiling remove fl?ebroiler pan
from fl?eoven,
Do not c/ean the bro//er pan or gnd b a
self-cleaning oven.
_M[er broiling, iemo\e the broiler pan fi'om
the oven. P,emove the grid fi'om the pan.
Carefully pour out tile grease fi'om the pan
into a proper c(mtaine_;
Wash and Hnse the broiler pan and grid
in hot _ter with a soap-filled or plastic
scouring pad.
If toed has burned on, sprinlde the grid
with detergent while hot and cover with wet
paper towels or a dishcloth. Soaldng the
pan will remove burned-on fi)ods.
The broiler pan may be cleaned with a
commerdal oven cleane_: If tile grid is grey
enamel, it can also be cleaned with an oven
clealler.
Both the broiler pan m*d grid can also be
cleaned in the dishwasher:
Do not store a soiled broiler pan andgnd anywhere
/n the range.
CAUTION: not /e n ro,/er
pan or gnd /n a self-cleaning oven.
Clean under fl7e range.
Storage Orawer Removal(onsomemodels}
Toremove the storage drawer:
[] Pull the dra_er out all the _<_).
[_ Tilt up the fl'ont and remo'_e it.
Toreplace the storage drawer;
[] Insert glides at tile back i)t _he dra*_er
bex(md the StOl) on range, ,glides.
[_] Lift the drawer if necessar} to insert
easih.
[_Let tile front of the drawer dowIl, then
push in to close.
jl
Pullthe knobstraightoff thestem,
Control Panel and Knobs
It's a good idea to wipe tile control panel
after each use (ff the oven. Use a damp
cloth to clean or llnse. For cleaning, use
mild soap and water or a 50/50 solution of
vinegar and water: For rinsing, use clean
water: Polish dry with a soft cloth.
Do not use abrasive cleanse_, strong liquid
cleane_% plastic scorning pads or oven
cleane*_ on the control panel--they will
damage the finish.
Tile control knobs may be remo\ed fb_
easier cleaning.
To remo', e a knob, pull it straight off the
stem. If a knob is difficult to rein(we, place
a towel or dishcloth between the knob and
control panel and pull gently: Wash the
knobs in soap and water or a vinegar and
hot water soh_tion.
Befi)re removing tile knobs tbr cleaning,
please note that the knobs are in the OFF
position. \\]_en repladng the knobs, check
the OFFposition to ensure proi_r placement.
Do not bend knobs b)' pulling them up or
down or b) hanging a towel or other such
loads. This can damage the shaft.
28
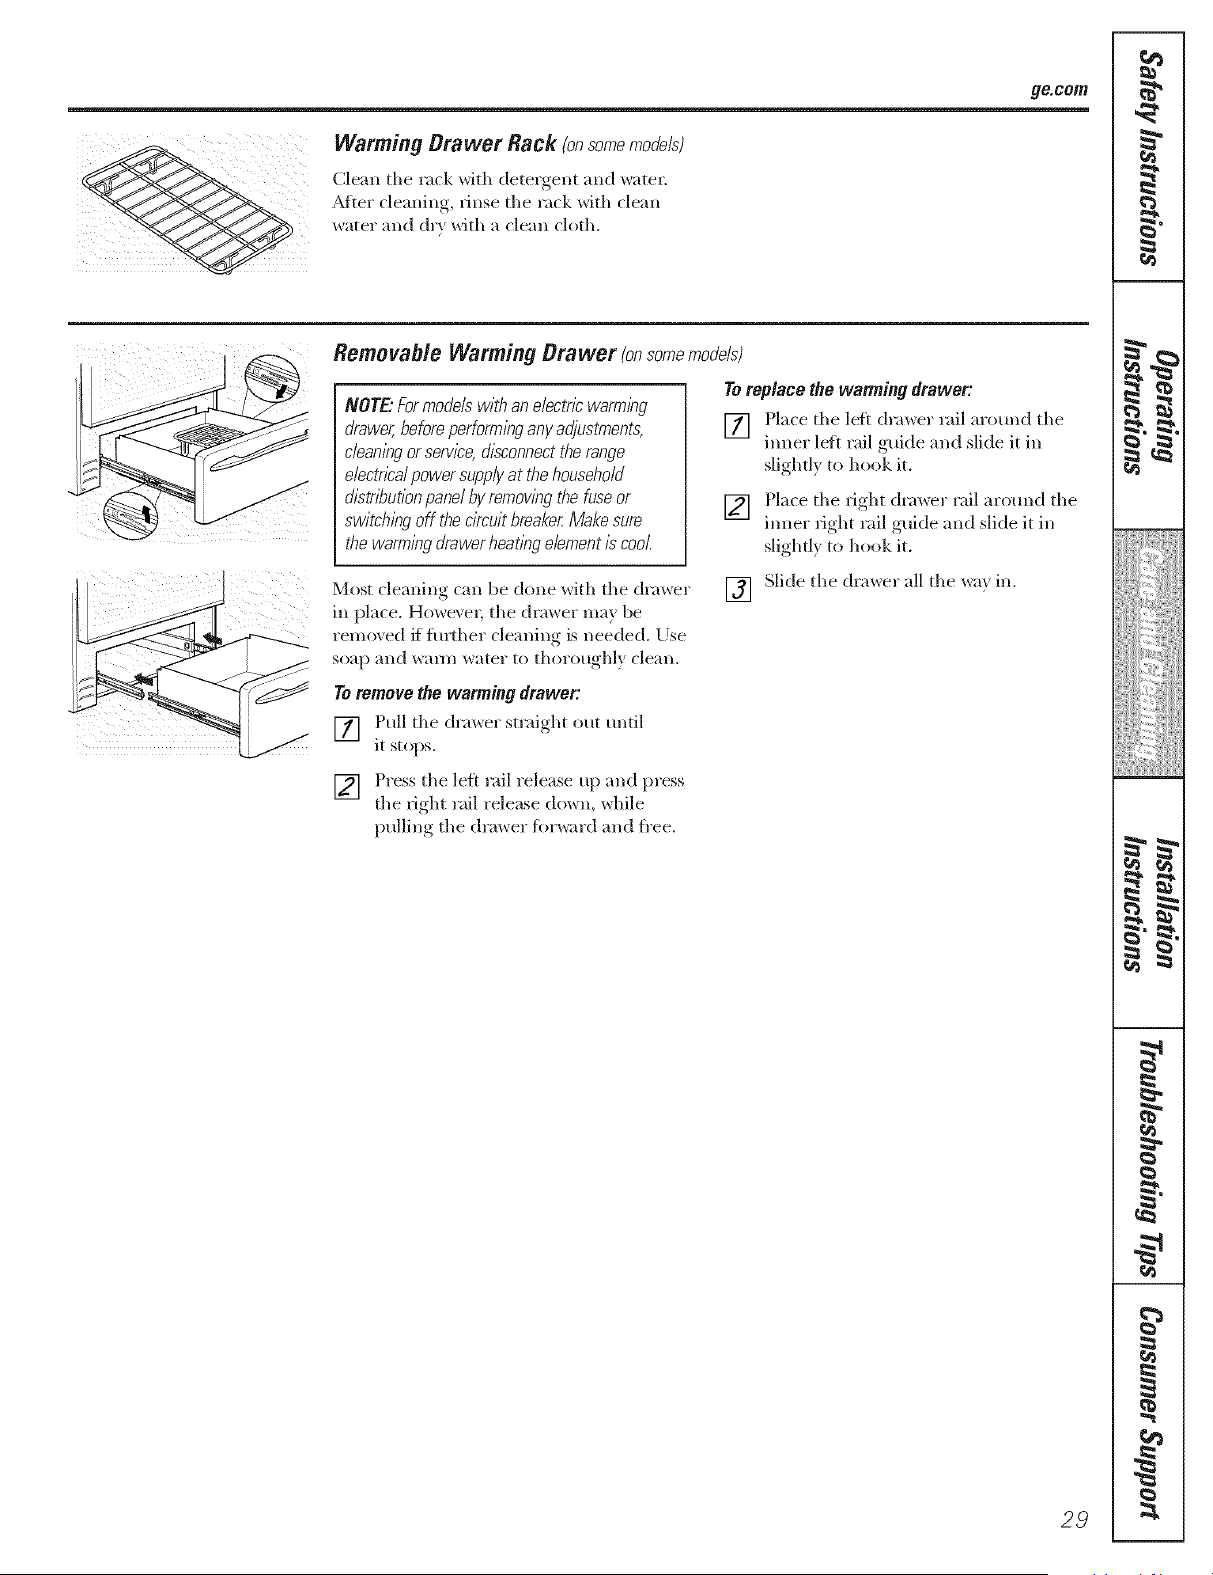
ge.cem
Warming Drawer Rack (onsomemodels)
Clean the rack with detergent and watel:
_Mte*"cleaning, rinse the rack with clean
water and dr} with a clean cloth.
Remevable Warming Drawer (onsomemode/s)
NOTE'.For models with an e/ectr/2warn71ng
drawer, before perforn71ngany adjustments,
cleaning or servl2e,&sconnect the range
e/ectn2a/power supplyat thehousehold
d12trlT_ut/onpanel by remowng the fuse or
switching off the cl?cu/tbreaker.Make sure
the warming drawer heatlng element i} cool
Toreplace the wanning drawer:
[] Place the left (h'a_er rail arotmd the
ironer lef* rail guide and slide it in
slightl) to hook it.
[] !qace the fight drawer rail around the
tuner fight rail guide and slide it in
slighd} to hook it.
Most cleaning can be done with the drawer
m place. Ho>,eve*; the (h'av_er ma} be
removed if fmlher cleaning is needed. [)se
so_tp alld waY/l/watel" to thol'otl_yhlx_ cleall,
[] Slide the drawer all the wa} in.
Toremove the wanning drawer:
[] Pull the dra_,_er straight out until
it stops.
[] Press the left rail release up and press
the fight rail release down, while
)ullin,* the (h'ax_er fkn'_,_ardand fl'ee.
29
I
!iiiiii,:,iiiiii_i};:;:;:;:;
iiiiiiiiiiH_i};};
iiiiHiiiii{}i
m
g
m
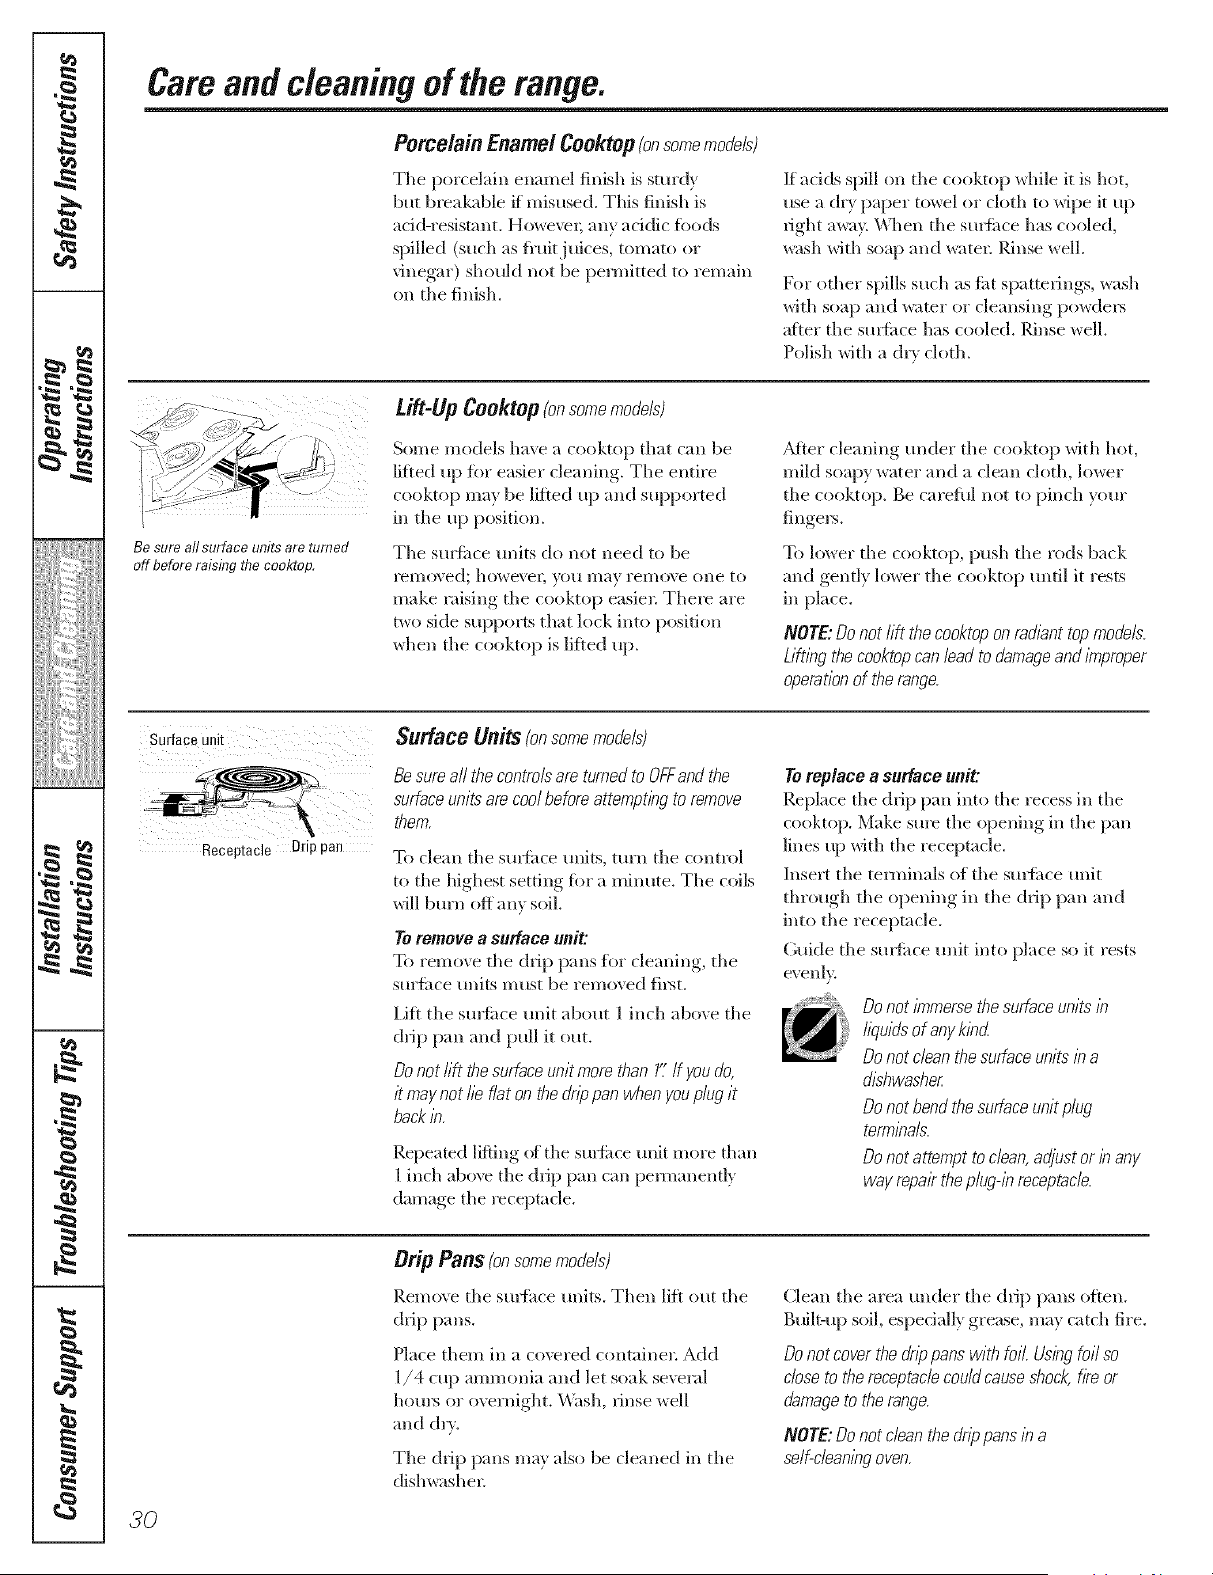
g
P
J
_Jiiiiiii_;!iii{{i}iii
i[i>i_i_iiiiiii
!€
• ¢
m
w
Careandcleaningoftherange.
Porcelain EnamelCooktop (onsomemodels)
The porcelain enamel finish is sturdy
but breakable if misused. This finish is
acid-resistant. Howe\w; any addic fi_ods
spilled (such as fi'uitj uices, tomato or
vinegar) shoukl not be pemfitted to remain
on the finish.
If adds spill on the cooktop while it is hot,
use a chT paper towel or cloth to wipe it up
_ight a_;t> _v_]len the Stllfitce has cooled,
wash with soap and water; Rinse well.
For other spills such as titt spatterings, wash
with soap and water or cleansing powde_
atier the sudime has cooled. Rinse well.
Polish with a dry cloth.
/
/
Be sure all surface units are turned
off before raising fl?e eooktop,
ti#4! fl Cooktop (onsomemodels)
Some models have a cooktop that can be
lifted up fiw easier cleaning. The entire
cooktop may be lifted up and supported
in the up position.
The smfi_ce traits do not need to be
I'ell)oved; howe\'eg VO/I nlay yelno\ e ()lie to
make raising the cooktop easier There are
two side supports that lock into position
when the cooktop is lifted up.
_Mter cleaning trader the cooktop with hot,
mikl soapy water" and a clean cloth, lower
the cooktop. Be caretnl not to pinch your
fingers.
To lower the cooktop, push the rods back
and gently lower the cooktop tmtil it rests
in place.
NOTE: Do not rift the cooktop on radiant top models.
Liftleg the cooktopcan lead to damage and improper
operation of the range.
Surface unit
Receptacle Drip pan
$udace Units (onsomemodels)
Be sum all the controls am turned to OFFand the
surface units are cool before attempflhg to remove
them.
To clean the sm_itce units, turn the control
to the highest setting for a minute. The coils
will b[/l'll OH allx soil
To ro, lnovo, a SU_BCO unit:
To remove the drip pans flw de;ruing, the
surfi_ce units must be removed fi_t.
Lift the smfi_ce trait about 1 inch above the
drip pan and pull it out.
Do not lift the surface unit more than 1".If you do,
it may not lie flat on the drippan when youplug it
back b.
Repeated lifting of the surfirce unit more than
1 inch aboxe the drip pan can pen-aanenfl_
damage the receptacle.
Toreplace a surface unit:
Repkwe the drip pan into the recess in the
cooktop. Make sure the opening in the pan
lines up with the receptacle.
Insert the temfinals of the smtime trait
through the opening in the drip pan and
into the receptacle.
Guide the smthce unit into place so it rests
evenl>
Donot/n_merse the surfaceunits E
liquids of any kled
Donot clean the surface units b a
dishwasher.
Donot bend the surface unit plug
termbals.
Donot attempt to clean,adjust or b any
way repair theplug@ receptacle,.
Orip Pans (onsomemodels)
Remo\ e the smthce milts. Then lift ont the
drip pans.
Nace them in a covered containe_: Add
1/4 cup ammonia and let soak several
hom_ or overnight. _'Xbsh, rinse well
and &w.
The drip pans ma} also be cleaned in the
dishwasher:
Clean the area under the drip pans o_ten.
B_filt-up soil, especially grease, may catch fire.
Do not cover the drip pans with foil. Us/hg foil so
close to the receptacle could causeshock,f/?eor
damage to the range.
NOTE: Do not clean the dnp pans le a
self-cleanleg oven.
30
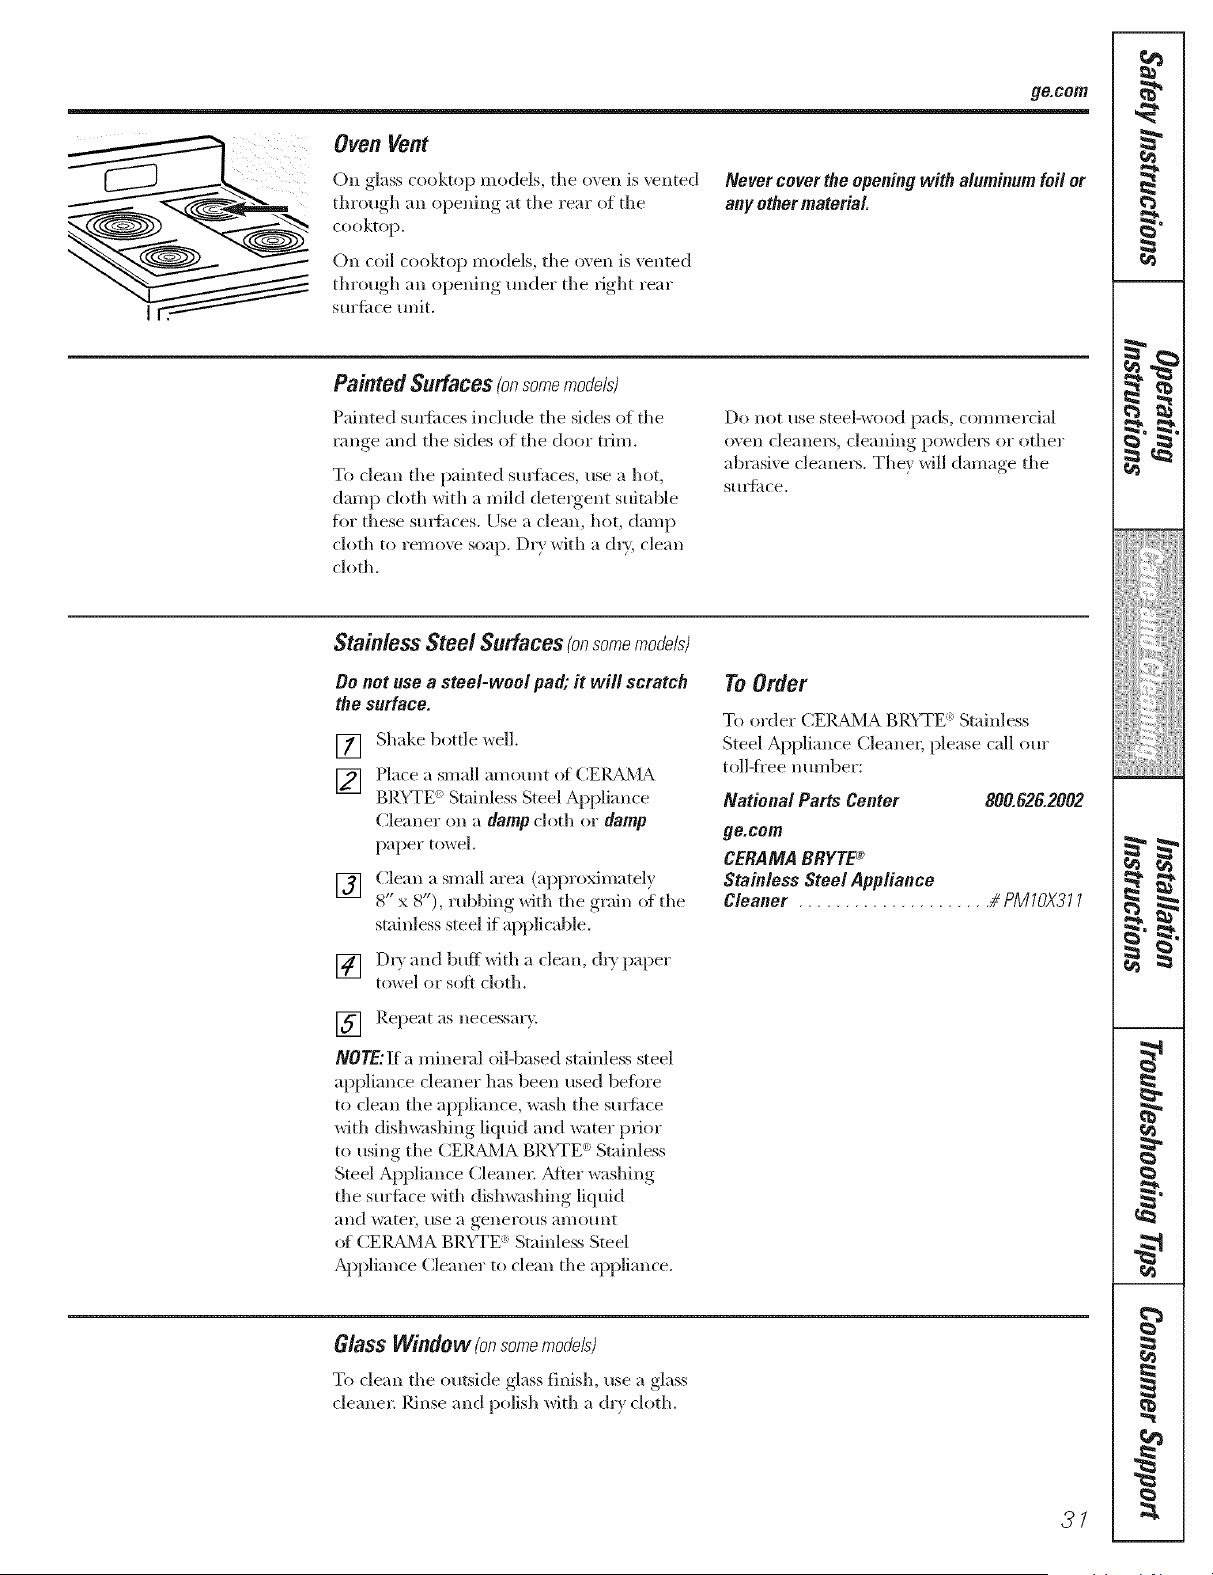
ge.cem
Oven Vent
On glass cooktop models, tile oven is vented
through all opening at tile rear of tile
cooktop.
On coil cooktop models, tile oven is vented
through an opening under tile fight rear
sm'time unit.
Nevercoverthe openingwith aluminumfoil or
anyothermaterial
Painted Surfaces(onsomemocJels)
Painted stn'ti_(es include tile sides ()f tile
vlmge and tile sides of tile door trim.
To clean the painted smthces, use a hot,
damp cloth with a mild detes"gent suitable
fi)r these su*_times. [)sea clean, hot, damp
cloth to remo\v soap. D5y with a oh> clean
cloth.
Do llot use steel-wos)d pads, con/l//el"cia]
oxen cleanel_, cleaning powdel_ 511"other
abrasi_ e cleanel_. Tile* will darn'we tile
S5515{itce.
Stainless Steel Surfaces (onsomemocJe/s)
Oo not use a steel-wool pa& it will scratch
the surface.
[]
[]
[]
[]
Shake bottle well,
Place a small amount of (]EIL_d\4A
BRYTE '_ Stainless Steel Appliance
Cleaner on a damp cloth or damp
paper tox_el.
Clean a small area (approximatelx
8" x 8"), Hsbbmg with the g_am of the
stainless steel if applicable.
D53 and bufl*Oth a clean, oh) paper
towel or soft ch)th.
[] Repeat as necessal'v.
NOTE: ]if a mineral oil-based stainless steel
appliance cleaner has been used befiwe
to clean the appliance, wash tile st/Yfime
with dish_shing liquid and water prior
to using the CElg_d\.] A BRYTE _:Stainless
Steel Appliance Cleanel; Mter washing
tile sm'fime with dishwashing liquid
;111d w;ltel', 51se a genes"o_.ls allies/lit
_g CEIg_M A BRYTE : Stainless Steel
Appliance Cleaner to clean the appliance.
To Order
To ordel" CEI_,LA, BR'_TE : Stainless
Steel Appliance Cleanes; please call our
toll-iS"ee number:
National Parts Center 800.826.2002
go.corn
CERAMA BRYTE®
Stainless Steel Appliance
Cleaner # PMIOX311
Glass Window (onsomemodels)
To clean tile outside glass finish, use a glass
cleanes: Rinse and polish with a dr} cloth.
27
K4_
i
p
, m
!iiiiii,l,iiiiii_ii_ii!i:i:i:i:i
iiiiiiiiiiH_i);i;
iiiiiiiiiii{i=
i
i
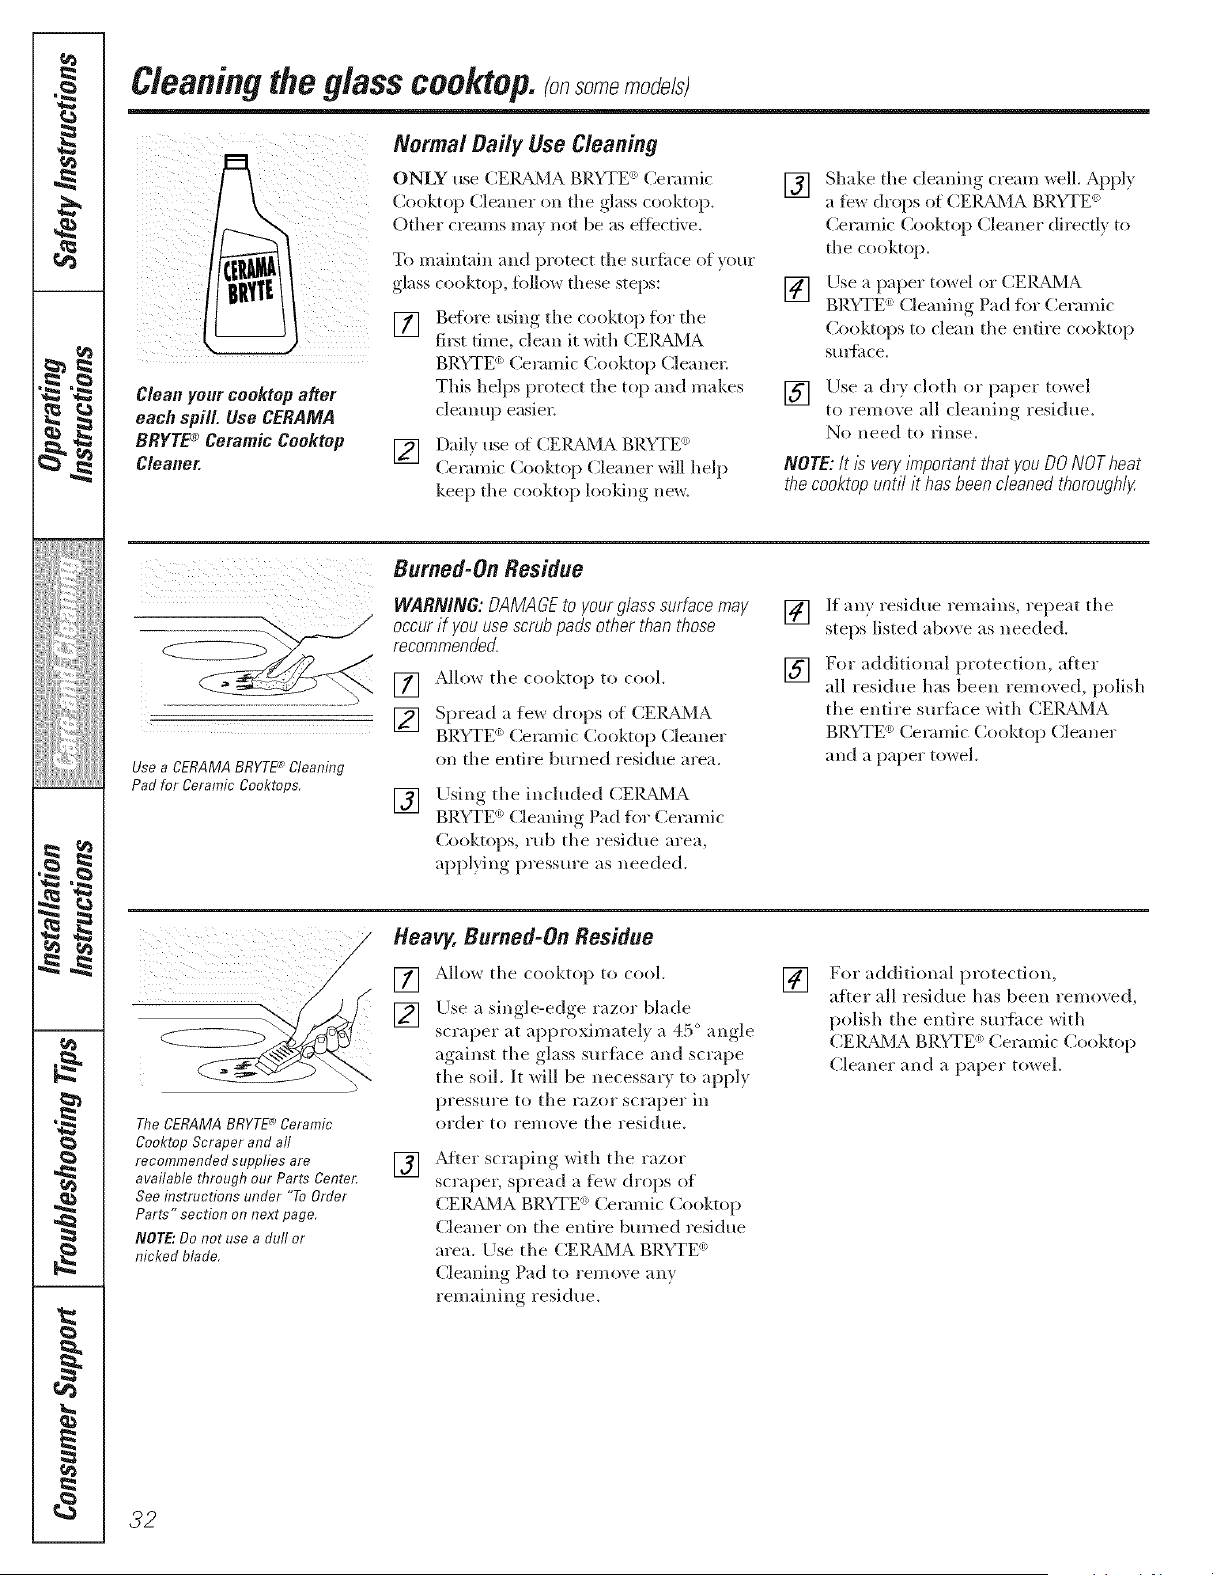
g
P
J
_Jiiiiiii_;!iii{{i}iii
i[i>i_i_iiiiiii
!€
• ¢
m
m
tz
Cleaningthe glass cooktop, somemo e/sl
Cleanyour cooktop after
each spill. Use CERAMA
BRYTE® Ceramic Cooktop
Cleaner.
Normal Daily Use Cleaning
ONLY use (_E]L_L_ BRUFE _elamw
Cooktop Cleaner on the glass rooktop.
Other creams ma_ not be as eflecdxe.
riP{}maintain and protect the surfime of your
glass cooktop, lbllow these steps:
[] Before using the cooktop for the
fi_t time, clean it with CEIL_dMA
BRYTE _Ceramic Cooktop Cleane_;
This helps protect the top and makes
cleanup easier;
[] Dail) use of CE]LBdMA BP.YTE (_)
Ceramic ( 2)oktop Cleaner will help
kee I) the {ooktop looldng new.
[]
[]
Shake the cleaning cream well. Apply
a t0w drops of CEIU_MA BRYTE_
Ceramic Cooktop Cleaner directly to
the cooktop.
Use a paper toy, el or CEIL_X,IA
BRYTE '_)Cleaning Pad h}r Ceramic
Cooktops to clean the entire cooktop
Stlla_itce,
[] Use a drx cloth or paper tox_el
to remove all cleaning residue.
No need to Finse.
NOTE:/t/s veryimportantthat you DONOTheat
thecooktopuntil it hasbeencleanedthoroughly.
Burned-On Residue
WARNING:OAMAGEto yourglasssurfacemay
occurif youusescrubpads otherthan those
recommended.
Use a CERAMA BRYTE_ Cleaning
Pad for Ceramic Cooktops.
[] Allow the cooktop to cool.
[] Sprea(!_ a few drops {}t CEIL_X,IA
BRYTE _)(2erami{ Cooktop Cleaner
on the entire bm'ned residue area.
[]
Llsing the included CEIL_,/A
_) _ " " O" )" " ) "
BRYTE (lemm% tad f( _ Ceramic
Cooktops, rub the residue area,
appl}lng pressure as needed.
[]
[]
If any residue remains, repeat the
steps listed above as needed.
For additional protectitm, after
all residue has been removed, polish
the entire suriace with CEIUkMA
BRVFE (_ ( eramic Cooktop Cleaner
and a paper towel.
The CERAMA BRYTE _ Ceramic
Cooktop Scraper and aft
recommended supplies are
available through our Parts Center;
See instructions under "To Order
Parts" section on next page,
NOT£" Do not use a dull or
nicked blade,
Heavy, Burned-On Residue
[] AHow the rooktop to reel.
[] Use a single-edge razor blade
scraper at approximately a 45 ° angle
against the glass surfime and scrape
the soil. It will be necessar_ to apply
pressm'e to the razor scraper in
order to remove the residue.
[]
After scraping with the razor
scrape_, spread a few drops of
CEI_BdX,IABRYTE ) Ceramic Cooktop
Cleaner on the entire bm_ed residue
area. Use the CEIUkMA BRYTE _
Cleaning Pad to remove any
remaining residue.
[]
For additional protection,
after all residue has been removed,
p{}lish the entire surface with
CEI_BdMA BRYTE <:Ceramic Cooktop
Cleaner and a paper towel.
32
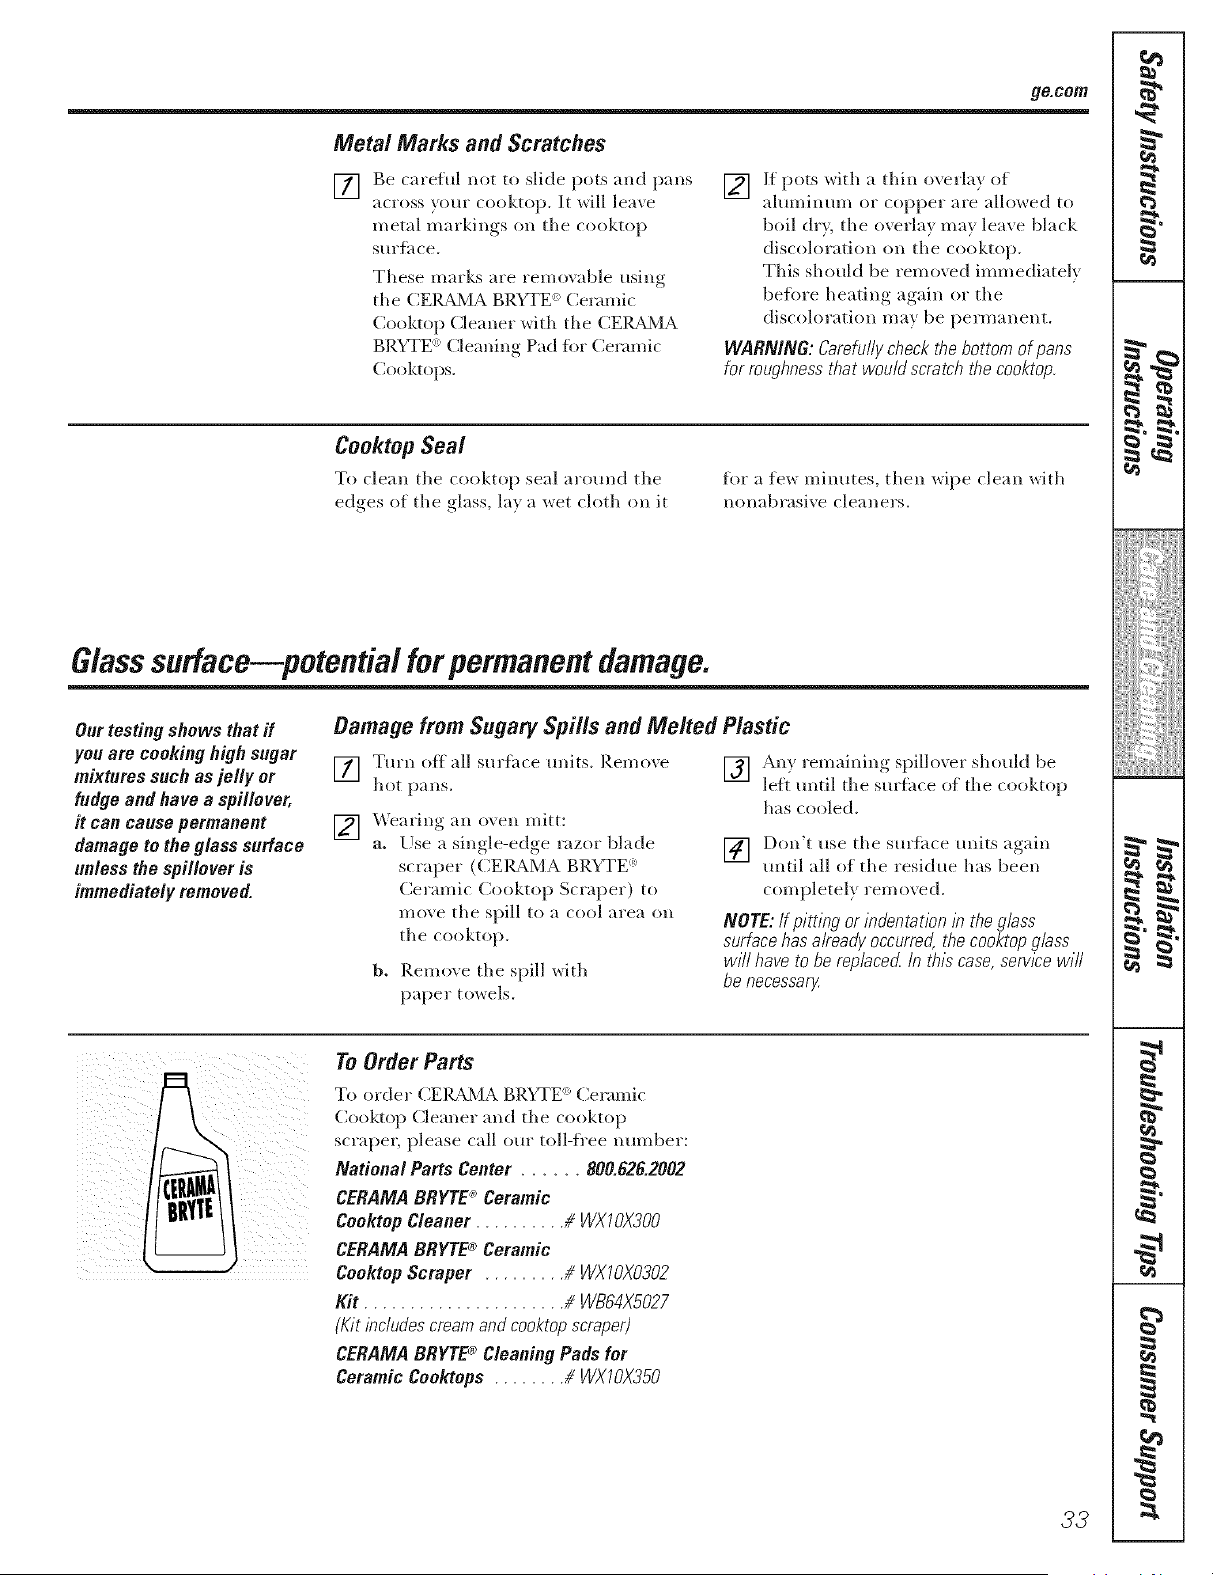
ge.cmn
Metal Marks and Scratches
[]
Be careful not to slide pots and pans
across v(mr cooktop. It will leave
metal markings o1, the cooktop
stiFf, ice.
These marks are removable using
the CEIg_dHA BRYTE e: Ceramic
Cooktop Cleaner with the CEIg_dHA
BRYTE <: Cleaning Pad fin" Ceramic
Cooktops.
[] If pots ``dth a thin overla} of
aluminum or copper are allowed to
boil d*), the overlay may leave black
discoloration on the cooktop.
This should be removed immediately
be%re heating again or the
discoloration may be permanent.
WARNING: &refully check the bottom of pans
for roughness that would scratch the cooktop
Cooktop Seal
To clean the cooktop seal around the
edges of the glass, la) a ",vet cloth on it
for a few minutes, then wipe clean with
ll()llabl'_lsi`` e clea 11el's.
Glasssudace petential forpermanentdamage.
Our testing shows that if
you are cooking high sugar
mixtures such as jelly or
fudge and have a spillever,
it can cause permanent
damage to the glass surface
unless the spillever is
immediately removed.
Damage from Sugary Spills and Melted Plastic
[] Turn off all surthce units. I_.emo``e
hot pans.
[] Wearing an o\ ell mitt:
a. Use a single-edge *wzor blade
scraper (C.EIgA,MA BRYTE <:
Ceramic Cooktop Scraper) to
me\ e the spill to a cool area oll
the cooktop.
b. Remove the spill with
paper towels.
[] An) remaining spillover should be
leit until the surthce of the cooktop
has cooled.
] Don't use the sm'tace units ao"dn
until all of the residue has been
completely removed.
NOTE: If pitting or indentation la the glass
surface has already occurred, the cooktop glass
w#l have to be replaced, b thla case, serv/2e w/fl
be necessaaz
To Order Parts
T{} order CEI_M A BRYTE _ Ceramic
Cooktop Cle;u]er and the cooktop
s{ r;iper, please (all ore" toll-i/"ee 11tllllbey:
National Parts Center ...... 800.828.2002
CERAMA BRYTE* Ceramic
Ceektep Cleaner # WXI OX300
CERAMA BRYTE® Ceramic
Cooktop Scraper # WXIOX0302
Kit ...................... # WB84X5027
(Kit lacludes cream and cooktop scraper)
CERAMA BBYTE_ Cleaning Pads for
Ceramic Cookteps # WXIOX350
33
r_
i
p
, m
!iiiiii,l,iiiiii_i}i:i:i:i:i
iiiiiiiiiiH_i};};
iiiiiiiiiii{i=
I,, _=
m
m

I stallat"
I structi
Free-Standi
lectric Ranges
[_Questions? Call 800.GE.CARES (800.432.2737) or Visit our Website at: ge.com
BEFORE YOU BEGIN
Read these instructions completely
and carefully.
• iMPORTANT - Savethese
instructions for local inspector's use.
• iMPORTANT - Observeall
governing codes and ordinances.
Note to Installer - Be sure to leave these
instructions with the Consumer.
Note to Consumer - Keep these
instructions for future reference.
= Skill level - Installation of this appliance
requires basic mechanical skills.
• Completion time - 1 to 3 hours
• Proper installation is the responsibility of
the installer.
• Product failure due to improper installation
is not covered under the Warranty.
_,WARNING - This appliance must
be properly grounded.
FOR YOUR SAFETY:
-&WARNING - Beforebeginningthe
installation, switch power off at service panel
and lock the service disconnecting means to
prevent power from being switched on
accidentally. When the service disconnecting
means cannot be locked, securely fasten a
prominent warning device, such as a tag, to
the service panel.
FOR YOUR SAFETY:
All rough-in and spacing dimensions must be
met for safe use of your range. Electricity to
the range can be disconnected at the outlet
without moving the range if the outlet is in
the preferred location (remove lower drawer).
To reduce the risk of burns or fire when
reaching over hot surface elements, cabinet
storage space above the cooktop should be
avoided. If cabinet storage space is to be
provided above the cooktop, the risk can
be reduced by installing a range hood that
sticks out at least 5" beyond the front of the
cabinets. Cabinets installed above a cooktop
must be no deeper than 13:'
Be sure your appliance is properly installed
and grounded by a qualified technician.
Make sure the cabinets and wall coverings
around the range can withstand the temperatures
(up to 200°F) generated by the range.
ANTI-TIP DEVICE
_I,WARNING - Toreducetherisk
of tipping, the appliance must be secured by
properly installed Anti-Tip bracket packed
with this appliance.
If the Anti-Tip device supplied with the range
does not fit this application, use the universal
Anti-Tip device WB2X7909.
-&WARNING -
• All ranges can tip
= Injury to persons could result
(_ • Install Anti-Tip bracket packed
with range
= See Installation Instructions
If you pull the range out and away from the
wall for any reason, make sure the Anti-Tip
bracket is engaged when the range is pushed
back against the wall.
34
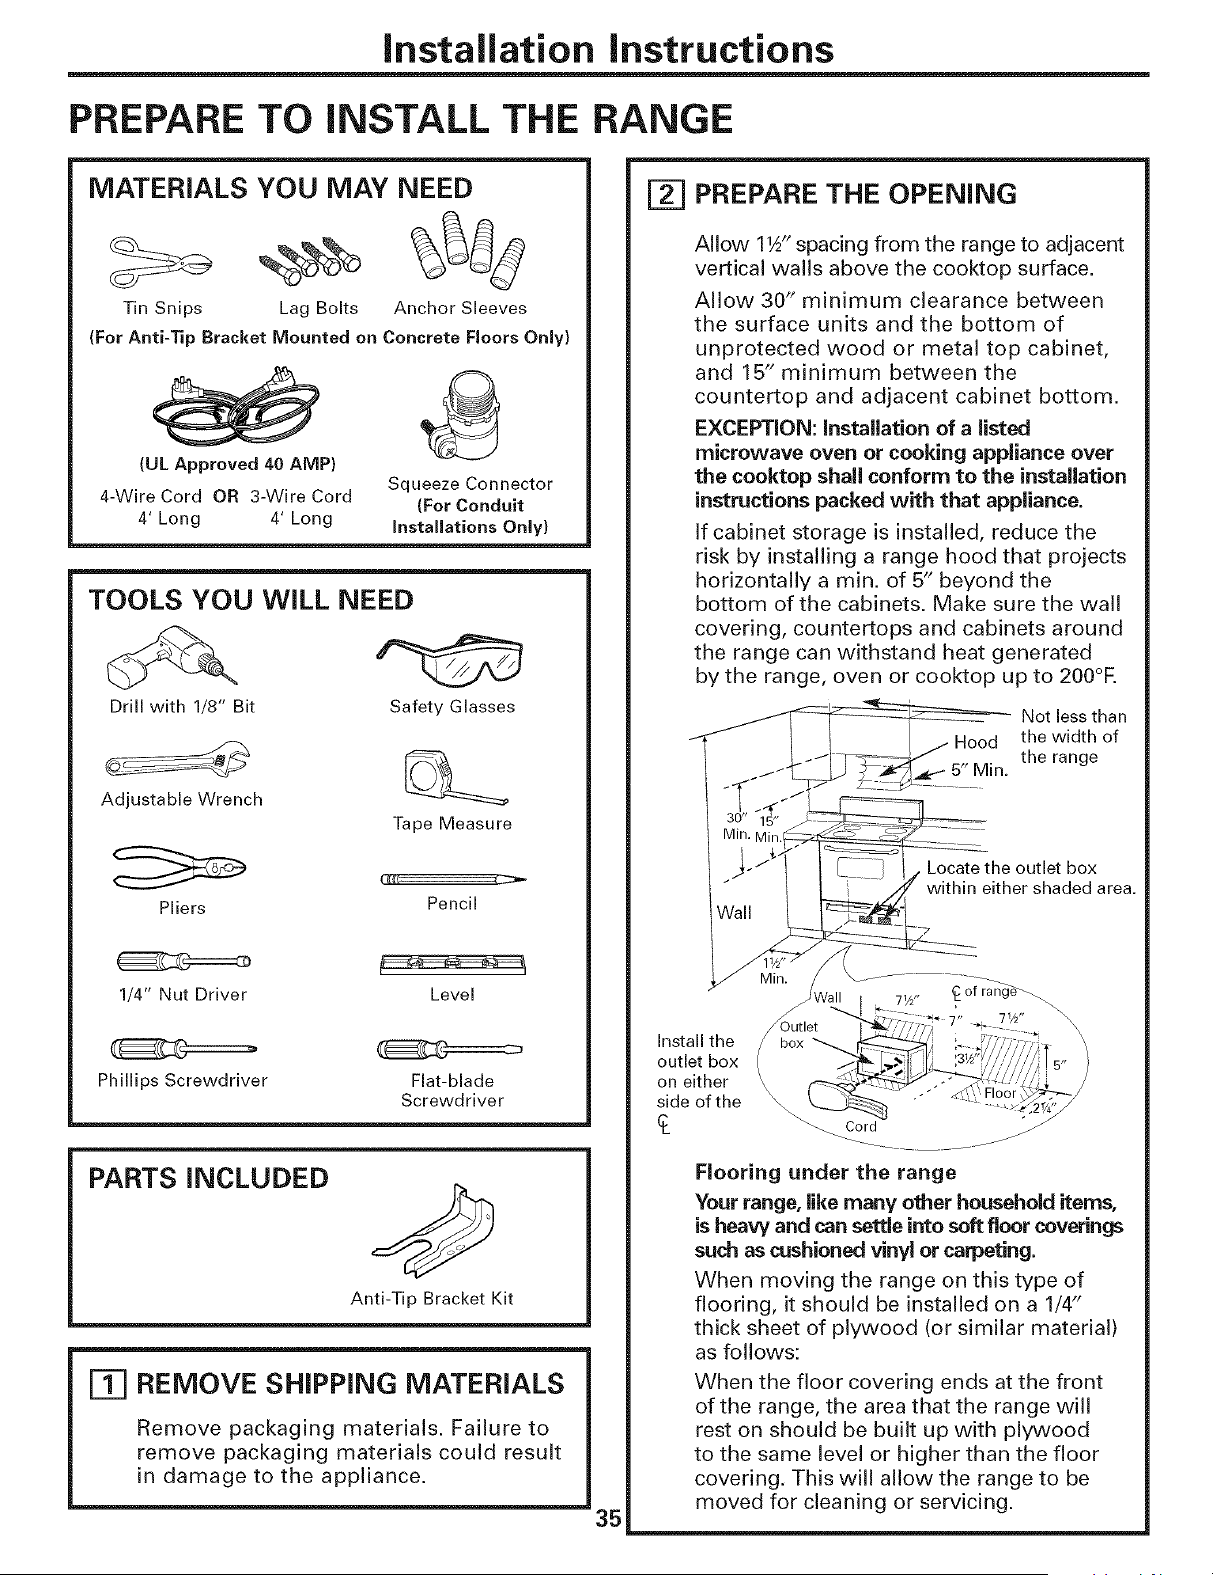
Installation instructions
PREPARE TO iNSTALL THE RANGE
MATERIALS YOU MAY NEED
Tin Snips Lag Bolts Anchor Sleeves
(For Anti-Tip Bracket Mounted on Concrete Floors Only)
(UL Approved 40 AMP)
4-Wire Cord OR 3-Wire Cord
4' Long 4' Long
Squeeze Connector
(For Conduit
installations Only)
TOOLS YOU WiLL NEED
Drill with 1/8" Bit Safety Glasses
Adjustable Wrench
Tape Measure
Pliers
Pencil
1/4" Nut Driver Level
Phillips Screwdriver
Flat-blade
Screwdriver
PARTS INCLUDED
Anti-Tip Bracket Kit
[=_ REMOVE SHIPPING MATERIALS
Remove packaging materials. Failure to
remove packaging materials could result
in damage to the appliance.
35
[-_ PREPARE THE OPENING
Allow 11A"spacing from the range to adjacent
vertical walls above the cooktop surface.
Allow 30" minimum clearance between
the surface units and the bottom of
unprotected wood or metal top cabinet,
and 15" minimum between the
countertop and adjacent cabinet bottom.
EXCEPTION: Installation of a listed
microwave oven or cooking appliance over
the cooktop shall conform to the installation
instructions packed with that appliance.
If cabinet storage is installed, reduce the
risk by installing a range hood that projects
horizontally a min. of 5" beyond the
bottom of the cabinets. Make sure the wall
covering, countertops and cabinets around
the range can withstand heat generated
by the range, oven or cooktop up to 200°R
Not less than
Hood the width of
the range
5" Min.
Locate the outlet box
within either shaded area.
Install the
outlet box
on either
side of the
of rar_
\
Outlet
box
\
_o r d jjJ
Flooring under the range
Your range, like many other househoM items,
is heaw and can settle into soft floor coverings
such as cushioned vinyl or carpeting.
When moving the range on this type of
flooring, it should be installed on a 1/4"
thick sheet of plywood (or similar material)
as follows:
When the floor covering ends at the front
of the range, the area that the range will
rest on should be built up with plywood
to the same level or higher than the floor
covering. This will allow the range to be
moved for cleaning or servicing.
Installation instructions
ELECTRICAL CONNECTIONS
ELECTRICAL REQUIREMENTS
-4,CAUTION: Forpersonalsafety,
do not use an extension cord with this
appliance. Remove house fuse or open circuit
breaker before beginning installation.
This appliance must be supplied with the
proper voltage and frequency, and connected
to an individual properly grounded branch
circuit, protected by a circuit breaker or fuse
having amperage as specified on the rating
plate. The rating plate is located behind the
storage drawer or warming drawer on the
oven frame.
Location of
model rating
plate
We recommend you have the electrical wiring
and hookup of your range connected by a
qualified electrician. After installation, have
the electrician show you where your main
range disconnect is located.
Check with your local utilities for electrical
codes which apply in your area. Failure to
wire your oven according to governing codes
could result in a hazardous condition. If there
are no local codes, your range must be wired
and fused to meet the requirements of the
National Electrical Code, ANSI/NFPA No. 70--
Latest Edition. You can get a copy by writing:
National Fire Protection Association
Batterymarch Park
Quincy, MA 02269
Effective January 1, 1996, the National
Electrical Code requires that new construction
(not existing) utilize a 4-conductor connection
to an electric range.
When installing an electric range in new
construction, follow Steps 3 and 5 for 4-wire
connection.
You must use a 3-wire, single-phase A.C.
208Y/120 Volt or 240/120 Vok, 60 hertz
electrical system. If you connect to aluminum
wiring, properly installed connectors
approved for use with aluminum wiring
must be used.
If the electrical service provided does not
meet the above specifications, have a
licensed electrician install an approved outlet.
'36
ALL NEW CONSTRUCTIONS,
MOBILE HOMES AND
INSTALLATIONS WHERE
LOCAL CODES DO NOT
ALLOW GROUNDING
THROUGH NEUTRAL
Use only a 3-conductor or a 4-conductor
UL-listed range cord. These cords may be
provided with ring terminals on wire and
a strain relief device.
A range cord rated at 40 amps with 125/250
minimum volt range is required. A 50 amp
range cord is not recommended but if used, it
should be marked for use with nominal 1%"
diameter connection openings. Care should
be taken to center the cable and strain relief
within the knockout hole to keep the edge
from damaging the cable.
Because range terminals are not accessible
after range is in position, flexible service
conduit or cord must be used.
NOTE: If conduit is being used, go to Step 3D
and then to Step 6 or 7.
• On some models, a filter capacitor may be
connected between the black and white
leads on the junction block.
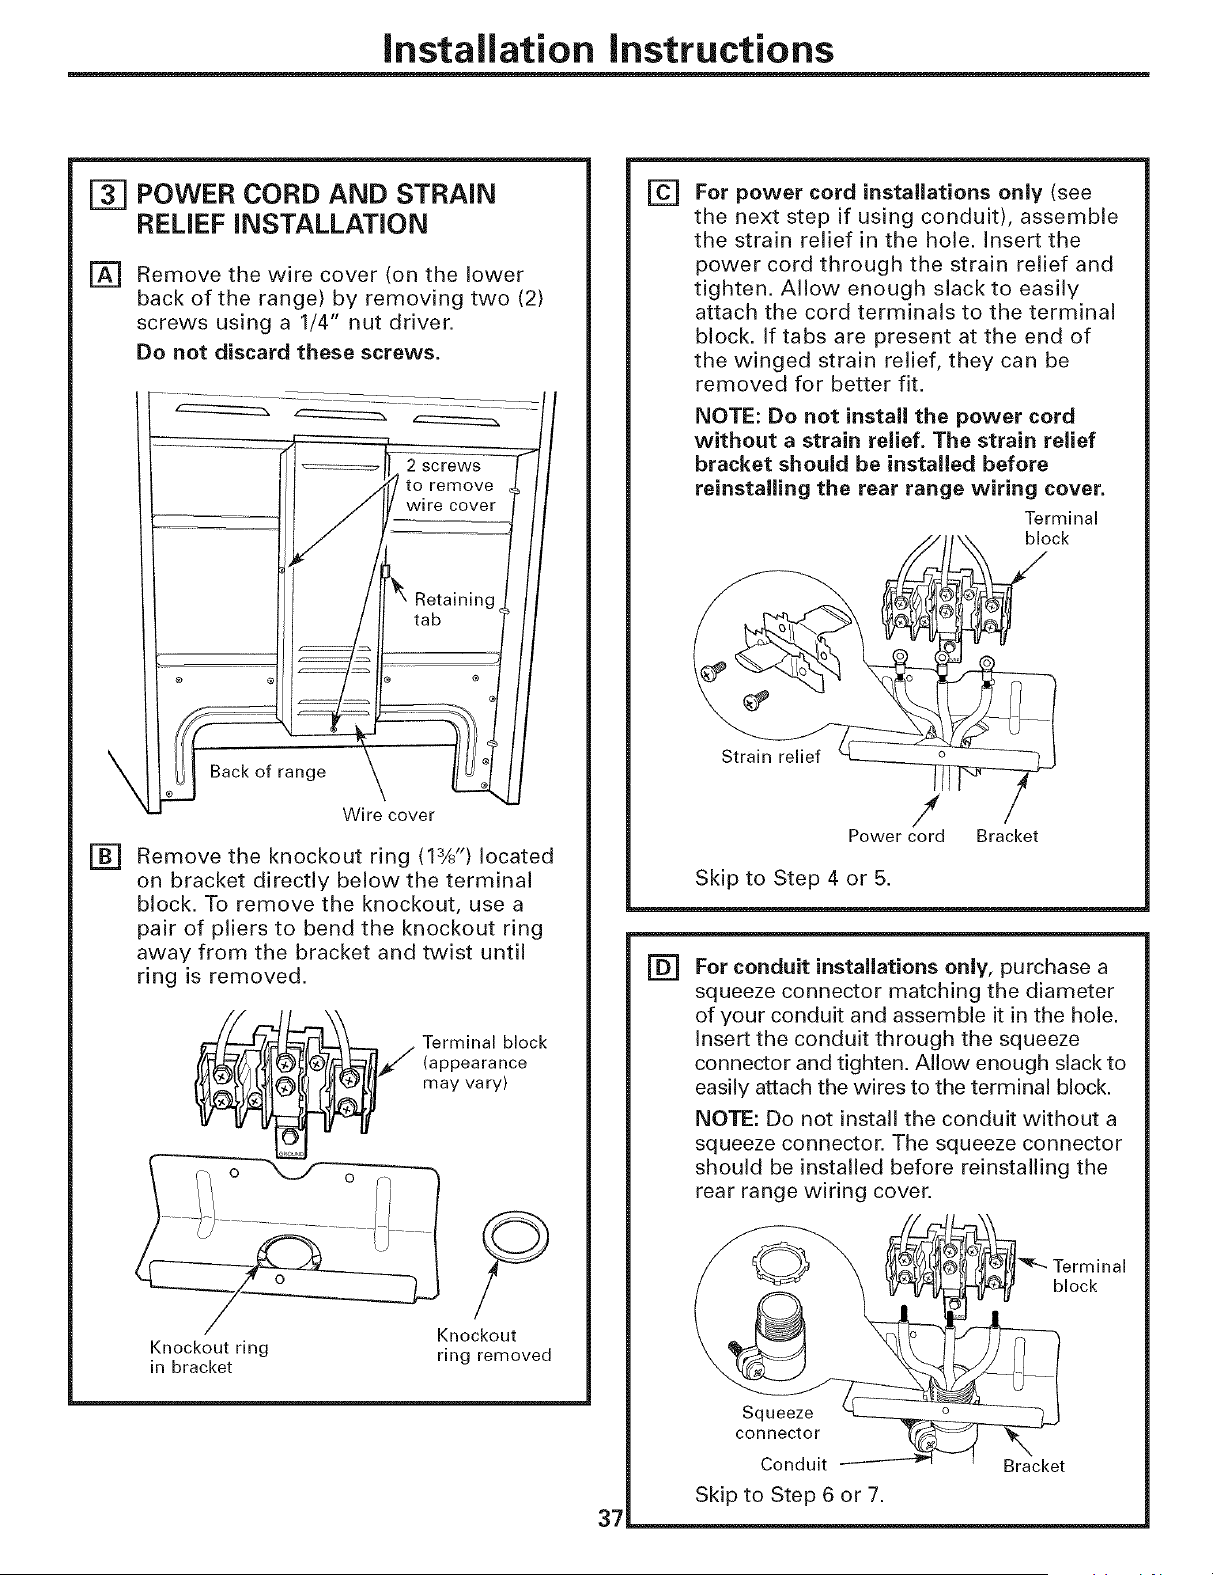
Installation instructions
POWER CORD AND STRAIN
RELIEF iNSTALLATiON
[] Remove the wire cover (on the lower
back of the range) by removing two (2)
screws using a 1/4" nut driver.
Do not discard these screws.
of range
Wire cover
[]
Remove the knockout ring (13X') located
on bracket directly below the terminal
block. To remove the knockout, use a
pair of pliers to bend the knockout ring
away from the bracket and twist until
ring is removed.
_/ erminal block
(appearance
may vary)
Knockout ring ring removed
in bracket
37
[] For power cord installations only (see
the next step if using conduit), assemble
the strain relief in the hole. Insert the
power cord through the strain relief and
tighten. Allow enough slack to easily
attach the cord terminals to the terminal
block. If tabs are present at the end of
the winged strain relief, they can be
removed for better fit.
NOTE: Do not install the power cord
without a strain relief. The strain relief
bracket should be installed before
reinstalling the rear range wiring cover.
Terminal
• _t \ block
Strain relief _ /
Power cord Bracket
Skip to Step 4 or 5.
[] For conduit installations only, purchase a
squeeze connector matching the diameter
of your conduit and assemble it in the hole.
Insert the conduit through the squeeze
connector and tighten. Allow enough slack to
easily attach the wires to the terminal block.
NOTE: Do not install the conduit without a
squeeze connector. The squeeze connector
should be installed before reinstalling the
rear range wiring cover.
Terminal
block
Squeeze
connector
Conduit Bracket
Skip to Step 6 or 7.
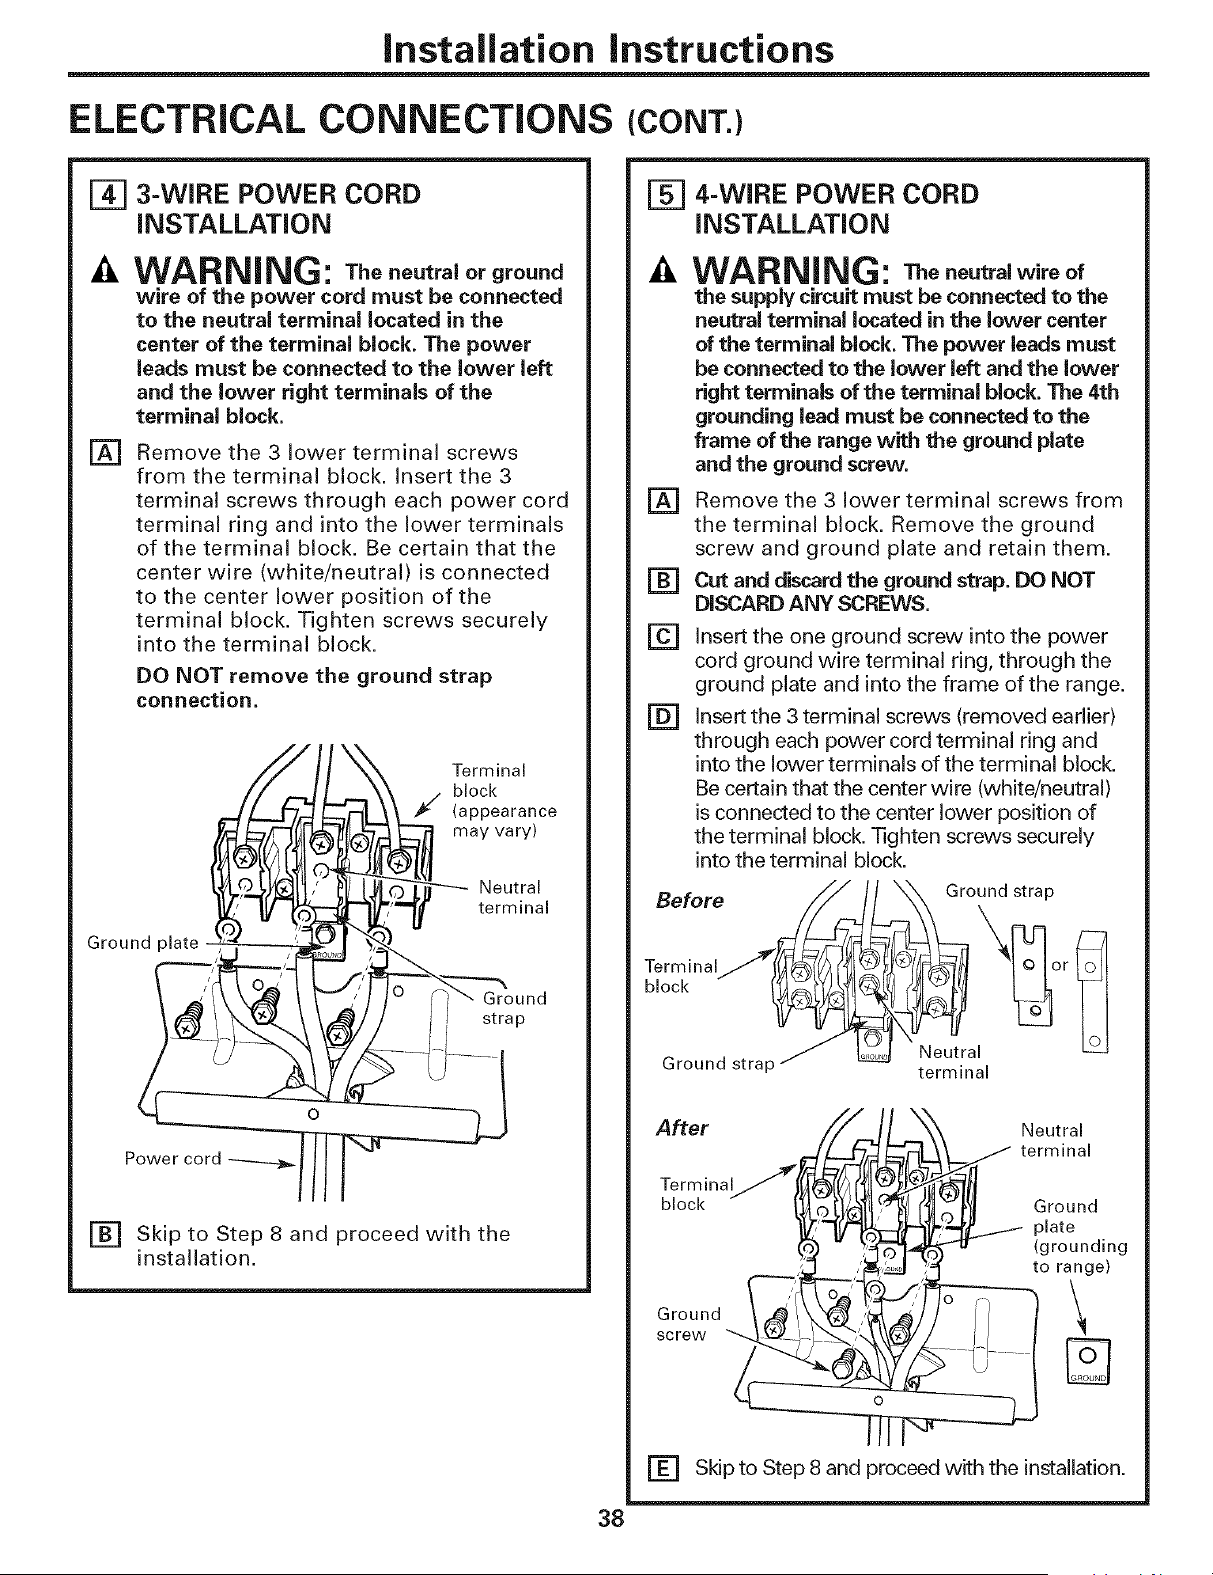
Installation instructions
ELECTRICAL CONNECTIONS (CONT.)
_] 3-WIRE POWER CORD
INSTALLATION
WARNING: Thenoutralorground
wire of the power cord must be connected
to the neutral terminal located in the
center of the terminal block. The power
leads must be connected to the lower left
and the lower right terminals of the
terminal block.
Remove the 3 lower terminal screws
from the terminal block. Insert the 3
terminal screws through each power cord
terminal ring and into the lower terminals
of the terminal block. Be certain that the
center wire (white/neutral) is connected
to the center lower position of the
terminal block. Tighten screws securely
into the terminal block.
DO NOT remove the ground strap
connection.
[]
Terminal
block
_'/ (appearance
may vary)
Neutral
terminal
Ground
f strap
Power cord
Ground plate
[] Skip to Step 8 and proceed with the
installation.
_] 4-WIRE POWER CORD
INSTALLATION
[]
[]
[]
[]
WARNING: Thoneutralwireof
the supply circuit must be connected to the
neutral terminal located in the lower center
of the terminaJ block. The power leads must
be connected to the lower left and the lower
right terminals of the terminal block. The 4th
grounding lead must be connected to the
frame of the range with the ground plate
and the ground screw.
Remove the 3 lower terminal screws from
the terminal block. Remove the ground
screw and ground plate and retain them.
Cut and discard the ground strap. DO NOT
DISCARD ANY SCREWS.
Insert the one ground screw into the power
cord ground wire terminal ring, through the
ground plate and into the frame of the range.
Insert the 3 terminal screws (removed earlier)
through each power cord terminal ring and
into the lower terminals of the terminal block.
Be certain that the center wire (white/neutral)
is connected to the center lower position of
the terminal block. Tighten screws securely
into the terminal block.
Before _/_x_ °und strap
After
Terminal
block
Ground
screw
Neutral
__ terminal
_ Ground
_i'L1../ plate
_lJ (grounding
to range)
\
[] Skip to Step 8 and proceed with the installation.
38
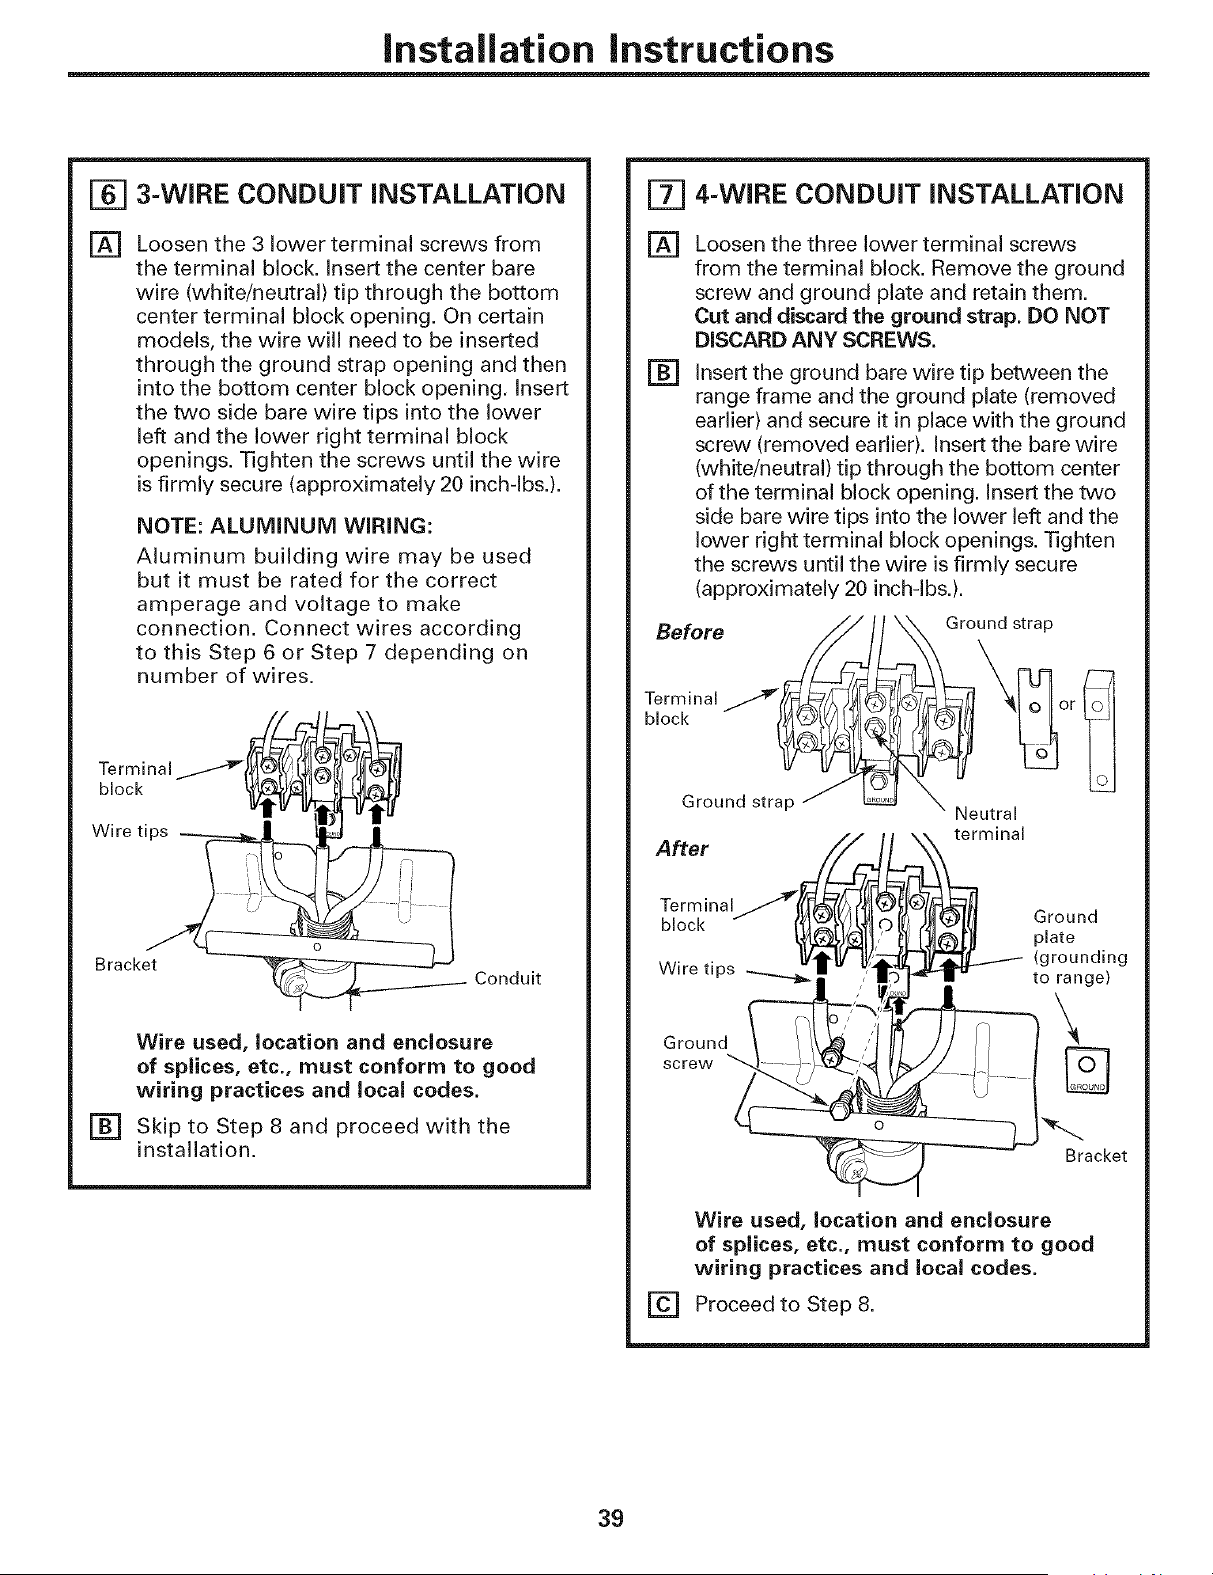
Installation instructions
[_ 3-WIRE CONDUIT iNSTALLATiON
[]
Loosen the 3 lower terminal screws from
the terminal block. Insert the center bare
wire (white/neutral) tip through the bottom
center terminal block opening. On certain
models, the wire will need to be inserted
through the ground strap opening and then
into the bottom center block opening, Insert
the two side bare wire tips into the lower
left and the lower right terminal block
openings. Tighten the screws until the wire
is firmly secure (approximately 20 inch-lbs.).
NOTE: ALUMINUM WiRiNG:
Aluminum building wire may be used
but it must be rated for the correct
amperage and voltage to make
connection. Connect wires according
to this Step 6 or Step 7 depending on
number of wires.
Terminal i } 9
_
Wire tips _ _ [_ u'fll
Brack-det'_ _ _- "
o(_------_ Conduit
Wire used, location and enclosure
of splices, etc., must conform to good
wiring practices and local codes.
[] Skip to Step 8 and proceed with the
installation.
E_] 4-WIRE CONDUIT INSTALLATION
[]
[]
Loosen the three lower terminal screws
from the terminal block. Remove the ground
screw and ground plate and retain them.
Cut and discard the ground strap. DO NOT
DISCARD ANY SCREWS.
Insert the ground bare wire tip between the
range frame and the ground plate (removed
earlier) and secure it in place with the ground
screw (removed earlier). Insert the bare wire
(white/neutral) tip through the bottom center
of the terminal block opening. Insert the two
side bare wire tips into the lower left and the
lower right terminal block openings. Tighten
the screws until the wire is firmly secure
(approximately 20 inch-lbs.).
Before S_ Ground strap
Ground strap e X Neutral
=+' ,]{AI
block J ?_l_7_k_l_ J/DI/I Ground
_)_11,"- [_[_ plate
, • • [Vtk_/ _:, -IV"_'IL---_- (grounding
vvlretlps __/_'!_" _']rtr tOrange)'L_/i_l _)_ _4_
Ground
screw '_t_-i_- - { m
-- Bracket
[]
Wire used, location and enclosure
of splices, etc., must conform to good
wiring practices and local codes.
Proceed to Step 8.
39
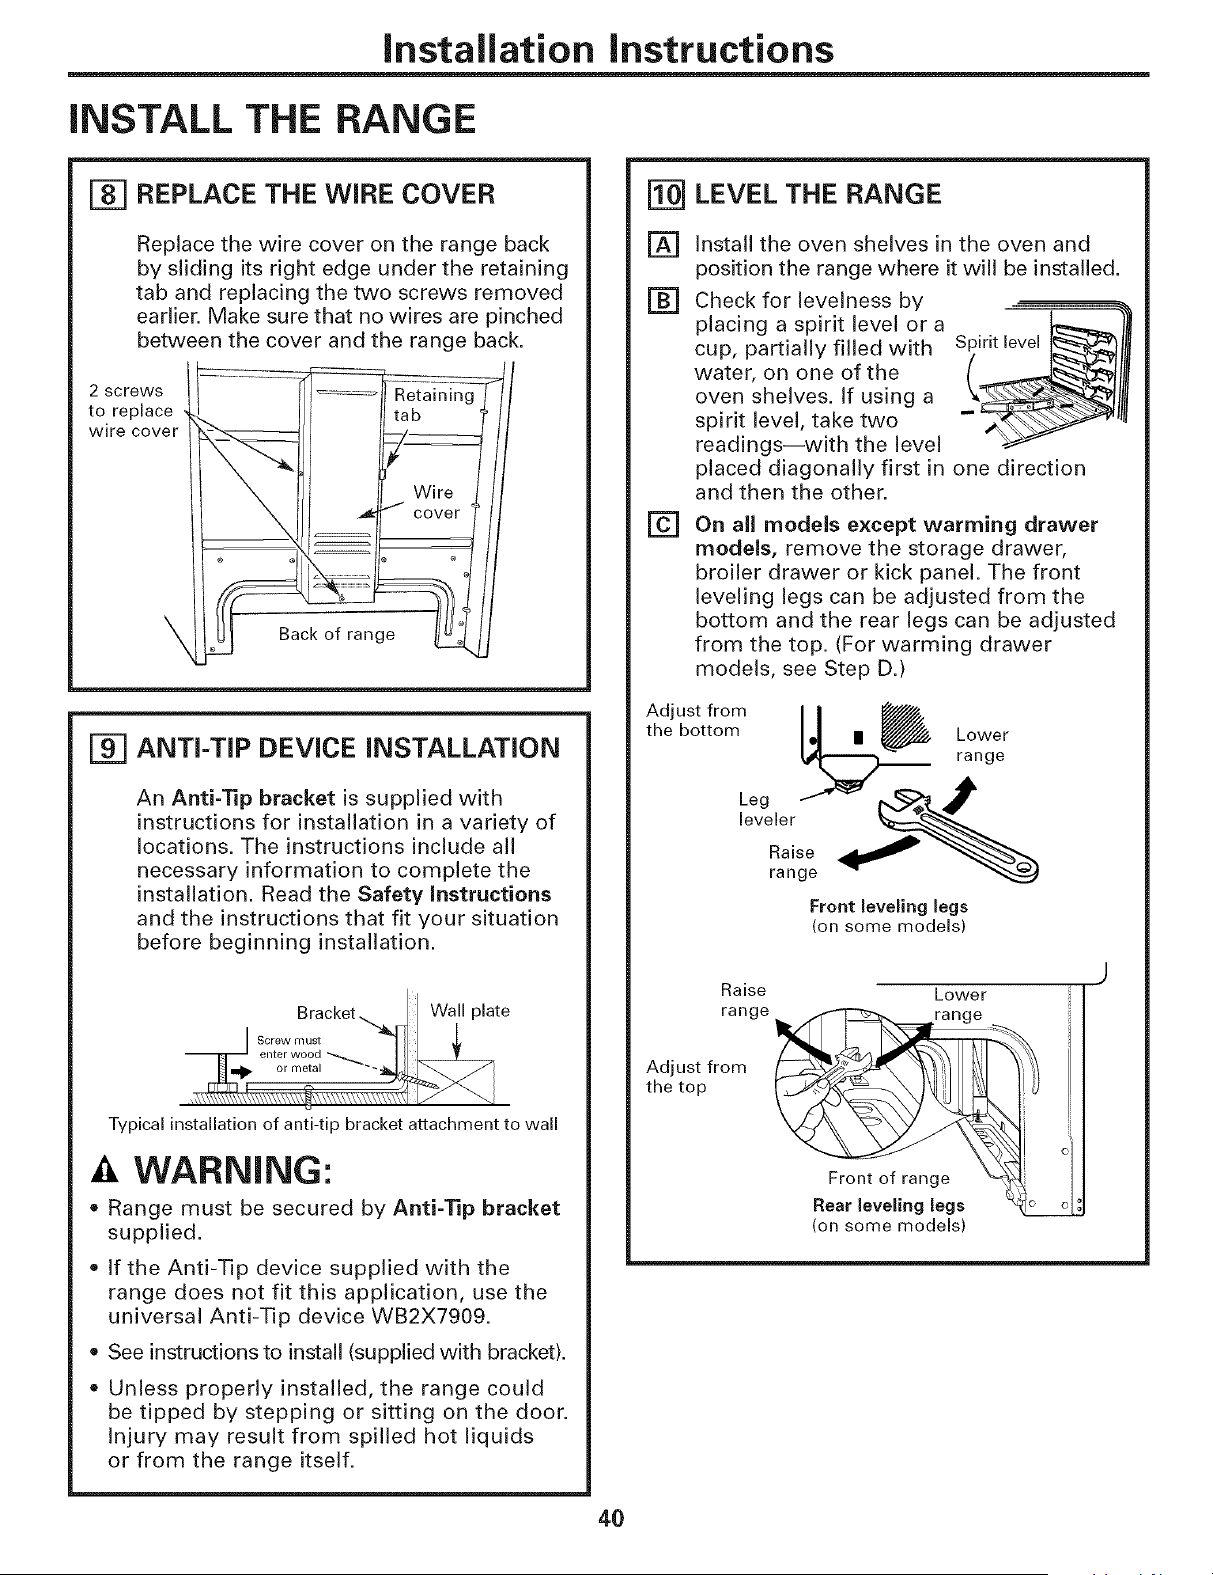
Installation instructions
iNSTALL THE RANGE
_] REPLACE THE WIRE COVER
Replace the wire cover on the range back
by sliding its right edge under the retaining
tab and replacing the two screws removed
earlier. Make sure that no wires are pinched
between the cover and the range back.
2 screws
to replace
wire cover
111 .1¼Wire
@
ANTI-TIP DEVICE iNSTALLATiON
An Anti-'lip bracket is supplied with
instructions for installation in a variety of
locations. The instructions include all
necessary information to complete the
installation. Read the Safety instructions
and the instructions that fit your situation
before beginning installation.
Bracket.._ Wall plate
S I_[teWwm°U'd _ I: _
Typical installation of anti-tip bracket attachment to wall
A WARNING:
= Range must be secured by Anti-Tip bracket
supplied.
• If the Anti-Tip device supplied with the
range does not fit this application, use the
universal Anti-Tip device WB2X7909.
• See instructions to install (supplied with bracket).
• Unless properly installed, the range could
be tipped by stepping or sitting on the door.
Injury may result from spilled hot liquids
or from the range itself.
LEVEL THE RANGE
[]
[]
[]
Install the oven shelves in the oven and
position the range where it will be installed.
Check for levelness by
placing a spirit level or a
cup, partially filled with
water, on one of the
oven shelves. If using a
spirit level, take two
readings--with the level
placed diagonally first in one direction
and then the other.
On all models except warming drawer
models, remove the storage drawer,
broiler drawer or kick panel. The front
leveling legs can be adjusted from the
bottom and the rear legs can be adjusted
from the top. (For warming drawer
models, see Step D.)
tAt _tt _r°°mm L_ rLa°nVger
Front leveling legs
(on some models)
Adjust from
the top
Raise Lower
Front of range X_
Rear leveling legs
(on some models)
4O
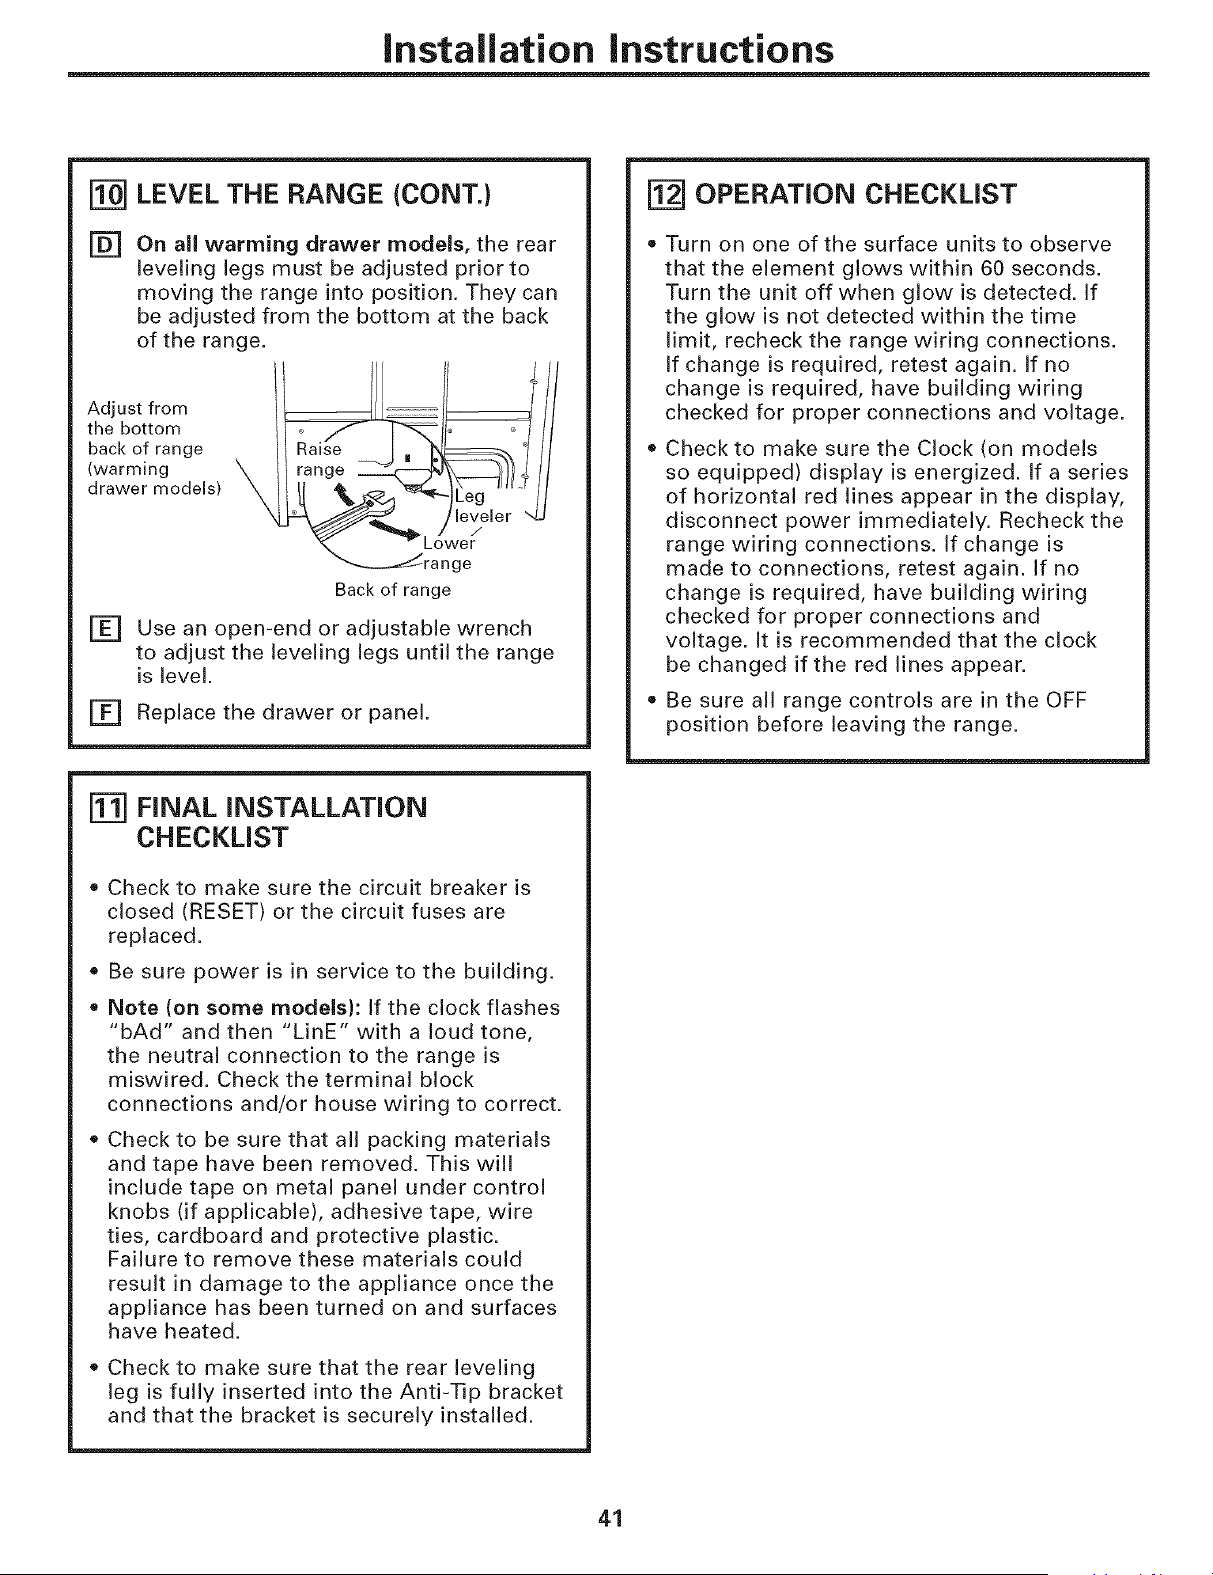
Installation instructions
LEVEL THE RANGE (CONT.)
[] On all warming drawer models, the rear
leveling legs must be adjusted prior to
moving the range into position. They can
be adjusted from the bottom at the back
of the range.
Adjust from
the bottom
back of range
(warming
drawer models)
Lower
ge
Back of range
Use an open-end or adjustable wrench[]
to adjust the leveling legs until the range
is level.
[] Replace the drawer or panel.
FINAL INSTALLATION
CHECKLIST
• Check to make sure the circuit breaker is
closed (RESET) or the circuit fuses are
replaced.
Be sure power is in service to the building.
Note (on some models): If the clock flashes
"bAd" and then "LinE" with a loud tone,
the neutral connection to the range is
miswired. Check the terminal block
connections and/or house wiring to correct.
• Check to be sure that all packing materials
and tape have been removed. This will
include tape on metal panel under control
knobs (if applicable), adhesive tape, wire
ties, cardboard and protective plastic.
Failure to remove these materials could
result in damage to the appliance once the
appliance has been turned on and surfaces
have heated.
Check to make sure that the rear leveling
leg is fully inserted into the Anti-Tip bracket
and that the bracket is securely installed.
[] OPERATION CHECKLIST
Turn on one of the surface units to observe
that the element glows within 60 seconds.
Turn the unit off when glow is detected. If
the glow is not detected within the time
limit, recheck the range wiring connections.
If change is required, retest again. If no
change is required, have building wiring
checked for proper connections and voltage.
Check to make sure the Clock (on models
so equipped) display is energized. If a series
of horizontal red lines appear in the display,
disconnect power immediately. Recheck the
range wiring connections. If change is
made to connections, retest again. If no
change is required, have building wiring
checked for proper connections and
voltage. It is recommended that the clock
be changed if the red lines appear.
Be sure all range controls are in the OFF
position before leaving the range.
41
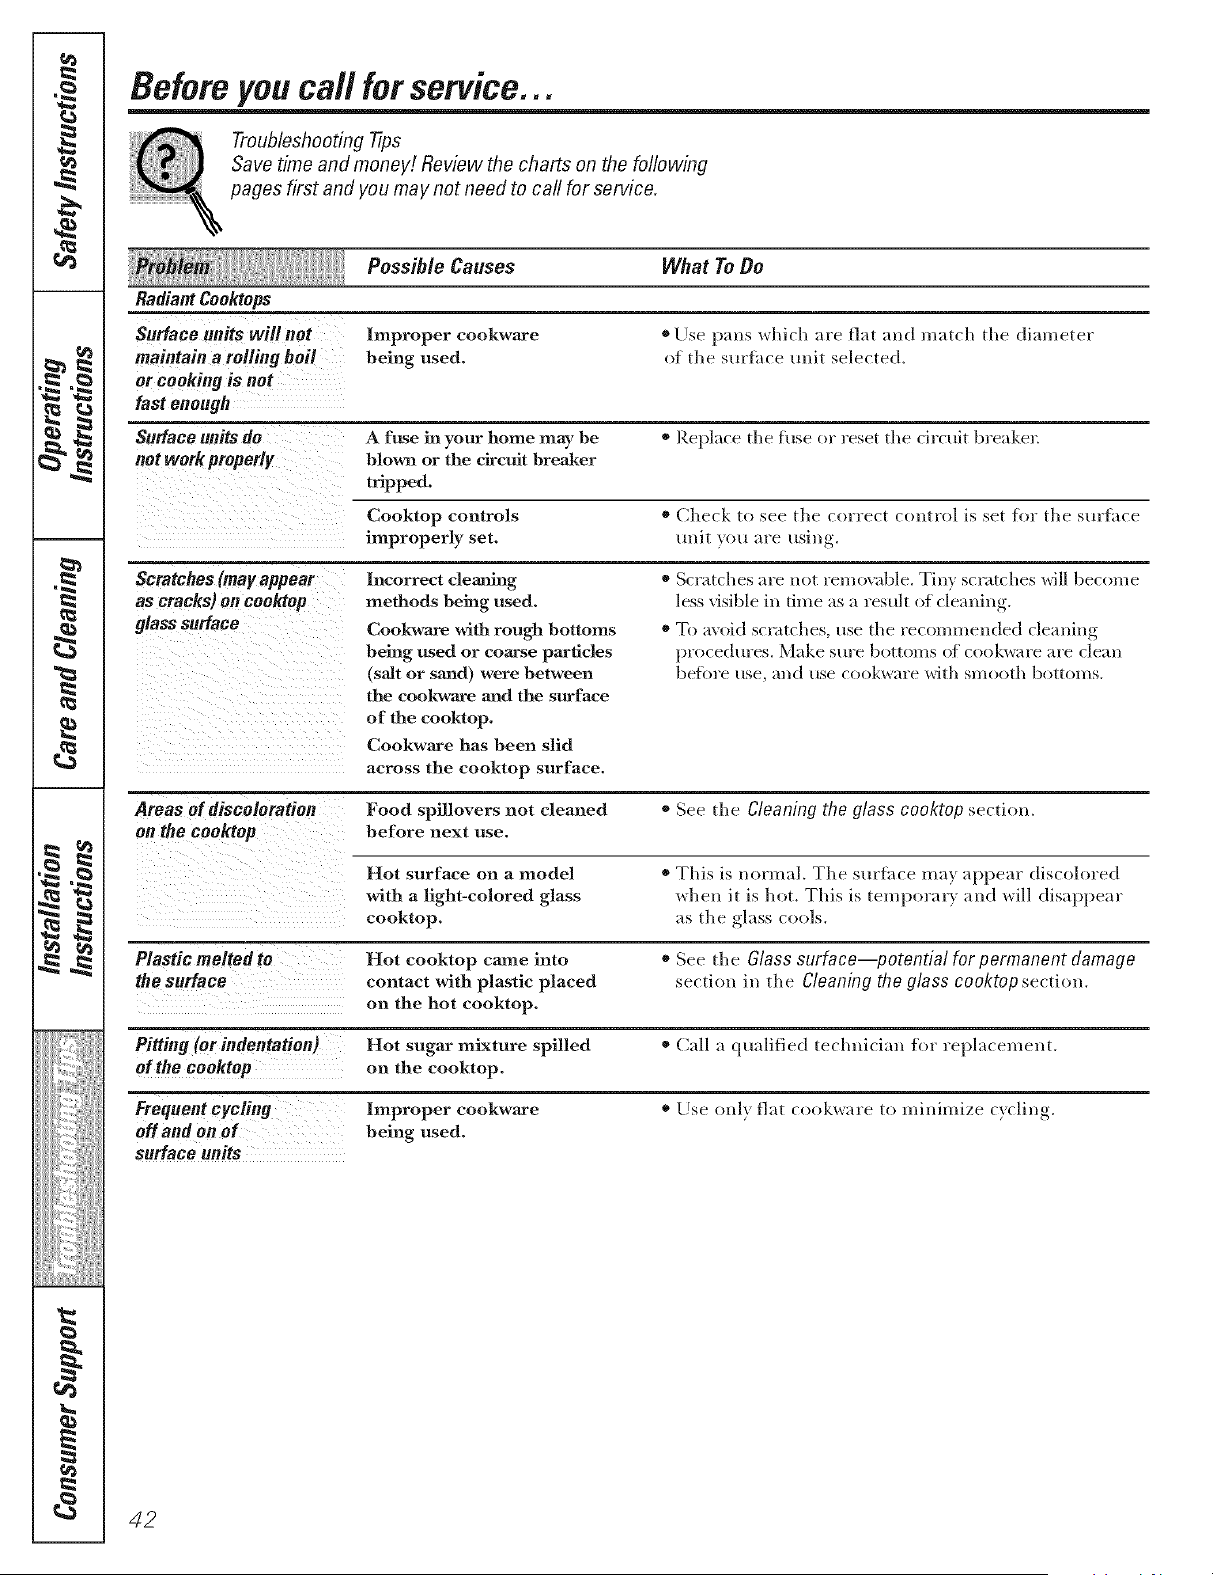
Before you call for service...
Troubleshooting tips
Save time and monev! Review the charts on the following
pages first and you may not need to call for service.
Possible Causes What To Do
Radiant Coo_ops
Surface units will not Improper cool(ware ®Else pro> which :ire fiat and match the dJmneter
maintain a roRing boil being used. of the st/Hhce unit selected,
or cooking is not
fast enough
Surface units do A fuse in your home may be * Replace the fuse or reset the ch'cuit breakel:
not work properly blo_wn or the circuit breaker
tripped.
Cooktop controls * Check to see the correct comrol is set fl_r the suHhce
improperly set. unit you are using.
Scratches (may appear
as cracks) on cooktop
glasssurface
Incorrect cleaning
methods being used.
Cookwame with rough bottoms
being used or coarse particles
(salt or sand) were between
the cookwaace aaad the surface
of the cooktop.
Cookwa_re has been slid
across the cooktop surface.
o Scratches are not remo\_ble. Tiny scratches will become
less visible ix* time as a result of cleaning.
. To avoid scratches, use the recommended cleauing
procedures. Make Stll'e bottolns Of cookware are clean
befl)re rise, all(] rise cookware with sm(}oth botton/s.
Areas of discoloration Food spillovers not cleaned * See the gleaning the glass cooktop section.
on the cooktop before next use.
Hot surface on a model * This is norm:ll. The surfitce may appem" discolored
with a light-colored glass when it is hot. This is temporm T and will disappear
cooktop, as the _-l'/ss,,cools.
Plastic melted to Hot cooktop came into * See the Glass surface potential for permanent damage
the surface contact with plastic placed section in the Cleaning the glass co&top section.
on the hot cooktop.
PRHng (or indentation) Hot sugar mixture spilled * Call a qualified technician for replacement.
of the cooktop on the cooktop.
Frequent cycling Improper cookware * Use only fiat cookware to minimize cycling.
off and on of being used.
surface units
42
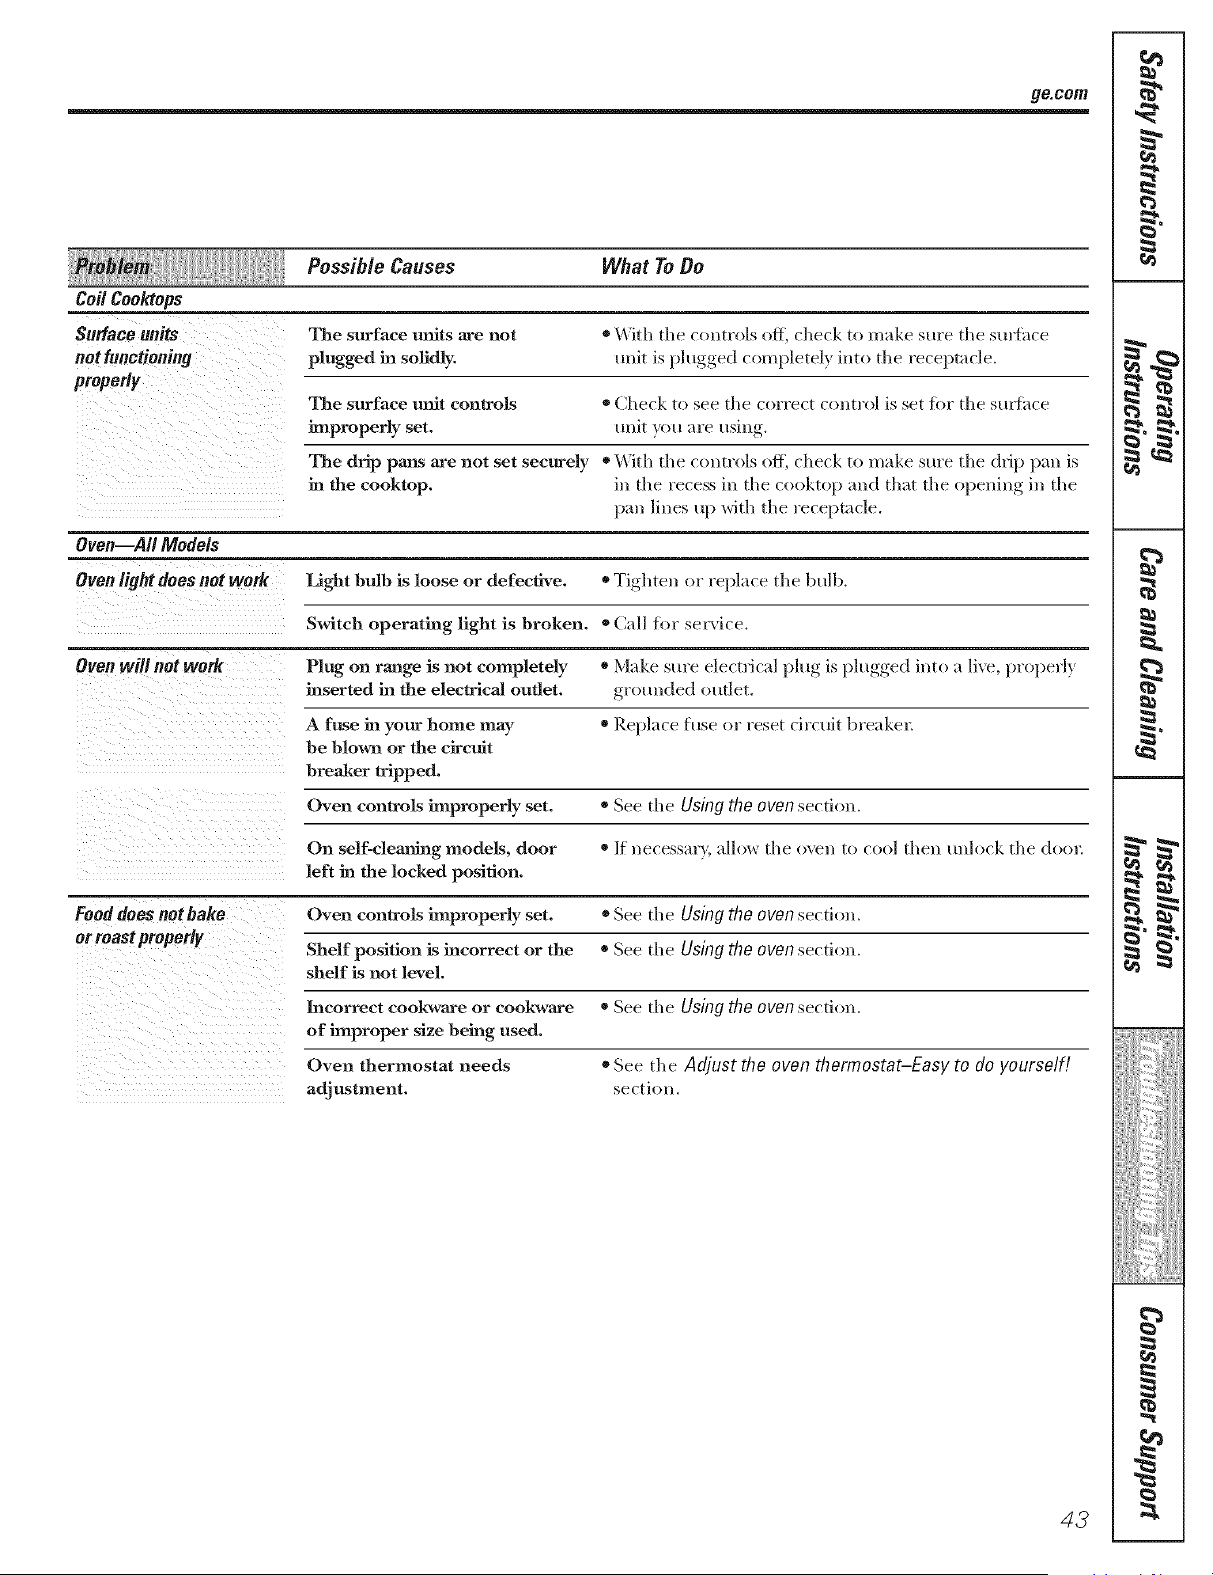
ge.com
Possible Causes What To Do
Coil CooMops
Surface units The surface units are not ®\'Vith the controls off, check to make sure the smfhce
not functioning plugged in solidly, unit is I_lugged,, completely, into the receptacle.
The surface unit controls ®Check to see the correct control is set tbr the stu_fiice
improperly set. unit you "u'e usin
The drip pans are not set securely * With the controls off, check to make stu'e the drip pan is
in the cooktop, in the recess in the cooktop m_d that the o )enim* in the
pan lines up with the receptacle.
Oven--all Models
Oven light does not work Light bulb is loose or defective. * Tighten or I'epln(e the bulb,
Switch operating light is broken. * Call for sela'ice.
Oven will not weIR Plug on range is not completely * Make sure electrical plug is l)lugged,, into a lix e, properly
inserted in the electrical outlet, g/'ottllded ottdet.
A fnse in your home may * Replace fuse or reset circuit breaker_
be blown or the circuit
breaker tripped.
Oven controls improperly set. * See the Using No oven section,
On sdf-cleauing models, door */f necessaQ', allow the oven to cool then unlock the (loo1:
left in the locked position.
Food does notbake Oven controls improperly set. * See the Using the oven section,
or roast properly
Shelf position is incorrect or the * See the Using the oven se(ti(m,
shelf is not level.
Incorrect cookwa_re or cookwm'e
of improper size being used.
Oven thermostat needs
adjustment.
o See the Using the oven section.
® See the Adjust the oven thermostat-Easy to do yourself!
se(tioll,
42
€
r
: =_
b
?'7;i!_'
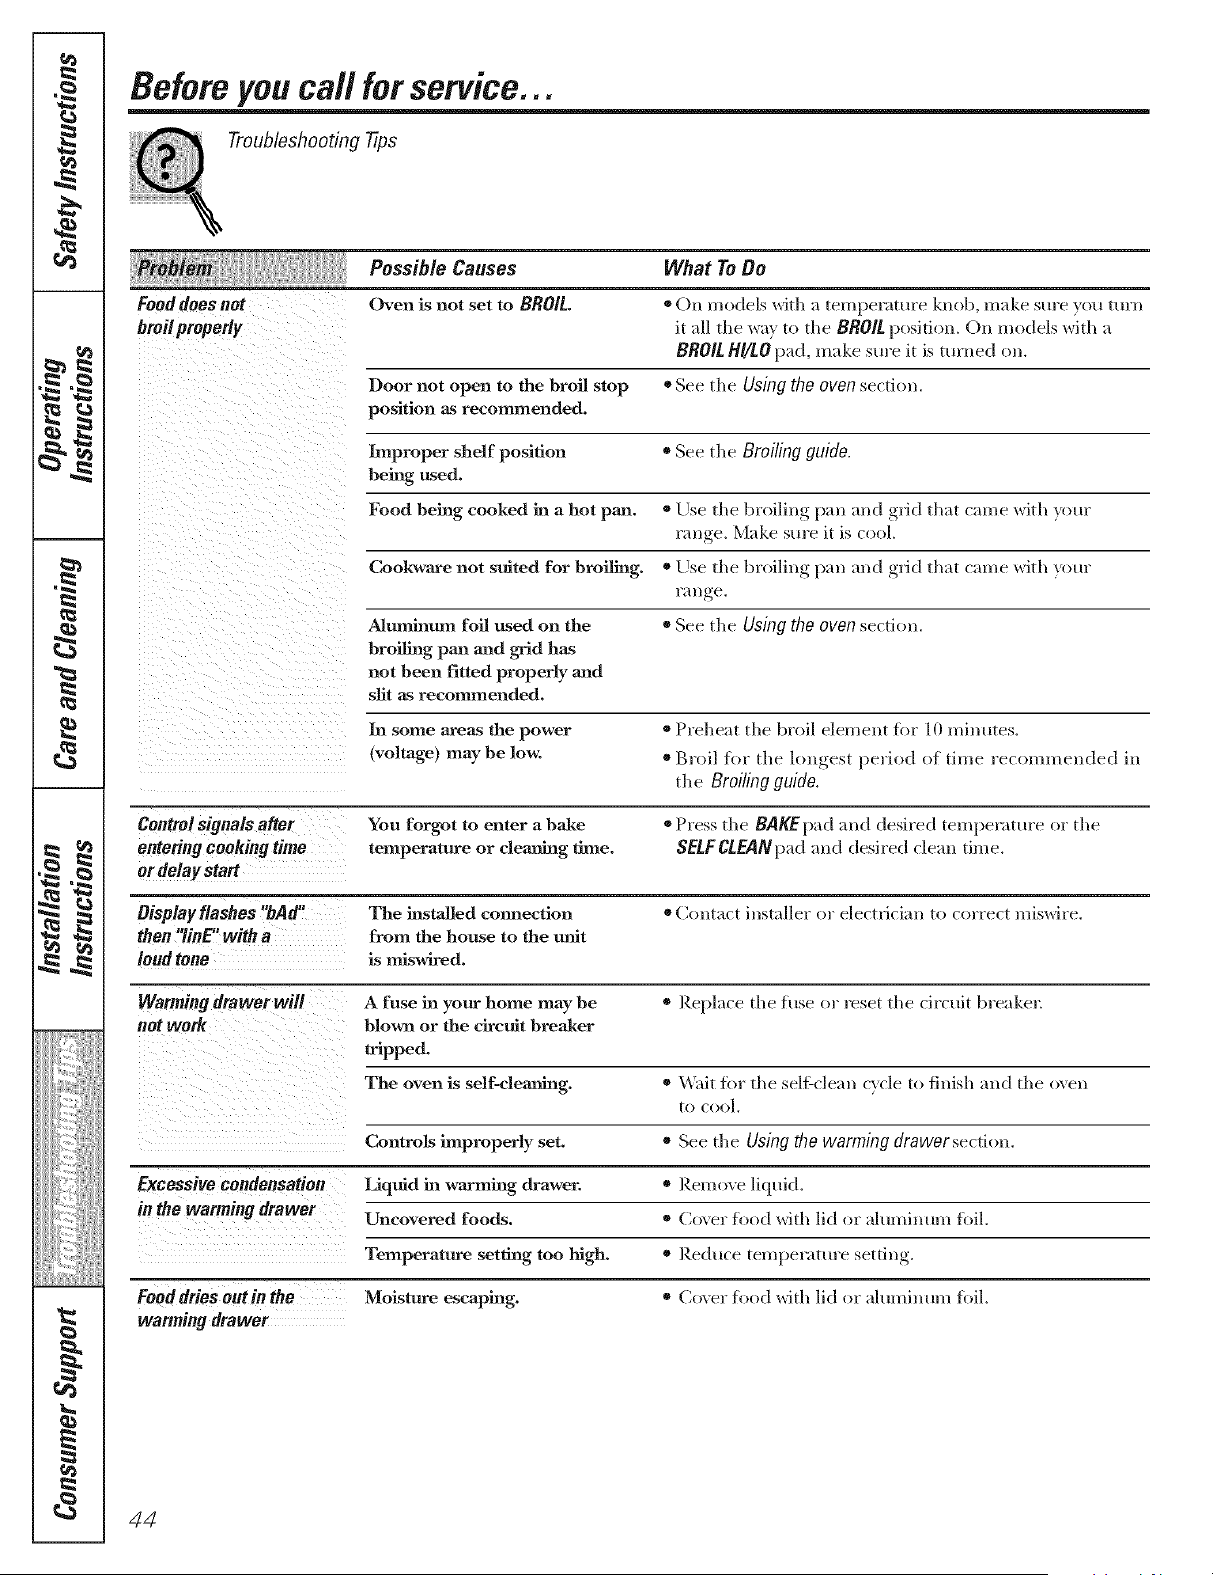
Before you call for service...
Troubleshooting 77ps
Possible Causes What To Do
Food does not Oven is not set to BROIL. * On models with ;_temperature knob, mM<e sure you tm'n
broi/proper/y it _dl tile way to the BR0/L position. Oil models with a
BROIL HI/LO pad, m;/ke sure it is turned on.
Door not open to the broil stop * See the Using the oven section.
position as recommended.
Improper shelf position * See the Broiling guide.
being used.
Food being cooked in a hot pan. * Else, the broiling, }xm m_d ,grid tluit c_m/e with yore"
range. N,'l;d<esm'e it is cool
Coolcware not suited for broiling. * Else, the broiling, l)_m m_d ,grid tluit c_m/e with yore"
l'i/l/ge.
Aluminum foil used on the o See the Using the oven section.
broiling pan and grid has
not been fitted properly and
slit as recommended.
In some areas the power * Probe;it the broil element for 10 minutes.
(voltage) maybe low. * Broil for the h)n_est_, period of time recommended ill
the Broiling guide.
Control signals after You forgot to enter a bake ®Press the BAKEpad ;rod desired tempenmu'e or the
entering cooking time temperature or cleaning time. SELFCLEANp'dd mid desired cleml dine.
or delay start
Bisplay flashes "bAd" The installed connection ®(]ont;_ct installer or electfici;m to c(wrect miswire.
then "linE' with a from the house to the unit
land tone is miswired.
Warming drawer will A fuse in your home may be * Reph/ce the fuse or reset the circuit breakel:
net WOrk blown or the circuit breaker
tripped.
The oven is self-deaning. * \_ait tbr the selfXclean cycle to finish mid the o\en
to cool.
Controls improperly set. * See the Using the warming drawerse(tion.
Excessive condensation Liquid in warming drawer, o Remove liquid.
in the warming drawer Uncovered foods. * Cox el" food with lid or ;dumhmm fbil.
Temperature setting too high. ® Reduce teml_el'itttll'e setting,.
Fooddries outin the Moisture escaping. * Cox el" food with lid or ;dmnhmm fbil.
wanning drawer
44
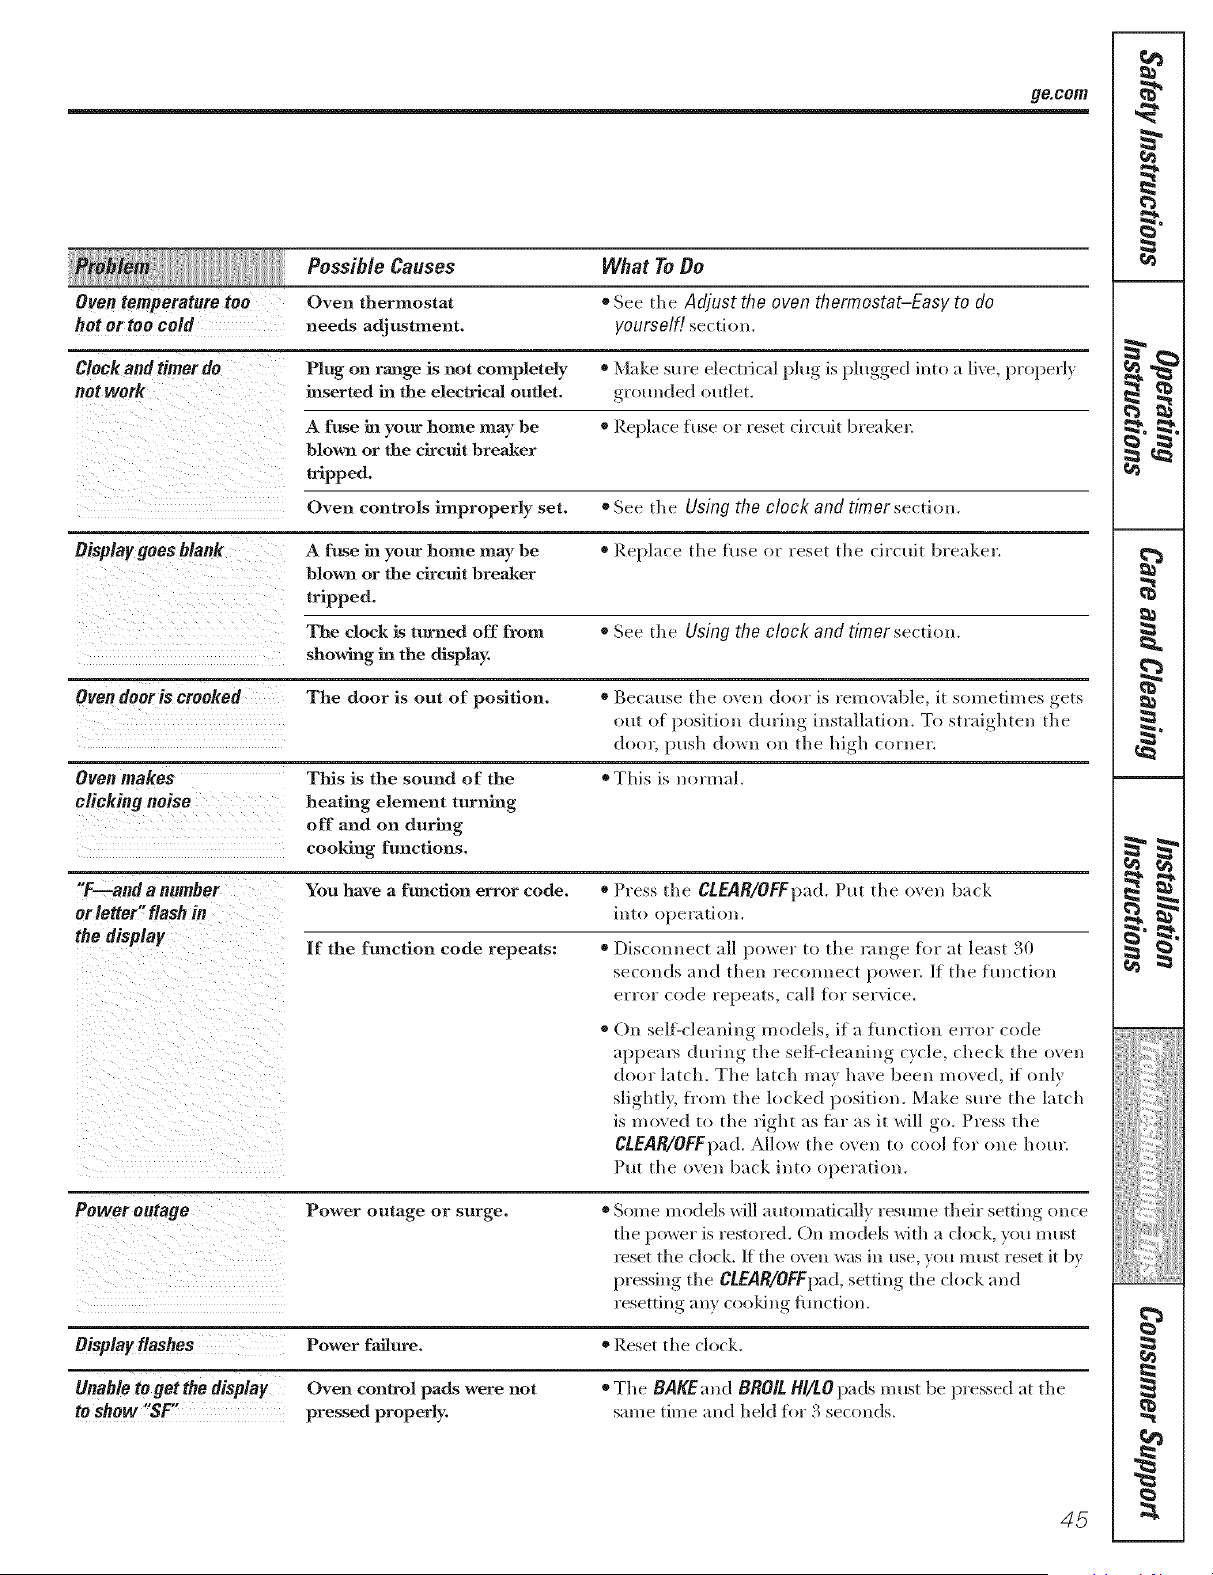
go.corn
Possible Causes What To Do
Oven temperature too Oven thermostat ® See the Adjust the oven thermostat-Easy to do
hot or too cold needs adjustment, yourself! serdon.
Clock and timer do Plug on range is not completely o Make sm'e electrical ping is plugged into a live, properly
not work inserted in the electrical outlet, grounded outlet.
A fuse in your home may be * Replace fuse or reset dreuit breakeL
blown or the circuit Breaker
tripped.
Oven controls improperly set. * See the Using the clock and timer section.
Display goes blank A fuse in your home may he * Replace the fuse or reset tile ci/'ctlit breaker.
blown or the circuit brealmr
tripped.
The dock is turned off from * See tile Using the clock and timersectiom
showing in the display
Oven dooris crooked Tile door is out of position. * Because tile oven door is removable, it sometimes gets
out of l)ositiou during installation. To straighten tile
door, push down on tile high corner.
Oven makes This is the sound of the * This is normal.
clicking noise heating element turning
off and on during
cooMng functions.
"F--andanumber You have a ftmctlon errur code. * Press the CLEAR/OFFpad. Put tile oven back
or letter" flash in into operation.
the display If the function code repeats: * Disrmmect all power to tile rallge for at least 30
seconds and then reconllect i)oweL If the function
error code repeats, call flw service.
® ()n self:cleaning models, if a function error code
apl)eals during the sel6cleaning cycle, check tile oven
door latch. Tile latch may have been moved, if only
slightl,_, fl'om tile locked position. Make sure tile latch
is moved to tile right as flu" as it will go. Press the
CLEAR/OFFpad. Allow tile oxen to cool for one hour.
Put tile oven back into operation.
Power outage Power outage or surge.
Oisplay flashes Power failure.
Unable to get the display Oven control pads were not
to show"SF pressed properly.
®Some models will automatically resume their setting once
tile power is restored. On models with a clock, you must
reset the clock. If tile ox ell was ill use, you must reset it by
pressing tile CLEAR/OFFpad,setting tile clock and
resetting ally cooldng fimction.
* Reset tile clock.
* Tile BAKEand BROILHI/tO pads m ust be pressed at tile
same time and held for 3 seconds.
45
K4_
€
i =
r =
b
?'7;i!_'
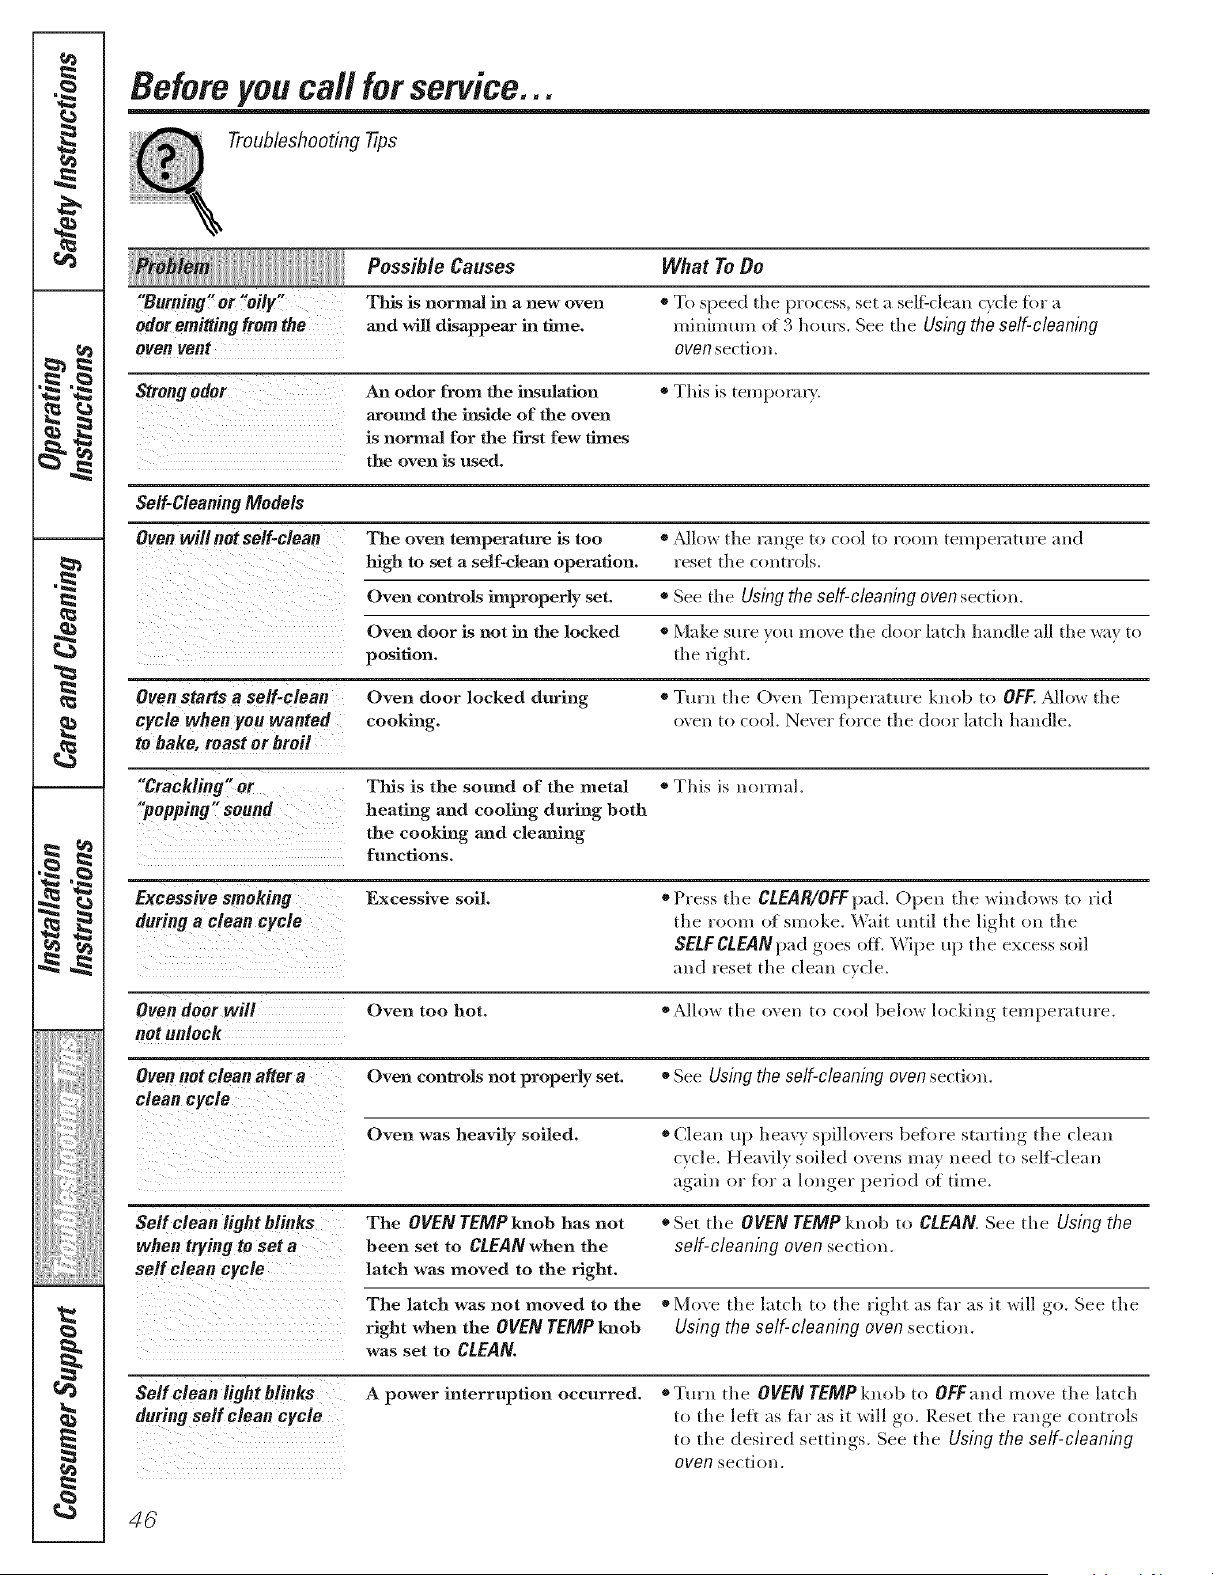
Before you call for service...
Troubleshooting Tips
Possible Causes What To Do
"Burning'_ or Yoily!" This is normal in a new oven * To speed tile process, set a selfXclean cxcle f(w a
odor emitting from the aaad will disappear in dine, minimum of 3 hom_. See tile Using theself-cleaning
oven vent oven section.
Strongodor An odor from the insulation * This is tenq)or:u).
around the inside of the oven
is norma3 for the first few _es
the oven is used.
Self-Cleaning Models
Oven will net se/f-clean The oven temperature is too * ?dlow the range to cool to room temperature and
high to set a self-clea_a operation, reset the controls.
Oven controls improperly set. * See tile Using the self-cleaning oven section.
Oven door is not in the locked * Make sure you mo_e tile door latch handle all tile way to
position, the l_ght.
Oven Starts a self-€lean Oven door locked during * Turn the O, en Temperature knob to OFF..Mlow tile
cycle when you wanted cooking, oven to cool. Never force tile door latch handle.
to bake, roast or broil
,'CracklingS! or Tiffs is tile sound of the metal * This is normal.
"popping" sound heating and cooling during both
the cooking and cleaning
functions.
Excess!vest, eking Excessive soil. *Press tile CLEAR/OFFpad. Open tile windo,_s to ,id
during a cleancyc!e the room of smoke. Wait until tile light on tile
SELFCLEANp'dd goes off. _'_ipe up tlle excess soft
and reset the clean cycle.
Oven door will Oven too hot, o A]lo_ tile oven to cool belm_ h)cking temperature.
not unloek
Oven not clean after a Oven controls not properly set. * See Using the self-cleaning oven section.
clean cycle
Oven was heavily soiled. ®Clean up heax) spilh)vers before starting tile cleall
c,cle.ne.,'il,s,,iled,,,e.sm., .eed t,,self'de:l,,
again or for a hmger pe_fod of time.
Self clean tight blinks The OVEN TEMP knob has not * Set the OVEN TEMP knob to CLEAN. See tile Using the
when trying to Set a been set to CLEAN when the self-cleaning oven section.
selfe!ean cycle latch was moved to the right,
The latch was not moved to the o Mine the latch to tile right, as far as it _ill .,,o See tile
right when the OVEN TEMP lmob Using the self-cleaning oven section.
was set to CLEAN.
Self clean light blinks A power interruption occurred. * Turn tile OVEN TEMP knob to OFFand move tile latch
during self clean cycle to tile left as far as it _ill go. Reset tile range controls
to tile desired settings. See tile Using the self-cleaning
oven section.
46
Looking For Something More ?
Youcan find these accessories and many more at ge.com, or call 800.626.2002
(during normal business hours). Have your model number ready.
Surface Elements & Drip Pans
!_[_ii_!ili_21_i__/_ii!_i[_II__/_I!!I_i_i!_ili[i[[i_ii_[_[}iill
Oven Racks BroHer Pan
_ ii !
OvenElements Light Bulbs Knobs
Cleaner Cleaning Pads Scraper
Tired of discolored racks? Wishing you had extra-heaxT-duty oven racks?
NOW AVAILABtEfor your range:
GE's innovative, self:cleanable porcelain-coated oven racks!
* Heax 7 Duty
* Durable
* Able to be cleaned in a self:<leaning oven
Visit ge.com %r more in%rmafion.
47
m
m
F
m
m
g
I¢1
}ii!lili!lili!Im
_ 1_ •
€_
_ h
w _
_ c4_
m
I
€_
Lq_
Notes,
48
GE Service Protection Plus 'M
GE, a name recognized _orldwide %r quality' and dependability; o_ers yon
Service Protection Plus'"--comprehensive protection on all yore appliances--
No Matter What Brand!
Benefits Include:
• Backed by GE
• All brands covered
• Unlimited service calls
• All parts and labor costs included
• No out-of-pocket expenses
• No hidden deductibles
• One 800 nmnber to call
We TI Cover Any Appliance.
Anywhere. Anytime. *
You _ill be complete b satisfied with our service protection or )on ma? request _our mone} back
on the remaining value of your contract. No questions asked. It's that simple.
Protect your refl'igerator, dishwasher, washer and (byer, range, TV, VCR and much more--any brand!
Plus there's no extra charge ti)r emergency service and low monthly financing is available. Even icemaker
coverage and ti)od spoilage protection is otibred. You can rest easy, knowing that all your valuable
household products are protected against expensive repairs.
Place ,our confidence in (lie and call us in the Ij.S. toll-free at _UU.OZD.ZZZz]:
for I/lore illforI//atiOll.
*-MI ])l-;lllds ci)_,(?l(!d, lip IO _(} yeal'_ old, in Ihe (OlltJll(!llt}l] I_J._.
Please place in envelope and mail to:
General Electric Company
Warranty Registration Department
EO. Box 32150
Louisville, KY 40232-2150
49
Consumer Product Ownership Registration
Dear Customer:
Thank you fl)r purchasing our product and thank you for placing your confidence in us.
_\_ are proud to hme you as a customer!
Follow these three steps to protect your new appliance investment:
Complete and mMl
your Consumer
Product Ownership
Re#stration today.
ttave the peace of
mind of knowing we
CHII COlltilct XOH ill
the tmlikely e_ent of a
saii' W lnodific_,tion.
Atlel- mailing the
registration below,
store this dO(ulnent
in a sati, place. It
contains intk n-nmtiol_
you will need should
rot/ re(lllil-e service.
()111" sel'_,ice ll(/lll[)el- is
SO0.(;E.CARES
(800.432.2737).
Read you r ()wller's
Manual cal-efhlE.
h will help ?ou
opel-_lte vot/r lleW
appliance prol_el-1 ? .
Model Number Serial Number
, , , , , , I I , , , , ,
Important: If you did not get a registration card with your
product, detach and return the form below to
ensure that your product is registered, or register
online at ge.com.
_Cut here
Consumer Product Ownership Registration
Model Number Serial Number
Fil_l ] ] Lasl]
Nalne ! ! ! ! ! ! ! ! ! Name ! ! ! ! ! ! ! ! ! ! ! !
Addr(ss ! ! ! ! ! ! ! ! ! I ! I ! ! ! ! I ! ! ! ! ! ! !
, I
!
I
Ap,.#l, ,
(;i,,I , ,
1)_le l'la( ed
In Use I I I
Monlh
I ! ! ! I ] E-mail Address*
Zip
N.n_ber!I I I!,, I! ,
5O
GE Consumer & Industrial
Appliances
General Electric Company
Louisville, KY 40225
ge.com
* Please provide } o111-e-lnail address to l-ecei_, e, _ia e-lnail, discounts, special ofler_ and other
ilnportant commulfications trom (_E Applial_ces (GEA).
Check hele if xou do not want to receive comlnmlications tl-Oln GEA's carehfllv selected
partners.
FAILURE TO (XlMPLETE AND RE'II RN THIS CARI) I)OES NOT I)IMINIStt YOUR
_\_\RRAN'[Y RIGHTS.
For infol-mation about GEA's pl-ivac} and data usage policy, go to ge.conl and (:lick O11 'Pl-ivac)
PolicC' or call 800.626.2224.
Electric Range Warranty.
Aft warranty service provided by our Factory Service Centers,
or an authorized Customer Care® technician. Toschedule service,
on-line, 24 hours a day, visit us at ge.com, or carl 800.GE.CARES
(800.432.2737).
Staple your receipt here.
Proof of the original purchase
date is needed to obtain service
under the warranty.
GE Will Provide:
) o" " • "
One Year Anypart (t the r;mae _dmh falls due to a dete(t in materials or _orl_n_mship.
Fromthe date of the During this full one-year warranty,GE will also provide, free of charge, all labor
originalpurchase and in-home service to replace the defbctive p;ut.
GEGLASSCOOKTOPMOBELJBP60ONLY--BOESNOT INCLUBEHOTPOINTMOBELS:
Five Years
Fromthe date of the
originalpurchase
(onOEglass cooktop
modelsonly)
A replacement glass cooMop if it should: crack due to theimal shock; discolor;
crack at the robber seal beP, veen the glass cooktop and the porcelain edge; or
if the patteHl weal_ off.
A replacement radiant surface unitif it should bm'n out.
During this limited additional four-year warranty, you will be responsible fiw _my
];d)or or in-home service.
Service trips to your home to teach you how to use
the product.
Improper installation, delivery or maintenance.
Failure of the product if it is abused, misused, or used for
other than the intended purpose or used commercially.
Damage to the glass cooktop caused by use of cleaners
other than the recommended clea_ng creams.
Damage to the glass cooktop caused by hardened spills
of sugary materials or melted plastic that axe not cleaned
according to the directions in the Owner's MaJatmJ.
Replacement of house fuses or resetting of circuit
breal<ers.
Damage to the product caused by accident, fire, floods
or acts of God,
Incidental or consequential daxnage caused by possible
defects with tiffs appliance,
Daanage caused after delivery.
This warranty is extended to the original purchaser and any succeeding owner for products purchased for home
use within the USA. In Alaska, the warranty excludes the cost of shipping or service calls to your home.
Some states do not allow the exclusion or limitation of incidental or consequential damages. This warranty gives
you specific legal rights, and you may also have other rights which vary from state to state. To know what your
legal fights are, consult your local or state consumer affairs office or your state's Attorney General.
Warrantor: General Electric Company.Louisville, KY 40225
5/
m
m
F
m
_L
m
ili!lili!lili!Im

ConsumerSupport.
gEAppliancesWebsite go.cam
Hm'e ;I question or need ;issistance with yam" appliance? Try the (;E Appliances Website 24 hom_ a day,
any day of the year! For greater conxvnience and ihster sesMce, you can now download Owner's Mammls,
order parts, catalogs, or even schedule ser;'ice on-line. You can also "_sk Ore" Team of Experts ......
yore" questions, mid SO lI](Ich l/iol'e...
ScheduleService
Exl)e_l (;E repair sel'_ice is onl) one step aw;l} fl'om )our door. (let on-line and schedule xom" serxfce at
xour, convenience 24 hom_ an) cI_l}of the )ear! 05" call 800.(;E.(;ARES (800.432.2737) dining nom_d
bsIsilleSS hosIl_.
go. cam
RealLife DesignStudio oo.com
GE suppox_s the Uni_wsal Design concept--products, services and enviromnents that can be used by
people of all ages, sizes and capabilities. We recognize the need to design for a wide range (ff physical and
mental abilities and impaim_ents. For derails of GE's Univel_al Design applications, including ldtchen
design ideas for people with disabilities, check out oar WH)site today. For the heating impaired, })lease call
800.TDD.GEAC (800.833.4322).
ExtendedWarranties
go. cam
Pro'chase a (;E extended _arrant} and learn about special discomlts th_lt are avail_d)le _hile ?our _arrant}
is still in effect. YOu c;m i)m'chase it on-line an}time, or call 800.626.2224 dining mmnal business hom_.
(;E Consmner Home Services will still be there after }am" wm'ranl) expires.
PartsandAccessories
go. cam
Individuals qualified to sec_'ice their own appliances can have parts 05"accessories sent directly to their
homes (VISA, MasterCaid and Discover cards are accepted). Order on-line today, 24 ham> e\'es)' clay or
by phone at 800.626.2002 during mmnal business hom_.
Instructions contained in this manual cover procedures to be performed by any user. Other servicing generally
should he referred to qualified service personnel. Caution must be exercised, since improper servicing may cause
unsafe operation.
ContactUs
go. cam
If yon are not satisfied with the service w)u receive fl'om GE, contact us on our Website with all the details
including yam" phone numbes; or write to: OenerM Manages; Customer Relations
GE Appliances, Appliance Park
Ix_uisville, KY 40225
RegisterYourAppliance
Register your new appliance on-line--at your convenience! Timel} product registration xdll allow flw
enhanced comlmmication :rod prompt service m*der the temps of }our warranty, should the need arise.
YOu ma} also m:dl in the pre-pfinted registration card included in the })acldm,b material.
go. cam
Thisbook is printed on recycled paper;
Printed in Mexico