Loading ...
Loading ...
Loading ...

7
INSTALLATION
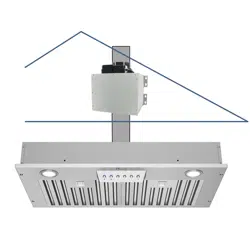
Identify the Vent In and Out Openings on the Blower Unit
• The Blower Unit has 2 vent openings on 2 opposite sides. One side with just a Vent Opening and the other side with a
Black Speed Control Box and a Vent Opening.
Installing the Hood Unit
CAUTION
Make sure the Hood Unit is securely mounted before releasing.
Connection
Box
Vent out to
the Roof
Vent in from the
Hood Unit
Vent in from the
Hood Unit
Vent out to
the Roof
Blower Unit Installed Vertically Blower Unit Installed Horizontally
The following steps requires 2 or more people:
• Unpack the Range Hood and place it on a sturdy flat surface
with the Baffle Filters facing the ceiling.
• Remove the Baffle Filters and the Screws on both sides.
(
Figure 1
)
• Flip the stainless steel Panel open on the longest side, locate
and disconnect the Wires for the LED Lamps and the Control
Panel. (
Figure 2
)
• Remove the Panel and put it in a safe location.
• Flip the Hood Unit body over so that the Vent Opening is
facing the ceiling. Remove the screws around the Vent
Opening and flip the black Vent Out Adapter over. (
Figure 3
)
• Align the Vent Out Adapter with the screw holes on the top of
the Hood Unit and tighten all screws. (
Figure 4
)
• Connect the duct to the vent opening on the Range Hood.
If the duct size isn't the same as the vent opening, use an
adapter between the duct and the vent opening.
• While lifting the Range Hood to fit into the wood hood, retract
the Duct into the attic carefully.
• Insert and tighten all screws into the pre-drilled holes on the
Hood body until it is securely mounted to the wood hood.
(
Figure 5
)
• Release the Range Hood.
• Re-connect the wires for the LED Lamps and the Control
Panel.
• Put the Panel back and tighten all screws.
Figure 1
Figure 2
Figure 5
Disconnect
the Wires
LED Lamp Control Panel
Figure 3
Figure 4
Loading ...
Loading ...
Loading ...