Instructions:
1. To Replace a Transformer with a Connector that
is the same as on the New Transformer:
• Unplug the old transformer from the Power Outlet.
• Connect the new transformer onto the timer
connector and then plug into a 110V AC wall outlet.
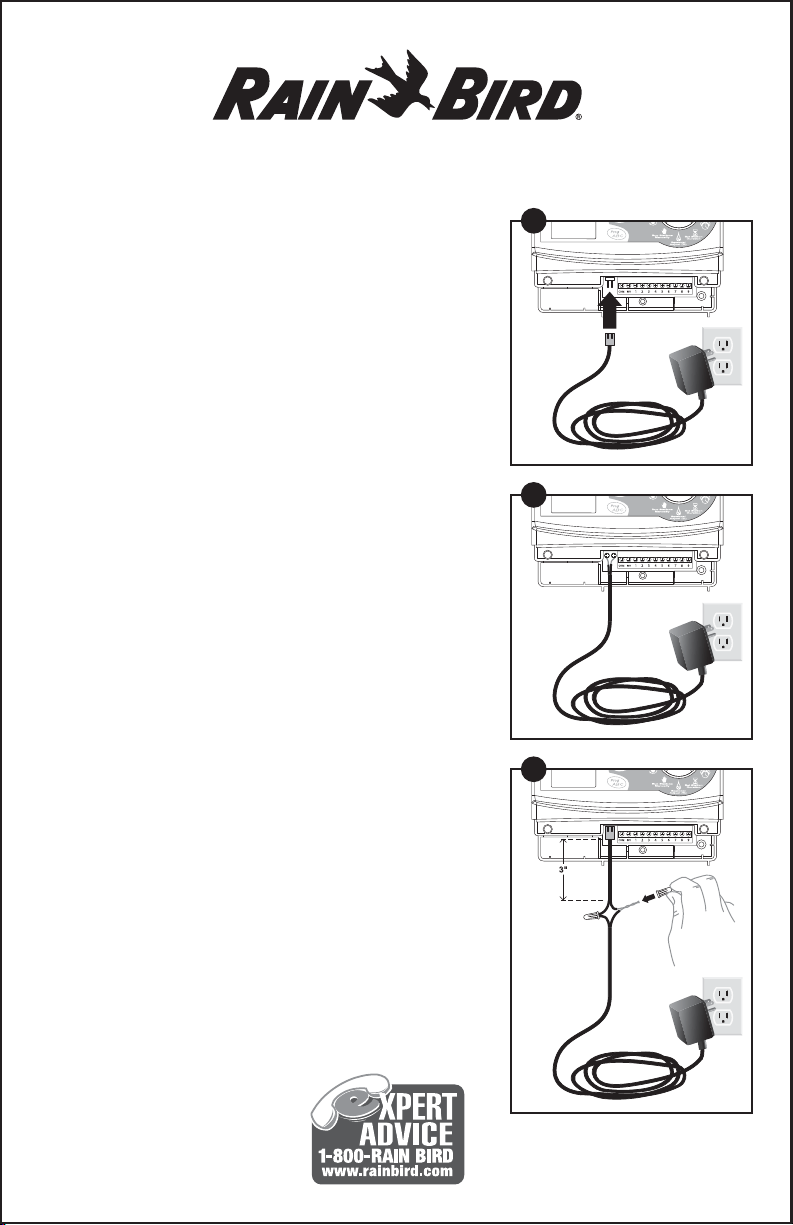
2. To Replace a Transformer without a Connector:
• Unplug the old transformer from the Power Outlet.
• Disconnect the wires from the old transformer of
the timer.
• Cutoff the connector on the transformer by cutting
the wire approximately 3 inches from the connector
end. Strip the wire ends of the new transformer and
connect the new transformer onto the same screw
terminals to which the old transformer was
connected (screw terminals may be labeled AC or
24VAC).
3. To Replace a Transformer with a Connector that
is Different from the New Transformer:
• Unplug the old transformer from the Power Outlet.
• Cut the wires of the old transformer, about 3 inches
from the connector and strip the wire ends (about
1/2 inch).
• On the new transformer, cut the connector off about
3 inches from the connector and strip the wire ends.
• Twist together the stripped wires of the old connector
with the stripped wires of the new transformer and
twist the wire nuts (included) onto the joined wires.
UT1
Replacement
Transformer
177229 REV 03/08
Rain Bird Corporation
Consumer Products Division
Customer Service Center
6991 E. Southpoint Rd. Bldg#1
Tucson, AZ 85706
© 2008 Rain Bird Corporation
® Trademark of Rain Bird Corporation
1
2
3