
Loading ...
Loading ...
Loading ...
22
MAINTENANCE
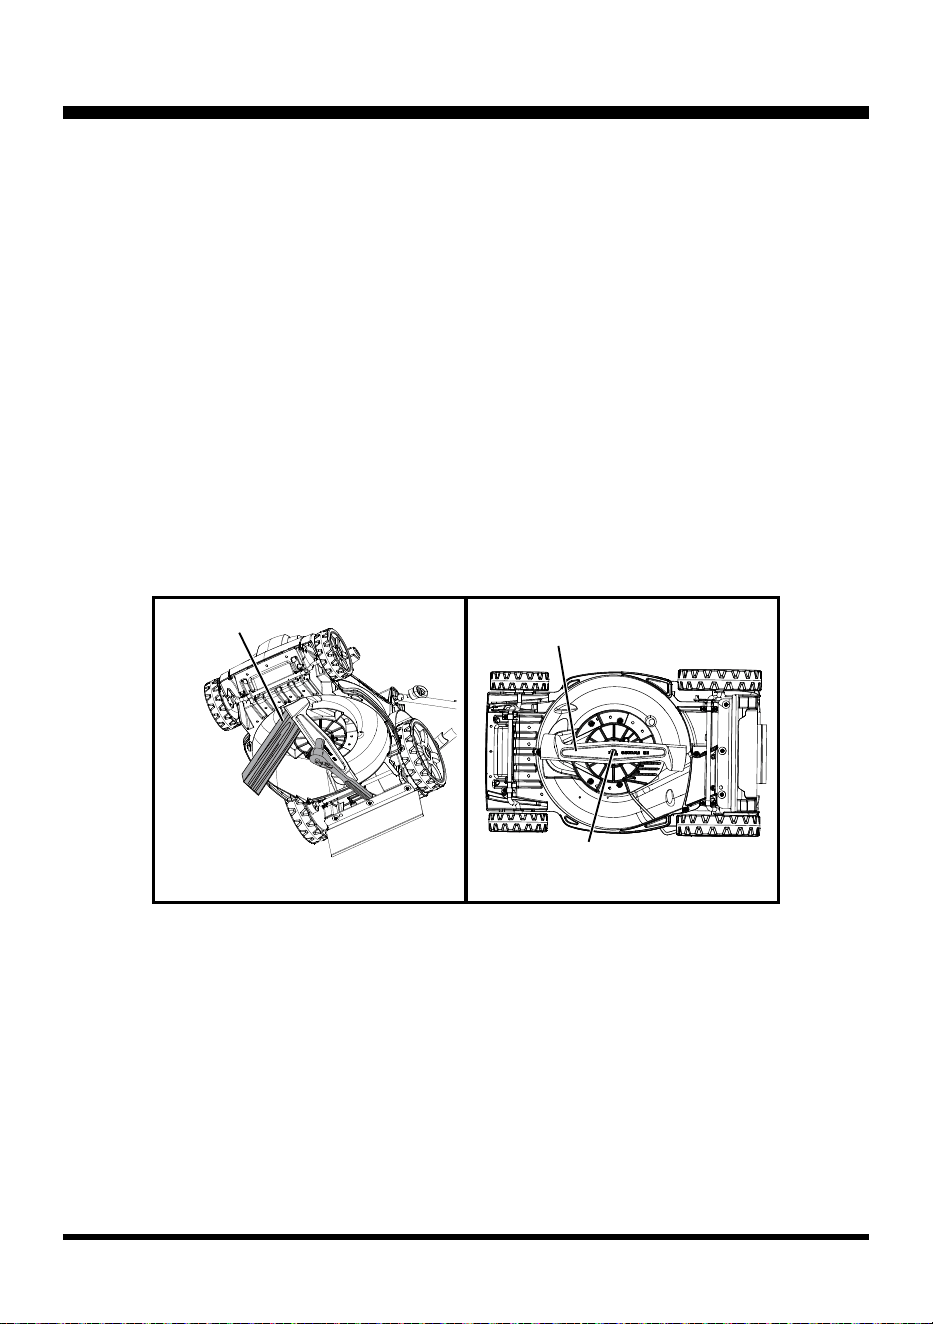
REPLACING THE MOWER BLADE (See Figs. 13-14)
NOTE: Only use identical replacement blades. LawnMaster® mower blade replacement part
NO.GM80BX.00.11.
■ Stop the motor and allow the blade to come to a complete stop. Disconnect the power supply.
■ Turn the mower on its side.
■ Wedge a block of wood between the blade and the mower deck in order to prevent the blade from
turning when the nut is being removed (Fig.13).
■ Loosen the blade nut using a 14 mm wrench or socket (not provided) (Fig.13).
■ Remove the blade nut and blade.
■ Make certain the fan assembly is pushed completely against the motor shaft.
■ Place the new blade on the shaft against the fan assembly. Make sure it is installed with the curved
ends pointing up toward the mower deck and not down toward the ground.
■ Thread the blade nut on the shaft and nger tighten.
■ Torque the blade nut down using a torque wrench (not provided) to ensure the bolt is properly
tightened (Fig.14).
NOTE: Make certain all parts are replaced in the exact order in which they were removed.
Fig. 14
Fig. 13
Blade
Bolt
Wooden Block
SHARPENING THE BLADE
(See Fig. 15)
For best mowing performance, the mower blade must be kept sharp. A dull blade does not cut grass
evenly and overloads the motor. Under normal circumstances, sharpening the blade twice during the
mowing season is usually sufcient. However, if your lawn has sandy soil, more frequent sharpening
may be required.
■ Following the instructions in the Replacing the Mower Blade section, remove the mower blade. DO
NOT attempt to sharpen the blade while it is attached to the mower.
■ Using a ne-tooth le or sharpening stone, sharpen cutting edges on both ends of the blade,
removing equal amounts of material from both ends (Fig. 15).
Loading ...
Loading ...
Loading ...