
Loading ...
Loading ...
Loading ...
ENGLISH
8
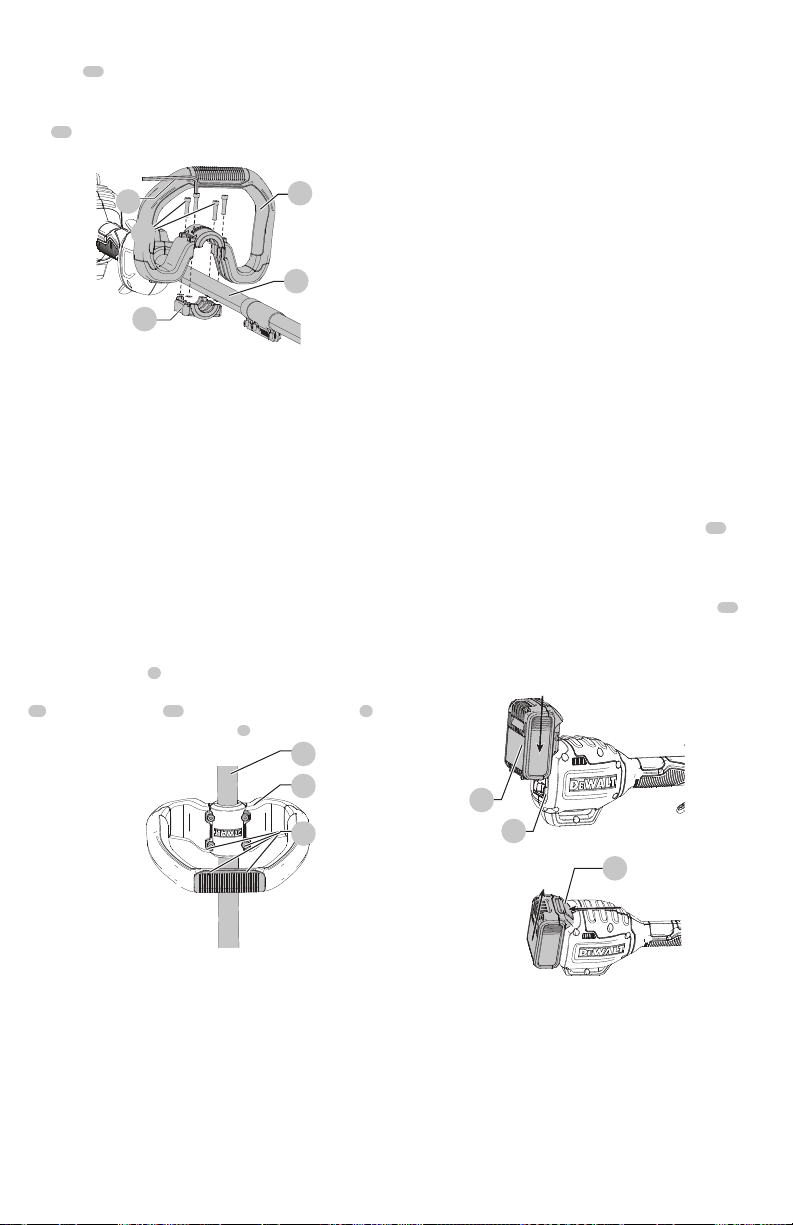
2. Hold the auxiliary handle in place and slide the handle
bolts
21
into the handle from the top, threading them
into the handlebase.
3. Tighten the handle bolts with the supplied hex wrench
22
. Ensure the handle is securelyattached.
4. Repeat for the other side of the auxiliaryhandle.
Fig. H
4
6
20
21
22
Adjustment (Fig. I)
WARNING: To reduce the risk
of serious personal injury, turn appliance
off and remove battery before making any
adjustments or removing/installing attachments
oraccessories.
WARNING: Never remove the guard.
Damage or personal injury couldresult.
WARNING: NEVER OPERATE
APPLIANCE WITHOUT GUARD FIRMLY IN PLACE.
The guard must always be properly attached on the
appliance to protect theuser.
The auxiliary handle
4
is positioned to maximize balance.
However, if adjustment is necessary, loosen the four bolts
21
with a hex wrench
22
and slide the auxiliary handle
4
up or down the upper trimmer pole
6
.
Fig.I
6
4
21
OPERATION
WARNING:To reduce the risk
of serious personal injury, turn appliance
off and remove battery before making any
adjustments or removing/installing attachments
oraccessories.
WARNING: Always use proper eye
protection that conforms to ANSI Z87.1 (CAN/CSA
Z94.3) while operating thisappliance.
WARNING:Remove the battery before
making any assembly, adjustments, or changing
accessories. Such preventive safety measures reduce
the risk of starting the TRIMMERaccidentally.
CAUTION: Before you begin trimming, only
use the appropriate type of cuttingline.
CAUTION: Inspect area to be trimmed and
remove any wire, cord, or string-like objects which
could become entangled in the rotating line or spool.
Be particularly careful to avoid any wire which might
be bent outwardly into the path of the appliance, such
as barbs at the base of a chain linkfence.
Installing and Removing the Battery Pack
(Fig. J, K)
WARNING: Make certain the lock-off
lever is not engaged to prevent switch actuation
before removing or installingbattery.
NOTE: For best results, make sure your battery pack is
fullycharged.
To install the battery pack: Align the battery pack
12
with the rails inside the battery housing and slide it into the
housing until the battery pack is firmly seated and ensure
that it does notdisengage.
To remove battery pack: Depress the release button
13
and firmly pull the battery pack out of the battery housing.
Insert it into the charger as described in the charger section
of thismanual.
Fig. J
12
11
Fig. K
13
Proper Hand Position (Fig. L)
WARNING: To reduce the risk of serious
personal injury, ALWAYS use proper hand position
as shown.
WARNING: To reduce the risk of serious
personal injury, ALWAYS hold securely in anticipation
of a suddenreaction.
Loading ...
Loading ...
Loading ...