Contents
•
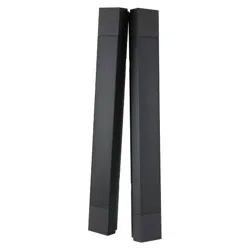
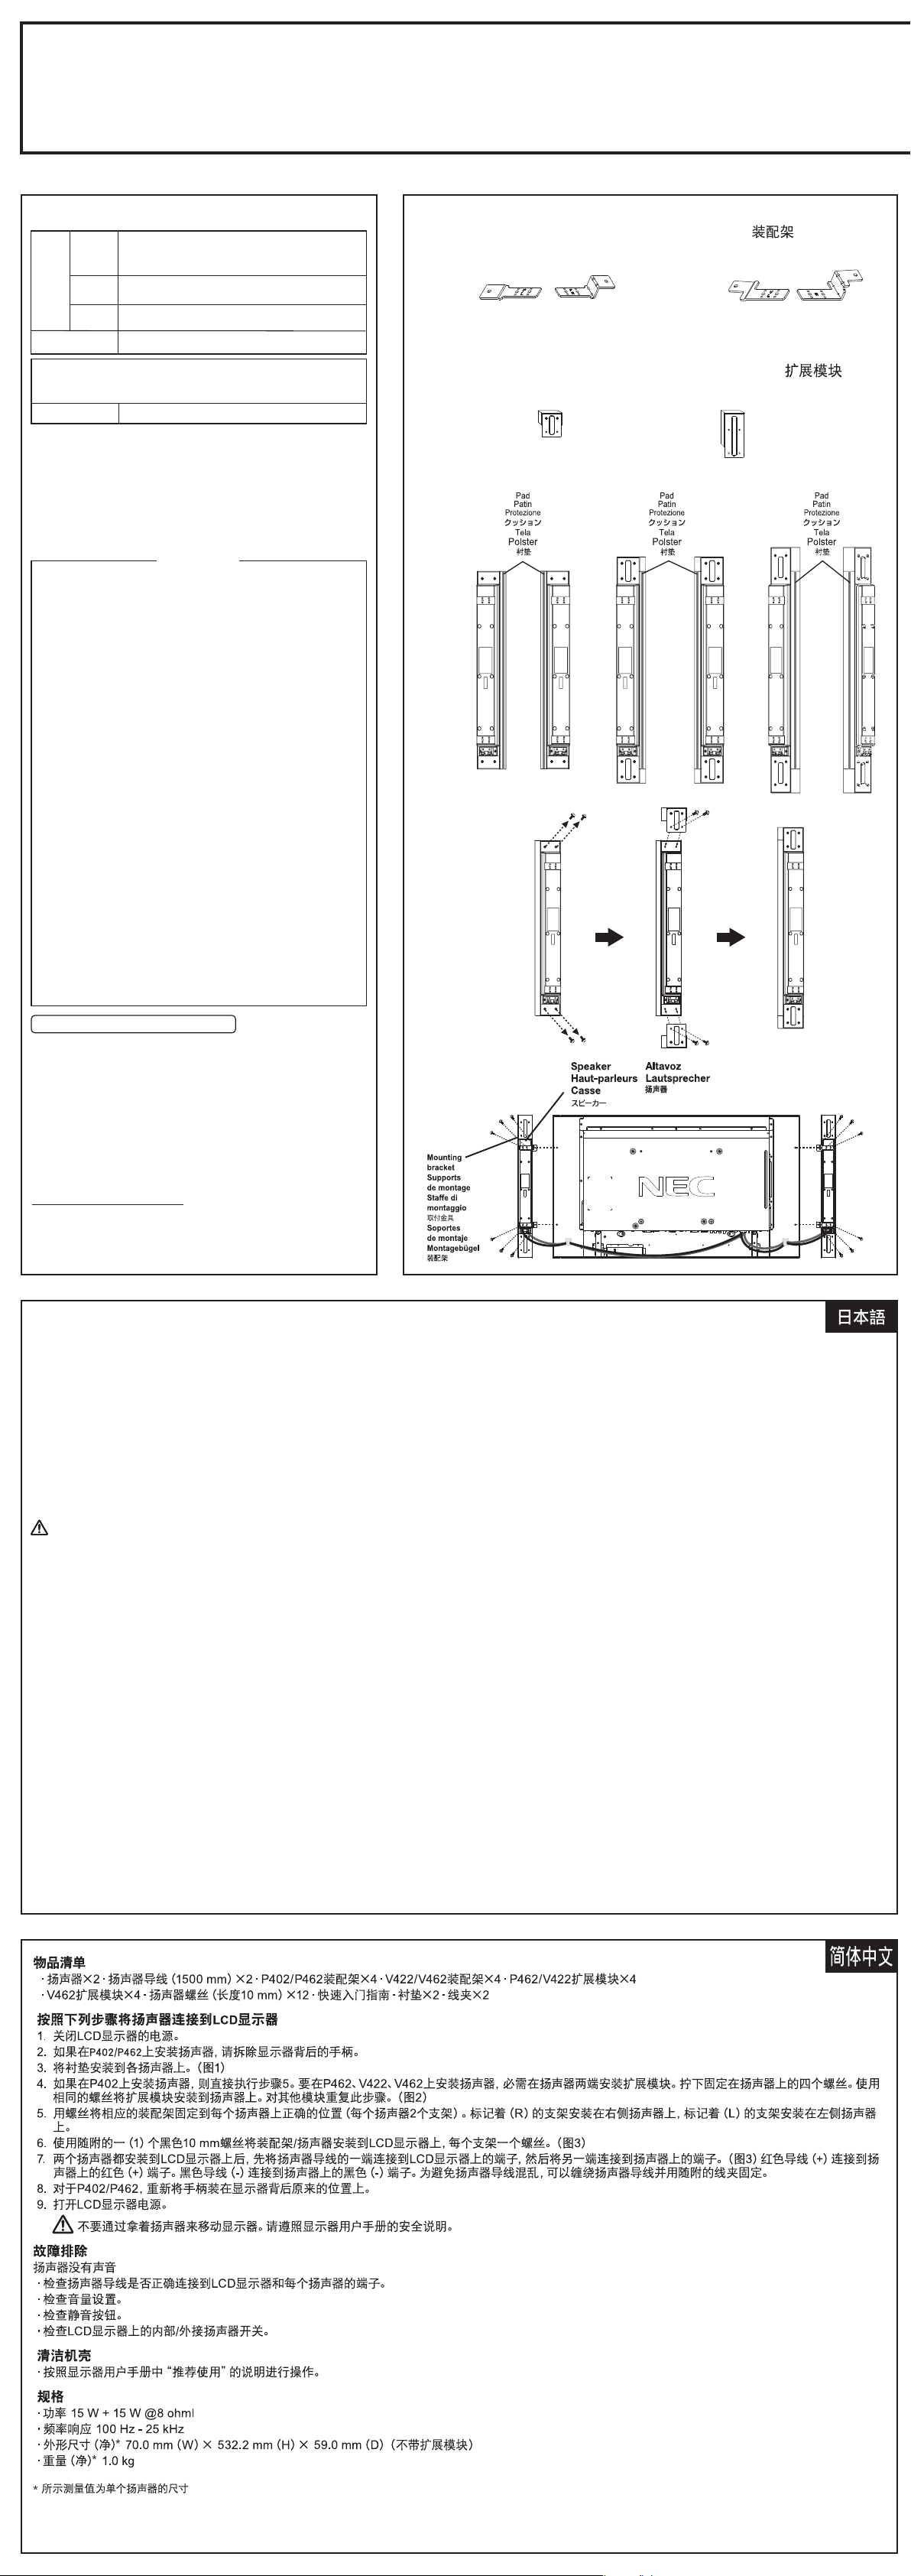
Speaker x 2 • Speaker wire (1500mm) x 2 • Mounting bracket for P402/P462 x 4
• Mounting bracket for V422/V462 x 4 • Extension block for P462/V422 x 4
• Extension block for V462 x 4
•
Speaker screws (10mm length) x 12
• Quick Start Guide • Pad x 2 • Clamp x 2
Follow these steps to connect the speaker to your LCD monitor
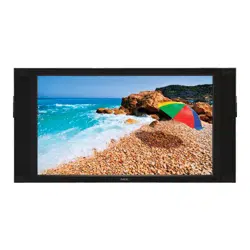
1. Turn off the power to the LCD monitor.
2. If mounting speakers on the P402/P462, remove the handles on the back of the
monitor.
3. Attach the pad to each speaker. (Figure1)
4. If mounting speakers on the P402, proceed to step 5. If mounting speakers on
the P462, V422, V462, you will need to attach the extension blocks to the ends
of the speakers. Remove the four screws attached to the speaker. Use the
same screws to attach the extension block to the speaker. Repeat for other
block. (Figure2)
5. Screw appropriate mounting brackets into appropriate position on each speaker
(2 brackets per speaker).
Use the brackets labeled (R) on the right speaker and brackets labeled (L) on
the left speaker.
6. Attach mounting bracket / speakers to the LCD monitor using one (1) black
10mm screw (included)per bracket. (Figure3)
7. Once both speakers are attached to the LCD monitor, connect the speaker
wires first to the terminals on the LCD and then to the terminals on the attached
speakers. (Figure3)
The red wire (+) connects to the red (+) terminal on the speaker.
The black wire (-) connects to the black (-) terminal on the speaker.
To manage excess speaker wire, coil the speaker wire and wrap it using
included clamp.
8. For P402/P462, reattach the handles on their original position on the back of the
monitor.
9. Turn the LCD monitor power on.
Contenuti
•
2 Casse • Cavo casse (1.500 mm) • Staffa di montaggio per modello P402/P462 x 4
• Staffa di montaggio per modello V422/V462 x 4
• Modulo di espansione per modello P462/V422 x 4
• Modulo di espansione per modello V462 x 4
•
12 Viti casse (da 10 mm) • Guida rapida • 2 Protezioni • 2 fermagli
Attenersi alle seguenti istruzioni per collegare le casse al monitor LCD
1. Disattivare l’interruttore d’alimentazione del monitor LCD.
2. Se si stanno montando le casse sul modello P402/P462, rimuovere le maniglie
nella parte posteriore del monitor.
3. Attaccare la protezione su ciascuna cassa. (Figura 1)
4. Se si stanno montando le casse sul modello P401, passare al punto 4. Se si
stanno montando le casse sul modello P461, sarà necessario attaccare i
moduli di espansione all’estremità delle casse. Rimuovere le quattro viti che
fissano la cassa. Usare le stesse quattro viti per attaccare i moduli di
espansione alla cassa. Ripetere con l’altro modulo. (Figura 2)
5. Montare le staffe di montaggio nella posizione corretta su ciascuna cassa (2
staffe per cassa).
Usare le staffe contrassegnate con (R) della cassa destra e le staffe
contrassegnate con (L) della cassa sinistra.
6. Montare il gruppo staffa/cassa sul monitor LCD usando una (1) vite da 10 mm
(fornito) per staffa. (Figura 3)
7. Una volta che entrambe le casse sono attaccate al monitor LCD, collegare i
cavi delle casse ai terminali sul monitor LCD e poi ai terminali delle casse.
(Figura 3)
Il cavo rosso (+) si collega al terminale rosso (+) della cassa.
Il cavo nero (-) si collega al terminale nero (-) della cassa.
8. Per il modello P402/P462, fissare di nuovo le maniglie nella posizione originale
sulla parte posteriore del monitor.
Per gestire il cavo in eccesso: arrotolare il cavo e fermarlo usando il fermaglio
fornito in dotazione.
Contenu
• Haut-parleur x 2 • Fil de haut-parleur (1500mm)
• Support de montage pour le P402/P462 x 4
• Support de montage pour le V422/V462 x 4
• Bloc d’extension pour le P462/V422 x 4• Bloc d’extension pour le V462 x 4
• Vis de haut-parleurs (longueur 10mm) x 12 • Guide de démarrage rapide
• Patin x 2 • Attache x 2
Suivez ces étapes pour brancher les haut-parleurs sur votre moniteur LCD
1. Éteignez le bouton d’alimentation du moniteur LCD.
2. Si vous devez fixer les haut-parleurs au P402/P462, retirez les poignées à
l’arrière du moniteur.
3. Fixez le patin sur chaque haut-parleur. (Figure 1)
4. Si vous devez fixer les haut-parleurs au P401, passez à l’étape 4. Si vous
devez fixer les haut-parleurs au P461, vous devrez aussi fixer les blocs
d’extension aux extrémités des haut-parleurs. Retirez les quatre vis fixées au
haut-parleur. Utilisez ces mêmes vis pour fixer le bloc d’extension au
haut-parleur. Répétez l’opération pour l’autre bloc. (Figure 2)
5. Vissez les supports de montage appropriés à leur position prévue sur chaque
haut-parleur (2 supports par haut-parleur).
Utilisez les supports étiquetés (R) sur le haut-parleur droit et les supports
étiquetés (L) sur le haut-parleur gauche.
6. Vissez les supports de montage/haut-parleurs sur le moniteur LCD à l’aide
d’une (1) vis noire de 10mm (incluse) par support. (Figure3)
7. Une fois que les deux haut-parleurs sont fixés au moniteur LCD, branchez les
fils des haut-parleurs sur les bornes du moniteur LCD puis sur les bornes des
haut-parleurs attachés. (Figure3)
Le fil rouge (+) se branche sur la borne rouge (+) du haut-parleur.
Le fil noire (-) se branche sur la borne noire (-) du haut-parleur.
8. Pour le P402/P462, fixez de nouveau les poignées à leur position d’origine à
l’arrière du moniteur.
Pour gérer le surplus de fil de haut-parleur, enroulez-le et faites-en une bobine à
l’aide de l’attache fournie.
SP -4 04 6PV
Quick Start Guide / Guide de démarrage rapide / Guida rapida
取扱説明書 / Schnellstartanleitung / Guía de inicio rápido /
Printed in China
Rev, 1
Do not hold the display by the speakers when moving or shifting the
display. Follow the safety instructions in the monitor’s user’s manual.
Troubleshooting
No speaker sound
• Check that the speaker wire is correctly attached to the LCD monitor and to
each speaker terminal.
• Check the volume setting.
• Check the mute button.
• Check the internal/external speaker switch on the LCD monitor.
Cleaning the Cabinet
• Follow the “Recommended Use” in the display’s user manual.
Specifications
• Power 15W + 15W@8 ohm
• Frequency response 100Hz - 25kHz
•
Dimension* (Net) 70.0mm(W) x 532.2mm(H) x 59.0mm(D)(without extension block)
• Weight* (Net) 1.0 kg
*Measurements shown are for each individual speaker
9. Accendere il monitor LCD
Quando si sposta il monitor, non afferrarlo per le casse.
Osservare le istruzioni di sicurezza nel manuale dell'utente del monitor.
Risoluzione dei problemi
Assenza sonoro casse
• Controllare che il cavo delle casse sia collegato in modo corretto, ed ai
terminali corretti del monitor LCD e delle casse.
• Controllare il volume delle casse.
• Controllare il tasto Mute.
• Controllare l'interruttore della cassa interna/esterna sul monitor LCD.
Pulizia del mobile
• Seguire le raccomandazioni d’uso del Manuale.
Specifiche
• Potenza 15W + 15W a 8 ohm
• Risposta di frequenza 100Hz - 25kHz
• Dimensioni* (Netto) 70,0 mm (L) x 532,2 mm (A) x 59,0 mm (P) (senza
modulo di espansione)
• Peso* (Netto) 1,0 kg
*Le misure indicate fanno riferimento ad ogni singola cassa
9. Allumez l’alimentation du moniteur LCD.
Ne tenez pas l’écran par les haut-parleurs lorsque vous le déplacez.
Suivez les consignes de sécurité du mode d'emploi du moniteur.
Dépannage
Aucun son dans les haut-parleurs
• Vérifiez que le fil du haut-parleur est correctement attaché au moniteur LCD et
que chaque haut-parleur est branché sur chaque borne de haut-parleur.
• Vérifiez le réglage de volume sur les haut-parleurs.
• Vérifiez le bouton de coupure du son.
• Vérifiez l’interrupteur des haut-parleurs internes/externes sur le moniteur LCD.
Nettoyage du boîtier
• Suivez l’utilisation recommandée dans le mode d’emploi de l’écran.
Spécifications
• Puissance 15W + 15W@8 ohms
• Réponse en fréquences 100Hz - 25kHz
• Dimensions* (Nettes) 70,0 mm (L) x 532,2 mm (H) x 59,0 mm (P) (sans bloc
d’extension)
• Poids* (Net) 1,0 kg
*Les dimensions indiquées correspondent à chaque haut-parleur
Contenido
• Altavoz x 2 • Cable de altavoz (1.500 mm) • Soporte de montaje para P402/P462 x 4
• Soporte de montaje para V422/V462 x 4• Bloque alargador para P462/V422 x 4
• Bloque alargador para V462 x 4
• Tornillos para altavoz (10 mm de largo) x 12 • Guía de inicio rápido • Tela x 2
• Abrazadera x 2
Siga estos pasos para conectar el altavoz al monitor LCD
1. Coloque el conmutador del monitor LCD en la posición de apagado.
2. Si va a montar altavoces en el modelo P402/P462, retire los asas de la parte
posterior del monitor.
3. Acople la tela a cada altavoz. (Figura 1)
4. Si va a montar altavoces en el modelo P401, vaya al paso 4. Si los altavoces
se montan en el P461, necesitará acoplar los bloques alargadores a los
extremos de los altavoces. Retire los cuatro tornillos que unen el altavoz. Utilice
los mismos tornillos para unir los bloques alargadores al altavoz. Repita la
operación con el otro bloque. (Figura 2)
5. Atornille los soportes de montaje adecuados en la posición correcta en cada
altavoz (2 soportes por altavoz).
Utilice los soportes etiquetados con (R) en el altavoz derecho y los etiquetados
con (L) en el altavoz izquierdo.
6. Atornille el soporte de montaje y los altavoces al monitor LCD utilizando un (1)
tornillo de 10mm (incluido) de color negro por soporte. (Figure 3)
7. Cuando haya acoplado los dos altavoces al monitor LCD, conecte sus cables a
los terminales de éste y, a continuación, a los terminales de los altavoces
montados. (Figura 3)
El cable rojo (+) se conecta al terminal de color rojo (+) del altavoz.
El cable negro (-) se conecta al terminal de color negro (-) del altavoz.
Para administrar el cable sobrante de los altavoces enrolle el cable de los
altavoces y envuélvalo utilizando la abrazadera que se inlcuye.
8. Para el modelo P402/P462, vuelva a acoplar las asas en su posición original en
la parte posterior del monitor.
9. Encienda el monitor LCD.
No agarre los altavoces cuando mueva o levante la pantalla.
Siga las instrucciones de seguridad en el manual de usuario del monitor.
Solucionar problemas
Los altavoces no emiten sonido
• Compruebe que el cable de los altavoces está correctamente conectado al
monitor LCD y, a su vez, aquéllos están perfectamente conectados a sus
terminales.
• Compruebe la configuración del volumen de los altavoces.
• Compruebe si el botón de silencio está activado.
• Compruebe el interruptor del altavoz interno/externo en el monitor LCD.
Limpiar la carcasa
• Siga las instrucciones de uso recomendado del manual del usuario de la
pantalla.
Especificaciones
• Potencia: 15 W + 15 W a 8 ohm
• Respuesta de frecuencia: 100 Hz - 25kHz
• Dimensiones* (netas) 70,0 mm (A) x 532,2 mm (L) x 59,0 mm (F) (sin bloque
alargador)
• Peso* (neto) 1,0 kg
*Estos parámetros hacen referencia a cada uno de los altavoces
Lieferumfang
• Lautsprecher x 2 • Lautsprecherkabel (1500 mm) • Montagebügel für P402/P462 x 4
• Montagebügel für V422/V462 x 4• Erweiterungsblock für P462/V422 x 4
• Erweiterungsblock für V462 x 4 • Lautsprecherschrauben 10 mm x 12
• Schnellstartanleitung • Klemme x 2 • Polsterstück x 2
So verbinden Sie die Lautsprecher mit lhrem LCD-Monitor
1. Schalten Sie den LCD-Monitor über den Ein-/Ausschalter ab.
2. Wenn Sie die Lautsprecher am P402/P462 montieren, entfernen Sie die Griffe
auf der Rückseite des Monitors.
3. Bringen Sie das Polsterstück an jedem Lautsprecher an. (Abbildung 1)
4. Wenn Sie die Lautsprecher am P401 montieren, fahren Sie mit Schritt 4 fort.
Wenn die Lautsprecher am P461 montiert werden, müssen Sie die
Erweiterungsblöcke an den Enden des Lautsprechers wechseln. Entfernen Sie
die vier Schrauben, die am Lautsprecher angebracht sind. Verwenden Sie
diese Schrauben zum Anbringen des Erweiterungsblocks am Lautsprecher.
Wiederholen Sie diese Schritte zum Befestigen des anderen Blocks. (Abbildung 2)
5. Befestigen Sie die Montagebügel an der richtigen Position an den einzelnen
Lautsprechern (2 Bügel pro Lautsprecher).
Verwenden Sie die mit (R) gekennzeichneten Halterungen am rechten
Lautsprecher und die mit (L) gekennzeichneten Halterungen am linken Lautsprecher.
6. Befestigen Sie die Lautsprecher mit den Montagebügeln am LCD-Monitor;
verwenden Sie dazu jeweils eine (1) schwarze mitgelieferte 10-mm-Schraube
pro Bügel. (Abbildung 3)
7. Nachdem Sie beide Lautsprecher am LCD-Monitor angebracht haben,
verbinden Sie die Lautsprecherkabel mit den Anschlüssen am LCD-Monitor;
das andere Ende der Kabelverbindungen verbinden Sie mit den Anschlüssen
an den Lautsprechern. (Abbildung 3)
Das Kabel mit der roten Kennzeichnung (+) wird mit dem roten Anschluss (+)
am Lautspre-cher verbunden.
Das schwarz gekennzeichnete Kabel (-) wird mit dem schwarzen Anschluss (-)
am Lautspre-cher verbunden.
So verfahren Sie mit überschüssigem Lautsprecherkabel: wickeln Sie das
Lautsprecherka-bel auf und befestigen Sie es mit Hilfe der mitgelieferten Klemme.
8. Bringen Sie beim P402/P462 die Griffe wieder an ihrer ursprünglichen Position
an der Rückseite des Monitors an.
9. Schalten Sie den LCD-Monitor ein.
Fassen Sie den Monitor nicht an den Lautsprechern, wenn Sie ihn bewegen
oder verschieben.
Befolgen Sie die Sicherheitsanweisungen in der Bedienungsanleitung des
Monitors.
Problemlösung
Kein Ton aus den Lautsprechern
• Überprüfun Sie, ob die Lautsprecherkabel richtig an die Anschlüsse von
LCD-Monitor und jedem Lautspre-cher angeschlossen sind.
• Überprüfun Sie die Lautstärkeeinstellung an den Lautsprechern.
• Überprüfen Sie, ob die Stummschaltungstaste betätigt wurde.
• Überprüfen Sie den Schalter für interne/externe Lautsprecher an dem
LCD-Monitor.
Gehäuse reinigen
• Bitte halten Sie sich an die Empfehlungen in der Bedienungsanleitung des
Monitors.
Technische Daten
• Ausgangsleistung: 15 W + 15 W bei 8 Ohm
• Frequenzgang: 100 Hz bis 25kHz
• Abmessungen* (netto) 70,0 mm(B) x 532,2 mm(H) x 59,0 mm(T) (ohne
Erweiterungsblock)
• Gewicht* (netto) 1,0 kg
*Die angegebenen Abmessungen gelten für jeden einzelnen Lautsprecher
以下の手順でスピーカーをディスプレイに接続してください。
1. ディスプレイの主電源スイッチをOFFにします。
2. P402、P462に取り付ける場合は、ディスプレイのハンドルをはずしてください。
3. 各スピーカーにクッションを取り付けてください。(Figure1参照)
4. スピーカーをP402に取り付ける場合は手順5に進んでください。スピーカーをP462、V 4 2 2 、V 4 6 2 に取り付ける場合は各スピーカーを固定している4本のネジを外し、外したネジを
使って延長ブロックを取り付けてください。(Figure2参照)
5. 添付の取付金具を添付の取り付け用ネジ(長さ10 mm)にて各スピーカーに取り付けてください。(1本につき2 個)
右側のスピーカーには(R)の取付金具、左側のスピーカーには(L)の取付金具を取り付けてください。
6. 添付の取り付け用ネジ(長さ10mm)でスピーカーをディスプレイに取り付けてください。(Figure3参照)
7. スピーカーをディスプレイに取り付けた後、ディスプレイとスピーカーを添付のスピーカーケーブルで接続してください。(Figure3参照)
入 力 端 子 の 極 性 は 、赤 が プ ラ ス( + )、黒 が マ イ ナ ス( - )で す 。ス ピ ー カ ー ケ ー ブ ル が 長 す ぎ る 場 合 は 、添 付 の ク ラ ン パ ー で 長 さ を 調 節 し て く だ さ い 。
8. P402、P 4 6 2 の 場 合 は 、ハ ン ド ル を 元 の 位 置 に 取 り 付 け てく だ さ い 。
9. ディスプレイの主電源スイッチをONにします。
スピーカーを取り付けた後で、ディスプレイを動かす場合は、スピーカー部分を持たないでください。
ディスプレイの下部を持って移動するようにしてください。
その他の注意はディスプレイの取扱説明書を参照してください。
困ったとき
音が出ない
・スピーカーケーブルがディスプレイとスピーカーのスピーカー端 子に正しく接続されているか調べてください。
・音量が最小になっていませんか。
・消音状態になっていませんか。
・ディスプレイ本 体 の 内 蔵 スピーカ ーと 外 部 スピーカーの切り替えスイッチが内蔵スピーカーになっていませんか。
キャビネット の お 手入 れ
・ディスプ レイ本 体 の 取扱説明書をご 覧ください。
仕様
定格入力:15W+15W@8Ω
周波数特性:100Hz〜25kHz
製品寸法(1本):幅70.0mmx高さ532.2mmx奥行き59.0mm
製 品 質 量 ( 1 本 ): 1 . 0 k g
同梱品
スピーカー本体x2、スピーカーケーブル(1500mm)x2、P402/P462用取付金具x4、V422/V462用取付金具x4、P462/V422用延長ブロックx4、V462用延長ブロックx4、
取り付け用ネジx12、取扱説明書(本紙)、クッションx2、クランパーx2
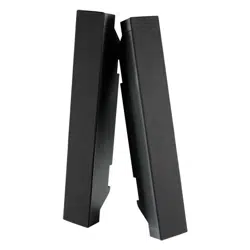
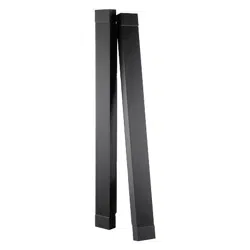
Figure 1
Mounting bracket / Support de montage / Staffe di montaggio /
取付金具 / Soporte de montaje / Montagebügel /
Extension block / Bloc d’extension / Modulo di espansione /
延長ブロック/ Bloque alargador / Erweiterungsblock /
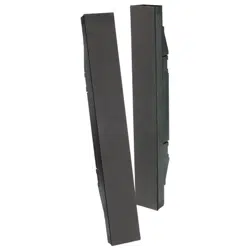
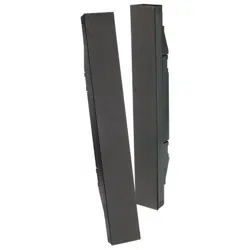
Figure 2
Figure 3
For P402 For P462
V422
For P462
V422
For P402
For P462
For V422
For V462
For V462
For V462
ご住所
お客様
お名前
(ふりがな)
〒 ー
TEL ー ー
様
年月日
お買い上げ日
販売店(住所、店名、TEL)
保証期間 一年間
※保証内容の詳細は「保証規定」を
ご覧ください。
保証書
修理受付/アフターサービス窓口
法人のお客様:NECビジネスPC修理受付センター
TEL 0120-00-8283
携帯電話専用 TEL 0570-064-211
受付時間:月〜金 9: 00〜18: 00
個人のお客様:121コンタクトセンター TEL 0120-977-121
携帯電話、PHS専用
受付時間:9:00〜21:00(年中無休)
TEL 03-6670-6000
Serial No.
保証規 定
1. 取扱説明書、本体添付ラベル等の注意書に基づくお客様の正常なご使用状
態のもとで保証期間内に万一故障した場合、無料にて故障箇所を当社所定
の方法で修理させていただきます。本保証書をご準備のうえ、お買い上げ
販売店、または、当社修理受付/アフターサービス窓口にお電話いただき、
修理をお申し出ください。
なお、パソコン等の他機器との取り付け取り外し作業、ならびに天吊り設
置、壁掛け設置、またはボックスへの内蔵設置等、特殊設置条件での取り
付け取り外し作業については、本保証対象外です。
また、本製品のハードウェア部分の修理に限らせていただき、お客様がご
使用のソフトウェア、データ等の破損は保証致しかねます。
2. 修理を行うために交換された旧部品、または、機械の一部は、当社にて回
収致します。
3. 本製品の故障、またはその使用によって生じた直接、間接の損害について
は当社はその責任を負わないものとします。また、故障により営業上の機
会損失の補償は致しかねます。
4. 次のような場合には、保証期間中でも有料修理になります。
(1) 本書のご提示がない場合。
(2) 本書に保証期間、型名、および製造番号、お客様名、販売店名の記
入のない場合、または字句を書き替えられた場合。
(3) お客様による輸送、移動時の落下、衝撃等お客様の取扱いが適正で
ないために生じた故障、損傷の場合。
(4) お客様による使用上の誤り、あるいは不当な改造、修理による故障
および損傷。
(5) 火災、塩害、ガス害、地震、落雷、および風水害、その他天災地変
、あるいは異常電圧などの外部要因に起因する故障および損傷。
(6) 高温・多湿の場所、車両・船舶等、煙・油煙・たばこの煙・埃の多
い場所で使用された場合に生ずる故障及び損傷。
(7) 正常なご使用状態のもとで部品が自然消耗、磨耗、劣化により故障
した場合。
(8) 本製品に接続している他の機器に起因する故障および損傷。
(9) お客様のご希望により、当社から出張にて修理に伺う場合は、出張
に要する実費を申し受けます。
(10)ケーブル等の付属品類。
5. ご不明の点は、当社のアフターサービス窓口にご相談ください。
6. 本保証書は日本国内においてのみ有効です。
ThiswarrantyisvalidonlyinJapan.
・ お客様にご記入いただいた情報は、保証期間内のサービス活動のため
に、記載内容を利用させて頂く場合がございますので、御了承ください。
・ この保証書は本書に明示した期間、条件のもとにおいて無料修理をお約
束するものです。従ってこの保証書によってお客様の法律上の権利を制
限するものではありません。保証期間経過後の修理などについてご不明
の場合は、お買い上げの販売店、または当社指定のアフターサービス窓
口にお問い合わせください。
・ 本製品の補修用性能部品の保有年限は、製造打切後5年です。
・ 本保証書は再発行致しませんので、大切に保管してください。
保証責任者
NECディスプレイソリューションズ株式会社
〒108-0023 東京都港区芝浦四丁目13番23号( MS 芝浦ビル)
電話番号は、修理受付/アフターサービス窓口の電話番号と同様になります。
Contents
•
Speaker x 2 • Speaker wire (1500mm) x 2 • Mounting bracket for P402/P462 x 4
• Mounting bracket for V422/V462 x 4 • Extension block for P462/V422 x 4
• Extension block for V462 x 4
•
Speaker screws (10mm length) x 12
• Quick Start Guide • Pad x 2 • Clamp x 2
Follow these steps to connect the speaker to your LCD monitor
1. Turn off the power to the LCD monitor.
2. If mounting speakers on the P402/P462, remove the handles on the back of the
monitor.
3. Attach the pad to each speaker. (Figure1)
4. If mounting speakers on the P402, proceed to step 5. If mounting speakers on
the P462, V422, V462, you will need to attach the extension blocks to the ends
of the speakers. Remove the four screws attached to the speaker. Use the
same screws to attach the extension block to the speaker. Repeat for other
block. (Figure2)
5. Screw appropriate mounting brackets into appropriate position on each speaker
(2 brackets per speaker).
Use the brackets labeled (R) on the right speaker and brackets labeled (L) on
the left speaker.
6. Attach mounting bracket / speakers to the LCD monitor using one (1) black
10mm screw (included)per bracket. (Figure3)
7. Once both speakers are attached to the LCD monitor, connect the speaker
wires first to the terminals on the LCD and then to the terminals on the attached
speakers. (Figure3)
The red wire (+) connects to the red (+) terminal on the speaker.
The black wire (-) connects to the black (-) terminal on the speaker.
To manage excess speaker wire, coil the speaker wire and wrap it using
included clamp.
8. For P402/P462, reattach the handles on their original position on the back of the
monitor.
9. Turn the LCD monitor power on.
Contenuti
•
2 Casse • Cavo casse (1.500 mm) • Staffa di montaggio per modello P402/P462 x 4
• Staffa di montaggio per modello V422/V462 x 4
• Modulo di espansione per modello P462/V422 x 4
• Modulo di espansione per modello V462 x 4
•
12 Viti casse (da 10 mm) • Guida rapida • 2 Protezioni • 2 fermagli
Attenersi alle seguenti istruzioni per collegare le casse al monitor LCD
1. Disattivare l’interruttore d’alimentazione del monitor LCD.
2. Se si stanno montando le casse sul modello P402/P462, rimuovere le maniglie
nella parte posteriore del monitor.
3. Attaccare la protezione su ciascuna cassa. (Figura 1)
4. Se si stanno montando le casse sul modello P401, passare al punto 4. Se si
stanno montando le casse sul modello P461, sarà necessario attaccare i
moduli di espansione all’estremità delle casse. Rimuovere le quattro viti che
fissano la cassa. Usare le stesse quattro viti per attaccare i moduli di
espansione alla cassa. Ripetere con l’altro modulo. (Figura 2)
5. Montare le staffe di montaggio nella posizione corretta su ciascuna cassa (2
staffe per cassa).
Usare le staffe contrassegnate con (R) della cassa destra e le staffe
contrassegnate con (L) della cassa sinistra.
6. Montare il gruppo staffa/cassa sul monitor LCD usando una (1) vite da 10 mm
(fornito) per staffa. (Figura 3)
7. Una volta che entrambe le casse sono attaccate al monitor LCD, collegare i
cavi delle casse ai terminali sul monitor LCD e poi ai terminali delle casse.
(Figura 3)
Il cavo rosso (+) si collega al terminale rosso (+) della cassa.
Il cavo nero (-) si collega al terminale nero (-) della cassa.
8. Per il modello P402/P462, fissare di nuovo le maniglie nella posizione originale
sulla parte posteriore del monitor.
Per gestire il cavo in eccesso: arrotolare il cavo e fermarlo usando il fermaglio
fornito in dotazione.
Contenu
• Haut-parleur x 2 • Fil de haut-parleur (1500mm)
• Support de montage pour le P402/P462 x 4
• Support de montage pour le V422/V462 x 4
• Bloc d’extension pour le P462/V422 x 4• Bloc d’extension pour le V462 x 4
• Vis de haut-parleurs (longueur 10mm) x 12 • Guide de démarrage rapide
• Patin x 2 • Attache x 2
Suivez ces étapes pour brancher les haut-parleurs sur votre moniteur LCD
1. Éteignez le bouton d’alimentation du moniteur LCD.
2. Si vous devez fixer les haut-parleurs au P402/P462, retirez les poignées à
l’arrière du moniteur.
3. Fixez le patin sur chaque haut-parleur. (Figure 1)
4. Si vous devez fixer les haut-parleurs au P401, passez à l’étape 4. Si vous
devez fixer les haut-parleurs au P461, vous devrez aussi fixer les blocs
d’extension aux extrémités des haut-parleurs. Retirez les quatre vis fixées au
haut-parleur. Utilisez ces mêmes vis pour fixer le bloc d’extension au
haut-parleur. Répétez l’opération pour l’autre bloc. (Figure 2)
5. Vissez les supports de montage appropriés à leur position prévue sur chaque
haut-parleur (2 supports par haut-parleur).
Utilisez les supports étiquetés (R) sur le haut-parleur droit et les supports
étiquetés (L) sur le haut-parleur gauche.
6. Vissez les supports de montage/haut-parleurs sur le moniteur LCD à l’aide
d’une (1) vis noire de 10mm (incluse) par support. (Figure3)
7. Une fois que les deux haut-parleurs sont fixés au moniteur LCD, branchez les
fils des haut-parleurs sur les bornes du moniteur LCD puis sur les bornes des
haut-parleurs attachés. (Figure3)
Le fil rouge (+) se branche sur la borne rouge (+) du haut-parleur.
Le fil noire (-) se branche sur la borne noire (-) du haut-parleur.
8. Pour le P402/P462, fixez de nouveau les poignées à leur position d’origine à
l’arrière du moniteur.
Pour gérer le surplus de fil de haut-parleur, enroulez-le et faites-en une bobine à
l’aide de l’attache fournie.
SP -4 04 6PV
Quick Start Guide / Guide de démarrage rapide / Guida rapida
取扱説明書 / Schnellstartanleitung / Guía de inicio rápido /
Printed in China
Rev, 1
Do not hold the display by the speakers when moving or shifting the
display. Follow the safety instructions in the monitor’s user’s manual.
Troubleshooting
No speaker sound
• Check that the speaker wire is correctly attached to the LCD monitor and to
each speaker terminal.
• Check the volume setting.
• Check the mute button.
• Check the internal/external speaker switch on the LCD monitor.
Cleaning the Cabinet
• Follow the “Recommended Use” in the display’s user manual.
Specifications
• Power 15W + 15W@8 ohm
• Frequency response 100Hz - 25kHz
•
Dimension* (Net) 70.0mm(W) x 532.2mm(H) x 59.0mm(D)(without extension block)
• Weight* (Net) 1.0 kg
*Measurements shown are for each individual speaker
9. Accendere il monitor LCD
Quando si sposta il monitor, non afferrarlo per le casse.
Osservare le istruzioni di sicurezza nel manuale dell'utente del monitor.
Risoluzione dei problemi
Assenza sonoro casse
• Controllare che il cavo delle casse sia collegato in modo corretto, ed ai
terminali corretti del monitor LCD e delle casse.
• Controllare il volume delle casse.
• Controllare il tasto Mute.
• Controllare l'interruttore della cassa interna/esterna sul monitor LCD.
Pulizia del mobile
• Seguire le raccomandazioni d’uso del Manuale.
Specifiche
• Potenza 15W + 15W a 8 ohm
• Risposta di frequenza 100Hz - 25kHz
• Dimensioni* (Netto) 70,0 mm (L) x 532,2 mm (A) x 59,0 mm (P) (senza
modulo di espansione)
• Peso* (Netto) 1,0 kg
*Le misure indicate fanno riferimento ad ogni singola cassa
9. Allumez l’alimentation du moniteur LCD.
Ne tenez pas l’écran par les haut-parleurs lorsque vous le déplacez.
Suivez les consignes de sécurité du mode d'emploi du moniteur.
Dépannage
Aucun son dans les haut-parleurs
• Vérifiez que le fil du haut-parleur est correctement attaché au moniteur LCD et
que chaque haut-parleur est branché sur chaque borne de haut-parleur.
• Vérifiez le réglage de volume sur les haut-parleurs.
• Vérifiez le bouton de coupure du son.
• Vérifiez l’interrupteur des haut-parleurs internes/externes sur le moniteur LCD.
Nettoyage du boîtier
• Suivez l’utilisation recommandée dans le mode d’emploi de l’écran.
Spécifications
• Puissance 15W + 15W@8 ohms
• Réponse en fréquences 100Hz - 25kHz
• Dimensions* (Nettes) 70,0 mm (L) x 532,2 mm (H) x 59,0 mm (P) (sans bloc
d’extension)
• Poids* (Net) 1,0 kg
*Les dimensions indiquées correspondent à chaque haut-parleur
Contenido
• Altavoz x 2 • Cable de altavoz (1.500 mm) • Soporte de montaje para P402/P462 x 4
• Soporte de montaje para V422/V462 x 4• Bloque alargador para P462/V422 x 4
• Bloque alargador para V462 x 4
• Tornillos para altavoz (10 mm de largo) x 12 • Guía de inicio rápido • Tela x 2
• Abrazadera x 2
Siga estos pasos para conectar el altavoz al monitor LCD
1. Coloque el conmutador del monitor LCD en la posición de apagado.
2. Si va a montar altavoces en el modelo P402/P462, retire los asas de la parte
posterior del monitor.
3. Acople la tela a cada altavoz. (Figura 1)
4. Si va a montar altavoces en el modelo P401, vaya al paso 4. Si los altavoces
se montan en el P461, necesitará acoplar los bloques alargadores a los
extremos de los altavoces. Retire los cuatro tornillos que unen el altavoz. Utilice
los mismos tornillos para unir los bloques alargadores al altavoz. Repita la
operación con el otro bloque. (Figura 2)
5. Atornille los soportes de montaje adecuados en la posición correcta en cada
altavoz (2 soportes por altavoz).
Utilice los soportes etiquetados con (R) en el altavoz derecho y los etiquetados
con (L) en el altavoz izquierdo.
6. Atornille el soporte de montaje y los altavoces al monitor LCD utilizando un (1)
tornillo de 10mm (incluido) de color negro por soporte. (Figure 3)
7. Cuando haya acoplado los dos altavoces al monitor LCD, conecte sus cables a
los terminales de éste y, a continuación, a los terminales de los altavoces
montados. (Figura 3)
El cable rojo (+) se conecta al terminal de color rojo (+) del altavoz.
El cable negro (-) se conecta al terminal de color negro (-) del altavoz.
Para administrar el cable sobrante de los altavoces enrolle el cable de los
altavoces y envuélvalo utilizando la abrazadera que se inlcuye.
8. Para el modelo P402/P462, vuelva a acoplar las asas en su posición original en
la parte posterior del monitor.
9. Encienda el monitor LCD.
No agarre los altavoces cuando mueva o levante la pantalla.
Siga las instrucciones de seguridad en el manual de usuario del monitor.
Solucionar problemas
Los altavoces no emiten sonido
• Compruebe que el cable de los altavoces está correctamente conectado al
monitor LCD y, a su vez, aquéllos están perfectamente conectados a sus
terminales.
• Compruebe la configuración del volumen de los altavoces.
• Compruebe si el botón de silencio está activado.
• Compruebe el interruptor del altavoz interno/externo en el monitor LCD.
Limpiar la carcasa
• Siga las instrucciones de uso recomendado del manual del usuario de la
pantalla.
Especificaciones
• Potencia: 15 W + 15 W a 8 ohm
• Respuesta de frecuencia: 100 Hz - 25kHz
• Dimensiones* (netas) 70,0 mm (A) x 532,2 mm (L) x 59,0 mm (F) (sin bloque
alargador)
• Peso* (neto) 1,0 kg
*Estos parámetros hacen referencia a cada uno de los altavoces
Lieferumfang
• Lautsprecher x 2 • Lautsprecherkabel (1500 mm) • Montagebügel für P402/P462 x 4
• Montagebügel für V422/V462 x 4• Erweiterungsblock für P462/V422 x 4
• Erweiterungsblock für V462 x 4 • Lautsprecherschrauben 10 mm x 12
• Schnellstartanleitung • Klemme x 2 • Polsterstück x 2
So verbinden Sie die Lautsprecher mit lhrem LCD-Monitor
1. Schalten Sie den LCD-Monitor über den Ein-/Ausschalter ab.
2. Wenn Sie die Lautsprecher am P402/P462 montieren, entfernen Sie die Griffe
auf der Rückseite des Monitors.
3. Bringen Sie das Polsterstück an jedem Lautsprecher an. (Abbildung 1)
4. Wenn Sie die Lautsprecher am P401 montieren, fahren Sie mit Schritt 4 fort.
Wenn die Lautsprecher am P461 montiert werden, müssen Sie die
Erweiterungsblöcke an den Enden des Lautsprechers wechseln. Entfernen Sie
die vier Schrauben, die am Lautsprecher angebracht sind. Verwenden Sie
diese Schrauben zum Anbringen des Erweiterungsblocks am Lautsprecher.
Wiederholen Sie diese Schritte zum Befestigen des anderen Blocks. (Abbildung 2)
5. Befestigen Sie die Montagebügel an der richtigen Position an den einzelnen
Lautsprechern (2 Bügel pro Lautsprecher).
Verwenden Sie die mit (R) gekennzeichneten Halterungen am rechten
Lautsprecher und die mit (L) gekennzeichneten Halterungen am linken Lautsprecher.
6. Befestigen Sie die Lautsprecher mit den Montagebügeln am LCD-Monitor;
verwenden Sie dazu jeweils eine (1) schwarze mitgelieferte 10-mm-Schraube
pro Bügel. (Abbildung 3)
7. Nachdem Sie beide Lautsprecher am LCD-Monitor angebracht haben,
verbinden Sie die Lautsprecherkabel mit den Anschlüssen am LCD-Monitor;
das andere Ende der Kabelverbindungen verbinden Sie mit den Anschlüssen
an den Lautsprechern. (Abbildung 3)
Das Kabel mit der roten Kennzeichnung (+) wird mit dem roten Anschluss (+)
am Lautspre-cher verbunden.
Das schwarz gekennzeichnete Kabel (-) wird mit dem schwarzen Anschluss (-)
am Lautspre-cher verbunden.
So verfahren Sie mit überschüssigem Lautsprecherkabel: wickeln Sie das
Lautsprecherka-bel auf und befestigen Sie es mit Hilfe der mitgelieferten Klemme.
8. Bringen Sie beim P402/P462 die Griffe wieder an ihrer ursprünglichen Position
an der Rückseite des Monitors an.
9. Schalten Sie den LCD-Monitor ein.
Fassen Sie den Monitor nicht an den Lautsprechern, wenn Sie ihn bewegen
oder verschieben.
Befolgen Sie die Sicherheitsanweisungen in der Bedienungsanleitung des
Monitors.
Problemlösung
Kein Ton aus den Lautsprechern
• Überprüfun Sie, ob die Lautsprecherkabel richtig an die Anschlüsse von
LCD-Monitor und jedem Lautspre-cher angeschlossen sind.
• Überprüfun Sie die Lautstärkeeinstellung an den Lautsprechern.
• Überprüfen Sie, ob die Stummschaltungstaste betätigt wurde.
• Überprüfen Sie den Schalter für interne/externe Lautsprecher an dem
LCD-Monitor.
Gehäuse reinigen
• Bitte halten Sie sich an die Empfehlungen in der Bedienungsanleitung des
Monitors.
Technische Daten
• Ausgangsleistung: 15 W + 15 W bei 8 Ohm
• Frequenzgang: 100 Hz bis 25kHz
• Abmessungen* (netto) 70,0 mm(B) x 532,2 mm(H) x 59,0 mm(T) (ohne
Erweiterungsblock)
• Gewicht* (netto) 1,0 kg
*Die angegebenen Abmessungen gelten für jeden einzelnen Lautsprecher
以下の手順でスピーカーをディスプレイに接続してください。
1. ディスプレイの主電源スイッチをOFFにします。
2. P402、P462に取り付ける場合は、ディスプレイのハンドルをはずしてください。
3. 各スピーカーにクッションを取り付けてください。(Figure1参照)
4. スピーカーをP402に取り付ける場合は手順5に進んでください。スピーカーをP462、V 4 2 2 、V 4 6 2 に取り付ける場合は各スピーカーを固定している4本のネジを外し、外したネジを
使って延長ブロックを取り付けてください。(Figure2参照)
5. 添付の取付金具を添付の取り付け用ネジ(長さ10mm)にて各スピーカーに取り付けてください。(1本につき2 個 )
右側のスピーカーには(R)の取付金具、左側のスピーカーには(L)の取付金具を取り付けてください。
6. 添付の取り付け用ネジ(長さ10mm)でスピーカーをディスプレイに取り付けてください。(Figure3参照)
7. スピーカーをディスプレイに取り付けた後、ディスプレイとスピーカーを添付のスピーカーケーブルで接続してください。(Figure3参照)
入 力 端 子 の 極 性 は 、赤 が プ ラ ス( + )、黒 が マ イ ナ ス( - )で す 。ス ピ ー カ ー ケ ー ブ ル が 長 す ぎ る 場 合 は 、添 付 の ク ラ ン パ ー で 長 さ を 調 節 し て く だ さ い 。
8. P402、P 4 6 2 の 場 合 は 、ハ ン ド ル を 元 の 位 置 に 取 り 付 け てく だ さ い 。
9. ディスプレイの主電源スイッチをONにします。
スピーカーを取り付けた後で、ディスプレイを動かす場合は、スピーカー部分を持たないでください。
ディスプレイの下部を持って移動するようにしてください。
その他の注意はディスプレイの取扱説明書を参照してください。
困ったとき
音が出ない
・スピーカーケーブルがディスプレイとスピーカーのスピーカー端 子に正しく接続されているか調べてください。
・音量が最小になっていませんか。
・消音状態になっていませんか。
・ディスプレイ本 体 の 内 蔵 スピーカ ーと 外 部 スピーカーの切り替えスイッチが内蔵スピーカーになっていませんか。
キャビネット の お 手入 れ
・ディスプ レイ本 体 の 取扱説明書をご 覧ください。
仕様
定格入力:15W+15W@8Ω
周波数特性:100Hz〜25kHz
製品寸法(1本):幅70.0mmx高さ532.2mmx奥行き59.0mm
製 品 質 量 ( 1 本 ): 1 . 0 k g
同梱品
スピーカー本体x2、スピーカーケーブル(1500mm)x2、P402/P462用取付金具x4、V422/V462用取付金具x4、P462/V422用延長ブロックx4、V462用延長ブロックx4、
取り付け用ネジx12、取扱説明書(本紙)、クッションx2、クランパーx2
Figure 1
Mounting bracket / Support de montage / Staffe di montaggio /
取付金具 / Soporte de montaje / Montagebügel /
Extension block / Bloc d’extension / Modulo di espansione /
延長ブロック/ Bloque alargador / Erweiterungsblock /
Figure 2
Figure 3
For P402 For P462
V422
For P462
V422
For P402
For P462
For V422
For V462
For V462
For V462
ご住所
お客様
お名前
(ふりがな)
〒 ー
TEL ー ー
様
年月日
お買い上げ日
販売店(住所、店名、TEL)
保証期間 一年間
※保証内容の詳細は「保証規定」を
ご覧ください。
保証書
修理受付/アフターサービス窓口
法人のお客様:NECビジネスPC修理受付センター
TEL 0120-00-8283
携帯電話専用 TEL 0570-064-211
受付時間:月〜金 9: 00〜18: 00
個人のお客様:121コンタクトセンター TEL 0120-977-121
携帯電話、PHS専用
受付時間:9:00〜21:00(年中無休)
TEL 03-6670-6000
Serial No.
保証規 定
1. 取扱説明書、本体添付ラベル等の注意書に基づくお客様の正常なご使用状
態のもとで保証期間内に万一故障した場合、無料にて故障箇所を当社所定
の方法で修理させていただきます。本保証書をご準備のうえ、お買い上げ
販売店、または、当社修理受付/アフターサービス窓口にお電話いただき、
修理をお申し出ください。
なお、パソコン等の他機器との取り付け取り外し作業、ならびに天吊り設
置、壁掛け設置、またはボックスへの内蔵設置等、特殊設置条件での取り
付け取り外し作業については、本保証対象外です。
また、本製品のハードウェア部分の修理に限らせていただき、お客様がご
使用のソフトウェア、データ等の破損は保証致しかねます。
2. 修理を行うために交換された旧部品、または、機械の一部は、当社にて回
収致します。
3. 本製品の故障、またはその使用によって生じた直接、間接の損害について
は当社はその責任を負わないものとします。また、故障により営業上の機
会損失の補償は致しかねます。
4. 次のような場合には、保証期間中でも有料修理になります。
(1) 本書のご提示がない場合。
(2) 本書に保証期間、型名、および製造番号、お客様名、販売店名の記
入のない場合、または字句を書き替えられた場合。
(3) お客様による輸送、移動時の落下、衝撃等お客様の取扱いが適正で
ないために生じた故障、損傷の場合。
(4) お客様による使用上の誤り、あるいは不当な改造、修理による故障
および損傷。
(5) 火災、塩害、ガス害、地震、落雷、および風水害、その他天災地変
、あるいは異常電圧などの外部要因に起因する故障および損傷。
(6) 高温・多湿の場所、車両・船舶等、煙・油煙・たばこの煙・埃の多
い場所で使用された場合に生ずる故障及び損傷。
(7) 正常なご使用状態のもとで部品が自然消耗、磨耗、劣化により故障
した場合。
(8) 本製品に接続している他の機器に起因する故障および損傷。
(9) お客様のご希望により、当社から出張にて修理に伺う場合は、出張
に要する実費を申し受けます。
(10)ケーブル等の付属品類。
5. ご不明の点は、当社のアフターサービス窓口にご相談ください。
6. 本保証書は日本国内においてのみ有効です。
ThiswarrantyisvalidonlyinJapan.
・ お客様にご記入いただいた情報は、保証期間内のサービス活動のため
に、記載内容を利用させて頂く場合がございますので、御了承ください。
・ この保証書は本書に明示した期間、条件のもとにおいて無料修理をお約
束するものです。従ってこの保証書によってお客様の法律上の権利を制
限するものではありません。保証期間経過後の修理などについてご不明
の場合は、お買い上げの販売店、または当社指定のアフターサービス窓
口にお問い合わせください。
・ 本製品の補修用性能部品の保有年限は、製造打切後5年です。
・ 本保証書は再発行致しませんので、大切に保管してください。
保証責任者
NECディスプレイソリューションズ株式会社
〒108-0023 東京都港区芝浦四丁目13番23号( MS 芝浦ビル)
電話番号は、修理受付/アフターサービス窓口の電話番号と同様になります。
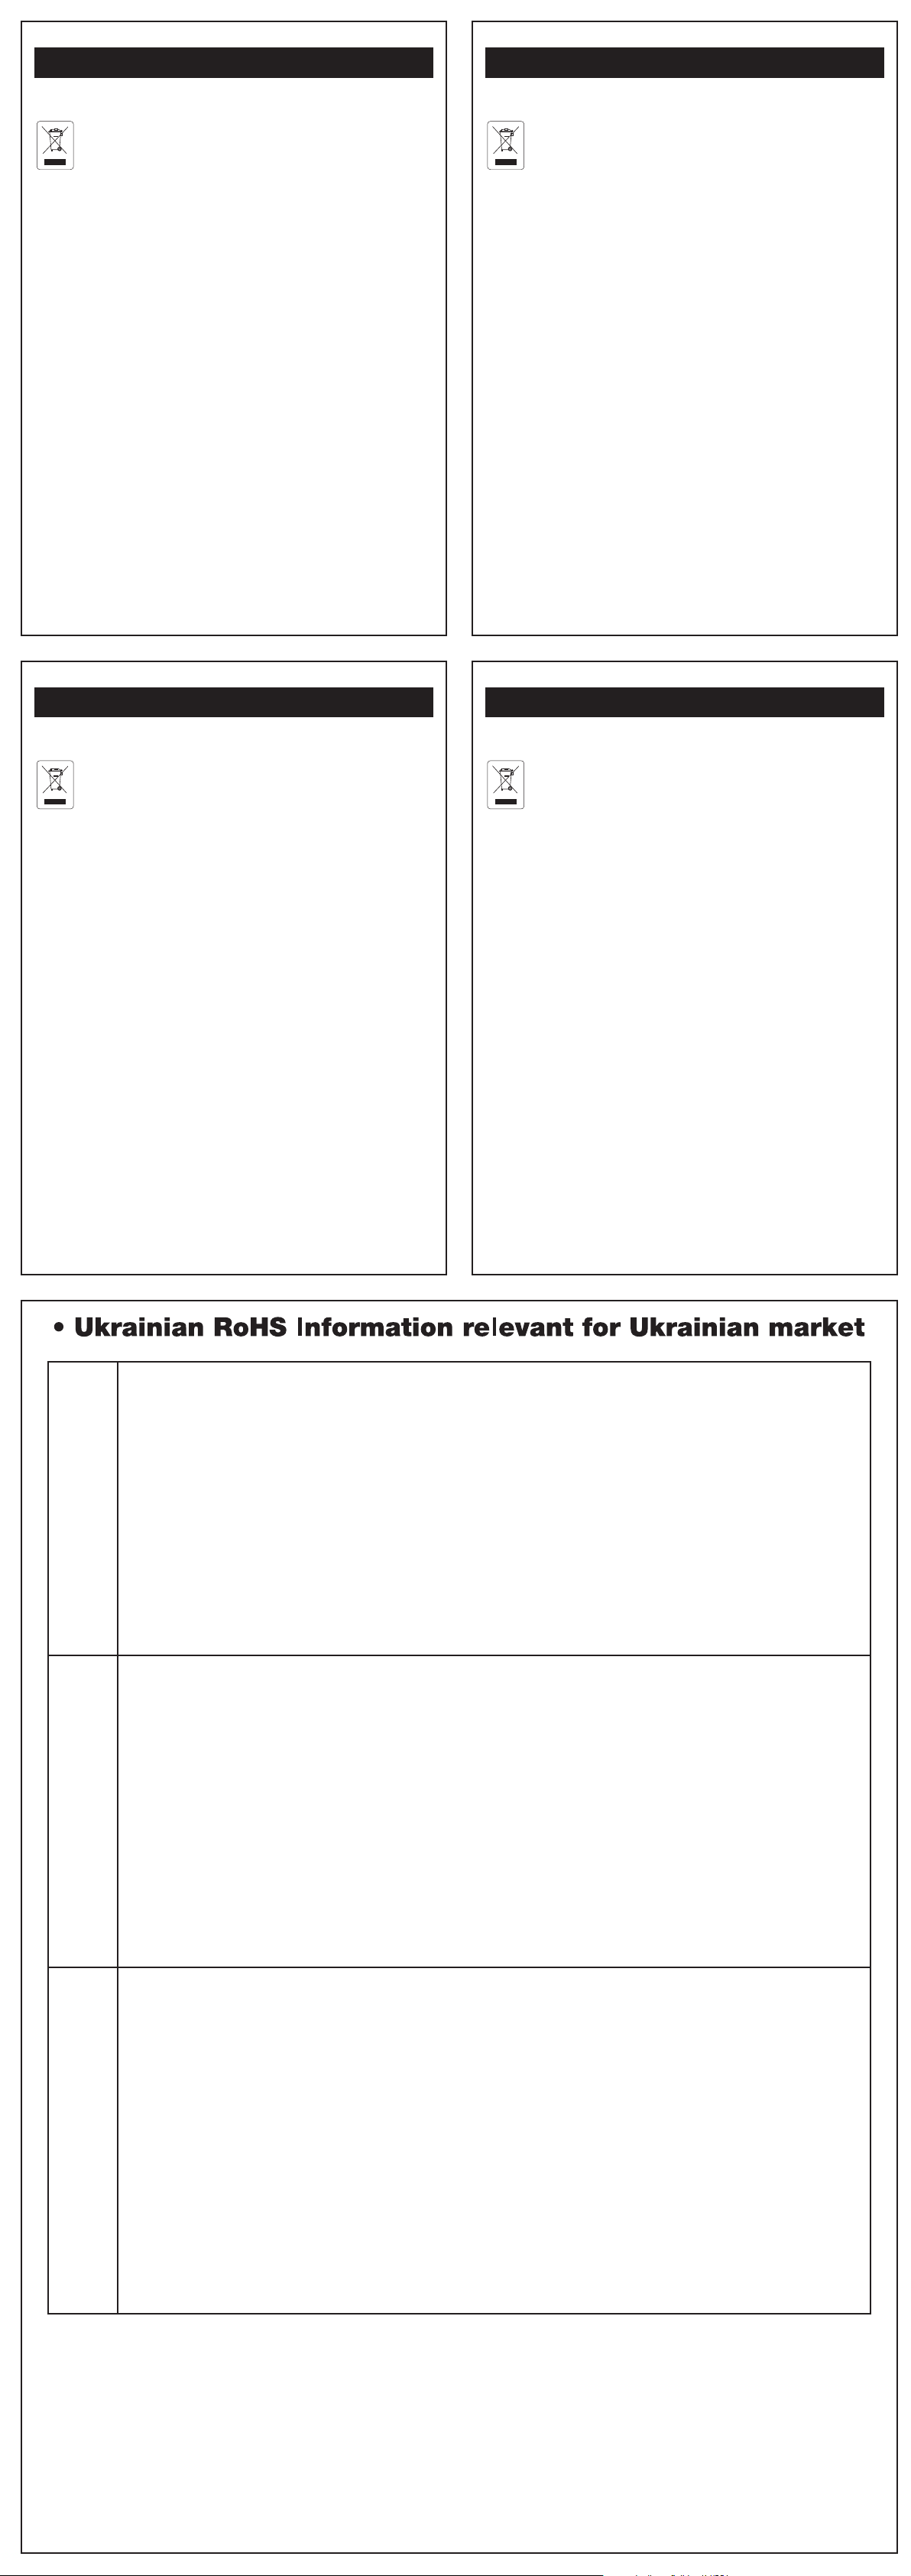
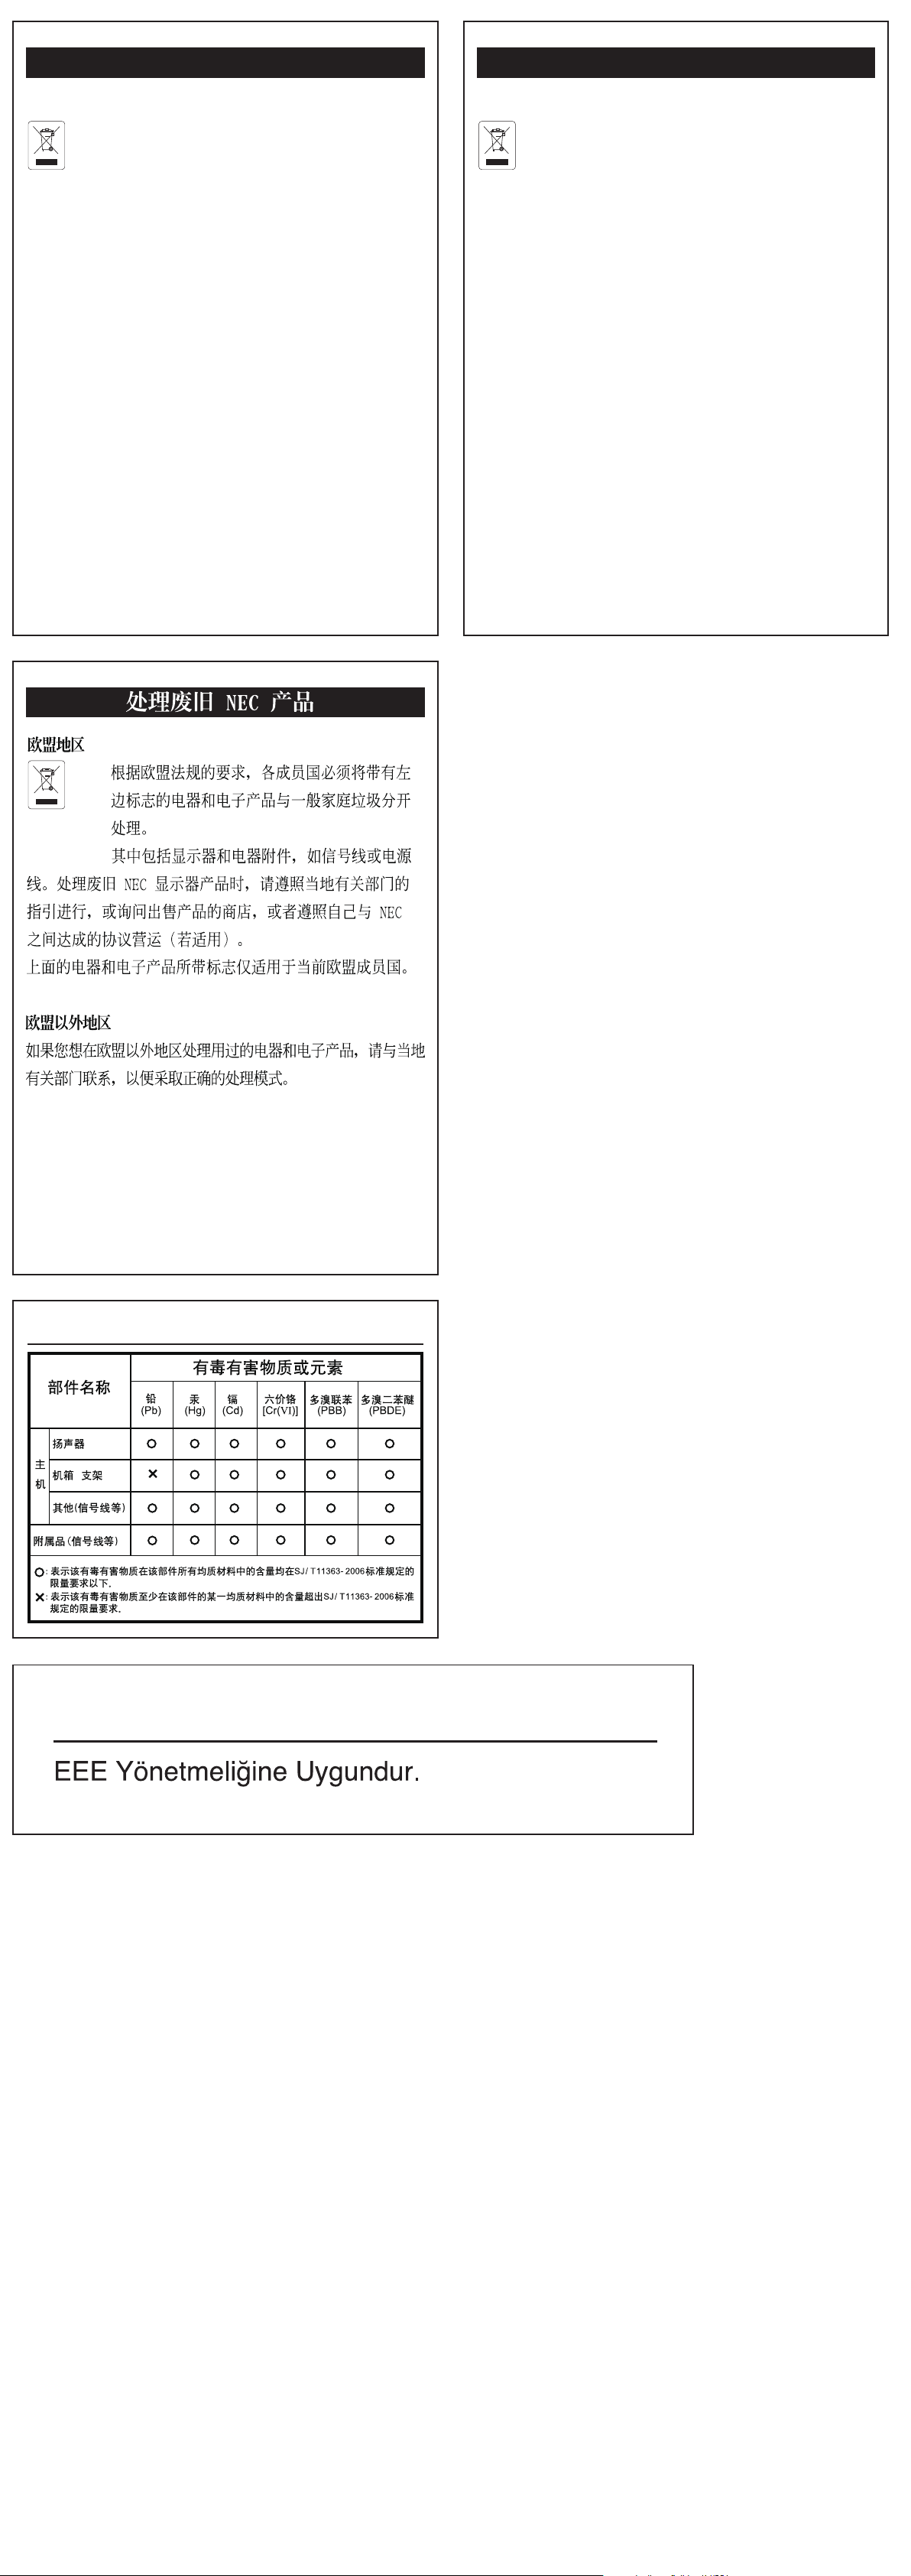
Chinese RoHS -information relevant for Chinese mark
Turkish RoHS information relevant for Turkish market
Elimination des anciens produits NEC
Au sein de l’Union Euroréenne
La législation en vigueur dans tous les états membres
de l’Union Euroréenne exige que tous les déchets
électriques et électroniques portant le symbole ci-
contre (à gauche) ne soient pas mélangés au reste des
déchets ménagers lors de leur élimination. Ceci inclut
notamment les moniteurs et accessoires électriques, tels que
les câbles-signaux et les cordons d’alimentation. Lorsque
vous devez vous débarrasser de vos produits d’achage
NEC, des autorités veuillez suivre les recommandations
locales ou demander conseil auprès du revendeur qui vous a
vendu le produite en question. Vous pouvez aussi respecter
tout accord passé entre NEC et vous-même, le cas échéant.
Ce symbole présent sur les produits électriques et électro-
niques ne s’applique qu’aux membres actuels de l’Union
Européenne.
En dehors de l’Union Européenne
Si vous souhaitez vous débarrasser de produits électriques
ou électroniques usagés en dehors de l’Union Euroréenne,
veuillez contacter les autorités locales concernées pour
respecter les modes de traitement acceptés.
Desecho de productos NEC obsoletos
En la Unión europea
A medida que la legislación de la Unión Europea se
va implementando en los distintos estados miem-
bros, se está imponiendo que los productos residu-
ales eléctricos y electrónicos que llevan la marca que se
muestra a la izquierda se desechen por separado de los
residuos domésticos comunes. En esta categoría se incluyen
desde monitores hasta accesorios eléctricos, como cables de
alimentación o de señal. Para desechar monitores NEC, siga
las instrucciones de las autoridades locales, solicite infor-
mación al respecto en el establecimiento donde haya
adquirido el monitor o, si corresponde, siga las condiciones
acordadas con NEC.
Esta marca en productos eléctricos o electrónicos sólo se
aplica a los estados miembros actuales de la Unión europea.
Fuera de la Unión europea
Para desechar productos eléctricos o electrónicos fuera de la
Unión europea, póngase en contacto con las autoridades
locales para utilizar el método de desecho adecuado.
NEC製ディスプレイの廃棄について
EU加盟国のお客さまへ
EU加盟各国で施行されている法律に
基づき、EU加盟国内では左記のマー
クが記載されている電気機器は家庭ゴ
ミとは区別して廃棄しなければなりません
。本商品では、ディスプレイ本体と信号ケ
ーブルや電源コードなどの付属品が該当し
ます。当社のディスプレイ商品を廃棄する
場合は、お住まいの地域の法律に従ってく
ださい。またはお買い上げの販売店にご相
談ください。当社とお客さまとの間で別途
取り決めがおこなわれている場合はそれに
従ってください。このマークは現在のEU加
盟国内でのみ適用されます。
EU加盟国外のお客さまへ
EU加盟国外で本商品を廃棄する場合は、お
住まいの地域の法律に従ってください。
Disposing of your old NEC product
Within the European Union
EU-wide legislation, as implemented in each
Member State, requires that waste electrical and
electronic products carrying the mark (le) must be
disposed of separately from normal household waste. is
includes monitors and electrical accessories, such as single
cables or power cords. When you need to dispose of your
NEC display products, please follow the guidance of your
local authority, or ask the shop where you purchased the
products, or if applicable, follow any agreements made
between yourself and NEC.
e mark on electrical and electronic products only applies
to the current European Union Member States.
Outside the European Union
If you wish to dispose of used electrical and electronic prod-
ucts outside the European Union, please contact your local
authority so as to comply with the correct disposal method.
Entsorgung alter NEC Geräte
Innerhalb der Europäischen Union
Gemäß EU-Gesetzgebung und deren Umsetzung in
den einzelnen Mitgliedstaanten müssen elektrische
und elektronische Geräte, die das links abgebildete
Kennzeichen tragen, getrennt vom normalen Hausmüll
entsorgt werden. Dazu gehören auch Monitore und
elektrisches Zubehör wie Signal- oder Netzkabel. Wenn Sie
Ihr NEC Anzeigegerät entsorgen müssen, befolgen Sie bitte
die Richtlinien der örtlichen Behörden, wenden Sie sich an
den Händler, bei dem Sie das Gerät gekau haben, oder
verfahren Sie gemäß eventuellen Vereinbarungen zwischen
Ihnen und NEC.
Die Kennzeichnung elektrischer und elektronischer
Produkte erfolgt nur in den derzeitigen Mitgliedstaaten der
Europäischen Union.
Außerhalb der Europäischen Union
Außerhalb der Europäischen Union informieren Sie sich
bitte bei den zuständigen örtlichen Behörden über die
ordnungsgemäße Entsorgung elektrischer und
elektronischer Geräte.
Smaltimento del prodotto NEC usato
Nell'Unione Europea
La legislazione in vigore nell'UE e applicata dal
singolo Stato Membro prevede che i prodotti elettrici
ed elettronici dismessi che recano il simbolo
illustrato a sinistra debbano essere smaltiti separatamente
rispetto agli altri riuti domestici. Questo comprende i
monitor e gli accessori elettrici, come i cavi segnali o di
alimentazione. Per smaltire i monitor NEC, pertanto,
occorre informarisi presso gli enti locali oppure chiedere al
punto vendita dove è stato acquistato il prodotto; in alterna-
tiva, occorre attenersi a quanto contenuto nei contratti
stipulati tra voi e NEC.
Il contrassegno sui prodotti elettrici ed elettronici viene
applicato unicamente ai paesi che fanno parte dell'Unione
Europea.
Fuori dall'Unione Eurorea
Se si desidera smaltire dei prodotti elettrici ed elettronici
fuori dall'Unione Europea, contattare gli enti locali compe-
tenti al ne di applicare il metodo corretto di smaltimento.
Declaration of Conformity
with the requirements of Technical Regulation on the Restriction Of the use of certain Hazardous
Substances in Electrical and Electronic Equipment
(adopted by Order №1057 of Cabinet of Ministers of Ukraine)
The Product is in conformity with the requirements of Technical Regulation on the Restriction Of the use of certain
Hazardous Substances in electrical and electronic equipment (TR on RoHS).
The content of hazardous substance with the exemption of the applications listed in the Annex №2 of TR on RoHS:
1. Lead (Pb) – not over 0,1wt % or 1000wt ppm;
2. Cadmium (Cd) – not over 0,01wt % or 100wt ppm;
3. Mercury (Hg) – not over 0,1wt % or 1000wt ppm;
4. Hexavalent chromium (Cr6+) – not over 0,1wt % or 1000wt ppm;
5. Polybrominated biphenyls (PBBs) – not over 0,1wt % or 1000wt ppm;
6. Polybrominated diphenyl ethers (PBDEs) – not over 0,1wt % or 1000wt ppm.
NEC Display Solutions, Ltd.
English
Декларація про Відповідність
Вимогам Технічного Регламенту Обмеження Використання деяких Небезпечних Речовин в
електричному та електронному обладнанні
(затвердженого Постановою №1057 Кабінету Міністрів України)
Виріб відповідає вимогам Технічного Регламенту Обмеження Використання деяких Небезпечних Речовин в
електричному та електронному обладнанні (ТР ОВНР).
Вміст небезпечних речовин у випадках, не обумовлених в Додатку №2 ТР ОВНР, :
1. свинець(Pb) – не перевищує 0,1 % ваги речовини або в концентрації до 1000 частин на мільйон;
2. кадмій (Cd)– не перевищує 0,01 % ваги речовини або в концентрації до 100 частин на мільйон;
3. ртуть(Hg) – не перевищує 0,1 % ваги речовини або в концентрації до 1000 частин на мільйон;
4. шестивалентний хром (Cr6+ ) – не перевищує 0,1 % ваги речовини або в концентрації до 1000 частин на мільйон;
5. полібромбіфеноли (PBB) – не перевищує 0,1% ваги речовини або в концентрації до 1000 частин на мільйон;
6. полібромдефенілові ефіри (PBDE) – не перевищує 0,1 % ваги речовини або в концентрації до 1000 частин на
мільйон.
NEC Display Solutions, Ltd.
Декларация о Соответствии
Требованиям Технического Регламента об Ограничении Использования некоторых Вредных
Веществ в электрическом и электронном оборудовании
(утверждённого Постановлением №1057 Кабинета Министров Украины)
Изделие соответствует требованиям Технического Регламента об Ограничении Использования некоторых
Вредных Веществ в электрическом и электронном оборудовании (ТР ОИВВ).
Содержание вредных веществ в случаях, не предусмотренных Дополнением №2 ТР ОИВВ:
1. свинец (Pb) – не превышает 0,1 % веса вещества или в концентрации до 1000 миллионных частей;
2. кадмий (Cd) – не превышает 0,01 % веса вещества или в концентрации до 100 миллионных частей;
3. ртуть (Hg) – не превышает 0,1 % веса вещества или в концентрации до 1000 миллионных частей;
4. шестивалентный хром (Cr6+)– не превышает 0,1 % веса вещества или в концентрации до 1000 миллионных
частей;
5. полибромбифенолы (PBB) – не превышает 0,1 % веса вещества или в концентрации до 1000 миллионных
частей;
6. полибромдифеноловые эфиры (PBDE) – не превышает 0,1 % веса вещества или в концентрации до 1000
миллионных частей.
NEC Display Solutions, Ltd.
Ukrainian
Russian