ES-G1914D5-1
MADE IN PRC


12
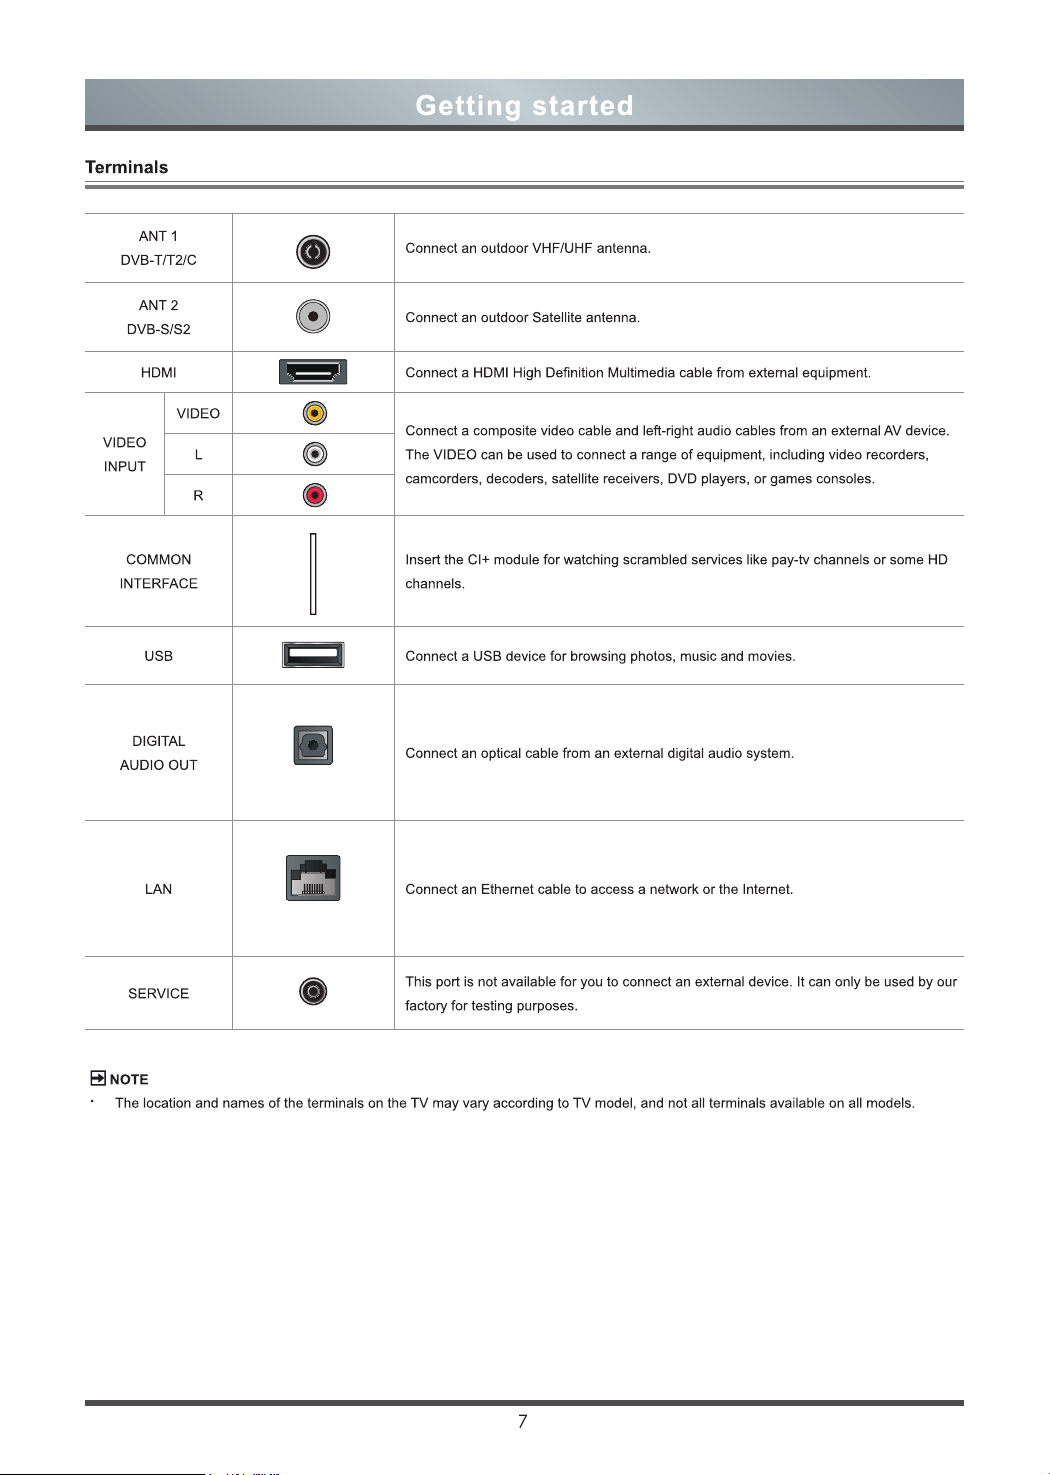
General Operation
Turning the TV on for the First Time
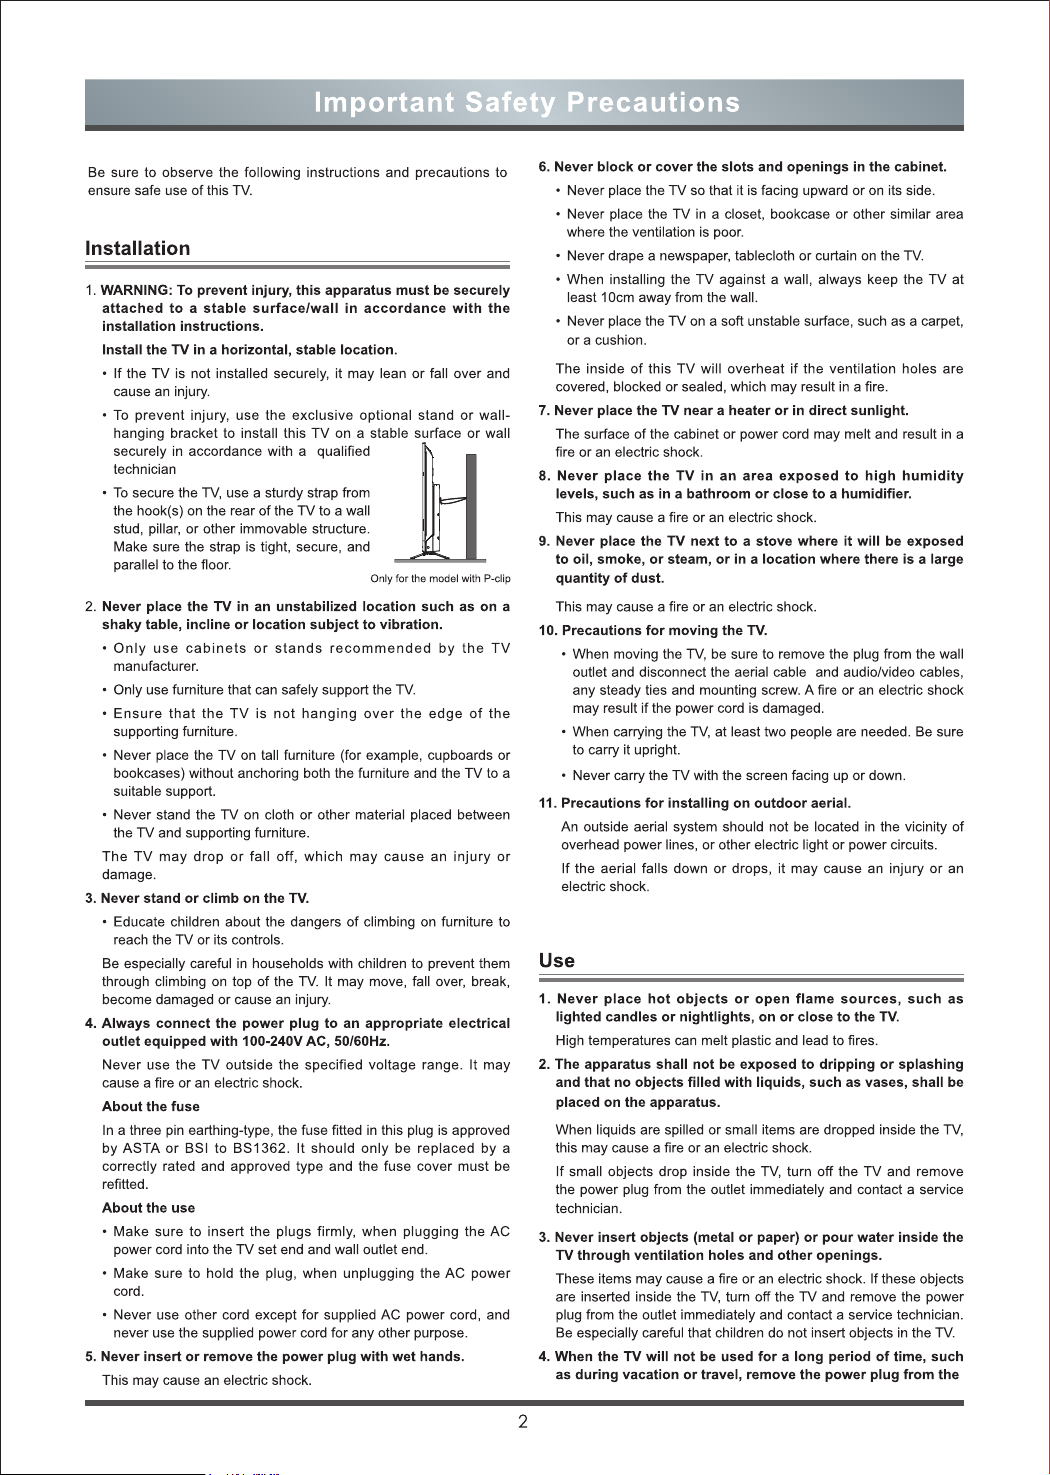
1. Connect the mains cable to the mains socket after you have
completed all the connections.
2. The first time you turn the TV on, it will go straight into the
Installation Guide.
3.
Press the
▲
/
▼
/
◄
/
►
button to navigate the menu and
change the settings. Press the
OK
button to confirm.
Language
Select your desired language to be displayed on the menu.
Country
Select the country where you will operate the TV.
Time Zone
Select the local time zone according to your region.
Disclaimer
Your use of this device and all related services is governed by the
End User License Agreement and relative policies. Please review
these documents carefully and make sure that you have read and
agree to the provisions of the End User License Agreement.
Network Connection
If your TV does not automatically detect an Ethernet connection,
then use a wireless network, select your network from the list that
displays, also you can add a hidden network. When you’re done,
move to the next screen.
Success
Congratulations, you have finished the Wizard setup.
Press “Finish” to use your TV, for retailers press “Store Mode”.
HOME
> Settings > Channel > Auto Scan
Auto Scan
Automatically scan for channels to view programming from your
TV source.
HOME
> Settings > Channel > Advanced Settings >
Manual Scan
DTV Manual Scan
Manual scan TV programme in digital signals.
When the DTV Manual Scan screen appears, press
◄
/
►
button to select Antenna, Cable or Satellite and then press Start
to commence the search of that channel. When the signal has
been tuned, signal strength will be displayed on the screen.
ATV Manual Scan
Manual scan TV programme in analog signals.
Channel Scan
Channel Edit
HOME
> Settings > Channel > Channel Edit
Manually edit the channel list order to your preference.
Edit the channels
Press
OK
button on the selected channel then a checkbox will
appear. You can select more channels at the same time to move
or delete them.
Delete: Press
►
button to delete the selected channel.
Restore: Press [RED] button to enter the list of deleted
channels. Press
◄
button to restore the deleted channel.
Move: Press
◄
button to move the selected channel.
NOTE
Moving the channels could be restricted by the operator. If
you want to be able to move channels, we recommend not to
choose an operator during channel scan and LCN should be set
to Off.
Edit the favorite channels
You can add favorite channels or move/remove favorite
channels.
Export to USB
Allows you to export the current channel list to a USB storage
device.
Import from USB
Allows you to import a previously exported channel list via a
USB storage device.
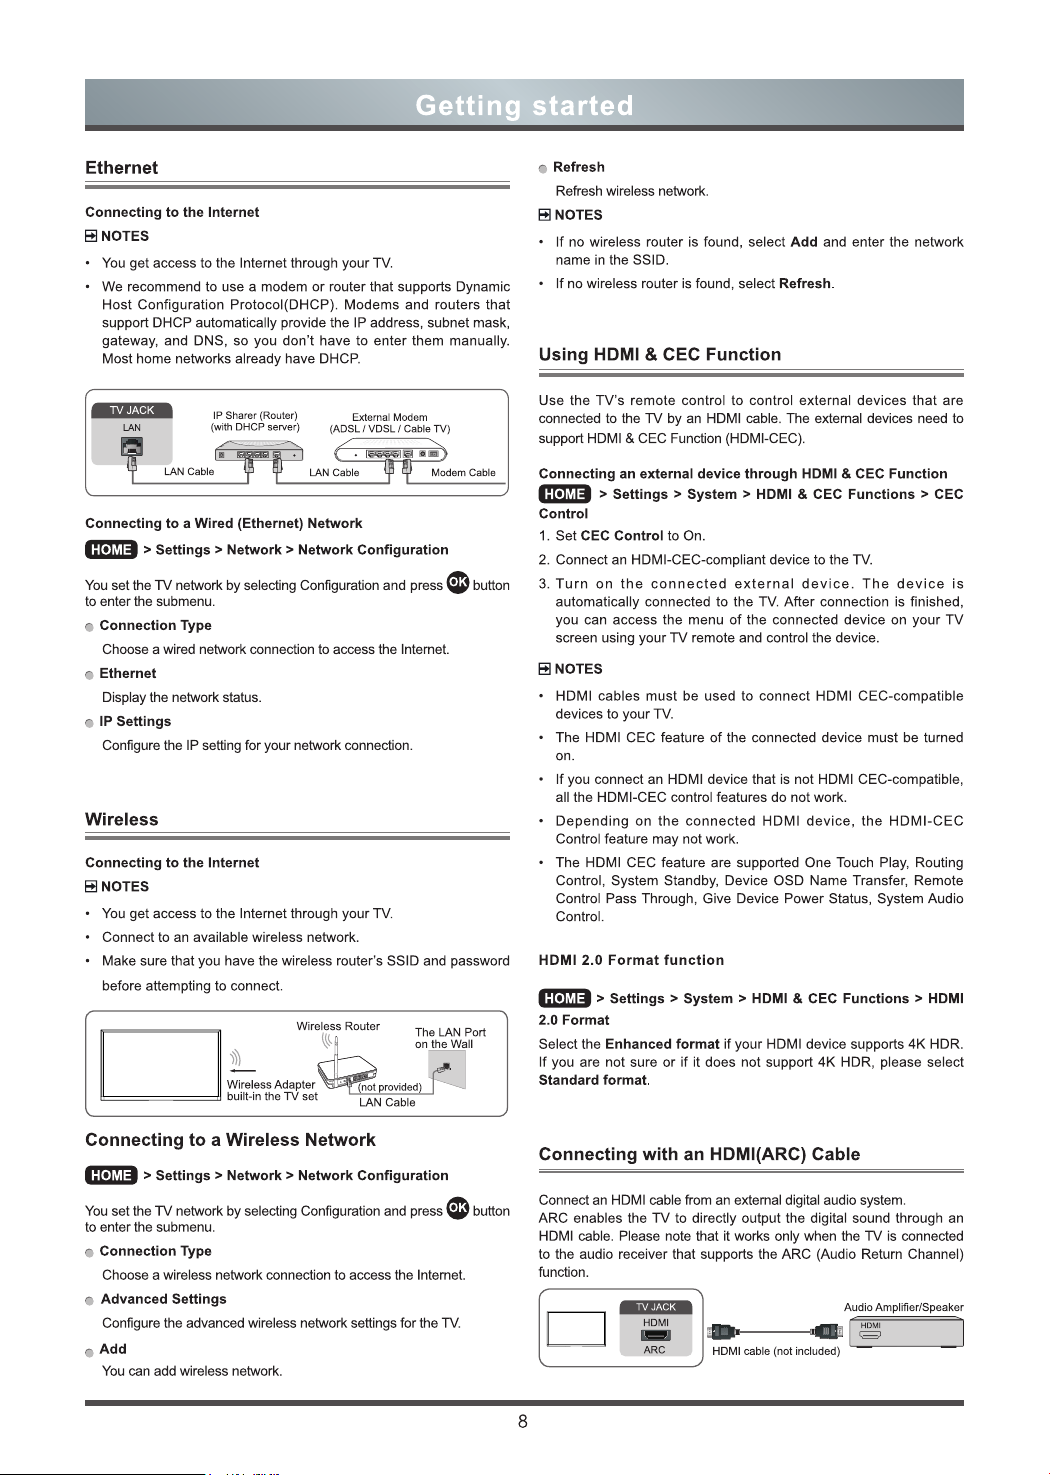
Channel List
Display the channel list
In Live TV, press
OK
or
LIST
button on the remote control
to display the Channel List menu.
Enter the sub-menu of channel list
OK
or
LIST
>
◄
Cable FAV1 FAV2
1 BBC
2 3D-HD
3 DX-HD
CH List Select
Add to Favourite
Channel List
Filter
Search
Edit
Channel list menu
Sub-
menu

13
Favorite
Viewing your ‘Favorites’ list
Press
OK
button to call out the Channel list, the channel list
appears on the right side of the screen, a heart-shaped icon will
appear next to your favorite channel.
Edit the favorite list
There are 2 ways to enter the edit menu
:
OK
or
LIST
˃
◄
˃ Edit > FAV1-FAV4
or
HOME
˃ Settings ˃ Channel ˃ Channel Edit ˃ FAV1-FAV4
The Edit Favorites screen appears.
Adding channels to a Favorites list
Select the Add channels to add the selected channel to the
favorite list.
Moving channels from a favorites list
Select channels in a favorites list, press
◄
button to move the
selected channel.
Deleting channels from Favorites list
Select channels in a favorites list, press
►
button to remove
the selected channel.
NOTE
·
These steps should be operated under TV inputs.
·
Before you edit the fav lists, complete channel scan first.
·
You can add channels from various reception types to the FAV
list.
Introduction of the sub-menu
1.
Channel List
OK
or
LIST
>
◄
> Channel List
·
All
Displays the channels that have been automatically
searched.
·
Favourite List
Displays favourites lists 1 to 4. (Max 4 fav lists can be
added)
·
Add fav list
Add an additional favourite list.
2. Filter
Select channels by content, child lock, scrambled.
3. Search
Quick access to channels.
4. Edit
Edit the channel list.
Guide
It provides convenience to check TV programmes that will be
available in the next 7 days. The information displayed by the Guide
is made available by the commercial television networks for digital
channels only. The Guide also provides a simple way to record your
favorite programmes and a reminder function which can switch
channel automatically at scheduled time so that you do not miss
programmes of interest. (The availability and amount of programme
information will vary, depending on the particular broadcaster).
Press button on the remote control to display channel
information on programme guide list.
Watch
When a current programme is selected, press
OK
button and
then a dialog box pops up, select Watch to watch it in full screen
mode.
PVR/Reminder
Press
▲
/
▼
button to select the channels. Press
◄
/
►
button to select programme based on the time schedule.
Press
OK
button on the remote control to select PVR or
Reminder.
NOTE
·
PVR/Reminder in the Guide is only available for programmes
that haven’t been aired yet.
·
A storage device (space should be no less than 2G, transfer
rate should be no less than 5MB/s) must be attached to the
television for recording purposes.
·
The TV will record the programme even in standby mode.
·
The PVR function is only applicable in certain models.
Page Up/Down
Press
P / P
button to move programme listing page up/
down.
Schedule
Press [RED] button to view a list of scheduled reminders and
recordings.
Programme Colour
Press [GREEN] button on the remote control to choose colours
to indicate different genres in the Guide for quick and easy
viewing.
(This function is only applicable in certain countries/regions.)
24-
Press [YELLOW] button to select the yesterday programmes.
(This function is only applicable in certain countries/regions.)
24+
Press [BLUE] button to select the next day programmes.
General Operation

14
PVR
The PVR function allows you to easily record digital television
content for later viewing. The function is only available in DTV
source. To use PVR, you must connect a USB device for recording.
The format of the storage disk should be NTFS, FAT32, EXT4.
The PVR will not function if a data storage device has not been
connected.
Schedule Recording
Press button, Select the programme to be played, press
OK
button to set the appointment time and period, the reservation is
successful. Press [RED] button to view the schedule recording.
In the schedule recording list, you can readjust the reservation
information that has been set.
Instant Recording
1. Press
▼
button to select PVR
2. Select the partition, and the USB device speed will be
tested(appear when using for the first time) .
3. You can choose to Manual stop or automatically match the
programme time.
Standby record
If you press the power button during recording, TV will go into
standby mode but the recording process is still going on. If
you press power button again and wake up the TV, recording
process will not be affected. After recording, the recorded file
will be automatically saved to the disk.
NOTE
·
The storage space of your USB device should be no less than
2G (for 15 minutes high definition video).
·
If the transfer rate of your hard disk is too slow, a pop-up notice
will appear, in this case, you can try another one.
·
The PVR function doesn’t support analogue channels.
·
The schedule recording function is not available while you are
watching a programme that is currently being broadcast.
·
Some broadcasters may restrict to record the programme.
·
During the recording progress, channels locked with Channel
Lock(password needed) are disabled to watch.
·
The PVR function is disabled for scrambled channels(CI module
needed).
·
The PVR function is only applicable in certain models.
Recording List
Accessing the recording list
See the list of recorded programmes and scheduled recordings.
To enter the recording list
:
MENU
> Recording List
Managing the recording list
MENU
> Recording List > Recorded
You can watch or delete recorded programmes.
Delete the recorded programme
Select Edit and then select recorded programme in recording
list, press
►
button to remove the recorded programme. Or
you can press
▼
˃ Recorded Files, select the programmes
you want to delete, then press [RED] button to delete.
Watch
Select recorded programme in recording list, press
OK
button
to watch the recorded programme.
Managing the schedule recording list
MENU
> Recording List > Scheduled
You can change scheduled recording information or cancel
scheduled recordings.
Delete the scheduled programme
Select Edit and then select scheduled programme in schedule
list, press
►
button to remove the scheduled programme.
Edit scheduled programme
Select scheduled programme in schedule list, press
OK
button to
adjust the scheduled programme.
NOTE
·
The Recording List function is only applicable in certain models.
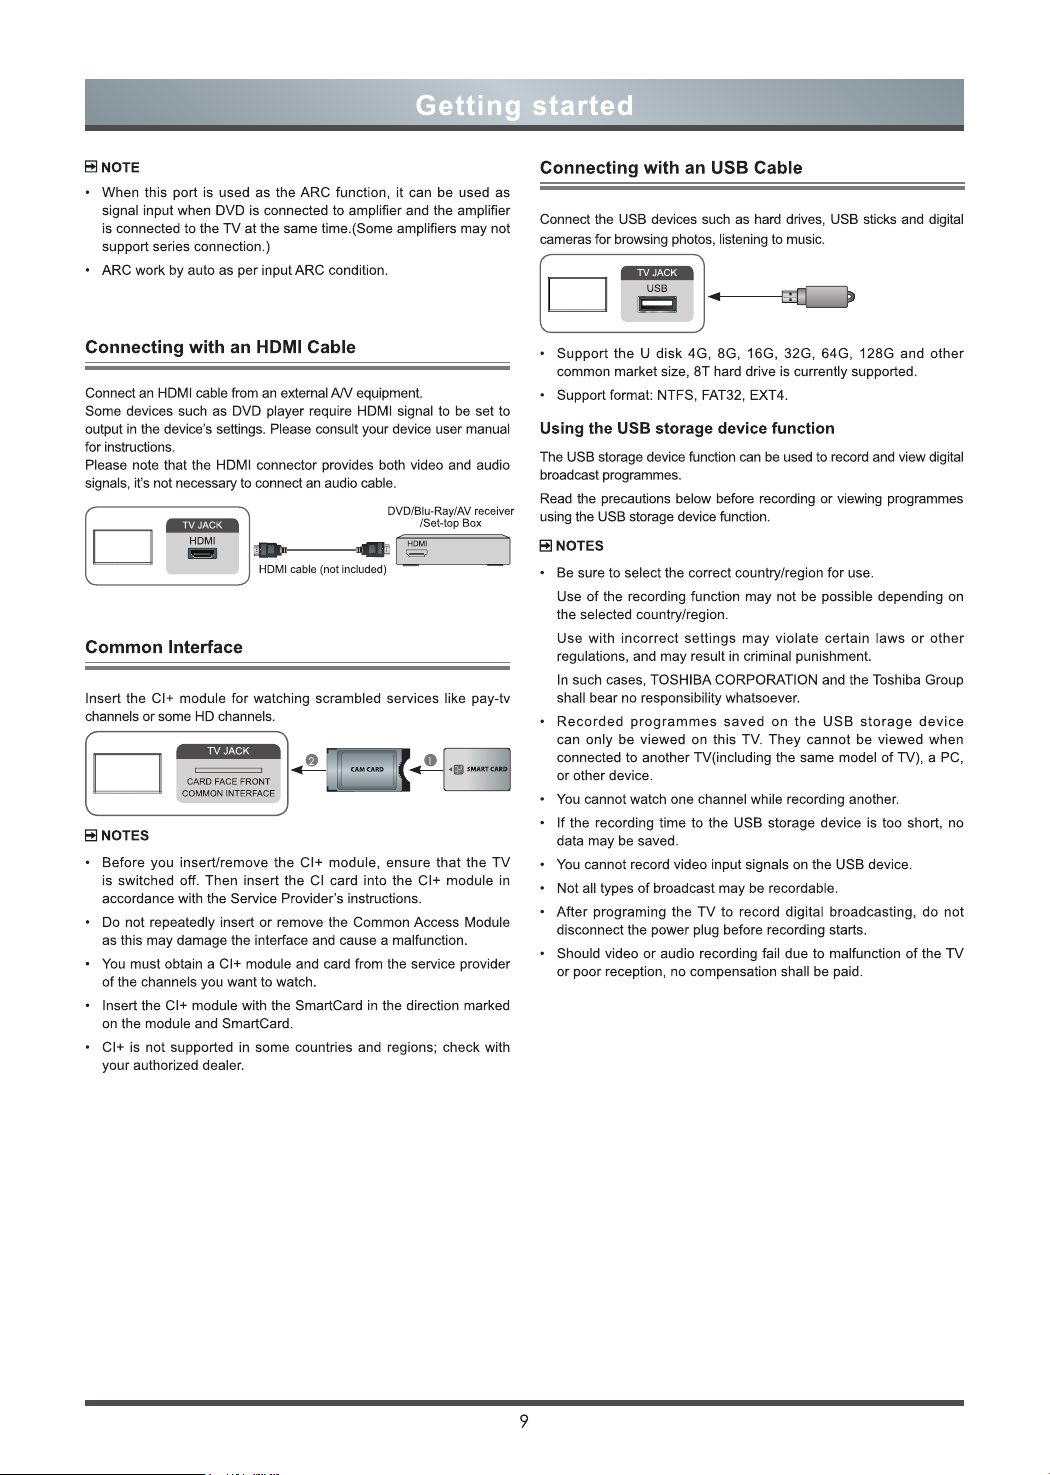
Timeshift
This option allows you to pause and rewind live TV. This function
operates by recording temporarily to a storage device. Please
ensure your storage device is connected and there is enough free
disk space. Otherwise the recording will not commence.
Press
▼
button on the remote control to select T.Shift and then the
menu will appear, press
button to pause the live broadcast
and press
►
button to play. Press button to watch
reverse and press
button to watch advance playback rapidly.
Press
button to exit the function and watch the current
broadcast.
NOTE
·
The T.Shift function doesn’t support analogue channels.
·
The storage space of the USB device should be no less than
1G.
·
The Timeshift function is only applicable in certain models.
T.Shift
- 00:00:13
00:00:16 / 00:03:22
Current time
Pause/Play Stop Timeshift
Rewind forward
Fast forward
Total time
Rewind time
General Operation

15
General Operation
Adjusting the Picture Quality
Adjust current picture mode to apply to all sources or just
current source.
Choosing a picture mode
HOME
˃ Settings ˃ Picture > Picture Mode
You can select the Picture Mode that provides the best
viewing experience.
Standard
Best suited for watching normal content e.g. News,
Drama or Documentary.
Dynamic
Best suited for the content that requires vivid picture
quality.
Cinema day
Best suited for watching movies in a bright environment.
Cinema night
Best suited for watching movies with dark environment.
Changing the picture size
HOME
˃ Settings ˃ Picture > Aspect Ratio
You can change the size of the picture displayed on the TV
screen.
Automatic
Automatically switch Aspect Ratio between 16:9 and 4:3
based on the signal information.
16:9
Best suited for 16:9 Widescreen content. This will also
stretch 4:3 content to Widescreen.
4:3
Best suited for 4:3 content.
Panoramic
Provides a full screen image by stretching the edges
whilst leaving the middle untouched.
Movie Zoom
Provides a full screen image by zooming in on the movie.
Direct
Point to point display also known as 1:1 Pixel Mapping.
NOTE
·
Using the special functions to change the size of the
displayed image(e.g. changing the height/width ratio)
for the purpose of public display or commercial gain may
infringe on copyright laws.
·
If the aspect ratio of the selected format is different from
the one of the TV transmission or video programme, it
can cause a difference in vision.
·
When using PC connected via HDMI terminal, the moving
image quality may be deteriorated.
Configuring advanced picture settings
HOME
˃ Settings ˃ Picture > Picture Mode Settings
You can select the Picture Mode that provides the best
viewing experience.
Backlight
Set the overall brightness of the screen.
Brightness
Adjust the Brightness level to generate lighter or darker
images.
Contrast
Adjust the Contrast level to increase or decrease how
bright images appear.
Colour Saturation
Adjust the colour intensity of the picture for a more
vibrant image.
Sharpness
Adjust how sharp or soft edges of images appear.
Game Mode
Best suited for PC or Games console. Reduces Input Lag
and improves responsiveness.
(This function is only applicable in certain models.)
Adaptive Contrast
Automatically darken dark areas and lighten light areas of
images to see more details.
Noise Reduction
Improve how clear the picture appears by reducing noise.
MPEG Noise Reduction
Reduces MPEG block noise and provides clearer edge
transitions.
Colour Temperature
Adjust how warm(red) or cool(blue) the white areas of an
image appears.
Colour Tuner
Adjust the Hue, Saturation and Brightness of colour
settings.
White Balance
Adjust the intensity of red, green and blue lights to view
the true colours of all images in the picture.
Black Level
Adjust the HDMI signal range to be more suitable for the
content.
Gamma Adjustment
Adjust the Gamma to choose how the TV will respond to
the content grayscale. In a dark room choose a Higher
number like 2.2. In a brighter area select a Lower number
like 2.0. In general, 2.4 is normally recommended.
Gamma Calibration
Adjust selected Gamma curve.
16
RGB Only Mode
View images based on default settings or choose the
colour red, blue or green.
Restore Current Picture Mode Settings
Restore all the picture settings in the current picture
mode to the factory default values.
Overscan
Change the video size settings to slightly crop the edges
of the displayed image.
(This function is only applicable in some countries/
regions.)
Adjusting the Sound Quality
Adjust current sound mode to apply to all sources or just
current source.
Choosing a sound mode
HOME
˃ Settings ˃ Sound > Sound Mode
You can select a favourite sound mode suitable for the
content type or the listening environment.
Standard
In Standard mode, the TV delivers a flat frequency
response, which preserves the natural characteristics of
the original sound.
Theatre
Theatre mode increases the surround sound effect and
provides a more prominent subwoofer response.
Music
In Music mode low and high frequencies are emphasized
to enhance musical instrument reproduction.
Speech
In Speech mode low and high frequencies are attenuated
to improve the reproduction and clarity of the human
voice.
Late Night
In Late Night mode, the TV will improve the reproduction
and clarity of the human voice with a low volume level.
Configuring advanced sound settings
HOME
˃ Settings ˃ Sound > Advanced Audio Settings
You can personalize the sound quality by adjusting the
following settings.
Bass Boost
Bass Boost uses DTS TruBass to enhance the
perception of bass frequencies to provide deep, rich bass
response from the TV’s internal speakers.
Sound Surround
Surround sound uses DTS TruSurround to deliver an
immersive surround sound experience from the TV’s
internal speakers.
Dialog Clarity
Dialog Clarity uses DTS Dialog Clarity to boost the
frequency range of the human voice so dialog is clearly
understood and heard above audio or surround effects.
Equalizer
Boost the volume at different frequencies.
Wall Mount Setup
Automatically optimize the sound based on the position of the
TV.
Restore Default Audio Settings
Restore all of the audio settings in the current audio mode to the
factory default values.
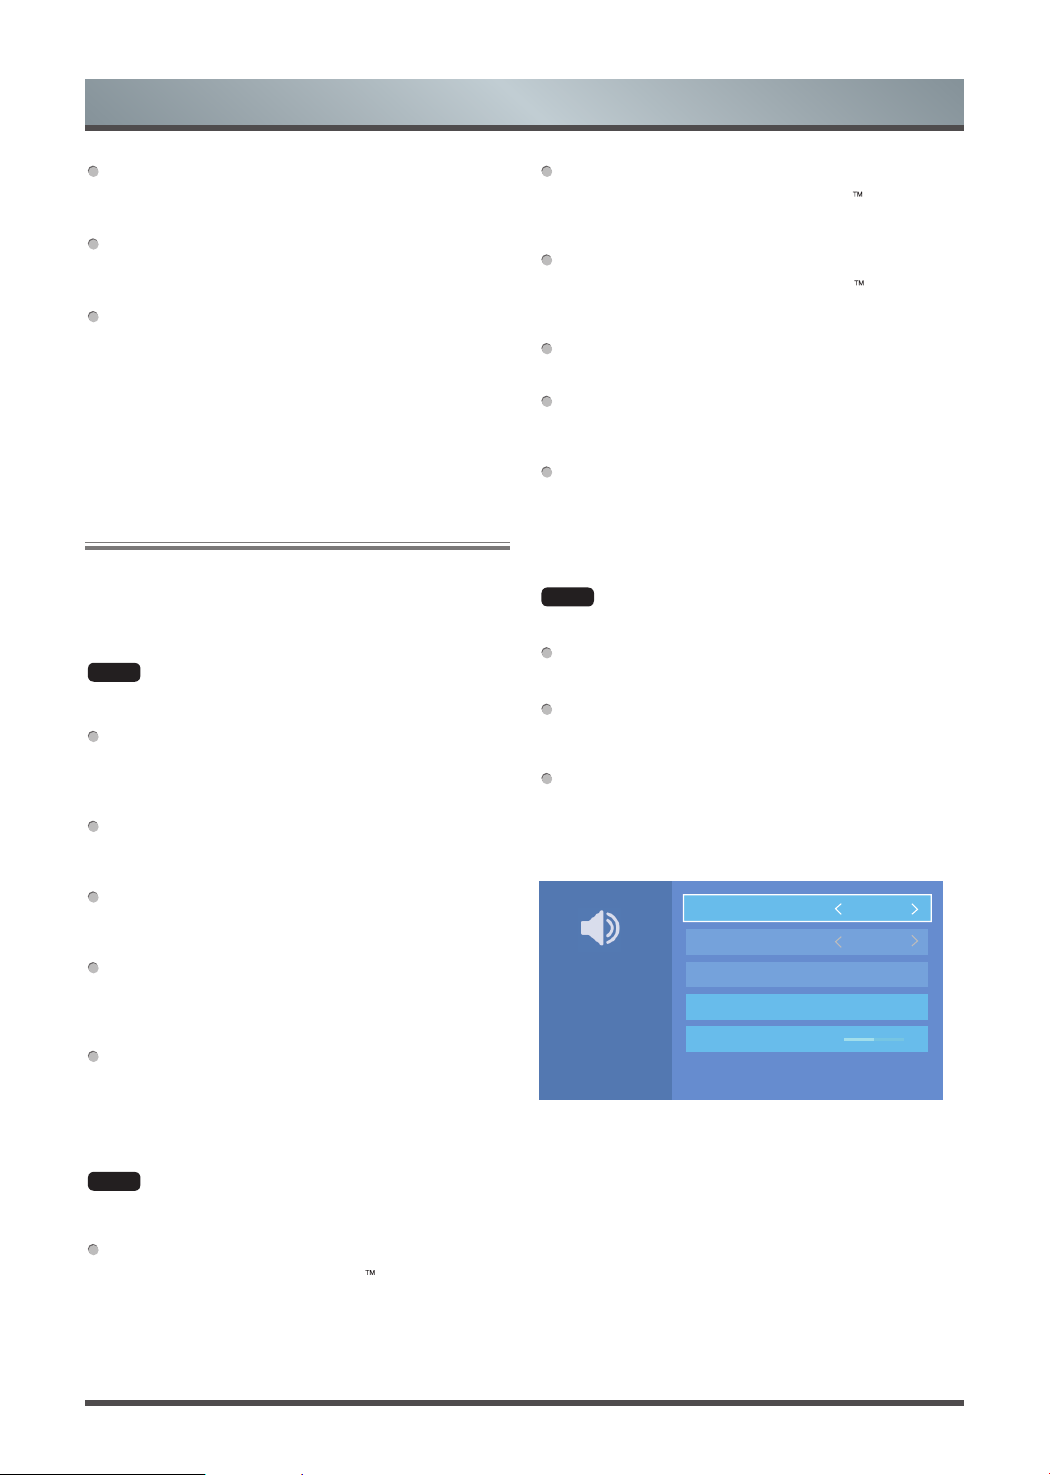
Select your speaker
HOME
˃ Settings ˃ Sound > Speakers
Select the speakers which you want to use.
TV Speaker
TV Speaker mode only for TV speaker.
SPDIF
For external output such as SPDIF, need to change option from
TV Speaker or ARC to SPDIF.
ARC
ARC work by auto as per input ARC condition.
General Operation
0
Speakers
TV Speaker
Digital Audio Out
Digital Audio Delay:0
PCM
Lip Sync:3
Balance
Select the speakers which
you want to use.
Sound
17
Using Set Time
HOME
˃ Settings ˃ System > Time
Set the current time based on your location.
Time Format
Set the time to display in a 12 or 24-hour format.
Date/Time
Set the Date and Time. You can set the date and time
to automatically sync with Internet/broadcast or manual
setup by yourself.
Time Zone
Select your time zone.
Daylight Savings
Select whether to apply Daylight Savings Time to the TV.
Using the Timer
HOME
˃ Settings ˃ System > Timer Settings
Adjust the timer settings to suit your preference.
Sleep Timer
Set the sleep timer to automatically turn the TV Off within
a specified time: Off, 15 Minutes, 30 Minutes, 60 Minutes,
90 Minutes, 120 Minutes or User define.
Power On Timer
Set the clock for the time you want the TV to turn on
automatically. You can set the time only once or set the
time in specified date by weekly.
Power Off Timer
Set the clock for the time you want the TV to turn off
automatically. You can set the time only once or set the
time in specified date by weekly.
Menu Timeout
Set the amount of time that you would like for the menu
to display: Off, 10s, 20s, 30s, 60s.
Auto Sleep
Set the amount of time that you would like for TV auto
power off without any activity: Off, 3H, 4H.(This function
is only applicable in some countries/regions.)
Notications
HOME
˃ Settings ˃ System > Advanced Settings >
Notifications
Allow pop-up notifications to appear for useful information
and events that occur with your TV, including: Advertising,
New Arrivals, Warnings And Legal Statements and
System message. You can enable / disable each of these
notifications.
HOME
˃ Notifications
You can view the list of event messages generated by the
TV.
NOTE
To delete all notifications, select Clear All.
Using Upgrade
HOME
˃ Settings ˃ Support > System Update
Set your TV to receive the latest firmware.
Check Firmware Upgrade
Check to ensure that your TV has received the latest
firmware.
NOTE
Please ensure your TV is connected to the Internet.
Check OAD Upgrade
Check to ensure that your TV has received the latest
firmware via the tuner.
NOTE
·
Please ensure your TV is connected to the Internet.
·
This function is only applicable when UK is selected in
Location.
Upgrade from USB
Upgrade TV software from USB device.
NOTE
·
Please ensure the USB flash drive insert to USB2.0
port of the TV.
·
The updating files must be available in root directory.
·
The format of the USB must be FAT32 and the partition
table type must be MBR.
General Operation
Clear All
Press
[RED] button
18
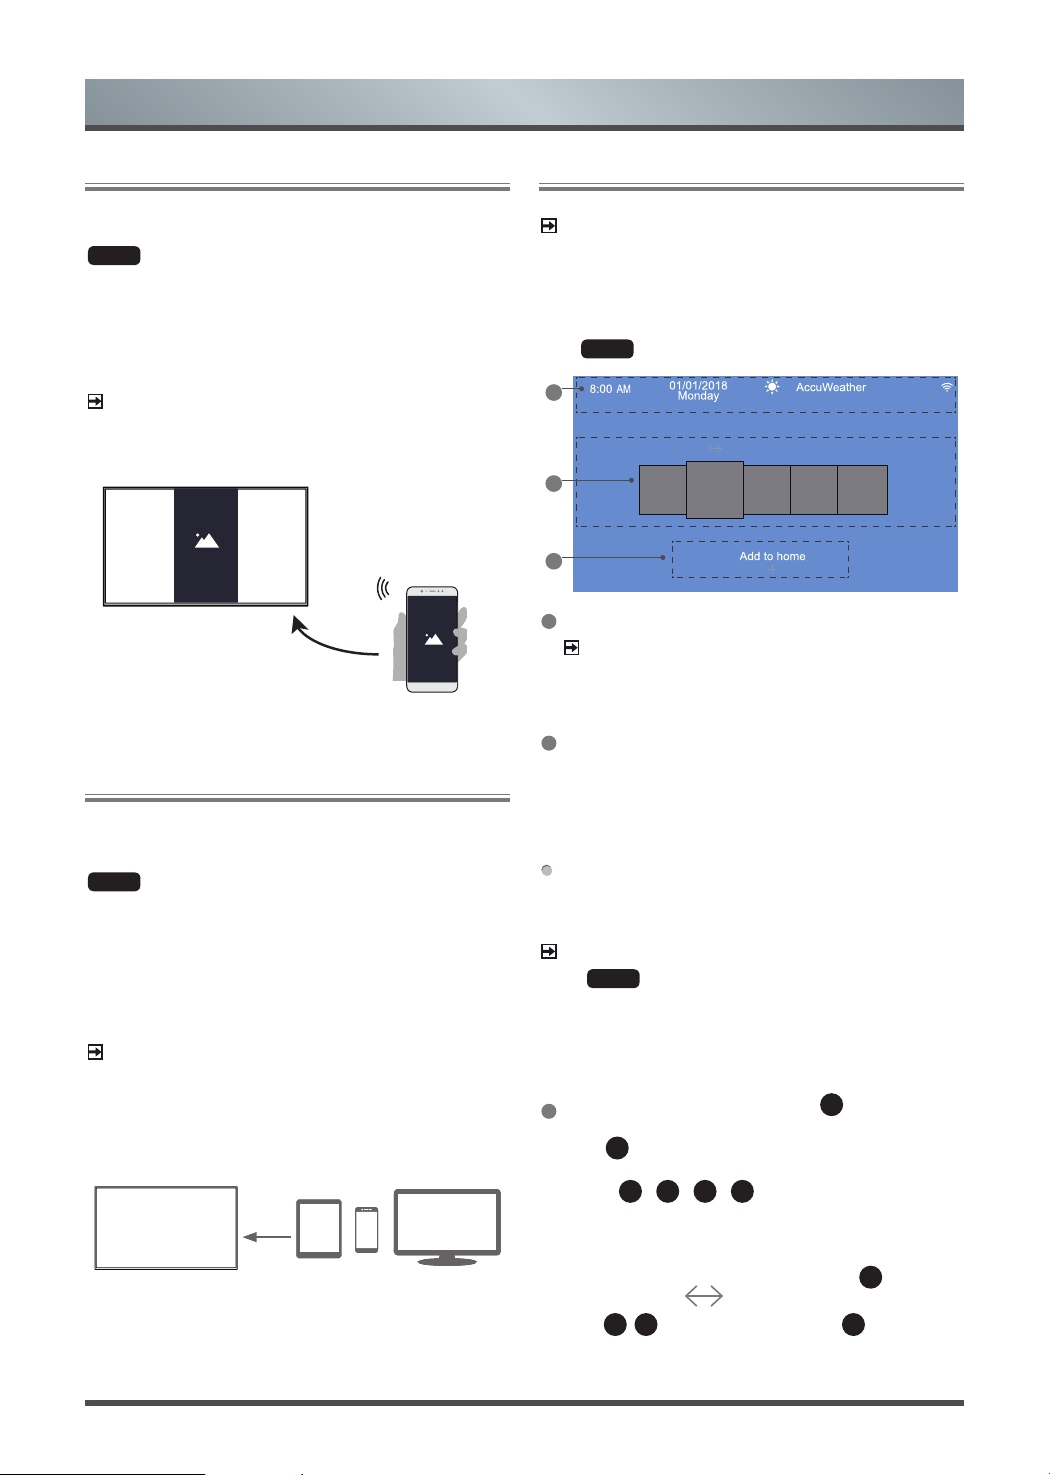
Screen Mirroring
Mirror content from your Android device to the TV.
HOME
˃ Inputs ˃ Screen Mirroring
1.
Turn on the casting function of your Android device.
2. Find the TV name in the searching list of your device and select
it.
Wait for the connection progress to complete and the content on
your device will be displayed on the TV.
NOTE
Some Android devices may not support casting.
Anyview Stream
Share video, music or pictures from your Android/ios/PC device to
the TV screen.
HOME
˃ Settings ˃ System ˃ Application Settings ˃
Anyview Stream
1. Turn on the contents sharing function of your Android/ios/PC
device.
2. Find the TV name in the searching list of your device and select
it.
Wait for the connection progress to complete and select content
you want to share.
NOTE
·
TV and your Android/ios/PC device need to connect to the same
network.
·
Some devices may not support contents sharing function. If your
device doesn’t support contents sharing, you can download an
app that supports the function.
Getting Familiar with the Home Screen
NOTE
The image is only for reference and may be different from the
image on your TV.
Run the TV more conveniently by selecting the corresponding
sections.
Press
HOME
button
2
3
1
2
3
1
Display weather and system level information.
NOTE
To display the local weather information correctly, TV must be
connected to the Internet.
2
By default, display Notifications, Apps, Inputs, Media,
Settings. But in some countries/regions, the TV may be preset
local special applications on the Home screen.
Notifications
Allow pop-up notifications to appear for useful information and
events that occur with your TV.
Select
Notifications on the Home screen, and then display
Advertising, New Arrivals, System message, Warnings And
Legal Statements only when starting the TV for the first time.
Choose the types of notifications you would like to receive.
NOTE
·
By
HOME
˃ Settings ˃ System ˃ Advanced Settings ˃
Notifications, you can also choose which types of notifications
you would like to receive.
·
For more information about Apps, Inputs, Media, Settings,
refer to the detailed introduction of each part.
3
Entering the home screen, press the
▼
button, and then
display the tip Add to home.
Press
▼
button again, and then display Add an input, Add
an app, Add a channel.
Use the
▲
/
▼
/
◄
/
►
button to select an input, or an
app, or a channel that you prefer to use frequently.and press ok
Move an app, or an input, or a channel within the
Home screen
1.
Select the item you want to move, press the
▲
button, and
then display the tip
.
2.
Press
◄
/
►
button to move it. then press
▼
or ok
Smart Functions
Mirror content from
your Android device
19
Smart Functions
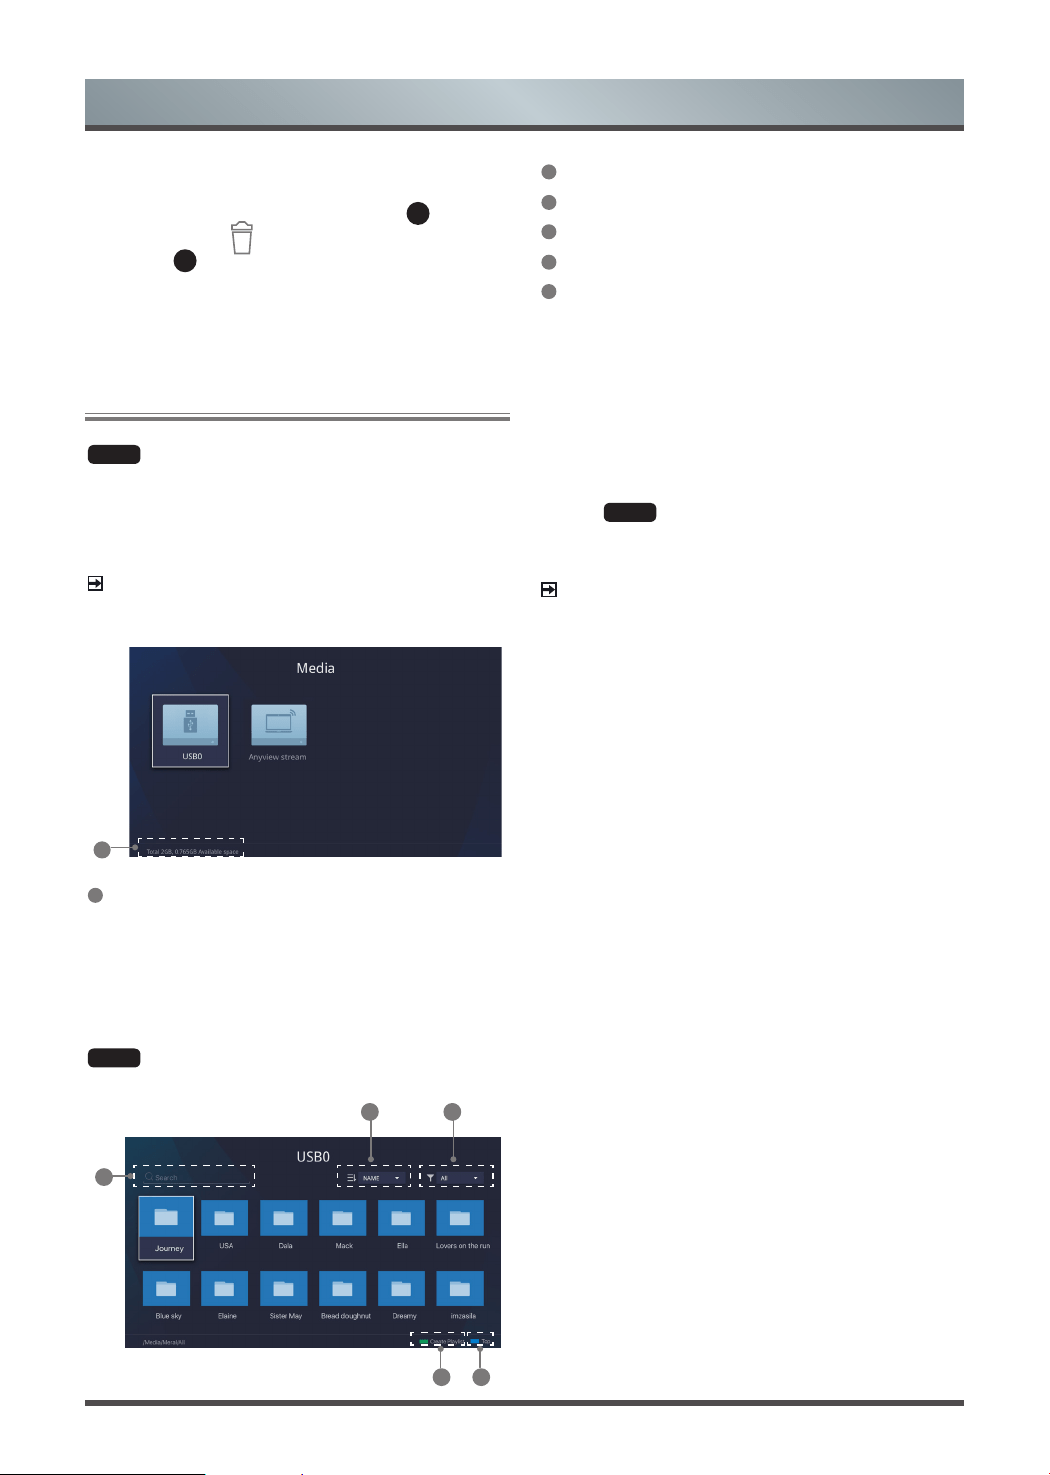
Playing Media Contents
HOME
˃ Media
Play multimedia contents stored on your TV, smartphones, USB
devices, cameras, PCs, etc.
By default, there is Anyview Stream displayed on the Media
screen. If your mobile device is connected to the TV, its name also
appears on the Media screen.
NOTE
For more information about Anyview Stream, refer to its detailed
introduction.
1
1
Display the total memory and available space of connected
device.
You must obtain any required permission from copyright owners to
download or use copyrighted content. TOSHIBA cannot and does
not grant such permission.
HOME
˃ Media > connected device
Select the content you want to play on the screen, like pictures,
videos and music.
1
2 3
45
Delete an app, or an input, or a channel from the
Home screen
1.
Select the item you want to delete, press the
▲
button, and
then display the tip
.
2.
Press the
▲
button twice constantly, and it will be deleted.
1
Input the content name you want to play.
2
Arrange the content list by Name, Date modified, Size.
3
Filter the content list by All, Photo, Music, Video.
4
Back to the top.
5
Create a photo, music, or video playlist.
1. Press [GREEN] button to create a playlist.
2. Select photo / music / video that you want to play.
3. Press [GREEN] button to play the list you have created.
Playing background music during viewing pictures
1. Create a music playlist as described above and press [BLUE]
button to save the playlist.
2. Choose a picture to playback.
3.
Press
MENU
button.
4. Set Background music to on.
NOTE
·
For more information about connection to PC/mobile device,
refer to the detailed introduction of each part.
20
Self Diagnosis
Troubleshooting
The Problem Possible Solutions
No picture, or
black and white
picture.
·
Unplug TV from AC outlet and re-plug after
60 seconds.
·
Check that the Colour Saturation is set to
50 or higher.
·
Try different TV channels.
The picture is
distorted.
·
The compression of video content may
cause picture distortions, especially in fast
moving pictures from sports programmes
and action movies.
·
If the signal reception is weak or poor,
screen distortion may be visible but it is not
a malfunction.
·
Mobile phones used close to the TV (within
1m) may cause noise on analogue and
digital channels.
Diagnose issues with your TV
HOME
˃ Settings ˃ Support ˃ Self Diagnosis
Use the Picture Test to help diagnose video issues and the
Sound Test to diagnose sound issues. You can also view
signal strength information for over-the-air digital signals by
using the Network Test and the Input Connection Test.
Picture Problem
When the TV has trouble with the picture, these steps may
help resolve the problem.
Picture Test
HOME
˃ Settings ˃ Support ˃ Self Diagnosis ˃ Picture
Test
Before you review the list of problems and solutions below, use
Picture Test to determine if the problem is caused by the TV.
Picture Test displays a high definition picture that you can
examine for flaws or faults.
NOTE
·
If the test picture does not appear or there is noise or distortion,
the TV may have a problem. Contact the service company in
your country/region.
·
If the test picture is displayed properly, there may be a problem
with an external device. Please check the connections.
·
If the problem persists, check the signal strength or refer to the
external device’s user manual.
The Problem Possible Solutions
There is no
sound or the
sound is too low
at maximum
volume.
·
Check the volume control of the device
(cable or satellite box, DVD, Blu-ray, etc.)
connected to your TV.
Picture is normal,
but no sound.
·
Check the volume settings.
·
Check if ‘Mute’ mode is set to on.
The speakers
are making an
odd sound.
·
Make sure that the audio cable is connected
to the correct audio output connector on the
external device.
·
For antenna or cable connections, check the
signal information.
·
A low signal level may cause sound
distortions.
Sound Problem
When the TV has difficulties with sound, these steps may help
resolve the problem.
Sound Test
HOME
˃ Settings ˃ Support ˃ Self Diagnosis ˃ Sound
Test
If the TV plays the Sound Test melody without distortion, there
may be a problem with an external device or the broadcast signal’s
strength.
The Problem Possible Solutions
No sound and
picture.
·
Check if the power cord is plugged into a
powered AC outlet.
·
Press the button in the remote control to
activate the unit from Standby.
·
Check to see if the LED light is on or not. If it
is, then the TV is receiving power.
Picture and Sound Problem
When the TV has difficulties with sound and picture, these steps may
help resolve the problem.
Picture Test
HOME
˃ Settings ˃ Support ˃ Self Diagnosis ˃ Picture
Test
Sound Test
HOME
˃ Settings ˃ Support ˃ Self Diagnosis ˃ Sound
Test
If the Sound Test and Picture Test are normal, there may be a
problem with an external device or the broadcast signal’s strength.
21
Troubleshooting
The Problem Possible Solutions
The TV cannot
connect to your
network or apps.
Make sure the TV has a network connection. .
·
Run Network Test (
HOME
˃ Settings ˃
Support ˃ Self Diagnosis ˃ Network Test ))
·
Contact your Internet service provider.
The wireless
network
connection
failed.
·
Make sure your wireless modem/router is on
and connected to the Internet.
The wireless
network signal is
too weak.
·
Position your wireless router, modem router,
or access point in a central location. Avoid
putting it in a corner.
Internet Problem
When the TV has difficulties connecting to the Internet, these steps
may help resolve the problem.
Network Test
HOME
˃ Settings ˃ Support ˃ Self Diagnosis ˃
Network Test
If the TV network is connected, the screen will display Connected
successfully.
The Problem Possible Solutions
Schedule
Recording
cannot be used.
·
Check if there is a USB device connected to
the TV.
·
Recording will automatically stop if the signal
becomes too weak.
·
Check the free space on the USB device.
The function will not work if there isn’t
enough storage space on the USB device.
Recording/Timeshift Function Isn’t Working
When Timeshift or Schedule recording aren’t working, these steps
may help resolve the problem.
NOTE
·
The Recording/Timeshift functions are only applicable in certain
models.
The Problem Possible Solutions
I have connected
an external
source to my
TV but I get no
picture and/or
sound.
·
Check the correct connection on the external
source and the input connection on the TV.
·
Make sure you have made the correct
selection for the input mode for the incoming
signal.
Sound and
picture distorted
or appear wavy.
·
Some electrical appliances may affect TV
set. If you turn off the appliance and the
interference goes away, then move it further
away from TV.
·
Insert the power plug of the TV set into
another power outlet.
Sound and
picture is blurry
or cuts out
momentarily.
·
If you use an external antenna, check the
direction, position and connection of the
antenna.
·
Adjust the direction of your antenna or reset
or fine tune the channel.
The Problem Possible Solutions
Some files can't
be played.
·
This problem may occur with high-bitrate
files. Most files can be played back, but you
might experience problems with high-bitrate
files.
My File Won’t Play
When files aren’t playing, this may help resolve the problem.
The Problem Possible Solutions
The TV is hot.
·
Watching TV for an extended period of time
causes the panel to generate heat. The
heat from the panel is dissipated through
internal vents running along the top of the
TV. However, after extended use, you may
feel hot when touch it. This heat, however,
is not a defect and does not affect the TV’s
functionality.
The TV smells of
plastic.
·
This smell is normal and will dissipate over
time.
The plastic
cabinet makes a
“clicking” type of
sound.
·
The ‘click’ sound can be caused when the
temperature of the television changes. This
change causes the television cabinet to
expand or contract, which makes the sound.
This is normal and the TV is OK.
Other Issues
Use these procedures to resolve other issues that may occur.
22
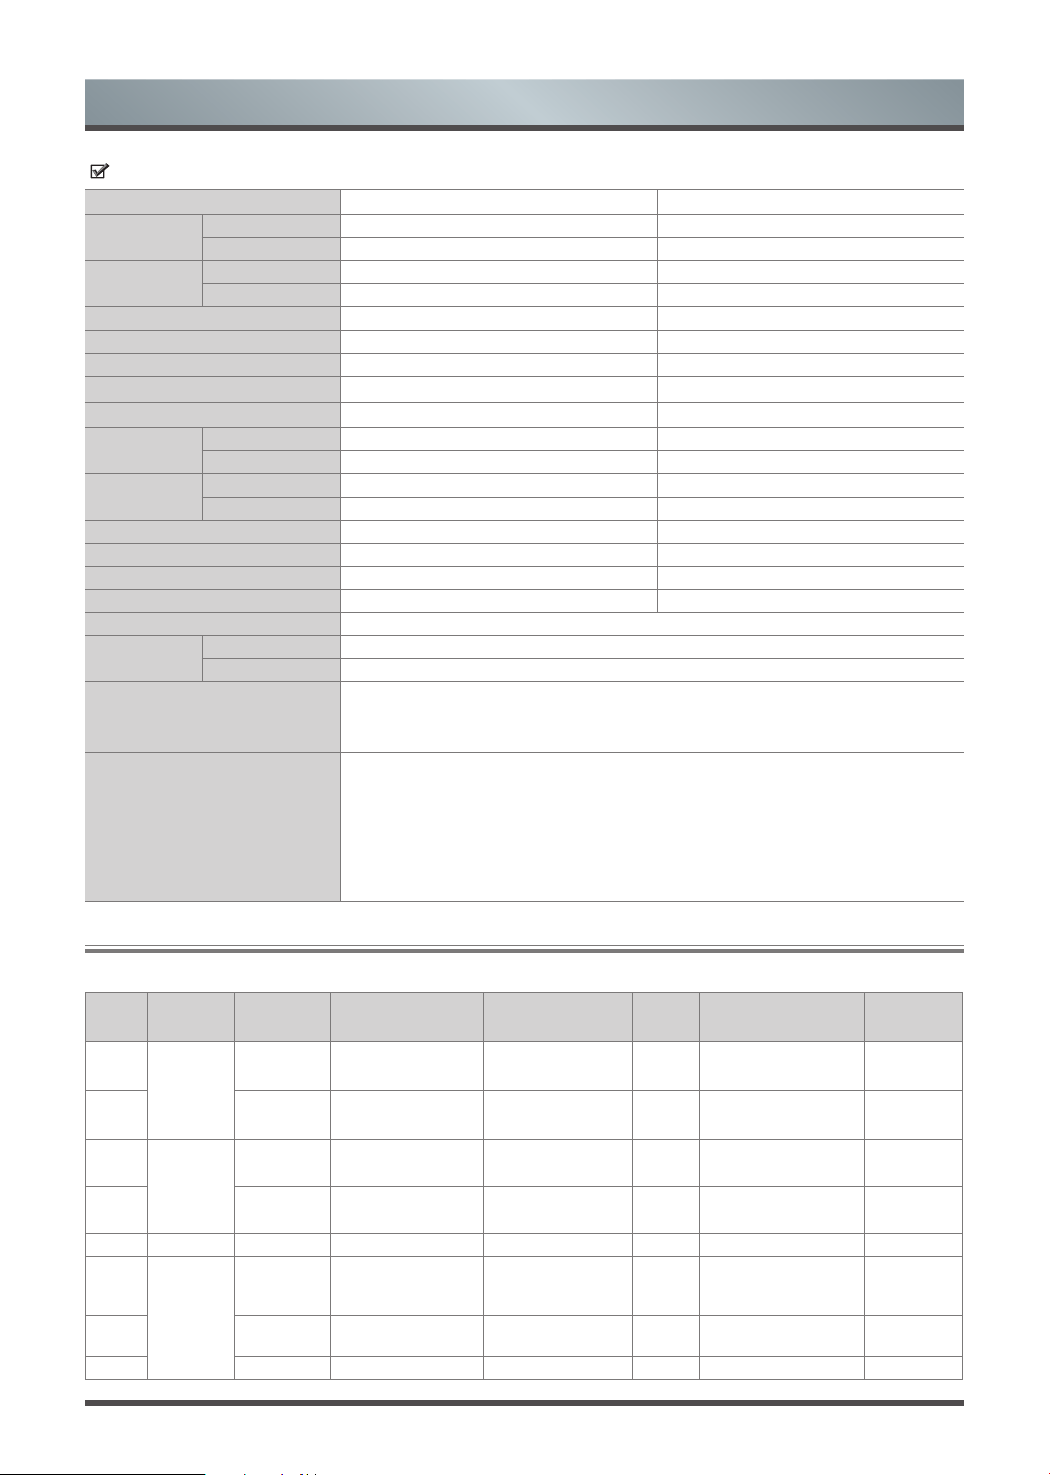
Specifications
Features, appearance and specifications are subject to change without notice.
Item
43" 50”
Dimension
(W × H × D)
Without Stand 970 × 573 × 71 mm 1127 × 661 × 73 mm
With Stand 970 × 609 × 208 mm 1127 × 700 × 258 mm
Weight
Without Stand 7.9 kg 11.7 kg
With Stand 8.2 kg 12.0 kg
Active Screen Size (Diagonal) 108 cm 126 cm
Screen resolution 3840 × 2160 3840 × 2160
Audio power 8W + 8W 12W + 12W
Item
55" 65”
Dimension
(W × H × D)
Without Stand 1242 × 726 × 73 mm 1460 × 847 × 76 mm
With Stand 1242 × 764 × 258 mm 1460 × 904 × 289 mm
Weight
Without Stand 14.0 kg 19.6 kg
With Stand 14.3 kg 20.1 kg
Active Screen Size (Diagonal) 138 cm 163 cm
Screen re
solution 3840 × 2160 3840 × 2160
Audio power 12W + 12W 18W + 18W
Power consumption 150W
Power supply 100-240V~50/60Hz
Receiving
systems
Analog PAL-D/K, B/G, I, SECAM-D/K, B/G
Digital DVB-T/T2, DVB-C, DVB-S/S2
Environmental conditions
Temperature: 5°C - 45°C
Humidity: 20% - 80% RH
Atmospheric pressure: 86 kPa - 106 kPa
HDMI Input
RGB / 60 Hz (640×480, 800×600, 1024×768)
YUV / 60 Hz (480 I, 480 P, 720 P, 1080 I, 1080 P)
YUV / 50Hz (576 I, 720 P, 1080 I, 1080 P)
3840×2160 / 24Hz
3840×2160 / 25Hz
3840×2160 / 30Hz
3840×2160 / 50Hz
3840×2160 / 60Hz
Number Container
Video Codec
(file type)
File Extension Name Sampling rate SPEC Bit Rate Profile Remark
1
MPG
Mpeg1 .dat .mpg.mpeg 1080P @ 30fps 20Mbps Main Profile
Y(.mpg.mpeg)
N(.dat)
2 Mpeg2 .dat .mpg.mpeg 1080P @ 30fps 20Mbps Main Profile
Y(.mpg.mpeg)
N(.dat)
3
MPEG
Mpeg1 .dat .mpg.mpeg 1080P @ 30fps 20Mbps Main Profile
Y(.mpg.mpeg)
N(.dat)
4 Mpeg2 .dat .mpg.mpeg 1080P @ 30fps 20Mbps Main Profile
Y(.mpg.mpeg)
N(.dat)
5 MPEG2 -PS MPEG2 .vob 1080P @ 30fps 20Mbps MPEG2: MP@HL Y
6
MP4
Mpeg4 .mp4 1080P @
30fps 20Mbps
Simple Profile and
Advanced Simple Profile
@Level 5
Y
7 H.264 .mp4 1080P @ 30fps 20Mbps
Main Profile and High
Profile@Level 4.0
Y
8 Motin JPEG .mp4 680X480 @ 30fps 10Mbps Y
Media Format List
Video:
200W
Power consumption
110W
130W
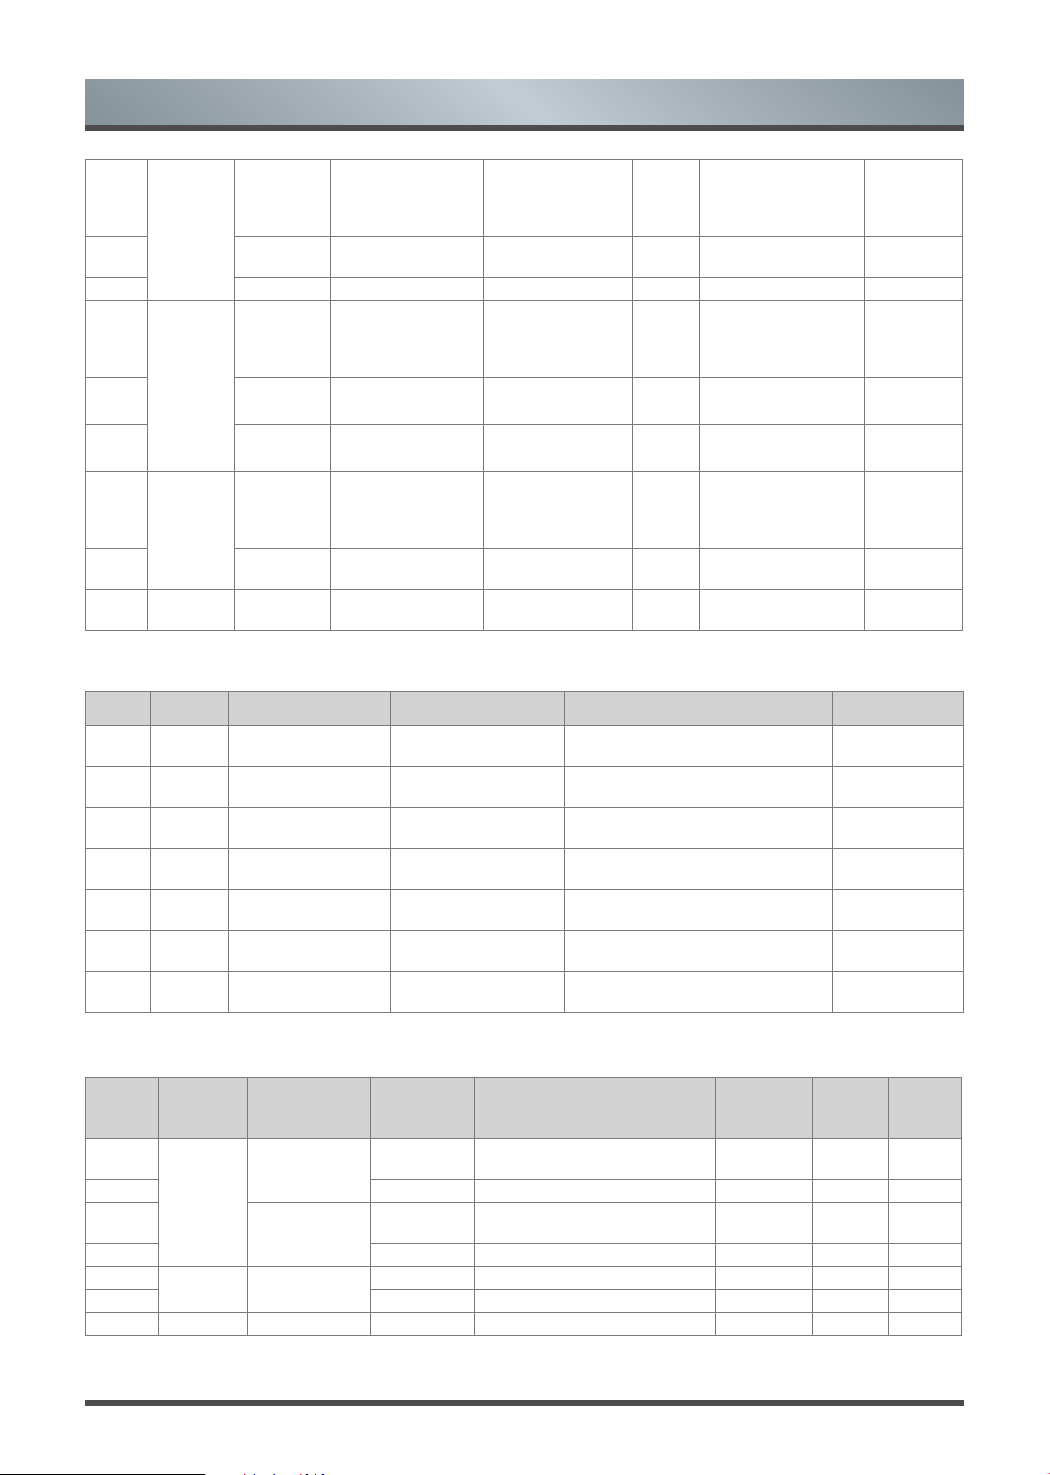
23
Number Container Audio Codec(file type) File Extension Name Bit Rate
Remark
1 MPEG1 Layer2 .MP3
32kbps ~ 448kbps(Bit rate)
32kHz ~ 48kHz(Sampling rate)
8kbps ~
384kbps(Bit rate)
2 MPEG1 Layer3 .MP3
32kbps ~ 320kbps(Bit rate)
32kHz ~ 48kHz(Sampling rate)
Y
3 AAC, HEAAC .m4a.aac
24kbps ~ 384kbps(Bit rate)
8kHz ~ 48kHz(Sampling rate)
Y
4 WMA .wma
Bitrate: 128bps ~ 320kbps
Sampling Rate: 8kHz ~ 48kHz
Y
5 WMA Pro .wma
<768kbps(Bit rate)
Sampling Rate: ~ 96kHz
Y
6 LPCM
N/A
(work with video files only)
Bitrate: 64kbps ~ 1.5Mbps
Sampling Rate: 8kHz ~ 48kHz
Y
7
IMA-ADPCM/MS-
ADPCM
N/A
(work with video files only)
Bitrate: 384kbps
Sampling Rate: 8kHz ~ 48kHz
Y
Audio:
Photo:
9
MKV
Mpeg1,2,4 .mkv 1080P @ 30fps 20Mbps
MPEG2: MP@HL
MPEG4: Simple Profile
and Advanced Simple
Profile @Level 5
Y
10 H.264 .mkv 1080P @ 30fps 20Mbps
Main Profile and High
Profile@Level 4.0
Y
11 Motin JPEG .mkv 680X480 @ 30fps 10Mbps Y
12
AVI
Mpeg2,4 .divx.avi 1080P @ 30fps 20Mbps
MPEG2: MP@HL
MPEG4: Simple Profile
and Advanced Simple
Profile @Level 5
Y(.avi)
N(.divx)
13 H.264 .divx.avi 1080P @ 30fps 20Mbps
Main Profile and High
Profile@Level 4.0
Y(.avi)
N(.divx)
14 Motin JPEG .divx.avi 680X480 @ 30fps 10Mbps
Y(.avi)
N(.divx)
15
ASF
Mpeg2,4 .asf.wmv 1080P @ 30fps 20Mbps
MPEG2: MP@HL
MPEG4: Simple Profile
and Advanced Simple
Profile @Level 5
Y
16 H.264 .asf.wmv 1080P @ 30fps 20Mbps
Main Profile and High
Profile@Level 4.0
Y
17 FLV H.264 .swf.flv 1080P @ 30fps 20Mbps
Main Profile and High
Profile@Level 4.0
Y
Specifications
Number Container
File Extension
Name
Photo Resolution
Required
DRAM size
(Mbytes)
bytes Remark
1
JPEG
.jpeg
Base-line
15360x8640
(1920X8 1080X8)
3.96 414720 Y
2 Progressive 1024x768 6.00 6291456 Y
3
.jpg
Base-line
15360x8640
(1920X8 1080X8)
3.96 414720 Y
4 Progressive 1024x768 6.00 6291456 Y
5
PNG .png
non-interlace 9600x6400 3.66 3840000 Y
6 interlace 1200x800 3.66 3840000 Y
7 BMP .bmp 9600x6400 3.66 3840000 Y
24
• The terms HDMI and HDMI High-Definition Multimedia Interface, and the HDMI logo are trademarks or
registered trademarks of HDMI
licensing Administrator ,Inc. in the United States and other countries.
• DVB is a registered trademark of the DVB Project.
• [1] EIA/CEA-861-D compliance covers the transmission of uncompressed digital video with high-bandwidth digital content protection, which
is being standardized for reception of high-definition video signals. Because this is an evolving technology, it is possible that some devices
may not operate properly with the television.
MP3 licence letter
MPEG Layer-3 audio coding technology licensed from Fraunhofer LLS and Thomson.
MP4 licence letter
THIS PRODUCT IS LICENSED UNDER THE MPEG-4 VISUAL PATENT PORTFOLIO LICENSE FOR THE PERSONAL AND NON-
COMMERCIAL USE OF A CONSUMER FOR (I) ENCODING VIDEO IN COMPLIANCE WITH THE MPEG-4 VISUAL STANDARD (MPEG-
4 VIDEO) AND/OR (II) DECODING MPEG-4 VIDEO THAT WAS ENCODED BY A CONSUMER ENGAGED IN A PERSONAL AND NON-
COMMERCIAL ACTIVITY AND/OR WAS OBTAINED FROM A VIDEO PROVIDER LICENSED BY MPEG LA TO PROVIDE MPEG-4 VIDEO.
NO LICENSE IS GRANTED OR SHALL BE IMPLIED FOR ANY OTHER USE. ADDITIONAL INFORMATION INCLUDING
THAT RELATING
TO PROMOTIONAL, INTERNAL AND COMMERCIAL USES AND LICENSING MAY BE OBTAINED FROM MPEG LA,L.L.C. SEE HTTP://
WWW.MPEGLA.COM
AVC licence letter
THIS PRODUCT IS LICENSED UNDER THE AVC PATENT PORTFOLIO LICENSE FOR THE PERSONAL AND NONCOMMERCIAL USE
OF ACONSUMERTO (I) ENCODE VIDEO IN COMPLIANCE WITH THE AVC STANDARD (“AVC VIDEO”) AND/OR (II) DECODE AVC VIDEO
THAT WAS ENCODED BY A CONSUMER ENGAGED IN A PERSONAL AND NON-COMMERCIAL ACTIVITY AND/OR WAS OBTAINED
FROM A VIDEO PROVIDER LICENSED TO PROVIDE AVC VIDEO. NO LICENSE IS GRANTED OR SHALL BE IMPLIED FOR ANY OTHER
USE. ADDITIONAL INFORMATION MAY BE OBTAINED FROM MPEG LA,L.L.C. SEE HTTP://WWW.MPEGLA.COM
Licence Notification
TRADEMARK ACKNOWLEDGMENT
Manufactured under license from Dolby Laboratories. Dolby and the double-D symbol are trademarks of Dolby Laboratories.
License Information
Disposal of Used Electrical & Electronic Equipment
Packaging and electrical goods should be recycled appropriately, and not treated as household waste. Please
dispose of this equipment at your applicable collection point for the recycling of electrical & electronic equipment
waste. By ensuring the correct disposal of this product, you will help prevent potentially hazardous to the
environment and to human health, which could otherwise be caused by unsuitable waste handling of this product.
The recycling of materials will help conserve natural resources. Please do not therefore dispose of your old electrical
and electronic equipment with your household waste. For more detailed information about recycling of this product,
please contact your local city office, your household waste disposal serv
ice or the shop where you purchased the
product.