Loading ...
Loading ...
Loading ...
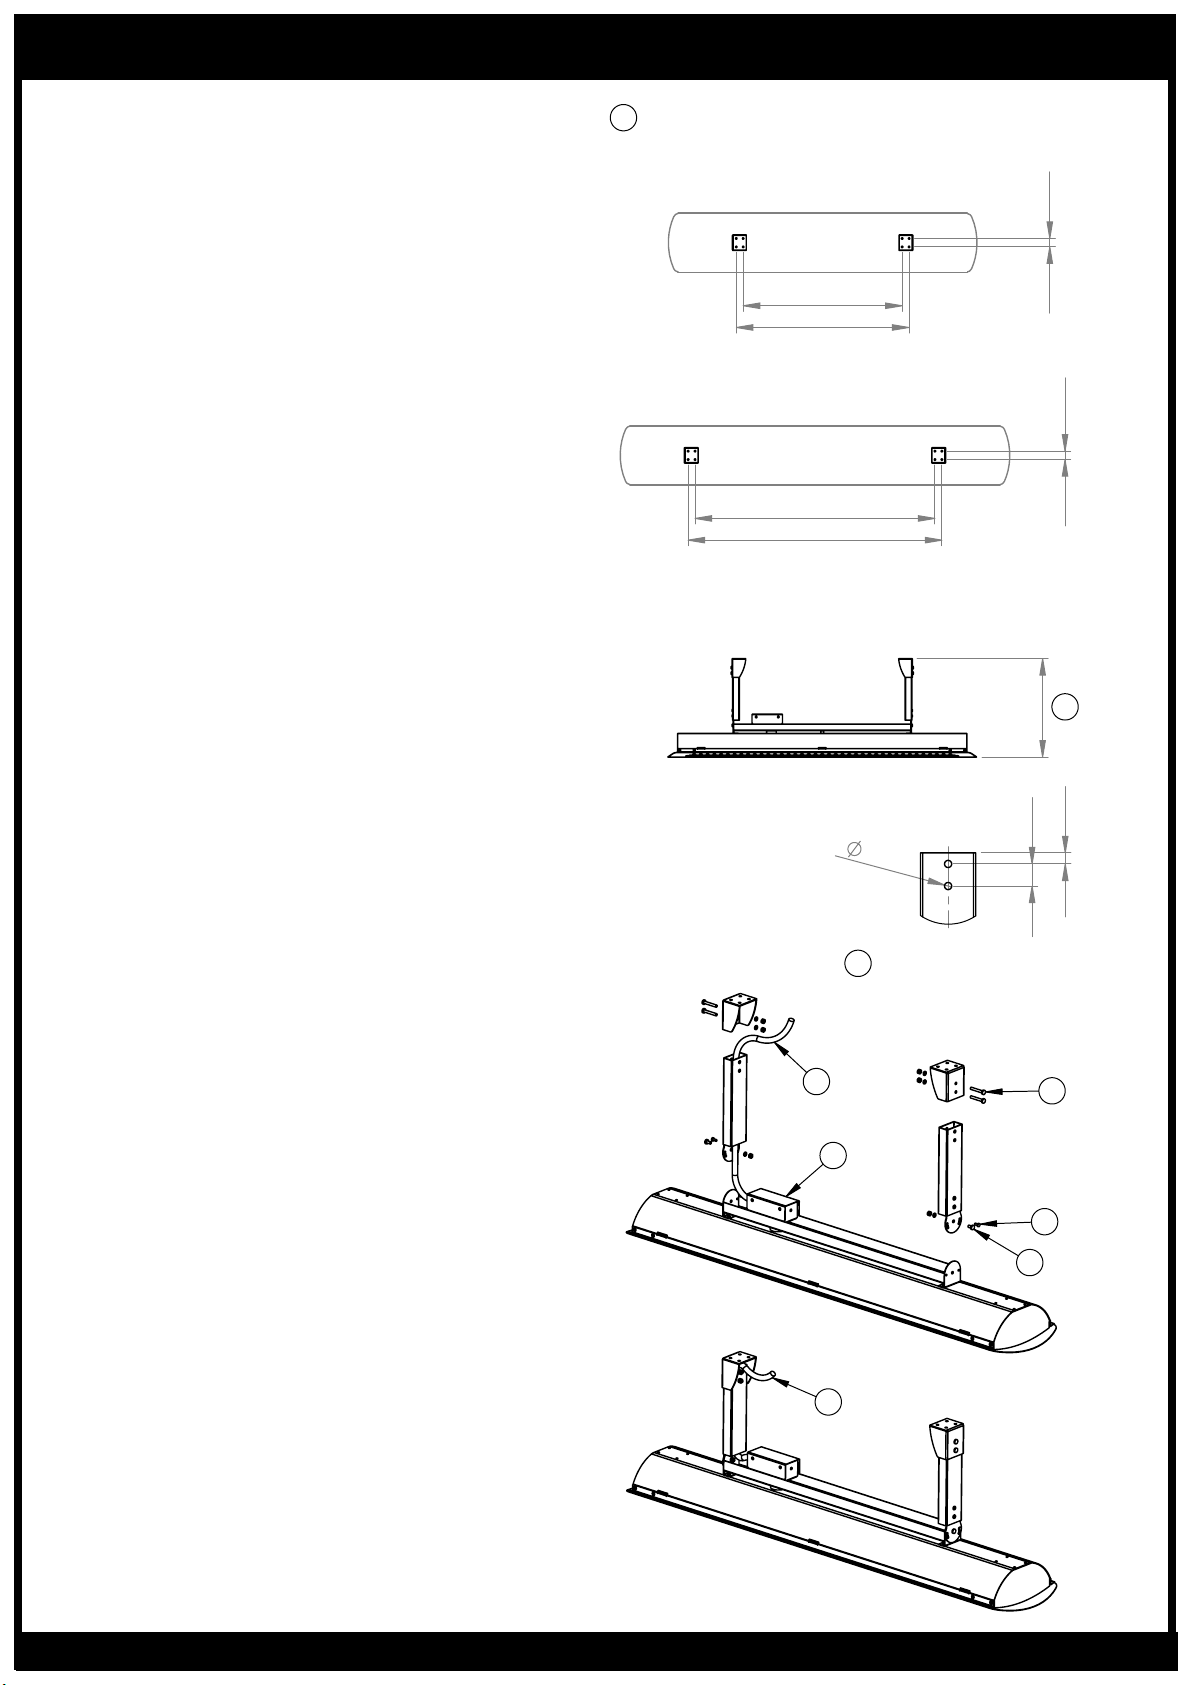
31
575
625
2000W & 4000W Models
Mounting Hole Centres & Heater Position
1
31
918
868
3000W & 6000W Models
2
Suspension
20
10
6.5
DETAIL Suspension
SCALE 1 : 5
Suspension Tube
Mounting Hole
3
4
6
7
5
8
9
1. Mark mounting hole centres on ceiling.
Attach mounting brackets to ceiling using
appropriate fasteners (Not supplied).
2. Heater must be installed with heater surface at least
2400mm above the floor level.
Supplied suspension tubes position heater surface
1000mm below the ceiling surface.
If required, cut down length of suspension tubes to
ensure correct installation height.
Minimum distance from front surface of heater to
ceiling surface must be 250mm for 2000W & 3000W
models & 330mm for 4000W & 6000W models.
3. If suspension tubes are cut down, drill new mounting
holes in each tube.
4. Make electrical connection in junction box as per
electrical installation instructions in this manual.
5. Feed power cord through suspension tube.
6. Assemble suspension tubes to rear bracket with M5
screw, spring washer and nut.
7. Rotate heater to required angle. 15° or 30° in either
direction. Lock into position with self tapping screw.
8. Raise heater assembly into position.
Attach suspension tubes to ceiling brackets with
M5x35mm screws, spring washers & nuts.
9. Make electrical connection from suspension tube
power cord to power from ceiling as per
electrical installation instructions in this manual.
TUBE SUSPENSION (SOLD SEPARATELY)
TUBE SUSPENSION (SOLD SEPARATELY)
1. Mark mounting hole centres on ceiling. Attach
mounting brackets to ceiling using appropriate
fasteners (Not supplied).
2. Heater must be installed with heater surface at least
2400mm above the floor level. Supplied suspension
tubes position heater surface 1000mm below the
ceiling surface. If required, cut down length of
suspension tubes to ensure correct installation
height. Minimum distance from front surface of
heater to ceiling surface must be 250mm for 2000W
& 3000W models & 330mm for 4000W & 6000W
models.
3. If suspension tubes are cut down, drill new mounting
holes in each tube.
4. Make electrical connection in junction box as per
electrical installation instructions in this manual.
5. Feed power cord through suspension tube.
6. Assemble suspension tubes to rear bracket with M5
screw, spring washer and nut.
7. Rotate heater to required angle. 15° or 30° in either
direction. Lock into position with self tapping screw.
8. Raise heater assembly into position. Attach
suspension tubes to ceiling brackets with M5x35mm
screws, spring washers & nuts.
9. Make electrical connection from suspension tube
power cord to power from ceiling as per electrical
installation instructions in this manual.
HEATER INSTALLATION CONTINUED...
www.bromic.com/heating-au
9
Loading ...
Loading ...
Loading ...