Loading ...
Loading ...
Loading ...
Door Closing
Your refrigerator has two front adjustable rollers - one on the right
and one on the left. If your refrigerator seems unsteady or you
want the doors to close easier, adjust the refrigerator's tilt using
the instructions below.
1. Remove the base grille. See the Base Grille graphic in
"Refrigerator Doors." The two leveling screws are part of the 2.
front roller assemblies which are at the base of the
refrigerator on either side.
2. Use a screwdriver to adjust the leveling screws. Turn the
leveling screw to the right to raise that side of the refrigerator
or turn the leveling screw to the left to lower that side. It may
take several turns of the leveling screws to adjust the tilt of
the refrigerator.
NOTE: Having someone push against the top of the 3.
refrigerator takes some weight off the leveling screws and
rollers. This makes it easier to adjust the screws.
NOTE: If your model has a base grille filter system, make sure the
base grille filter is properly installed and the cap is in the
horizontal position.
Do not use with water that is microbiologically unsafe or
of unknown quality without adequate disinfection before
or after the system. Systems certified for cyst reduction
may be used on disinfected waters that may contain
filterable cysts.
Use a sturdy container to depress the water dispenser until
the water begins to flow. Flush the water system by
dispensing and discarding 2 to 3 gal. (8 to 12 L) of water.
Cleaning the system will take approximately 5 minutes and
will help clear air from the line. Additional flushing may be
required in some households.
NOTE: As air is cleared from the system, water may spurt out
of the dispenser.
Turn on the ice maker by opening the freezer door and
lowering the wire shutoff arm as shown. Please refer to the
"Ice Maker" section for further instructions on the operation
of your ice maker.
• Allow 24 hours to produce the first batch of ice.
• Discard the first three batches of ice produced.
• Depending on your model, you may want to select the
maximum ice feature to increase the production of ice.
REFRIGERATOR USE
3. Open both doors again and check to make sure that they
close as easily as you like. If not, tilt the refrigerator slightly
more to the rear by turning both leveling screws to the right. It
may take several more turns, and you should turn both
leveling screws the same amount.
4. Replace the base grille.
Align Doors
If the space between your doors looks uneven, you can adjust it
using the instructions below:
1. Pry off the top hinge cover.
2. Loosen the top hinge screws using a 5/16"socket or wrench.
3. Have someone hold the door in place or put a spacer
between the doors while you tighten the top hinge screws.
4. Replace the top hinge cover.
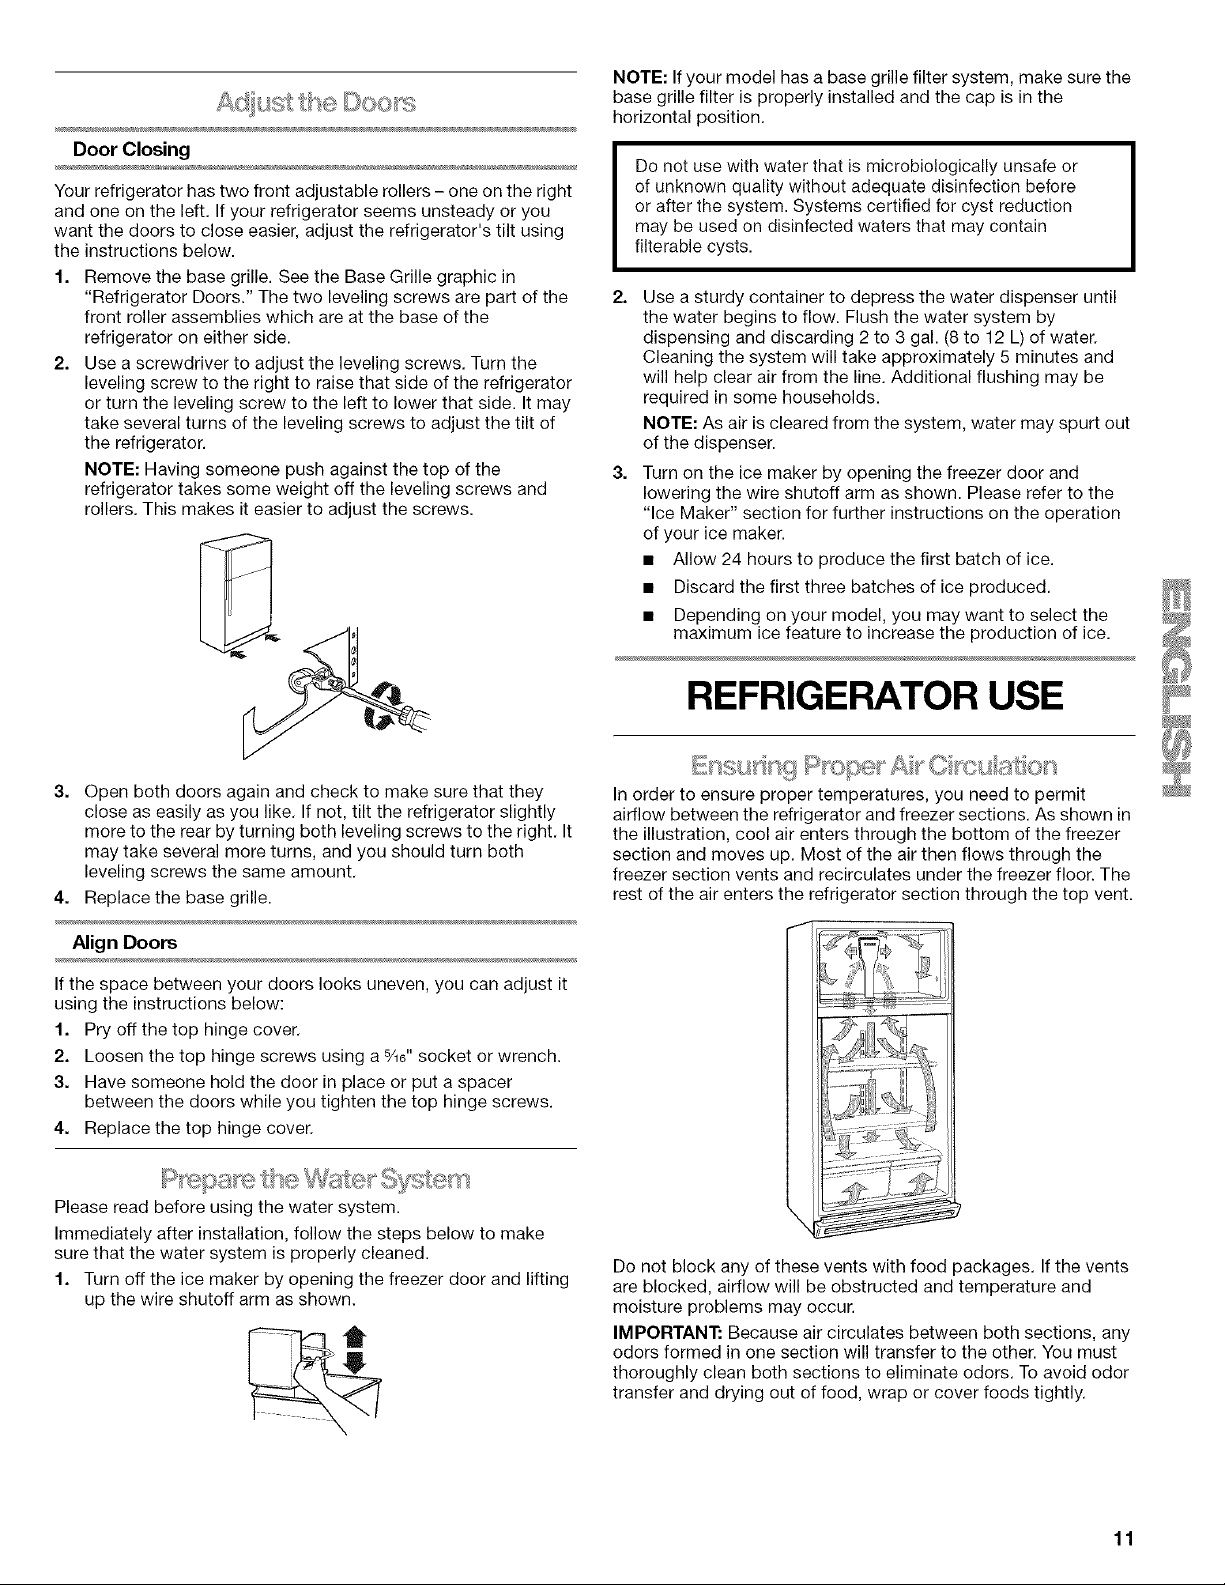
In order to ensure proper temperatures, you need to permit
airflow between the refrigerator and freezer sections. As shown in
the illustration, cool air enters through the bottom of the freezer
section and moves up. Most of the air then flows through the
freezer section vents and recirculates under the freezer floor. The
rest of the air enters the refrigerator section through the top vent.
Please read before using the water system.
Immediately after installation, follow the steps below to make
sure that the water system is properly cleaned.
1. Turn off the ice maker by opening the freezer door and lifting
up the wire shutoff arm as shown.
Do not block any of these vents with food packages. If the vents
are blocked, airflow will be obstructed and temperature and
moisture problems may occur.
IMPORTANT: Because air circulates between both sections, any
odors formed in one section will transfer to the other. You must
thoroughly clean both sections to eliminate odors. To avoid odor
transfer and drying out of food, wrap or cover foods tightly.
11
Loading ...
Loading ...
Loading ...