r
e
c
i
p
e
s
i
n
s
i
d
e
!
Dash 2-Pack
Mini Waffle & Griddle
#DMSW002
Instruction Manual | Recipe Guide


Important Safeguards .................................................................... 4-7
Parts & Features ..................................................................................8
....................................................9-12
Cleaning & Maintenance ............................................................... 13
Recipes ........................................................................................15-23
Customer Support .......................................................................... 46
Warranty ........................................................................................... 47
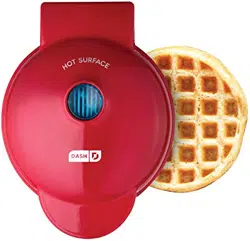
mini waffle maker

IMPORTANT SAFEGUARDS
• Read all instructions.
•
appliance before use.
• Never leave appliance unattended
when in use.
•
thoroughly before using.
• Do not use appliance for other than
intended use. For household use
only. Do not use outdoors.
• Warning: Hot surfaces! Never touch
while appliance is in use. Always lift
and lower the Cover by the Cover
Handle.
• DO NOT lift the Cover so that your
is hot and may cause injury. Lift from
the side.
•
near water or other liquids. The Mini
• Never use abrasive cleaning agents
to clean your appliance as this may
• Do not operate this appliance with
manner. Return appliance to the
nearest authorized service facility for
•
wet surface.
•
please contact StoreBound directly at
1-800-898-6970 from 7AM – 7PM PST
Monday – Friday or by email at
support@storebound.com.
• Do not use metal utensils on the
• This appliance is not intended for
use by persons (including children)
they are provided with supervision
and instruction concerning use of the
appliance by a person responsible
IMPORTANT SAFEGUARDS: PLEASE
READ AND SAVE THIS INSTRUCTION
AND CARE MANUAL.

IMPORTANT SAFEGUARDS
for their safety.
• Do not place appliance on or near a
in a heated oven.
• Be cautious when moving an
appliance containing hot oils or other
hot liquids.
• Refrain from using attachments
that are not recommended by the
personal injury.
•
or storing.
• Close supervision is necessary
when any appliance is used by or
near children.
• Do not let the cord touch hot surfaces
or hang over the edge of tables
or counters.
• Always be sure to unplug the
in use.
• StoreBound shall not accept liability
for damages caused by improper use
of the appliance.
•
can result in property damage or even
in personal injury.
• This appliance has a polarized plug
(one blade is wider than the other).
only one way. If the plug does not
modify the plug in any way.
• A short power supply cord is to
resulting from becoming entangled
in or tripping over a longer cord. An
extension cord may be used if care
is exercised in its use. If an extension
rating of the extension cord should be
at least as great as the electrical rating
of the appliance. If the appliance is
cord should be a grounding 3-wire
cord. The extension cord should be
arranged so that it will not drape over
the countertop or tabletop where
it can be pulled on by children or
tripped over unintentionally.
IMPORTANT SAFEGUARDS: PLEASE
READ AND SAVE THIS INSTRUCTION
AND CARE MANUAL.

GARANTIES IMPORTANTES:
VEUILLEZ LIRE ET CONSERVER CE
MODE D’EMPLOI ET D’ENTRETIEN
L’utilisation d’appareils électriques nécessite de prendre des mesures de
• Lisez toutes les instructions.
• Retirez tout sac ou emballage de
l’appareil avant utilisation.
• Ne laissez jamais l’appareil sans
surveillance pendant son utilisation.
• Assurez-vous que l’appareil est
minutieusement nettoyé avant
utilisation.
• N’utilisez pas l’appareil en dehors
de son utilisation prévue. Pour
usage ménager uniquement. Ne
l’utilisez pas à l’extérieur.
• AVERTISSEMENT: Surfaces chaudes!
Ne touchez jamais la surface de
cuisson ou le couvercle pendant
l’utilisation de l’appareil. Soulevez
et baissez toujours le couvercle à
l’aide de sa poignée.
• NE soulevez PAS le couvercle pour
que votre bras se trouve au-dessus
car cela pourrait entraîner des
blessures. Soulevez par le côté.
•
la prise ou l’appareil dans ou à
proximité de l’eau ou d’autres
liquides. Le mini gaufrier n’est PAS
lavable en machine.
• N’utilisez jamais des produits
d’entretien abrasifs pour nettoyer
endommager le mini gaufrier et sa
surface de cuisson anti-adhérente.
• N’utilisez pas cet appareil
avec un cordon ou une prise
endommagé de quelque façon.
détaillant agréé le plus proche.
• N’utilisez PAS le mini gaufrier à
proximité de l’eau ou d’autres
ou si vous vous tenez sur une
surface mouillée.
• Pour toute question liée à l’entretien
contacter StoreBound directement au
support@storebound.com.
• N’utilisez pas d’ustensiles en métal
sur la surface de cuisson car cela
endommagerait la surface anti-
adhérente.
• Cet appareil n’est pas prévu pour
être utilisé par des personnes
(enfants compris) ayant des
garanties importantes

garanties importantes
moins qu’elles ne soient supervisées
et instruites sur l’utilisation de
cet appareil par une personne
responsable de leur sécurité.
• Ne placez pas l’appareil sur ou à
proximité d’un brûleur à gaz ou
• Faites attention lorsque vous
déplacez un appareil contenant des
huiles chaudes ou d’autres liquides
chauds.
• Évitez d’utiliser des accessoires qui
ne sont pas recommandés
une électrocution ou un
dommage corporel.
• Laissez le mini gaufrier refroidir
complètement avant tout
entreposage.
• Une attention particulière doit être
apportée quand l’appareil est utilisé
par ou à proximité d’enfants.
• Ne laissez pas le cordon toucher
des surfaces chaudes ou pendre au
niveau des bords de tables ou de
comptoirs.
• Assurez-vous toujours de
débrancher l’appareil de la prise
nettoyage ou entreposage.
• StoreBound n’est nullement
responsable des dommages causés
par une mauvaise utilisation de
l’appareil.
• Une mauvaise utilisation du
mini gaufrier peut entraîner des
dommages matériels ou même des
dommages corporels.
•
(un des brins est plus large que
s’insère dans la prise électrique
s’insère pas complètement dans la
que ce soit.
• Un cordon d’alimentation court doit
d’emmêlement ou de trébuchement
lié aux cordons plus longs. Une
rallonge peut être utilisée à
condition de faire attention. Si une
électrique indiquée sur la rallonge
doit être au moins aussi grande
que celle de l’appareil. Si l’appareil
doit être un cordon tripolaire avec
prise de terre. La rallonge doit
être disposée de manière à ne pas
reposer sur le comptoir ou sur la
table où elle peut être tirée par un
enfant ou source de trébuchement
involontaire.
GARANTIES IMPORTANTES:
VEUILLEZ LIRE ET CONSERVER CE
MODE D’EMPLOI ET D’ENTRETIEN

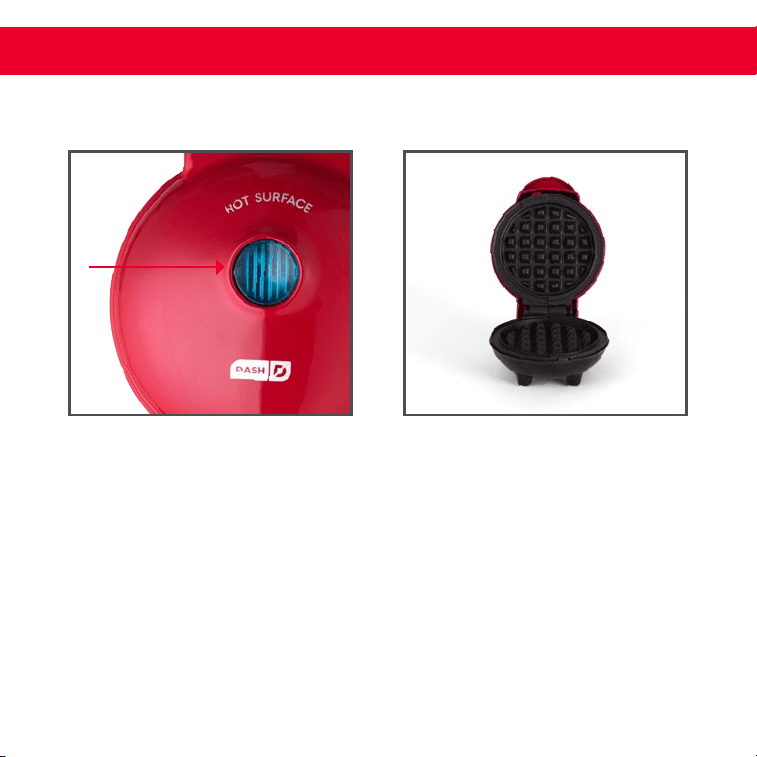
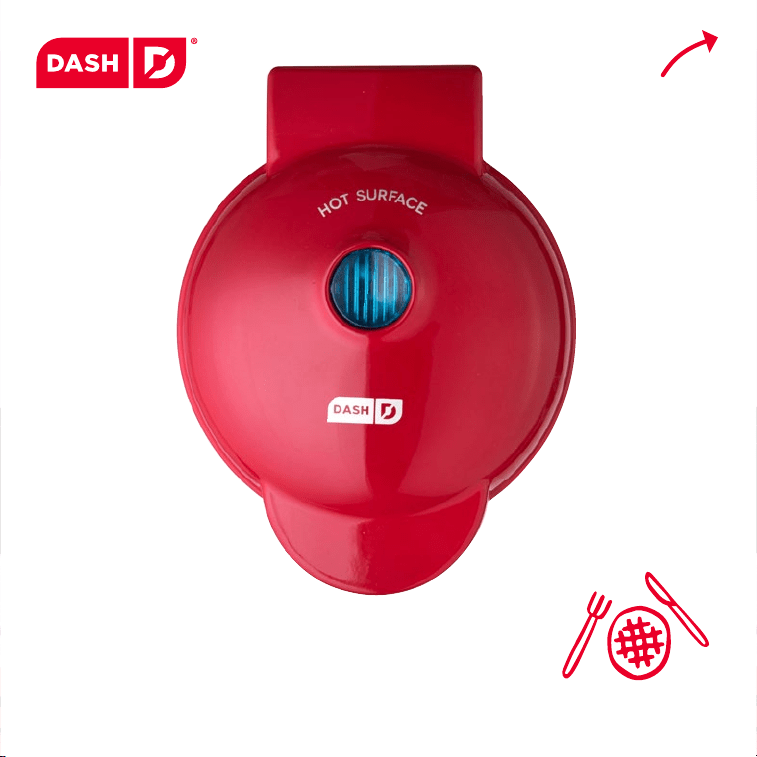
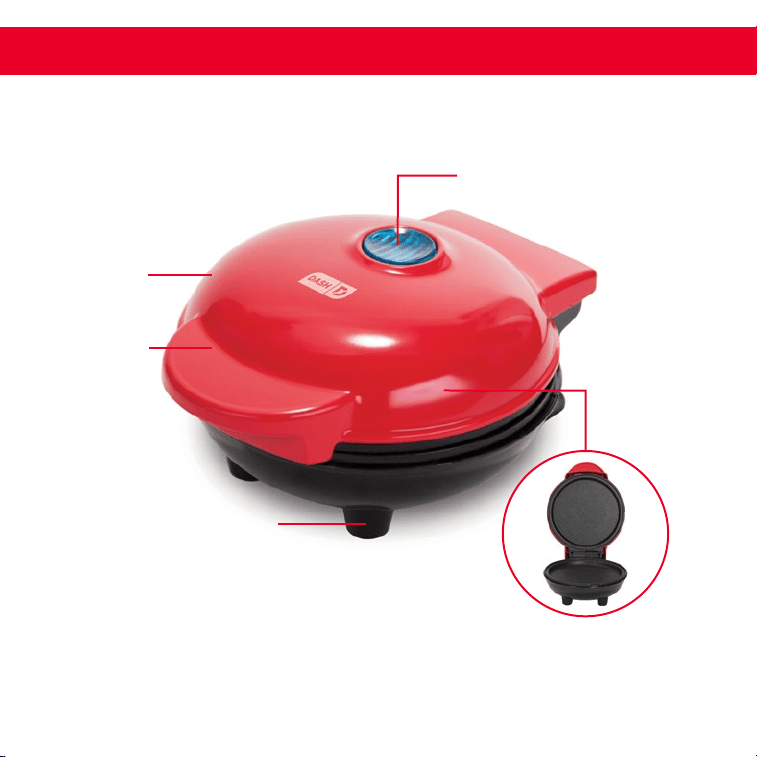
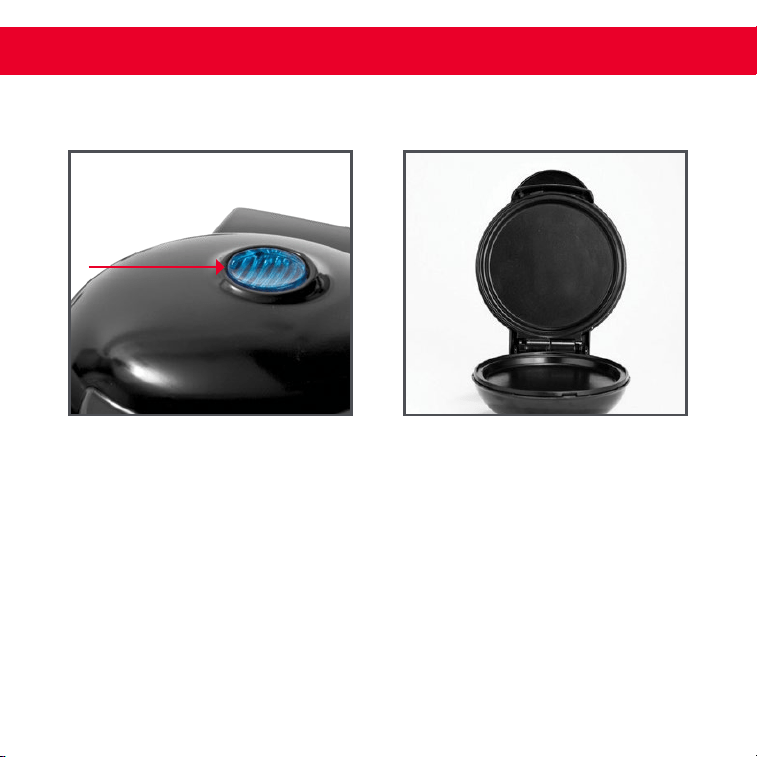
Indicator Light
Cover
Non-slip Feet
Cover Handle
parts & Features

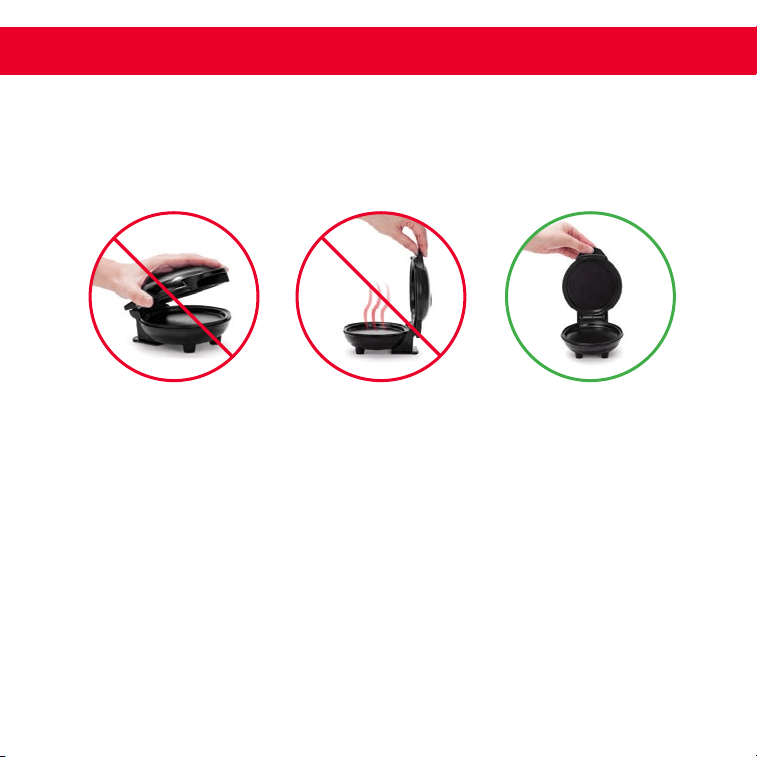
using your Mini Waffle Maker
DO NOT lift the Cover
so that your arm is
Surface as it is hot and
may cause injury.
Always lift and lower
the Cover by the
Cover Handle. Lift
from the side.
Never touch the
Cover while appliance
is in use.
BEFORE FIRST USE
using your Mini Waffle Maker
1 2
Place the appliance on a stable
and dry surface. Plug the cord into
a power outlet. The Indicator Light
(photo A)
heating up.
will automatically shut off.
(photo B)!
B
A
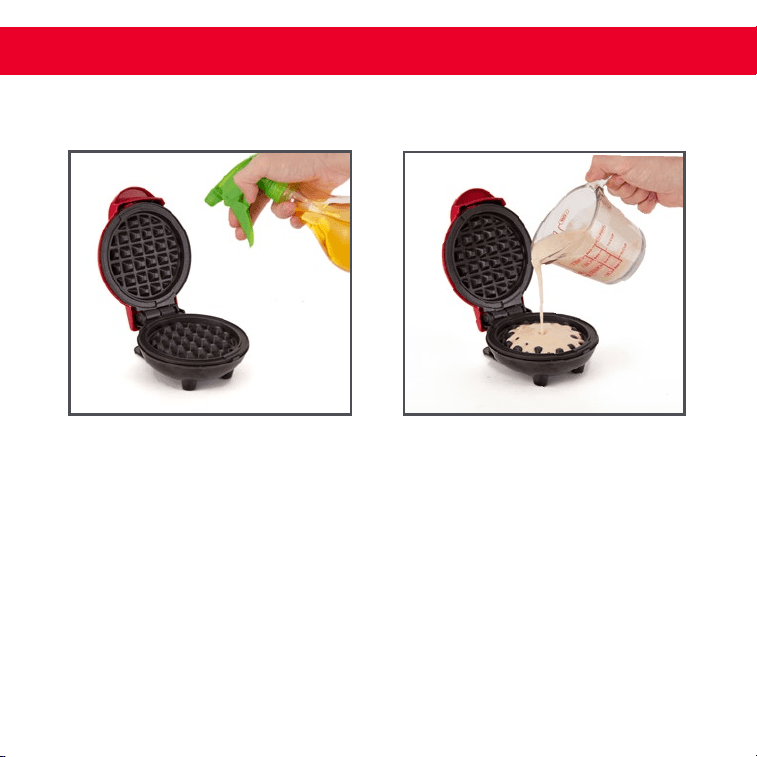
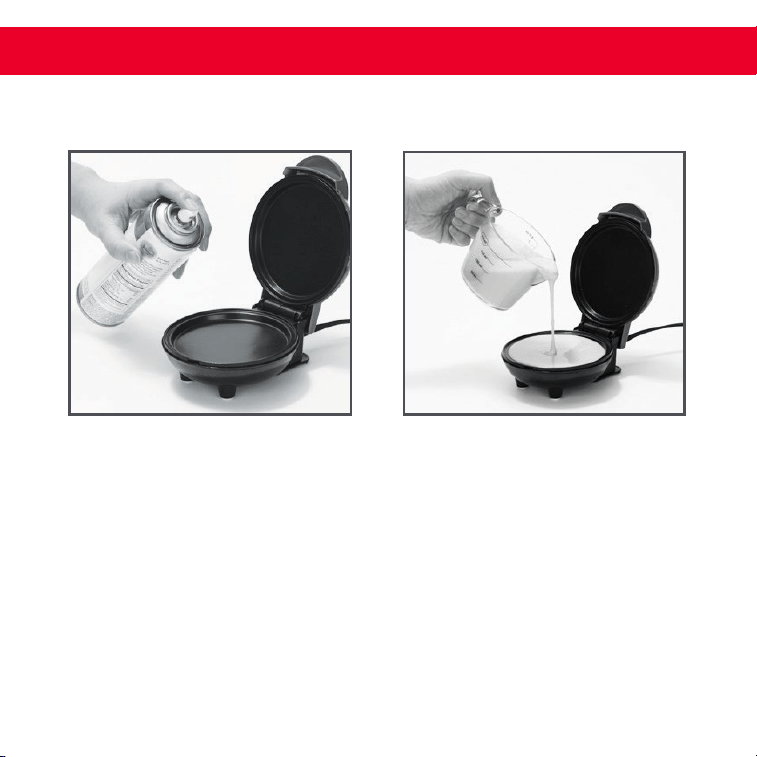
using your Mini Waffle Maker
4
Place or pour batter onto the
(photo D) and
close the Cover.
3
Carefully lift the Cover by the
Cover Handle and spray both
(photo C).
C D
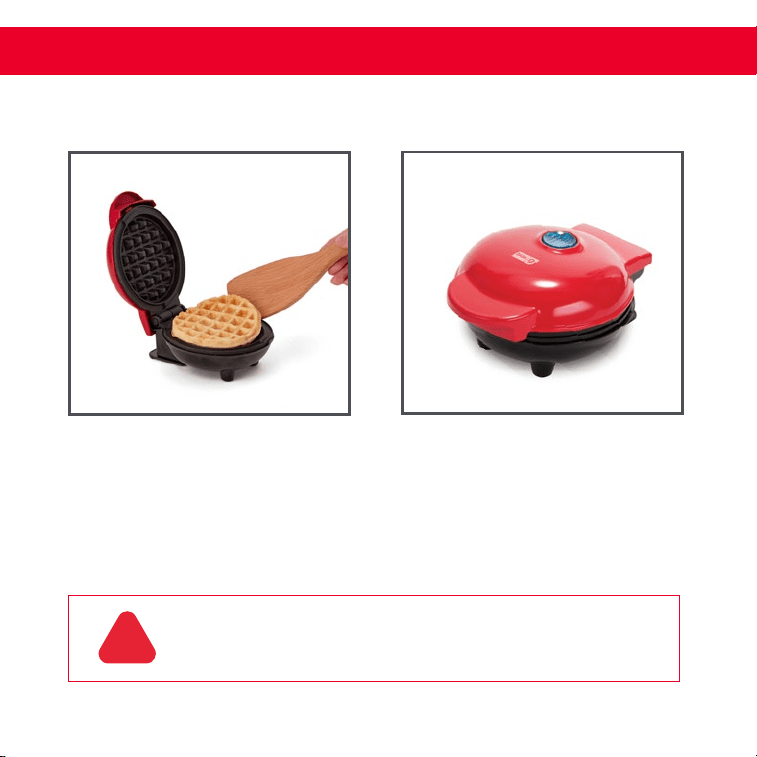
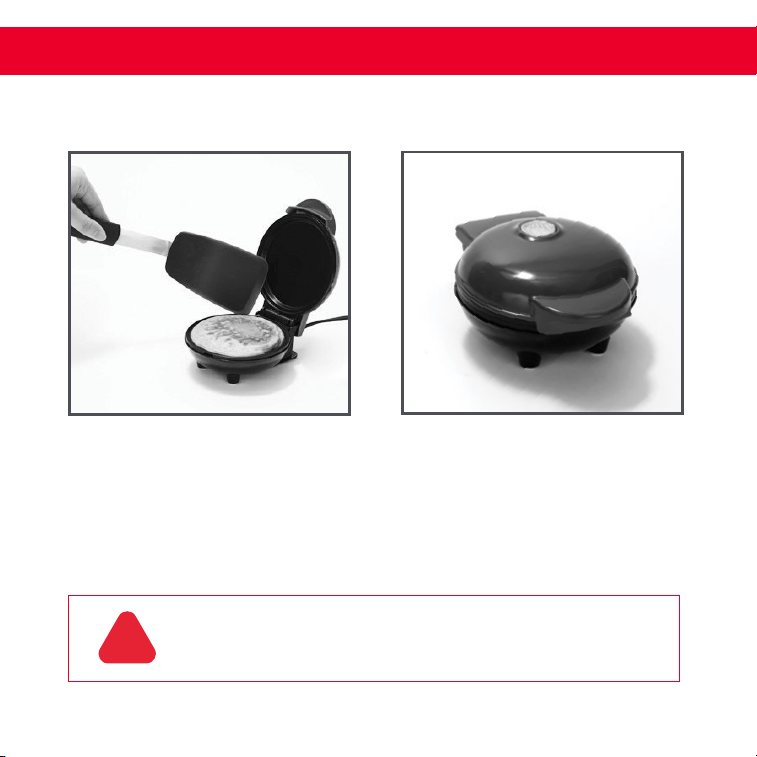
using your Mini Waffle Maker
5
6
a heat-resistant nylon or silicone
(photo E).
and allow it to cool before moving
or cleaning (photo F).
NOTE: Do not use metal utensils to remove or place food on the
!
F
E

storing. Do not submerge appliance in water or any other liquids. Never use
abrasive cleaning agents to clean your appliance as this may damage the
clean the appliance after each use. This will prevent the build-up of food or oil.
•
•
Thoroughly rinse the cloth and wipe again.
•
•
and wipe clean.
• Never use abrasive cleaning agents to clean your appliance as this may
cleaning & maintenance

14

15
Mini Waffle Maker
RECIPE
guide
Follow us @unprocessyourfood
for recipes, videos, & daily inspiration

1 tbsp sugar
¼ tsp salt
1 egg
2 tbsp melted butter or vegetable oil
classic
waffles
Directions:
1.
the dry and mix until just incorporated.
2.
golden brown. Repeat with the remaining batter.
3. Serve with a drizzle of maple syrup and fresh berries.
Ingredients:

1 large egg
½ cup shredded mozzarella cheese
½ tsp dried oregano
¹
8
/
tsp garlic powder
½ cup shredded Parmesan cheese
4 tbsp pizza sauce
4 tbsp shredded mozzarella
(for pizza topping)
pizza
Chaffle
Directions:
1.
2.
3.
4.
mins. Watch carefully so they don’t burn and serve immediately.
Ingredients:

1 cup mashed bananas
(roughly 2 bananas)
¼ cup light brown sugar
2 large eggs
3 tbsp canola oil
Banana Bread
waffles
Directions:
1.
2.
well-combined. Add dry ingredients and mix until no clumps remain.
3.
if desired.
Ingredients:

chocolate Tacos
waffles
2 tbsp cocoa powder
2
/
3
cup white sugar
1 large egg
2 tbsp canola oil
Directions:
1.
2.
until no clumps remain.
3.
on both sides.
4.
5.
Ingredients:

Directions
temperature to 140°F and let tomatoes dry for 6-8
hours. Flip halfway through the duration (approx.
3 hours into dehydrating cycle).
in a jar layering them with the garlic cloves and
along with the salt and pepper throughout the
layering process.
Pour in olive oil until all ingredients are submerged.
Cover and refrigerate.
Ingredients
cut into ¼” slices
1 tsp dried oregano
1 tsp dried basil
Dash of salt & pepper
5 garlic cloves
10 fresh basil leaves
2 cups olive oil
soaked sundried tomatoessoaked sundried tomatoes

MORE RECIPE IDEAS
recipe idea ingredients
cooking time
Protein Wafe
(pg 16)
1 scoop protein powder
4-6 min
Cornbread Wafe ¼ cup cornbread batter 6-8 min
Mashed Potato Bite 3 tbsp mashed potatoes 5 min
Smore Biscuit
1 refrigerated biscuit
5 mini marshmallows
5-7 min
Grilled Cheese
2 slices white or wheat
2 slices American Cheese
5 min
Chocolate
Chip Cookie
5-7 min
Wafe
Omelette
1 egg beaten
2 tbsp chopped veggies
1 tbsp grated Swiss cheese
5 min
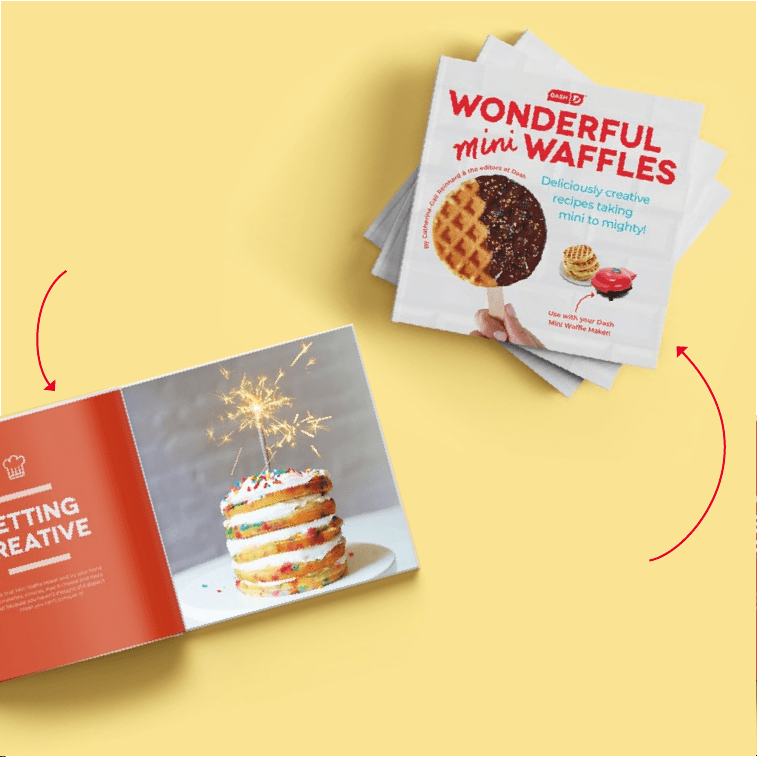
Billiant
waffle
recipes
o
v
e
r
8
0
for your Dash Mini
Waffle Maker...
available now
in our
SWEET
NEW
COOKBOOK
find more creative recipes at bydash.com!

PAGE TITLE
PAGE TITLE
mini maker
griddle
#DMSW002
Instruction Manual | Recipe Guide
r
e
c
i
p
e
s
i
n
s
i
d
e
!

t
h
e
d
a
s
h
t
e
a
m
!

PAGE TITLE
t
h
e
d
a
s
h
t
e
a
m
!
Parts & Features................................................................................28
Cleaning & Maintenance.................................................................33
Troubleshooting..........................................................................34-35
Recipes.........................................................................................37-45
Customer Support .......................................................................... 46
Warranty ........................................................................................... 47
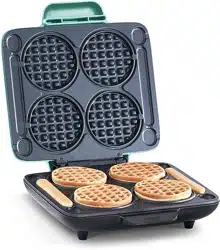
mini maker griddle
Indicator Light
Cover
Non-slip Feet
Cover Handle
parts & Features
using your Mini Waffle Maker
DO NOT lift the Cover
so that your arm is
Surface as it is hot and
may cause injury.
Always lift and lower
the Cover by the
Cover Handle. Lift
from the side.
Never touch the
Cover while appliance
is in use.
BEFORE FIRST USE
using your Mini Maker griddle
using your Mini Maker griddle
1 2
Place the appliance on a stable
and dry surface. Plug the cord
into a power outlet. The Indicator
Light (photo A)
Griddle is heating up.
will automatically shut off.
(photo B)!
B
A
using your Mini Waffle Maker
4
Place or pour batter onto the
(photo D) and
close the Cover.
3
Carefully lift the Cover by the
Cover Handle and spray both
(photo C).
C D
using your Mini Maker griddle
using your Mini Maker griddle
5
6
a heat-resistant nylon or silicone
(photo E).
and allow it to cool before moving
or cleaning (photo F).
NOTE: Do not use metal utensils to remove or place food on the
!
F
E

storing. Do not submerge appliance in water or any other liquids. Never use
abrasive cleaning agents to clean your appliance as this may damage the
clean the appliance after each use. This will prevent the build-up of food or oil.
•
•
Thoroughly rinse the cloth and wipe again.
•
•
and wipe clean.
• Never use abrasive cleaning agents to clean your appliance as this may
cleaning & maintenance
cleaning & maintenance

troubleshooting
listed below. If the issue is either not solved by the solutions recommended below
1-800-898-6970 or support@storebound.com.
ISSUE SOLUTION
the heating element will automatically turn
on and off to regulate the temperature and
Indicator Light turns on and off.
use?
There is no On/Off Button.
off and on?

1. Que dunt aut id qui culparc hillecepudit aut
sum nem. Ime nimpos ellaccu llibus es eat.
2. Meniend enecabo ribusandit litibuscid mo
exerorecus maionse culparcil in prese magnam
et id quat unt qui corrum id mollita volor audam
qui repuda nisquam aut as dolupta tiassun diatur
quasser iorecte volorio nserferi ullias ducidebis
eos dit
3. OdicidessimaEquas adit quia con necupti
troubleshooting
ISSUE SOLUTION
the Cover gets very hot. Is this
normal?
Cover by the Cover Handle. To prevent
hot and may cause injury. Lift from the side.
the surface. What is happening?
There is probably a build-up of burnt food
Scrub Surface with a sponge or soft bristled
Rinse the cloth and wipe again. If food
The Indicator Light will not turn on
to heat.
1. Ensure that the power cord is plugged
into the power outlet.
2.
operating correctly.
3. Determine if a power failure has occurred
Troubleshooting

Parts
37
RECIPESRECIPES
37
Mini Maker griddle
RECIPE
guide
Follow us @unprocessyourfood
for recipes, videos, & daily inspiration

1 tbsp sugar
¼ tsp salt
1 egg
2 tbsp melted butter or vegetable oil
classic
homemade pancakes
Directions:
1.
2.
Ingredients:


1 banana
1 egg
2 tbsp melted butter
2 tbsp sugar
1 tsp vanilla extract
¼ tsp salt
2 tbsp unsweetened cocoa
chocolate
brownie pancakes
Directions:
1.
2.
3.
Ingredients:


1 sausage patty
1 egg
1 slice cheddar or American cheese
2 slices tomato
SAUSAGE,
EGG & CHEESE
bREAKFAST SANDWICH
Directions:
1.
2.
3.
4. Place the egg on the sandwich and top with tomato slices and the other
Ingredients:

peeled and shredded
1 egg
½ tsp onion powder
½ tsp salt
POTATO PANCAKES
HASH BROWNS
Directions:
1. Combine all of the ingredients in a large bowl and mix until well-combined.
2. Scoop out small amounts of the potato mixture and form into patties. Spray
3.
Ingredients:

more recipe ideas
recipe idea ingredients
cooking time
Cinnamon Roll
1 piece of refrigerated cinnamon
roll dough
7-9 min
Grilled Ham &
Cheese Pocket
rolled and cut into 2 (4”) circles
1 slice ham
1 slice cheese
6-8 min
Brie en Croute
rolled and cut into 2 (4”) circles
1 slice Brie cheese
1 tsp raspberry jelly
6 min
Cheeseburger
Slider
3 oz 90% lean ground beef
1 tbsp shredded cheese
10 min
Quesadilla
¼ cup grated Mexican cheese blend
2 tbsp salsa
4-6 min
Cheesy Biscuit
cup shredded cheddar cheese
6-8 min
Wafe
Omelette
1 egg beaten
2 tbsp chopped veggies
1 tbsp grated Swiss cheese
5 min

customer support
7am
–
7pm
Our US-based customer support team is at your service
Monday - Friday during the times below.
Reach us at 1 (800) 898-6970 or suppor[email protected]
customer support
product with our Feel Good Guarantee
™
. To learn more about
8am
–
8pm
9am
–
9pm
10am
–
10pm
Hey Hawaii! You can reach our customer service team from 5AM to 5PM.
Alaska6AM - 6PM.
feel good
guarantee
™

STOREBOUND, LLC – 1 YEAR LIMITED WARRANTY
one (1) year from the date of the original purchase when utilized for normal and intended household use.
1-800-898-6970 for further assistance and instruction. A Customer Support agent will assist you by
issued. Proof of purchase indicating the date and place of purchase is required and should accompany the
ship returns to a PO box. StoreBound will not be responsible for delays or unprocessed claims resulting
from a purchaser’s failure to provide any or all of the necessary information. Freight costs must be prepaid
by the purchaser.
Send all inquiries to [email protected].
There are no express warranties except as listed above.
REPAIR OR REPLACEMENT AS PROVIDED UNDER THIS WARRANTY IS THE EXCLUSIVE REMEDY OF
THE CUSTOMER. STOREBOUND SHALL NOT BE LIABLE FOR ANY INCIDENTAL OR CONSEQUENTIAL
DAMAGES OR FOR BREACH OF ANY EXPRESS OR IMPLIED WARRANTY ON THIS PRODUCT EXCEPT
TO THE EXTENT REQUIRED BY APPLICABLE LAW. ANY IMPLIED WARRANTY OF MERCHANTABILITY
OR FITNESS FOR A PARTICULAR PURPOSE ON THIS PRODUCT IS LIMITED IN DURATION TO THE
DURATION OF THIS WARRANTY.
vary from state to state.
Refurbished items or items not purchased through an authorized retailer are not eligible for warranty claims.
REPAIRS
appliances. Do not attempt to repair the appliance yourself under any circumstances. Contact
Customer Support regarding repairs to the appliance.
TECHNICAL SPECIFICATIONS
Voltage 120V ~ 60Hz
Power Rating 350W
warranty
Hey Hawaii! You can reach our customer service team from 5AM to 5PM.
Alaska6AM - 6PM.
WARRANTY

1-800-898-6970 | @unprocessyourfood | bydash.com