Loading ...
Loading ...
Loading ...
- 13 -
B
X
A
B
B
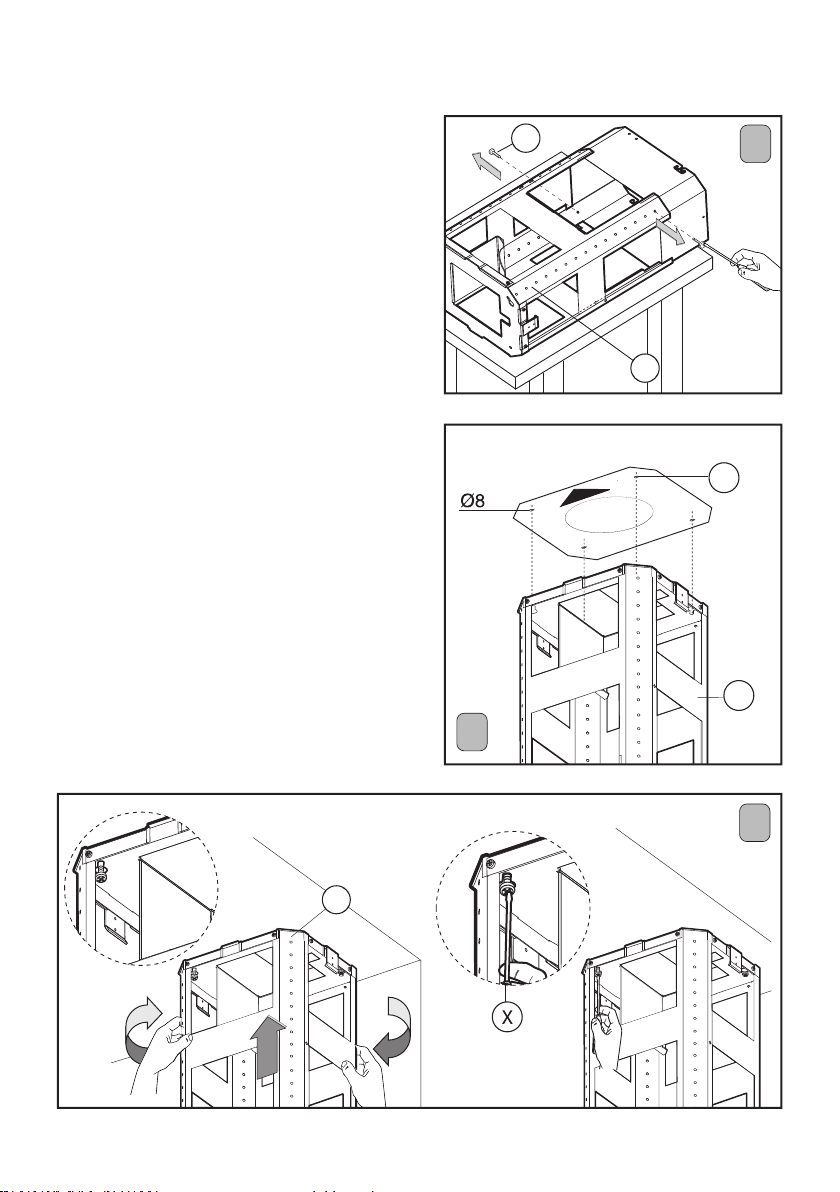
installation
- Remove the structure from the packaging and
remove the 2 screws A to separatethe upper
part from the lower part (Fig.1).
- Position hole template on the ceiling paying
attention that the arrow is positioned on the
same side as the appliance controls (Fig.2).
Make 4, Ø8 holes in the ceiling and drive in 3
screws without completely tightening them. Pay
attention not to insert the screw into the hole
marked with an X on the hole template (the
screws and expansion plugs must be suitable
for the type of wall).
- Take the upper part of the structure B (Fig.3)
and insert the 3 slots onto the 3 screws that are
not completely tightened. Rotate slightly to t
(Fig.3). Drive in the fourth screw X and tighten
the remaining 3 to allow denitive blocking of
the upper part ofstructure B.
- Take the lower part of the telescopic structure
C and insert it into the upper structure B (Fig.4).
Adjust the height by referring to the amounts in-
dicated in (Fig.5) and block it usingthe 8 screws
G that are supplied (Fig.6).
- Fix the exible pipe to the prepared air eva-
cuation hole (Fig.7).
- Take the upper chimney piece and x it to the
Loading ...
Loading ...
Loading ...