RISK OF ELECTRIC SHOCK
• PLUG DIRECTLY INTO A GFCI
ELECTRICAL OUTLET
• DO NOT USE IN WET
LOCATIONS
• UNPLUG TIMER BEFORE
CLEANING
• KEEP CHILDREN AWAY
WARNING
RISK OF FIRE
• DO NOT USE TO CONTROL
APPLIANCES THAT CONTAIN HEATING
ELEMENTS (COOKING APPLIANCES,
HEATERS, IRONS, ETC.)
• DO NOT EXCEED ELECTRICAL RATINGS
• DO NOT USE WITH AN EXTENSION
CORD
INSTRUCTIONS:
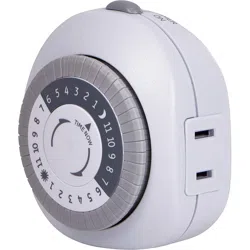
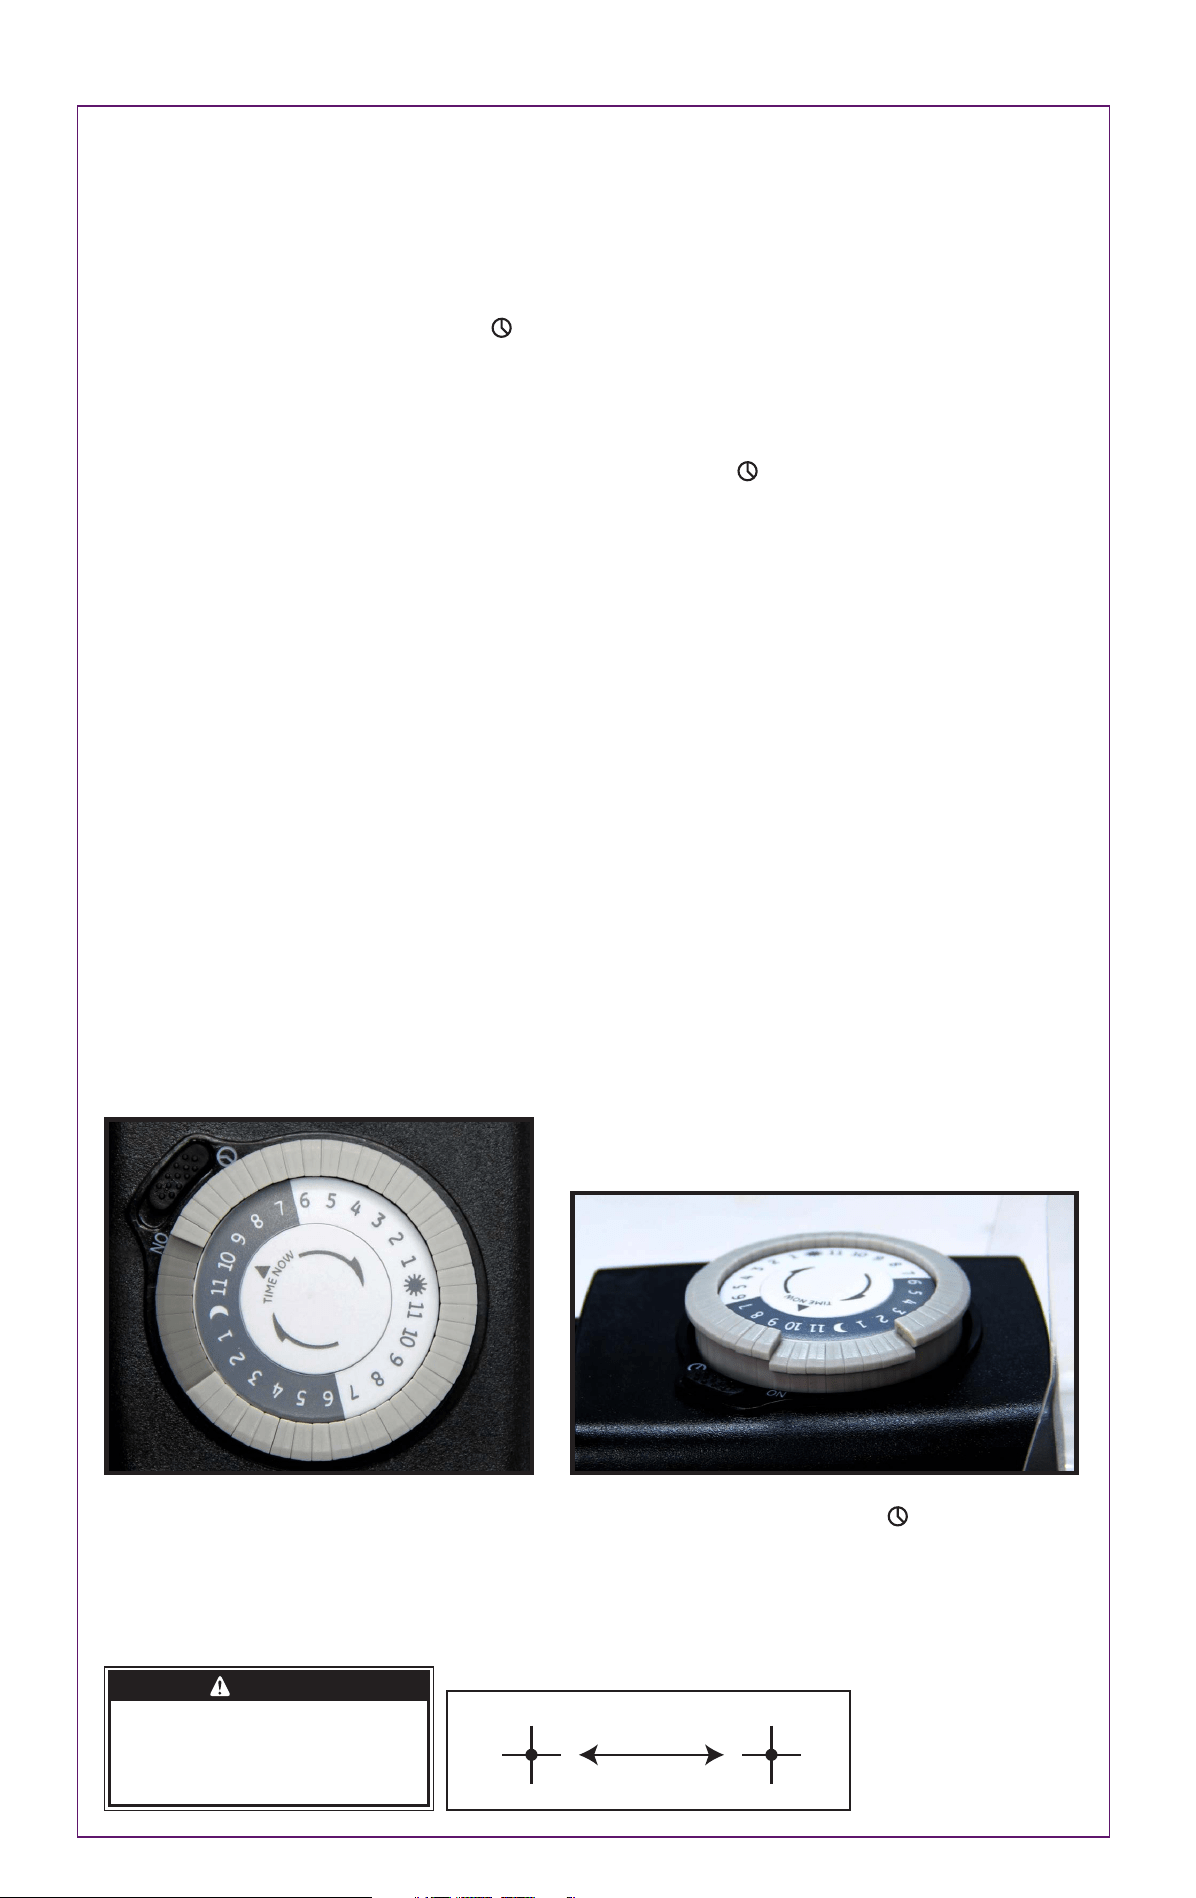
1. Locate the segments around the outer edge of the timer’s dial. These segments, each representing 30 minutes, can be pushed
down from the edge of the dial (try using the tip of a pen or pencil). Conversely, segments that have been pushed down can be
easily pulled back up by hand. Be sure all segments are pulled up before programming.
Select a time period (or periods) you want the device turned on, then push down ALL the segments that fall on or within that time
period. For example, to have the timer turn a lamp on at 10PM and off at 2AM, push down the segments representing 10PM and
2AM, and ALL the segments in between (See Figure 1). You may need to turn the dial clockwise to access the desired segments.
2. Rotate the timer’s dial clockwise until the pointer on the face of the dial points to the current time of day. Note: Nighttime hours
(from 6:30PM to 6:30AM) are highlighted with a grey background.
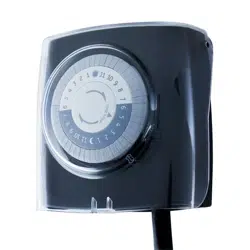
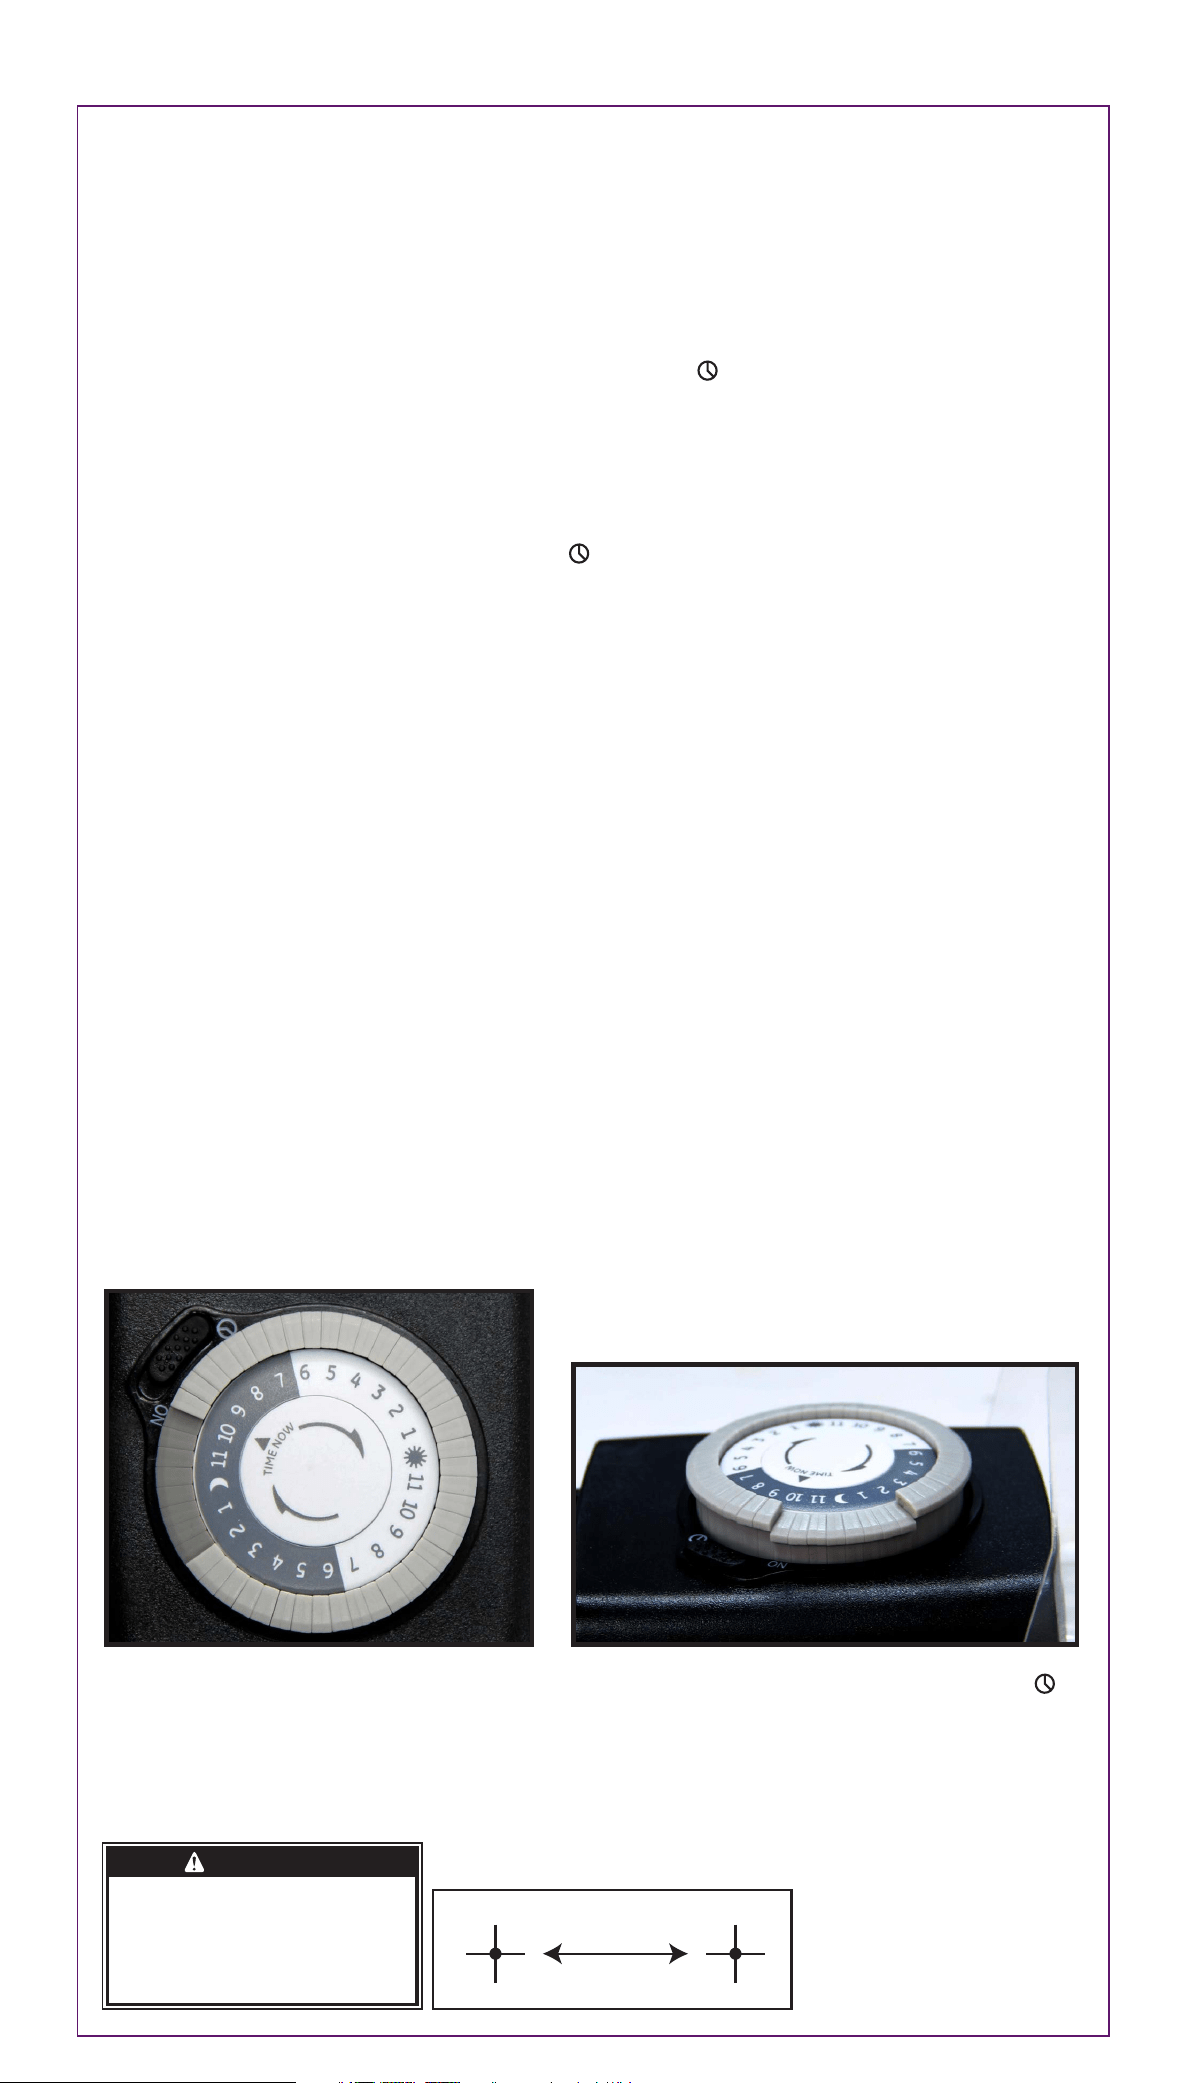
3. Set master switch to the timer position, shown as (See Figure 2).
4. Plug the timer into an electrical outlet convenient to the device to be controlled.
5. Plug the device into the outlet on the timer. Make sure the device is on for automatic control. The timer will not turn the device on
if the device’s main power switch is off.
NOTE: To override the timer and use your device normally, set the master switch to the ON position (See Figure 2.) This will
deactivate the timer’s control of the device, but the timer’s dial will still show the current time of day. To reactivate the timer’s
control of the device, turn the device’s switch on and set the timer’s master switch to . In case of power failure, reset the time of
day as explained in step 2.
DO NOT PLUG IN MORE THAN THE RATED LOAD (SEE RATINGS). To find total watts being used: If watts are not marked on the
appliance, multiply ampere rating (on nameplate) by 125 volts to determine equivalent watts. For lamps with multiple bulbs, sum
wattage on bulbs.
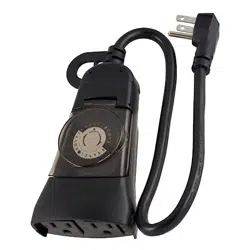
This is a GROUNDED device. It has a grounded plug and one grounded outlet.
For proper use:
• When used outdoors, plug only into a GFCI protected receptacle. Receptacle should be mounted in an approved “weatherproof
while in use” type outlet box. Install according to all applicable local codes.
• Device is to be installed properly upright and located in an area where it will not be an obstruction.
• Fully extend cord before using.
• Use within the electrical rating marked on the cord set.
• Rated 125 volts.
• Unplug when not in use (grasp the plug, not the cord, to unplug from outlet).
• Do not use for permanent installation. Do not install or use this product for more than a 90-day period per year.
• Inspect periodically.
• Do not splice, repair or modify cord set.
• Do not walk or drive on cord set.
• Do not expose directly to water.
• DO NOT USE WITH EXTENSION CORD
SUITABLE FOR USE WITH OUTDOOR APPLIANCES - STORE INDOORS WHEN NOT IN USE.
Installation:
• Two keyholes are available on the back of the timer for wall mounting. They are 1
9
/16
" apart (please refer to screw template).
• Install provided screws (in packaging) onto the area you wish to mount your timer. The screw heads must extend at least 3/16" out
from the wall.
• Hang the timer from the slots on the back of the unit onto the screws. Plug the power supply cord of the timer into the GFCI outlet.
• Plug the device cord into the receptacle at the bottom of the timer.
Figure 1
Timer is set to turn on at 10:00PM and off at 2:00AM.
Timer shows 9:30PM time of day.
Figure 2
Master Switch - When pushed to timer controls
appliance. When pushed to “ON” the timer acts like an
outlet. Timer outlet is always supplying power.
31277 V2
1/5/18
1
9
/16”
Screw Template
MADE IN CHINA
GE is a trademark of General Electric
Company and is under license by Jasco
Products Company LLC, 10 E. Memorial
Rd., Oklahoma City, OK 73114.
This Jasco product comes with a
1-year limited warranty. Visit
www.byjasco.com for warranty
details.
Questions? Contact us at
1-800-654-8483 between
7:00AM—8:00PM CST.
Insert
RIESGO DE DESCARGA ELÉCTRICA
•CONECTE DIRECTAMENTE A UN
TOMACORRIENTE ELÉCTRICO
GFCI.
•NO UTILICE EN LUGARES
HÚMEDOS.
• DESCONECTE EL TEMPORIZADOR
ANTES DE LIMPIARLO.
•MANTENGA FUERA DEL ALCANCE
DE LOS NIÑOS
ADVERTENCIA
RIESGO DE INCENDIO
• NO UTILICE PARA CONTROLAR
APARATOS QUE INCLUYAN
ELEMENTOS CALORÍFICOS
(COCINAS, CALEFACTORES,
PLANCHAS, ETC.).
• NO EXCEDA LOS LÍMITES DE LAS
ESPECIFICACIONES ELÉCTRICAS
• NO UTILICE UN CABLE DE
EXTENSIÓN
INSTRUCCIONES:
1. Ubique los segmentos alrededor del borde exterior de la esfera del temporizador. Estos segmentos, que representan 30 minutos
cada uno, pueden hundirse del borde de la esfera (puede usar la punta de un lápiz o bolígrafo). En forma opuesta, los segmentos
que han sido hundidos pueden levantarse manualmente. Asegúrese de que todos los segmentos estén levantados antes de
comenzar la programación.
Seleccione un periodo (o varios) en que desee que el dispositivo esté encendido, luego hunda TODOS los segmentos que
corresponden a ese período. Por ejemplo, para que el temporizador encienda una lámpara a las 10 p. m. y la apague a las 2 a.
m., hunda los segmentos que correspondan a las 10 p. m. y a las 2 a. m. y TODOS los segmentos intermedios (ver figura 1).
Puede que necesite girar la esfera a la derecha para acceder a los segmentos deseados.
2. Gire la esfera hacia la derecha hasta que la manecilla indique la hora actual. Nota: Las horas nocturnas (de 18 h 30 a 6 h 30)
aparecen resaltadas con un fondo gris.
3. Coloque el interruptor maestro en la posición de encendido del temporizador (Ver figura 2).
4. Enchufe el temporizador en un tomacorriente adecuado para el dispositivo que desea controlar.
5. Enchufe el dispositivo en el tomacorriente del temporizador. Asegúrese de que el dispositivo esté encendido para permitir el
control automático. El temporizador no encenderá el dispositivo si el interruptor de alimentación eléctrica del dispositivo está
apagado. La dispositivo no se encenderá y apagará a las horas programadas.
NOTA: Para anular el temporizador y usar el dispositivo normalmente, coloque el interruptor maestro en la posición de encendido
del tomacorriente (ON). Ver figura 2. Esto hará que el temporizador ya no controle el dispositivo, pero la esfera del temporizador
seguirá indicando la hora actual. Para que el temporizador vuelva a controlar el dispositivo, encienda el interruptor del dispositivo y
coloque el interruptor maestro del temporizador en la posición . En caso de falla eléctrica, restablezca la hora como se indicó en
el paso 2.
NO ENCHUFAR A UNA CARGA NOMINAL MAYOR (VER ESPECIFICACIONES). Para conocer el total de vatios en uso: si en el aparato
no aparece la especificación de los vatios utilizados, multiplique el promedio de amperes (estipulado en la placa de
especificaciones) por 125 voltios para determinar su equivalente en vatios. En el caso de lámparas con bombillas múltiples, sume
los vatios de las bombillas.
Este es un dispositivo CON CONEXIÓN A TIERRA. Tiene tanto un enchufe como un tomacorriente con conexión a tierra.
Para Su Uso Correcto
• Cuando se lo utiliza en exteriores, enchufe directamente a un tomacorriente protegido por un interruptor de circuito por pérdida a
tierra (GFCI). El tomacorriente debe estar instalado en una caja tomacorriente aprobada por ser "impermeable mientras está en
funcionamiento". Se debe realizar la instalación de conformidad con todos los códigos locales correspondientes.
• Se debe instalar el artefacto en posición vertical y colocarlo en un área donde no resulte un obstáculo.
• Extienda el cable completamente antes de utilizar el artefacto.
• Use el artefacto evitando superar el valor nominal eléctrico indicado sobre el cable de alimentación.
• Valor nominal: 125 voltios.
• Desenchufe el artefacto cuando esté apagado (jale el enchufe, no el cable, para desenchufarlo).
• No usar como instalación permanente. Evite instalar o usar este producto durante más de 90 días en el año.
• Controle el temporizador con periodicidad.
• Evite empalmar, arreglar o modificar el cable.
• Evite caminar o manejar sobre el cable.
• Evite el contacto directo con el agua.
• NO UTILICE CON CABLE DE EXTENSIÓN
IDEAL PARA USAR CON APARATOS PARA EXTERIORES - GUARDE EN UN LUGAR CERRADO CUANDO NO ESTÁ EN USO
Instalación:
• Hay dos orificios con forma de cerradura en la parte posterior del temporizador para la instalación en la pared. Estos orificios
están una distancia de 1
9
/16
" entre sí (consulte la imagen de los tornillos).
• Colocar el tornillo provisto (en el paquete) en el lugar en el que desea instalar el temporizador. Las cabezas de los tornillos deben
extenderse al menos 3/16" fuera de la pared.
• Cuelgue el temporizador enganchando las ranuras de la parte posterior de la unidad en los tornillos. Enchufe el cable de
alimentación eléctrica del temporizador en el enchufe GFCI.
• Enchufe el cable del dispositivo en el tomacorriente ubicado en la parte inferior del temporizador.
Figure 1
El temporizador está programado para encenderse
a las 10:00 p. m. y apagarse a las 2:00 a. m. El
temporizador indica que son las 9.30 p. m.
Figure 2
Interruptor maestro: Cuando está colocado en la posición ,
el temporizador controla el dispositivo. Cuando está colocado
en la posición “ON", el temporizador funciona como un
tomacorriente. El tomacorriente del temporizador está
siempre suministrando energía.
1
9
/16”
Tornillo Imagen
31277 V2
1/5/18
HECHO EN CHINA
GE es una marca comercial de General Electric
Company con licencia otorgada a Jasco
Products Company LLC, 10 E. Memorial Rd.,
Oklahoma City, OK 73114.
Este producto de Jasco tiene una garantía
limitada de 1 año. Visite www.byjasco.com para
obtener detalles de la garantía.
¿Preguntas? Comuníquese al
1-800-654-8483 entre las 7:00 a. m.
y las 8:00 p. m. CST (hora
central estándar).
Insert