Loading ...
Loading ...
Loading ...
17INSTALLATION
ENGLISH
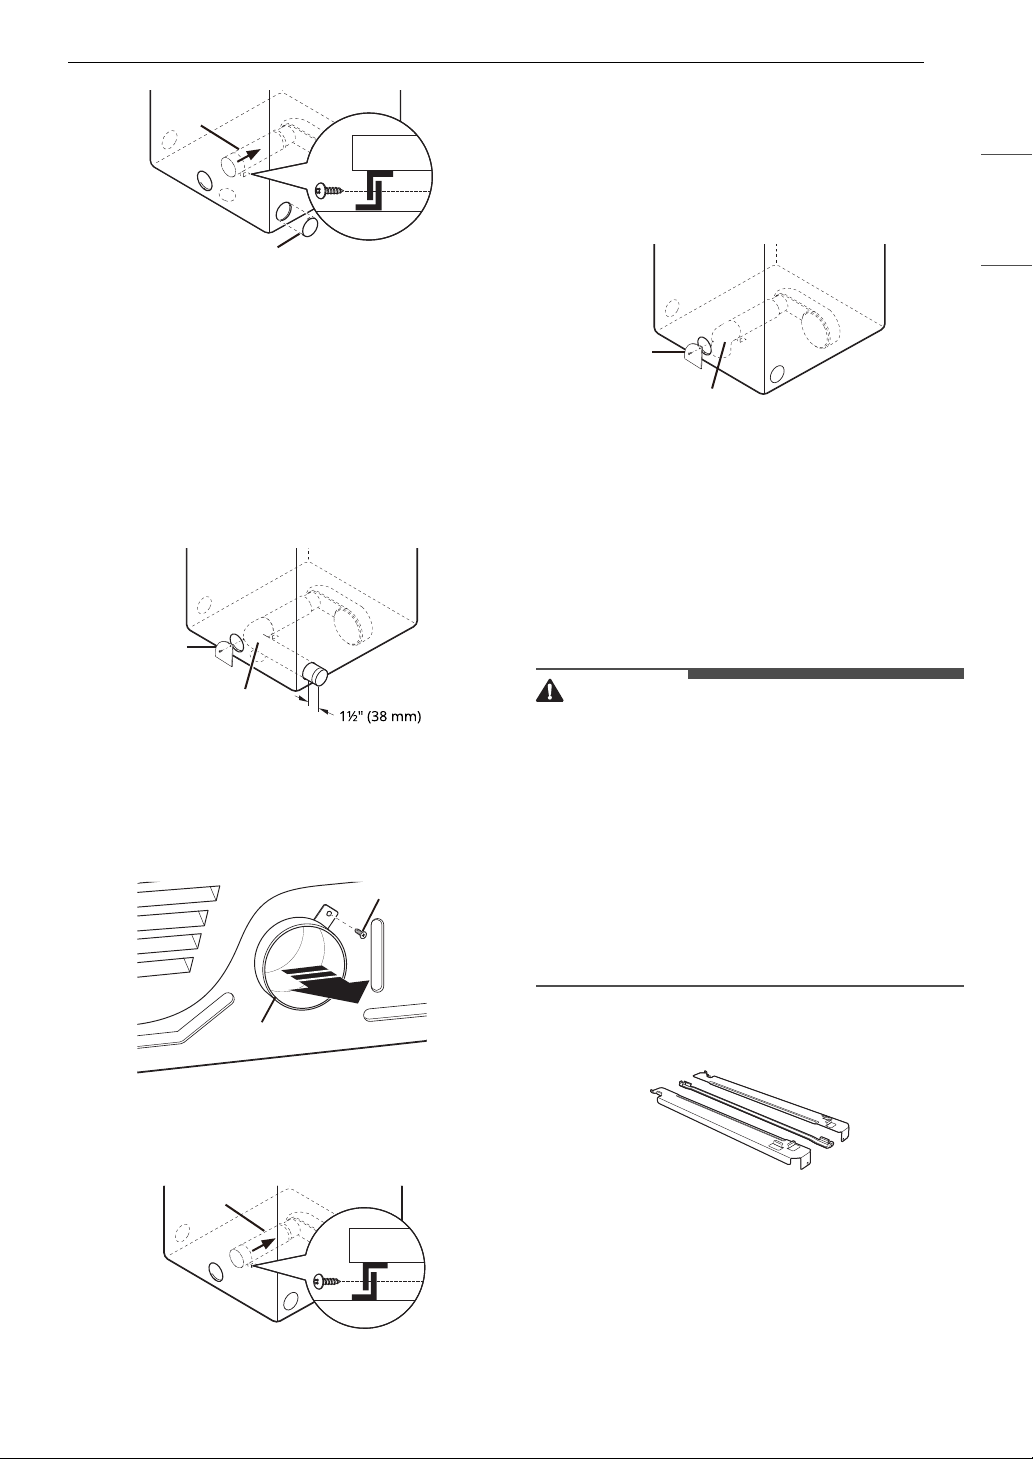
3 Preassemble a 4" (10.2 cm) elbow e to the
next 4" (10.2 cm) duct section, and secure all
joints with duct tape. Be sure that the male
end of the elbow faces AWAY from the dryer.
Insert the elbow/duct assembly through the
side opening and press it onto the adapter
duct. Secure it in place with duct tape. Be sure
that the male end of the duct protrudes 1.5"
(3.8 cm) to connect the remaining ductwork.
Attach the cover plate
f to the back of the
dryer with the included screw.
Bottom Venting
1 Remove the rear exhaust duct retaining screw
a. Pull out the exhaust duct b.
2 Press the adapter duct c onto the blower
housing and secure it to the base of the dryer
as shown.
3 Insert the 4" (10.2 cm) elbow d through the
rear opening and press it onto the adapter
duct. Be sure that the male end of the elbow
faces down through the hole in the bottom of
the dryer. Secure it in place with duct tape.
Attach the cover plate e to the back of the
dryer with the included screw.
Stacking the Appliance
Tools Required
• Phillips screwdriver
Stacking Kit Installation
WARNING
• The weight of the appliance and the height of
installation make this stacking procedure too
risky for one person. Two or more people are
required when installing the stacking kit.
• Place the washer on a solid, stable, level floor
capable of supporting the weight of both
appliances.
• Do not stack the washer on top of the dryer.
• If appliances are already installed, disconnect
them from all power, water and drain
connections.
This stacking kit includes:
• Two (2) side rails
• One (1) front rail
• Four (4) screws
To ensure safe and secure installation, please
observe the following instructions.
c
d
f
e
a
b
c
d
e
Loading ...
Loading ...
Loading ...