Loading ...
Loading ...
Loading ...
5=
To remove filters:
NOTE: Use 2 hands to remove the filters, one to pull and turn
the knob, the other to hold the filter so that it doesn't fall.
• Pull knob forward (toward the front of the hood) while
turning the knob counterclockwise to release the locking
lever.
• Slide the filter down and away from the front retaining
channel.
Slide apart the chimney covers.
NOTE: To avoid damage to the chimney covers, do not
remove the plastic coverings at this time.
The chimney section of the hood is shipped assembled. It
must be disassembled for installation.
6. Remove the lower chimney cover from the chimney support
by removing the two Phillips screws on the outside bottom of
the chimney cover.
7. Remove the upper chimney cover from the chimney support
by removing the two Phillips screws on the outside top of the
chimney cover.
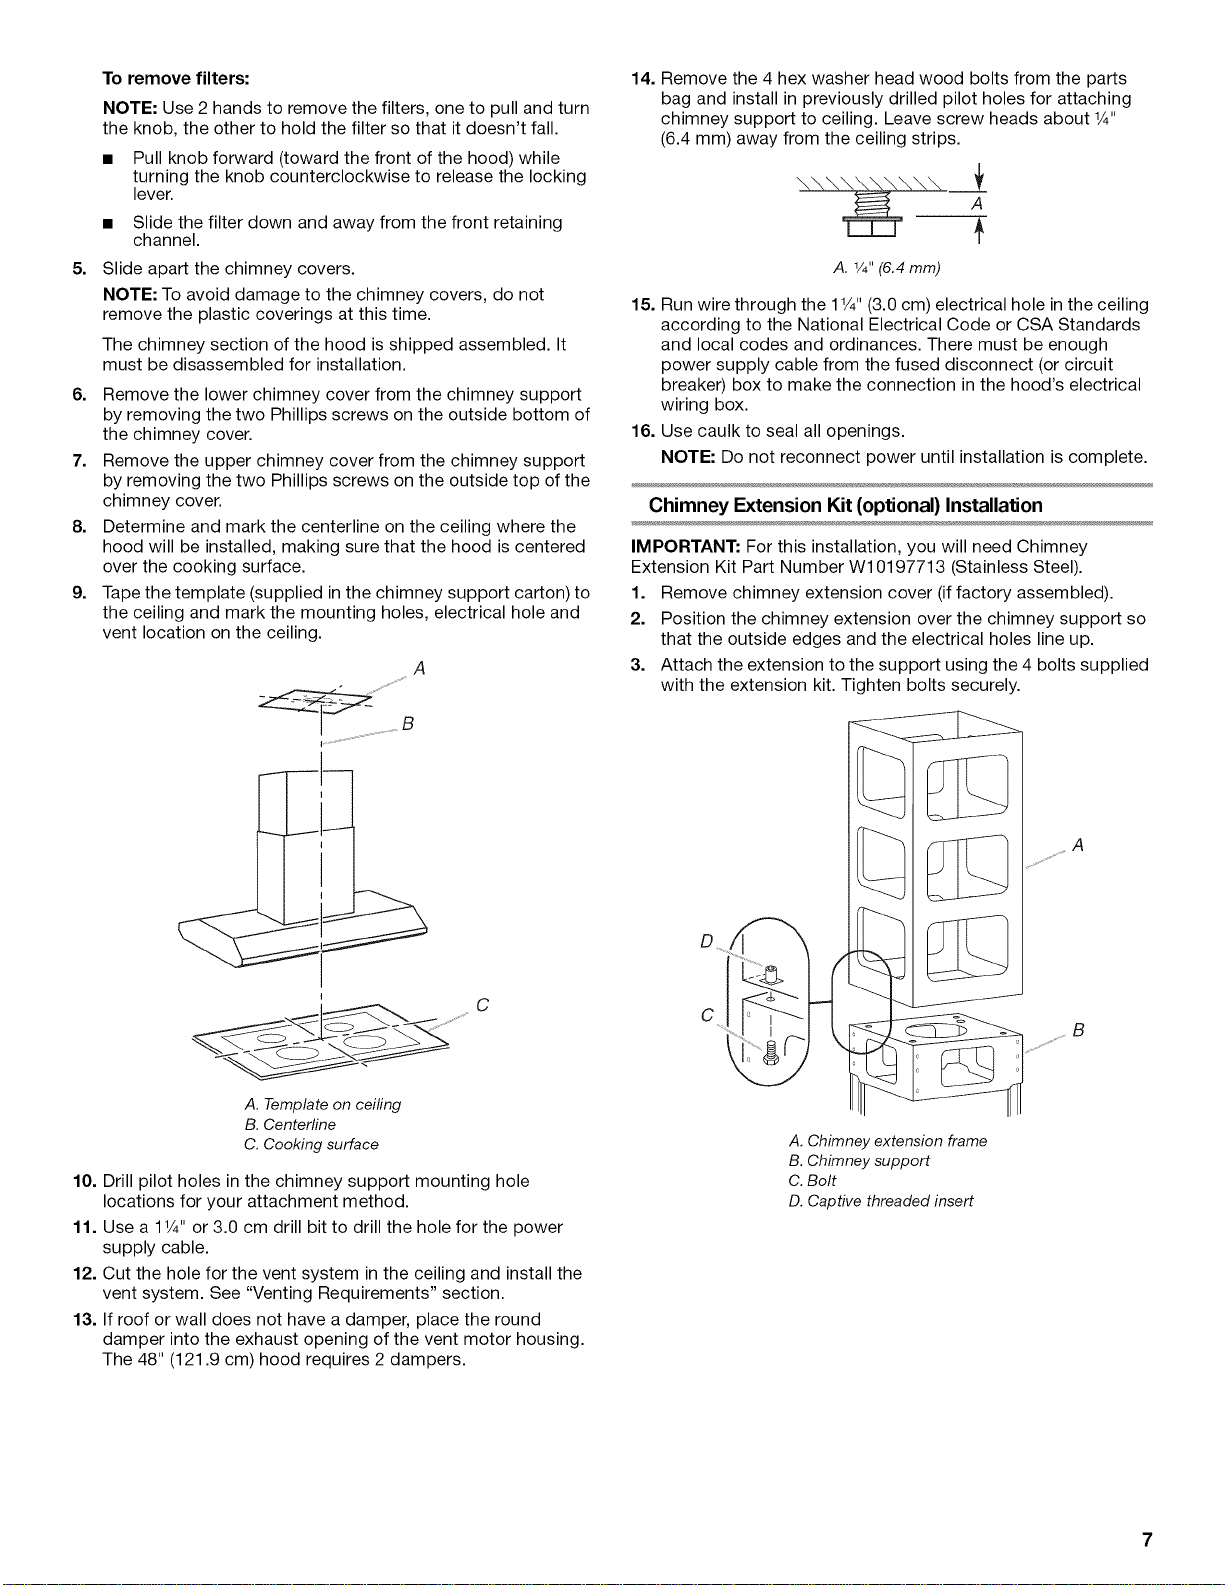
8. Determine and mark the centerline on the ceiling where the
hood will be installed, making sure that the hood is centered
over the cooking surface.
9. Tape the template (supplied in the chimney support carton) to
the ceiling and mark the mounting holes, electrical hole and
vent location on the ceiling.
A
I
A. Template on ceifing
B. Centerline
C. Cooking surface
C
10. Drill pilot holes in the chimney support mounting hole
locations for your attachment method.
11. Use a 1V4" or 3.0 cm drill bit to drill the hole for the power
supply cable.
12. Cut the hole for the vent system in the ceiling and install the
vent system. See "Venting Requirements" section.
13. If roof or wall does not have a damper, place the round
damper into the exhaust opening of the vent motor housing.
The 48" (121.9 cm) hood requires 2 dampers.
14. Remove the 4 hex washer head wood bolts from the parts
bag and install in previously drilled pilot holes for attaching
chimney support to ceiling. Leave screw heads about 1¼.
(6.4 mm) away from the ceiling strips.
\\\\\\\\\\
A. 1/4"(6.4mm)
15. Run wire through the 1V4"(3.0 cm) electrical hole in the ceiling
according to the National Electrical Code or CSA Standards
and local codes and ordinances. There must be enough
power supply cable from the fused disconnect (or circuit
breaker) box to make the connection in the hood's electrical
wiring box.
16. Use caulk to seal all openings.
NOTE: Do not reconnect power until installation is complete.
Chimney Extension Kit (optional) Installation
IMPORTANT: For this installation, you will need Chimney
Extension Kit Part Number W10197713 (Stainless Steel).
1. Remove chimney extension cover (if factory assembled).
2. Position the chimney extension over the chimney support so
that the outside edges and the electrical holes line up.
3. Attach the extension to the support using the 4 bolts supplied
with the extension kit. Tighten bolts securely.
D
C
B
A. Chimney extension frame
B. Chimney support
C. Bolt
D. Captive threaded insert
Loading ...
Loading ...
Loading ...